Table of Contents
Advertisement
Quick Links
Technical Support and E-Warranty Certificate
www.vevor.com/support
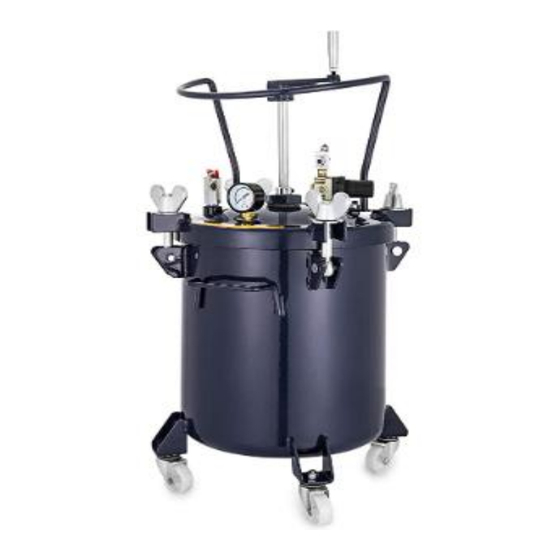
PRESSURE PAINT POT
USER MANUAL
We continue to be committed to provide you tools with competitive price.
"Save Half", "Half Price" or any other similar expressions used by us only
represents an estimate of savings you might benefit from buying certain tools
with us compared to the major top brands and does not necessarily mean to cover
all categories of tools offered by us. You are kindly reminded to verify carefully
when you are placing an order with us if you are actually Saving
Half in comparison with the top major brands.
Advertisement
Table of Contents

Related Manuals for VEVOR JY-SD20L


Summary of Contents for VEVOR JY-SD20L
- Page 1 Technical Support and E-Warranty Certificate www.vevor.com/support PRESSURE PAINT POT USER MANUAL We continue to be committed to provide you tools with competitive price. "Save Half", "Half Price" or any other similar expressions used by us only represents an estimate of savings you might benefit from buying certain tools with us compared to the major top brands and does not necessarily mean to cover all categories of tools offered by us.
- Page 3 This is the original instruction, please read all manual instructions carefully before operating. VEVOR reserves a clear interpretation of our user manual. The appearance of the product shall be subject to the product you received. Please forgive us that we won't inform you again if...
- Page 4 SAFETY INSTRUCTION AND PRECAUTIONS WARNING: Read this material before using this product. Failure to do so can result in serious injury. 1.Assemble only according to these instructions. Improper assembly can create hazards. 2.Wear ANSI-approved safety goggles and heavy-duty work gloves during assembly.
- Page 5 4. This product should not perform any form of modification, nor engage in any dangerous operations such as drilling, welding, etc., which may produce a tempering effect, damaging the pressure barrel, which affects the service life of the product. 5. It is strictly forbidden to pour strong acidic and alkaline liquid into this product to avoid corrosion of the tank body and causing personal injury.
- Page 6 Schematic diagram of JY-SD20L decomposition name name Pressure barrel body Upper fixing ring Inner barrel Fixed flange M16 butterfly nut Sealing gaskets...
- Page 7 M16 union bolts Discharge valve Stir the blades Inlet valve Mixing shaft Pressure regulator Barrel lid sealing Hex connector gasket Barrel lid relief valve relief valve interface 0-rings Round nuts Inlet nut Lower fixing ring Outlet valve Secure the latch Bleed valve Spring gasket Shake the fastening...
- Page 8 Discharge port (with American 3/8",threaded opening and closing NPS,18teeth valve) European style 1/4" Air intakes self-locking quick plug tubing fitting Air outlet (including European European 1/4",thread G, opening and closing standard 19teeth valve) Discharge port (with European 3/8",thread opening and closing G,19teeth valve) Japanese style 1/4"...
- Page 9 How to use 1.Before use, please make sure that there can be no residual pressure in the pressure barrel, if there is residual pressure, the operator can pull open the Red Hat safety valve bleed pull ring on the pressure barrel lid to completely release the air pressure inside the pressure barrel to ensure safety.
- Page 10 6.Connect the air intake connector (20) and open the air intake valve (25). 7.Adjust the intake pressure regulator and rotate clockwise to adjust to the required working pressure, or in a counterclockwise direction if you want to reduce the pressure in the pressure barrel.
-
Page 11: Maintenance
8.Open the outlet valve(12)Open the discharge valve(24) 9.If the paint settles, turn the manual shaker to stir. Maintenance 1. After use, cut off the air source. Open the balloon valve switch on the lid to completely release the air in the barrel, then loosen the butterfly bolt, open the lid of the barrel, pour out the residual paint in the barrel, and clean all parts that have been touched by the paint with an appropriate amount of solvent. -
Page 12: Troubleshooting
Troubleshooting Fault The cause of the failure Exclusion method 1. The air source is not The pointer of the 1. Adjust the air source normal pressure gauge to normal 2. The intake valve is not connected to the air 2. Open the intake open supply does not valve... - Page 13 1.The discharge valve is 1.0pen the discharge No paint not open valve 1.The pressure is too high 1.Adjust to normal or too low pressure Poor paint effect 2.Spraying equipment 2.Repair of spraying problems equipment Make sure to lock the bucket lid diagonally order of operations; 1-2 3-4...
- Page 14 Address: Shuangchenglu 803nong11hao1602A-1609shi, baoshanqu, shanghai 200000 CN. Imported to AUS: SIHAO PTY LTD, 1 ROKEVA STREETEASTWOOD NSW 2122 Australia Imported to USA: Sanven Technology Ltd., Suite 250, 9166 Anaheim Place, Rancho Cucamonga, CA 91730 E-CrossStu GmbH Mainzer Landstr.69, 60329 Frankfurt am Main. YH CONSULTING LIMITED.
- Page 16 Technical Support and E-Warranty Certificate www.vevor.com/support...
- Page 17 Assistance technique et certificat de garantie électronique www.vevor.com/support POT DE PEINTURE SOUS PRESSION MANUEL D'UTILISATION Nous continuons à nous engager à vous fournir des outils à des prix compétitifs. "Économisez la moitié", "Moitié prix" ou toute autre expression similaire utilisée uniquement par nous représente une estimation des économies dont vous pourriez bénéficier en achetant...
- Page 19 Il s'agit des instructions originales, veuillez lire attentivement toutes les instructions du manuel avant de l'utiliser. VEVOR se réserve une interprétation claire de notre manuel d’utilisation. L'apparence du produit dépend du produit que vous avez reçu. Veuillez nous pardonner que nous ne vous informerons plus s'il y a des mises à...
- Page 20 SAFETY INSTRUCTION AND PRECAUTIONS AVERTISSEMENT: Lisez ce document avant d'utiliser ce produit. Ne pas le faire peut entraîner des blessures graves. 1. Assemblez uniquement selon ces instructions. Un assemblage incorrect peut créer des dangers. 2. Portez des lunettes de sécurité approuvées par l'ANSI et des gants de travail robustes pendant l'assemblage.
- Page 21 excessive. La pression d'un dispositif de sécurité, avant que le produit ne quitte l'usine, a été réglée dans la plage de pression admissible, dans l'état normal d'utilisation, ne pas retirer à volonté, ne pas ajuster à volonté . 4. Ce produit ne doit pas effectuer aucune forme de modification, ni entreprendre des opérations dangereuses telles que le perçage, le soudage, etc., qui pourraient produire un effet de trempe, endommageant le cylindre de pression, ce qui affecterait la durée de vie du produit.
- Page 22 Diagramme schématique de la décomposition du JY-SD20L...
- Page 23 QTÉ QTÉ Corps du canon à Bague de fixation pression supérieure Canon intérieur Bride fixe Écrou papillon M16 Joints d'étanchéité Soupape de Boulons-union M16 décharge...
- Page 24 Soupape Remuez les lames d'admission Régulateur de Arbre de mélange pression Joint d'étanchéité du Connecteur couvercle du fût hexagonal soupape de Couvercle de baril décharge soupape de interface décharge 0 anneaux Noix rondes Bague de fixation Écrou d'entrée inférieure Soupape de sortie Fixez le loquet Vanne de purge Joint à...
- Page 25 Sortie d'air (y compris vanne Américain 1/4", fileté d'ouverture et de NPS, 18 dents fermeture) Orifice de décharge (avec vanne Américain 3/8",fileté d'ouverture et de NPS,18dents fermeture) Raccord de tube à prise Prises d'air rapide autobloquant de 1/4 "de style européen Sortie d'air (y compris vanne Européen 1/4",filetage...
-
Page 26: Comment Utiliser
Comment utiliser 1. Avant utilisation, veuillez vous assurer qu'il ne peut y avoir aucune pression résiduelle dans le baril de pression. S'il y a une pression résiduelle, l'opérateur peut ouvrir l'anneau de purge de la soupape de sécurité Red Hat sur le couvercle du baril de pression pour libérer complètement la pression de l'air. - Page 27 6. Connectez le connecteur d'admission d'air (20) et ouvrez la vanne d'admission d'air (25). 7. Ajustez le régulateur de pression d'admission et tournez-le dans le sens des aiguilles d'une montre pour régler la pression de service requise, ou dans le sens inverse des aiguilles d'une montre si vous souhaitez réduire la pression dans le barillet de pression .
- Page 28 8. Ouvrez la vanne de sortie (12) Ouvrez la vanne de décharge (24) 9. Si la peinture se dépose, tournez le shaker manuel pour remuer.
-
Page 29: Entretien
Entretien 2. Après utilisation, coupez la source d'air. Ouvrez l'interrupteur de la valve du ballon sur le couvercle pour libérer complètement l'air dans le baril, puis desserrez le boulon papillon, ouvrez le couvercle du baril, versez la peinture résiduelle dans le baril et nettoyez toutes les pièces qui ont été touchées par la peinture. -
Page 30: Dépannage
pendant 6 à 8 heures avant de continuer à utiliser la colle une fois qu'elle est complètement solidifiée . Dépannage Faute La cause de l'échec Méthode d'exclusion 1. La source d'air n'est pas 1. Réglez la source d'air L'aiguille du normale à... - Page 31 1. Lorsque le couvercle du fût est combiné avec le 1. Suivez l'article 3 des corps du fût, l'écrou conditions d'utilisation Fuite du couvercle papillon n'est pas serré en 2. Reportez-vous au du baril de peinture diagonale remède en cas de fuite 2.
- Page 32 Adresse : Shuangchenglu 803nong11hao1602A-1609shi, baoshanqu, Shanghai 200000 CN. Importé en Australie : SIHAO PTY LTD, 1 ROKEVA STREETASTWOOD NSW 2122 Australie Importé aux États-Unis : Sanven Technology Ltd., Suite 250, 9166 Anaheim Place, Rancho Cucamonga, CA 91730...
- Page 33 E-CrossStu GmbH Mainzer Landstr.69, 60329 Frankfurt am Main. YH CONSULTING LIMITED. C/O YH Consulting Limited Office 147, Centurion House, London Road, Staines-upon-Thames, Surrey, TW18 4AX...
- Page 35 Assistance technique et certificat de garantie électronique www.vevor.com/support...
- Page 36 Technischer Support und E-Garantie-Zertifikat www.vevor.com/support DRUCKFARBTOPF BENUTZERHANDBUCH Wir sind weiterhin bestrebt, Ihnen Werkzeuge zu wettbewerbsfähigen Preisen anzubieten. "Sparen Sie die Hälfte", "Halber Preis" oder andere ähnliche Ausdrücke, die wir nur verwenden stellt eine Schätzung der Einsparungen dar, die Sie durch den Kauf bestimmter Werkzeuge erzielen können...
- Page 38 Dies ist die Originalanleitung. Bitte lesen Sie alle Anweisungen sorgfältig durch, bevor Sie das Gerät in Betrieb nehmen. VEVOR behält sich eine klare Auslegung unserer Bedienungsanleitung vor. Das Erscheinungsbild des Produkts richtet sich nach dem Produkt, das Sie erhalten haben. Bitte verzeihen Sie uns, dass wir Sie nicht erneut informieren, wenn es Technologie- oder Software-Updates für unser Produkt gibt .
- Page 39 SAFETY INSTRUCTION AND PRECAUTIONS WARNUNG: Lesen Sie dieses Material, bevor Sie dieses Produkt verwenden. Andernfalls kann es zu schweren Verletzungen kommen. 1. Führen Sie die Montage ausschließlich gemäß dieser Anleitung durch. Eine unsachgemäße Montage kann zu Gefahren führen. 2. Tragen Sie während der Montage eine ANSI-geprüfte Schutzbrille und robuste Arbeitshandschuhe.
- Page 40 3. Das Sicherheitsventil am Druckfass dient zum Schutz des Normaldrucks im Druckfass und zur Vermeidung von Überdruck Der Druck einer Sicherheitsvorrichtung wurde vor Verlassen des Werks auf den zulässigen Druckbereich eingestellt. Im normalen Gebrauchszustand darf er nicht willkürlich entfernt oder verstellt werden . 4.
- Page 41 Schematische Darstellung der JY-SD20L-Zerlegung...
- Page 42 Name Name Oberer Druckfasskörper Befestigungsring Innenlauf Festflansch M16 Flügelmutter Dichtungen...
- Page 43 Auslassventil Überwurfschrauben Rühren Sie die Einlassventil Klingen Mischwelle Druckregler Dichtung für Sechskantverbinde Fassdeckel Fassdeckel Überdruckventil Überdruckventil Schnittstelle 0-Ringe Rundmuttern Unterer Einlassmutter Befestigungsring Sichern Sie den Auslassventil Riegel Entlüftungsventil Federdichtung Befestigungsschraub Saugrohr en schütteln Manuelle Wippe Farbsauganschluss Schütteln Sie den Filterdichtungen Griff Kipphebelbolzen Filter...
- Page 44 Amerikanische Bauform 1/4" selbstsichernd Lufteinlässe Schnellsteck-Schlauchverschraub Luftauslass (inkl. Öffnungs- Amerikanisch 1/4", Gewinde NPS, Nordamerikanisc 18 Zähne he Normen Schließventil Druckanschl uss (mit Öffnungs- Amerikanisch 3/8", Gewinde NPS, 18 Zähne Schließventil Selbstsichernde Lufteinlässe 1/4"-Schnellsteck-Schlauchversch raubung im europäischen Stil Luftauslass (inkl. Öffnungs- Europäisches 1/4", Gewinde G, 19 Zähne Europäische...
- Page 45 Luftauslass (inkl. Öffnungs- Europäisches 1/4", Gewinde G, 19 Zähne Schließventil Druckanschl uss (mit Öffnungs- Europäisches 3/8", Gewinde G, 19 Zähne Schließventil Anwendung 1. Stellen Sie vor der Verwendung sicher, dass sich im Druckfass kein Restdruck befindet. Wenn ein Restdruck vorhanden ist, kann der Bediener den Entlüftungsring des Red Hat-Sicherheitsventils am Deckel des Druckfasses öffnen, um den Luftdruck im Druckfass vollständig abzulassen und so die Sicherheit zu gewährleisten .
- Page 46 4. Schließen Sie den Eimerdeckel und ziehen Sie die Flügelmuttern nacheinander diagonal fest . 5. Alle Ventile schließen, der Spritzeneinlass wird mit dem Fassauslass (24) verbunden, und der Spritzeneinlass wird mit dem Fassauslassventil (12) verbunden 6. Den Luftansauganschluss (20) anschließen und das Luftansaugventil (25) öffnen.
- Page 47 7. Stellen Sie den Ansaugdruckregler ein und drehen Sie ihn im Uhrzeigersinn, um den erforderlichen Arbeitsdruck einzustellen, oder gegen den Uhrzeigersinn, wenn Sie den Druck im Druckgefäß verringern möchten .
-
Page 48: Wartung
8. Öffnen Sie das Auslassventil (12). Öffnen Sie das Auslassventil (24). 9.Wenn sich die Farbe absetzt, drehen Sie den Handschüttler zum Umrühren. Wartung 3. Nach Gebrauch Luftzufuhr abschalten. Öffnen Ballonventilschalter am Deckel, um die Luft im Fass vollständig abzulassen, lösen Sie dann den Flügelbolzen, öffnen Sie den Fassdeckel, gießen Sie die restliche Farbe im Fass aus und reinigen Sie alle Teile, die mit der Farbe in Berührung gekommen sind, mit einer angemessenen Menge Lösungsmittel. -
Page 49: Fehlerbehebung
durchdringen kann. Schließen Sie das Ansaugventil, öffnen Sie den Druckentlastungskolben und lassen Sie den Kleber 6–8 Stunden lang ruhig stehen, bevor Sie ihn weiter verwenden, nachdem er vollständig ausgehärtet ist . Fehlerbehebung Die Ursache des Fehler Ausschlussmethode Scheiterns 1. Die Luftquelle ist nicht 1. - Page 50 1. Wenn der Fassdeckel mit dem Fasskörper 1. Befolgen Sie Artikel 3 kombiniert wird, wird die Undichtigkeit im Flügelmutter nicht Nutzungsbedingungen Farbfassdeckel diagonal angezogen 2. Siehe Abhilfe bei 2. Die Teile am Fassdeckel Luftleckage sind schlecht abgedichtet 1.Das Auslassventil ist nicht 1.0Öffnen Sie das Keine Farbe geöffnet...
- Page 51 Adresse : Shuangchenglu 803nong11hao1602A-1609shi, Baoshanqu, Shanghai 200000 CN. Nach AUS importiert: SIHAO PTY LTD, 1 ROKEVA STREETEASTWOOD NSW 2122 Australien Importiert in die USA: Sanven Technology Ltd., Suite 250, 9166 Anaheim Place, Rancho Cucamonga, CA 91730...
- Page 52 E-CrossStu GmbH Mainzer Landstr.69, 60329 Frankfurt am Main. YH CONSULTING LIMITED. C/O YH Consulting Limited Office 147, Centurion House, London Road, Staines-upon-Thames, Surrey, TW18 4AX...
- Page 54 Technischer Support und E-Garantie-Zertifikat www.vevor.com/support...
- Page 55 Supporto tecnico e certificato di garanzia elettronica www.vevor.com/support VASO PER VERNICE A PRESSIONE MANUALE D'USO Continuiamo a impegnarci per fornirvi strumenti a prezzi competitivi. "Risparmia la metà", "Metà prezzo" o qualsiasi altra espressione simile utilizzata solo da noi rappresenta una stima del risparmio che potresti trarre dall'acquisto di determinati strumenti con noi rispetto ai principali marchi più...
- Page 57 Queste sono le istruzioni originali, leggere attentamente tutte le istruzioni del manuale prima dell'uso. VEVOR si riserva una chiara interpretazione del nostro manuale d'uso. L'aspetto del prodotto sarà soggetto al prodotto ricevuto. Ti preghiamo di perdonarci se non ti informeremo più se sono...
- Page 58 SAFETY INSTRUCTION AND PRECAUTIONS AVVERTIMENTO: Leggere questo materiale prima di utilizzare questo prodotto. In caso contrario si potrebbero causare lesioni gravi. 1. Assemblare solo secondo queste istruzioni. Un montaggio improprio può creare pericoli. 2. Indossare occhiali di sicurezza approvati ANSI e guanti da lavoro pesanti durante il montaggio.
- Page 59 consentito, nel normale stato d'uso, non rimuovere a piacimento, non regolare a piacimento . 4. Questo prodotto non dovrebbe eseguire qualsiasi forma di modifica, né impegnarsi in operazioni pericolose come foratura, saldatura, ecc., che potrebbero produrre un effetto di rinvenimento, danneggiando il cilindro a pressione, con conseguenze sulla durata del prodotto .
- Page 60 Diagramma schematico della decomposizione del JY-SD20L...
- Page 61 nome nome ITÀ ITÀ Corpo della canna a Anello di fissaggio pressione superiore Canna interna Flangia fissa Guarnizioni di Dado a farfalla M16 tenuta Bulloni di unione Valvola di scarico Mescola le lame Valvola di ingresso Albero di Regolatore di miscelazione pressione Guarnizione di...
- Page 62 Esportazione di ruota delle attività vernice esagonale Raccordi per Dado M10 l'aspirazione dell'aria Elenco delle specifiche del thread utente : Mercato delle valvola Specifiche della filettatura vendite Autobloccante tipo Prese d'aria americano da 1/4". raccordo rapido per tubo Uscita dell'aria Standard Americano 1/4", filettato (inclusa valvola di...
-
Page 63: Come Usare
Attacco di scarico Europeo 3/8", filetto G, 19 (con valvola di denti apertura e chiusura) Come usare 1. Prima dell'uso, assicurarsi che non vi sia pressione residua nel barile di pressione. Se è presente pressione residua, l'operatore può aprire l'anello di spurgo della valvola di sicurezza Red Hat sul coperchio del barile di pressione per rilasciare completamente la pressione dell'aria. - Page 64 5 . Chiudere tutte le valvole, l'ingresso dello spruzzatore è collegato all'uscita della canna (24) e l'ingresso dello spruzzatore è collegato alla valvola di uscita della canna (12) 6. Collegare il connettore di aspirazione dell'aria (20) e aprire la valvola di aspirazione dell'aria (25).
- Page 65 7. Regolare il regolatore della pressione di aspirazione e ruotare in senso orario per regolare la pressione di lavoro richiesta, o in senso antiorario se si desidera ridurre la pressione nel cilindro di pressione . 8. Aprire la valvola di scarico(12)Aprire la valvola di scarico(24)
-
Page 66: Manutenzione
9.Se la vernice si deposita, girare l'agitatore manuale per mescolare. Manutenzione 4. Dopo l'uso, interrompere la fonte d'aria. Aprire l'interruttore della valvola del palloncino sul coperchio per rilasciare completamente l'aria nella canna, quindi allentare il bullone a farfalla, aprire il coperchio della botte, versare la vernice residua nella canna e pulire tutte le parti che sono state toccate dalla vernice con una quantità... -
Page 67: Risoluzione Dei Problemi
apra lo stantuffo di scarico della pressione e rimanga fermo per 6-8 ore prima di continuare a utilizzare la colla dopo che si è completamente solidificata . Risoluzione dei problemi Colpa La causa del fallimento Metodo di esclusione La lancetta del 1. - Page 68 1. Quando il coperchio della canna è combinato 1. Seguire l'Articolo 3 con il corpo della canna, il Perdita dal delle Condizioni d'Uso dado a farfalla non viene coperchio del barile 2. Fare riferimento alla serrato in diagonale di vernice soluzione per le perdite 2.
- Page 69 Indirizzo : Shuangchenglu 803nong11hao1602A-1609shi, baoshanqu, shanghai 200000 CN. Importato in AUS: SIHAO PTY LTD, 1 ROKEVA STREETEASTWOOD NSW 2122 Australia Importato negli Stati Uniti: Sanven Technology Ltd., Suite 250, 9166 Anaheim Place, Rancho Cucamonga, CA 91730...
- Page 70 E-CrossStu GmbH Mainzer Landstr.69, 60329 Frankfurt am Main. YH CONSULTING LIMITED. C/O YH Consulting Limited Office 147, Centurion House, London Road, Staines-upon-Thames, Surrey, TW18 4AX...
- Page 72 Supporto tecnico e certificato di garanzia elettronica www.vevor.com/support...
- Page 73 Soporte técnico y certificado de garantía electrónica www.vevor.com/support BOTE DE PINTURA A PRESIÓN MANUAL DE USUARIO Seguimos comprometidos a proporcionarle herramientas a precios competitivos. "Ahorre a mitad de precio", "A mitad de precio" o cualquier otra expresión similar utilizada únicamente por nosotros representa una estimación de los ahorros que podría beneficiarse al comprar ciertas...
- Page 75 Estas son las instrucciones originales; lea atentamente todas las instrucciones del manual antes de operar. VEVOR se reserva una interpretación clara de nuestro manual de usuario. La apariencia del producto estará sujeta al producto que recibió. Perdone que no le informaremos nuevamente si hay actualizaciones de tecnología o...
- Page 76 SAFETY INSTRUCTION AND PRECAUTIONS ADVERTENCIA: Lea este material antes de usar este producto. De lo contrario, se pueden producir lesiones graves. 1. Ensamble únicamente de acuerdo con estas instrucciones. Un montaje inadecuado puede crear peligros. 2. Utilice gafas de seguridad aprobadas por ANSI y guantes de trabajo resistentes durante el montaje.
- Page 77 establecido dentro del rango de presión permitido, en el estado normal de uso, no lo retire a voluntad, no lo ajuste a voluntad . 4. Este producto no debe realizar cualquier tipo de modificación, ni realizar operaciones peligrosas como perforación, soldadura, etc., que puedan producir un efecto de templado, dañando el cilindro de presión, lo que afecta la vida útil del producto.
- Page 78 Diagrama esquemático de la descomposición de JY-SD20L.
- Page 79 nombre nombre Cuerpo del barril de Anillo de fijación presión superior cañón interior Brida fija...
- Page 80 Tuerca de mariposa Juntas de sellado Pernos de unión Válvula de descarga Revuelva las válvula de entrada cuchillas Regulador de Eje mezclador presión Junta de sellado de conector tapa de barril hexagonal tapa del barril válvula de alivio válvula de alivio interfaz 0 anillos tuercas redondas...
- Page 81 Estilo americano 1/4"autoblocante racor Tomas de aire de tubo de enchufe rápido Salida de aire Estándares (incluyendo válvula Americana 1/4", rosca norteamericanos de apertura y NPS, 18 dientes cierre) Puerto de descarga Americana 3/8", rosca (con válvula de NPS, 18 dientes apertura y cierre) Accesorio de tubo de enchufe rápido...
- Page 82 como usar 1. Antes de usar, asegúrese de que no haya presión residual en el cilindro de presión; si hay presión residual, el operador puede abrir el anillo de purga de la válvula de seguridad Red Hat en la tapa del cilindro de presión para liberar completamente la presión del aire.
- Page 83 5 . Cierre todas las válvulas, la entrada del rociador está conectada a la salida del barril (24) y la entrada del rociador está conectada a la válvula de salida del barril (12) 6. Conecte el conector de entrada de aire (20) y abra la válvula de entrada de aire (25).
- Page 84 8. Abra la válvula de salida (12) Abra la válvula de descarga (24) 9. Si la pintura se asienta, gira el agitador manual para revolver.
-
Page 85: Mantenimiento
Mantenimiento 5. Después del uso, corte la fuente de aire. Abra el interruptor de la válvula de globo en la tapa para liberar completamente el aire en el barril, luego afloje el perno de mariposa, abra la tapa del barril, vierta la pintura residual en el barril y limpie todas las partes que han sido tocadas por la pintura. -
Page 86: Solución De Problemas
durante 6 a 8 horas antes de continuar usando el pegamento después de que esté completamente solidificado . Solución de problemas Falla La causa del fracaso. Método de exclusión 1. La fuente de aire no es El puntero del 1. Ajuste la fuente de normal. - Page 87 1. Cuando la tapa del barril se combina con el cuerpo 1. Siga el artículo 3 de del barril, la tuerca Fugas en la tapa del los Términos de uso. mariposa no se aprieta en barril de pintura 2. Consulte la solución diagonal para fugas de aire.
- Page 88 Dirección : Shuangchenglu 803nong11hao1602A-1609shi, baoshanqu, shanghai 200000 CN. Importado a AUS: SIHAO PTY LTD, 1 ROKEVA STREETEASTWOOD NSW 2122 Australia Importado a EE. UU.: Sanven Technology Ltd., Suite 250, 9166 Anaheim Place, Rancho Cucamonga, CA 91730...
- Page 89 E-CrossStu GmbH Mainzer Landstr.69, 60329 Frankfurt am Main. YH CONSULTING LIMITED. C/O YH Consulting Limited Office 147, Centurion House, London Road, Staines-upon-Thames, Surrey, TW18 4AX...
- Page 91 Soporte técnico y certificado de garantía electrónica www.vevor.com/support...
- Page 92 Wsparcie techniczne i certyfikat e-gwarancji www.vevor.com/support CIŚNIENIOWY POJEMNIK NA FARBĘ INSTRUKCJA OBSŁUGI Nadal dokładamy wszelkich starań, aby zapewnić Państwu narzędzia w konkurencyjnej cenie. „Zaoszczędź pół ceny”, „Zaoszczędź połowę ceny” lub inne podobne wyrażenia używane wyłącznie przez nas reprezentuje szacunkową oszczędność, jaką możesz zyskać kupując określone narzędzia z nami w porównaniu z głównymi, najlepszymi markami i niekoniecznie to oznacza okładka...
- Page 94 Wsparcie techniczne i certyfikat e-gwarancji www.vevor.com/support To jest oryginalna instrukcja. Przed przystąpieniem do obsługi prosimy o dokładne zapoznanie się ze wszystkimi instrukcjami. VEVOR zastrzega sobie jasną interpretację naszej instrukcji obsługi. Wygląd produktu zależy od produktu, który otrzymałeś. Proszę wybaczyć nam, że nie będziemy ponownie informować...
- Page 95 SAFETY INSTRUCTION AND PRECAUTIONS OSTRZEŻENIE: Przeczytaj ten materiał przed użyciem tego produktu. Niezastosowanie się do tego może spowodować poważne obrażenia. 1. Montaż wyłącznie zgodnie z niniejszą instrukcją. Nieprawidłowy montaż może stworzyć zagrożenie. 2. Podczas montażu nosić zatwierdzone przez ANSI okulary ochronne i wytrzymałe rękawice robocze.
- Page 96 stanie użytkowania nie demontuj według własnego uznania, nie reguluj według własnego uznania . 4. Ten produkt nie powinien dokonywać żadnych modyfikacji ani nie wykonywać żadnych niebezpiecznych operacji, takich jak wiercenie, spawanie itp., które mogą wywołać efekt odpuszczania i uszkodzić cylinder ciśnieniowy, co ma wpływ na żywotność...
- Page 97 Schematyczny diagram rozkładu JY-SD20L nazwa nazwa ŚĆ ŚĆ...
- Page 98 Korpus lufy Górny pier ś cień ci ś nieniowej mocuj ą cy Lufa wewn ę trzna Sta ł y ko ł nierz Nakr ę tka motylkowa Uszczelki Ś ruby z łą czkowe Zawór wylotowy Wymieszaj ostrza Zawór wlotowy Wa ł mieszaj ą cy regulator ci ś...
- Page 99 powietrza Lista specyfikacji wątków użytkownika : Specyfikacje SN Rynek sprzedaży zawór gwintów Samoblokujący 1/4" w stylu Wloty powietrza amerykańskim szybkozłączka do węża Wylot powietrza Normy (wraz z zaworem Amerykański gwint północnoamerykańskie otwierającym i 1/4", NPS, 18 zębów zamykającym) Port tłoczny (z zaworem Amerykański gwint otwierającym i...
- Page 100 Wylot powietrza (wraz z zaworem Europejski 1/4", otwierającym i gwint G, 19 zębów zamykającym) Port tłoczny (z zaworem Europejski 3/8", otwierającym i gwint G, 19 zębów zamykającym) Jak używać 1. Przed użyciem upewnij się, że w beczce ciśnieniowej nie ma ciśnienia resztkowego.
- Page 101 5 . Zamknąć wszystkie zawory, wlot opryskiwacza podłączyć do wylotu beczki (24), a wlot opryskiwacza podłączyć do zaworu wylotowego beczki (12) 6. Podłączyć złącze wlotu powietrza (20) i otworzyć zawór wlotu powietrza (25).
- Page 102 7. Wyreguluj regulator ciśnienia wlotowego i obróć go w prawo, aby uzyskać wymagane ciśnienie robocze, lub w kierunku przeciwnym do ruchu wskazówek zegara, jeśli chcesz zmniejszyć ciśnienie w beczce ciśnieniowej .
- Page 103 8. Otwórz zawór wylotowy(12)Otwórz zawór wylotowy(24) 9.Jeśli farba opadnie, przekręć ręczne wytrząsarkę, aby wymieszać. Konserwacja 6. Po użyciu odciąć źródło powietrza. Otwórz przełącznik zaworu balonu na pokrywie, aby całkowicie wypuścić powietrze z beczki, następnie poluzuj śrubę motylkową, otwórz pokrywę beczki, wylej resztki farby z beczki i wyczyść...
-
Page 104: Rozwiązywanie Problemów
nadmiarowy ciśnienia i odstaw na 6-8 godzin przed ponownym użyciem kleju po jego całkowitym zestaleniu . Rozwiązywanie problemów Przyczyna Wada Metoda wykluczenia niepowodzenia 1. Ź ród ł o powietrza nie 1. Ustaw ź ród ł o Wskazówka jest normalne powietrza na normalne manometru 2. - Page 105 1. Post ę puj zgodnie z 1. Gdy pokrywa lufy jest po łą czona z korpusem art. 3 Warunków lufy, nakr ę tka motylkowa korzystania Wyciek pokrywy nie jest dokr ę cana po 2. Zapoznaj si ę z beczki z farb ą przek ą...
- Page 106 Adres : Shuangchenglu 803nong11hao1602A-1609shi, baoshanqu, szanghaj 200000 CN. Import do AUS: SIHAO PTY LTD, 1 ROKEVA STREETEASTWOOD NSW 2122 Australia Import do USA: Sanven Technology Ltd., Suite 250, 9166 Anaheim Place, Rancho Cucamonga, CA 91730...
- Page 107 E-CrossStu GmbH Mainzer Landstr.69, 60329 Frankfurt am Main. YH CONSULTING LIMITED. C/O YH Consulting Limited Office 147, Centurion House, London Road, Staines-upon-Thames, Surrey, TW18 4AX...
- Page 109 Wsparcie techniczne i certyfikat e-gwarancji www.vevor.com/support...
- Page 110 Technische ondersteuning en e-garantiecertificaat www.vevor.com/support DRUKVERFPOT GEBRUIKERSHANDLEIDING Wij blijven ons inzetten om u gereedschap te bieden tegen een concurrerende prijs. "Bespaar de helft", "Halve prijs" of andere soortgelijke uitdrukkingen die alleen door ons worden gebruikt vertegenwoordigt een schatting van de besparingen die u zou kunnen opleveren als u...
- Page 112 Dit is de originele instructie. Lees alle instructies in de handleiding zorgvuldig door voordat u ermee aan de slag gaat. VEVOR behoudt zich een duidelijke interpretatie van onze gebruikershandleiding voor. Het uiterlijk van het product is afhankelijk van het product dat u heeft ontvangen.
- Page 113 SAFETY INSTRUCTION AND PRECAUTIONS WAARSCHUWING: Lees dit materiaal voordat u dit product gebruikt. Als u dit niet doet, kan dit leiden tot ernstig letsel. 1. Monteer uitsluitend volgens deze instructies. Onjuiste montage kan gevaren veroorzaken. 2. Draag tijdens de montage een ANSI-goedgekeurde veiligheidsbril en stevige werkhandschoenen.
- Page 114 binnen het toegestane drukbereik, bij normaal gebruik, niet naar believen verwijderen, niet naar wens aanpassen . 4. Dit product zou dat niet moeten doen enige vorm van modificatie uitvoeren, noch gevaarlijke handelingen uitvoeren zoals boren, lassen, enz., die een tempereffect kunnen veroorzaken, waardoor het drukvat beschadigd raakt, wat de levensduur van het product beïnvloedt.
- Page 115 Schematisch diagram van de ontleding van JY-SD20L naam naam...
- Page 116 Lichaam van het Bovenste drukvat bevestigingsring Binnenvat Vaste flens Afdichtende M16 vleugelmoer pakkingen M16 wartelbouten Afvoerklep Roer de messen Inlaatklep Mengschacht Drukregelaar Afdichtingspakking Zeskantige van het vatdeksel connector Vat deksel ontlastklep ontlastklep interface 0-ringen Ronde noten Onderste Inlaatmoer bevestigingsring Uitlaatklep Zet de grendel vast Ontluchtingsventiel Veerpakking...
- Page 117 SN Verkoopmarkt ventiel Draadspecificaties Amerikaanse stijl 1/4" Luchtinlaten zelfremmend snelle plug-buisfitting Luchtuitlaat Amerikaans 1/4", NPS Noord-Amerikaanse (inclusief met schroefdraad, 18 normen openings- en tanden sluitklep) Afvoerpoort (met Amerikaans 3/8", NPS openings- en met schroefdraad, 18 sluitklep) tanden Europese stijl 1/4" Luchtinlaten zelfborgende snelplug-buisfitting...
-
Page 118: Hoe Te Gebruiken
Hoe te gebruiken 1. Zorg er vóór gebruik voor dat er geen restdruk in het drukvat kan zijn. Als er restdruk is, kan de operator de Red Hat-ontluchtingsring op het drukvatdeksel opentrekken om de luchtdruk volledig te laten ontsnappen. binnen het drukvat om de veiligheid te garanderen . 2. - Page 119 6. Sluit de luchtinlaatconnector (20) aan en open het luchtinlaatventiel (25). 7. Stel de inlaatdrukregelaar af en draai deze rechtsom om de gewenste werkdruk in te stellen, of linksom als u de druk in het drukvat wilt verlagen .
- Page 120 8. Open de uitlaatklep (12) Open de afvoerklep (24) 9. Als de verf bezinkt, draait u de handmatige schudder om te roeren.
- Page 121 Onderhoud 7. Sluit na gebruik de luchtbron af. Open de ballonventielschakelaar op het deksel om de lucht in het vat volledig te laten ontsnappen, draai vervolgens de vlinderbout los, open het deksel van het vat, giet de resterende verf in het vat weg en reinig alle onderdelen die door de verf zijn aangeraakt met een geschikte hoeveelheid oplosmiddel.
-
Page 122: Problemen Oplossen
Problemen oplossen De oorzaak van de Schuld Uitsluitingsmethode mislukking 1. De luchtbron is niet De wijzer van de op normaal 1. Stel de luchtbron in de luchttoevoer 2. De inlaatklep is niet op normaal aangesloten open 2. Open de inlaatklep manometer 3. - Page 123 2. De onderdelen op het vatdeksel zijn slecht afgedicht 1. De afvoerklep is niet Geen verf 1.0pen de afvoerklep open 1.De druk is te hoog of te 1. Aanpassen aan laag normale druk Slecht verfeffect 2. Problemen met de 2. Reparatie van spuitapparatuur spuitapparatuur Zorg ervoor dat u het deksel van de emmer in diagonale volgorde van...
- Page 124 Adres : Shuangchenglu 803nong11hao1602A-1609shi, baoshanqu, shanghai 200000 CN. Geïmporteerd naar AUS: SIHAO PTY LTD, 1 ROKEVA STREETEASTWOOD NSW 2122 Australië Geïmporteerd naar de VS: Sanven Technology Ltd., Suite 250, 9166 Anaheim Place, Rancho Cucamonga, CA 91730...
- Page 125 E-CrossStu GmbH Mainzer Landstr.69, 60329 Frankfurt am Main. YH CONSULTING LIMITED. C/O YH Consulting Limited Office 147, Centurion House, London Road, Staines-upon-Thames, Surrey, TW18 4AX...
- Page 127 Technische ondersteuning en e-garantiecertificaat www.vevor.com/support...
- Page 128 Teknisk support och e-garanticertifikat www.vevor.com/support TRYCKFÄRGSKRUKA ANVÄNDARMANUAL Vi fortsätter att vara engagerade i att ge dig verktyg till konkurrenskraftiga priser. "Spara hälften", "Halva priset" eller andra liknande uttryck som endast används av oss representerar en uppskattning av besparingar du kan dra nytta av att köpa vissa verktyg med oss jämfört med de stora toppmärkena och betyder inte nödvändigtvis att täcka...
- Page 130 Detta är den ursprungliga instruktionen, läs alla instruktioner noggrant innan du använder den. VEVOR reserverar sig för en tydlig tolkning av vår användarmanual. Utseendet på produkten är beroende av den produkt du fått. Ursäkta oss att vi inte kommer att informera dig igen om det finns...
- Page 131 SAFETY INSTRUCTION AND PRECAUTIONS VARNING: Läs detta material innan du använder denna produkt. Underlåtenhet att göra det kan resultera i allvarliga skador. 1. Montera endast enligt dessa instruktioner. Felaktig montering kan skapa faror. 2. Bär ANSI-godkända skyddsglasögon och kraftiga arbetshandskar vid montering.
- Page 132 4. Denna produkt bör inte utföra någon form av modifiering, och inte heller delta i några farliga operationer såsom borrning, svetsning, etc., som kan ge en härdningseffekt, skada tryckcylindern, vilket påverkar produktens livslängd . 5. Det är strängt förbjudet att hälla stark sur och alkalisk vätska i denna produkt för att undvika korrosion av tankkroppen och orsaka personskada.
- Page 133 Schematiskt diagram över JY-SD20L sönderdelning namn namn Tryckrörskropp Övre fästring Inre tunna Fast fläns...
- Page 134 Tätande M16 fjärilsmutter packningar M16 kopplingsbultar Utloppsventil Rör om bladen Inloppsventil Blandande axel Tryckregulator Tätningspackning Sexkantskontakt för fatlock Fatlock avlastningsventil avlastningsventil gränssnitt 0-ringar Runda nötter Inloppsmutter Nedre fästring Utloppsventil Säkra spärren Avluftningsventil Fjäderpackning Skaka fästskruvarna Sugrör Manuell vippa Färg sugport Skaka handtaget Filterpackningar Vipphandtagsbultar...
- Page 135 Luftutlopp (inklusive Amerikansk 1/4", öppnings- och gängad NPS, 18 stängningsventil tänder Utloppsport (med öppnings- Amerikansk 3/8", gängad NPS, 18 stängningsventil tänder Europeisk stil 1/4" självlåsande Luftintag slangkoppling med snabbplugg Luftutlopp (inklusive Europeisk 1/4", öppnings- och europeisk standard gänga G, 19 tänder stängningsventil Utloppsport (med öppnings-...
- Page 136 Utloppsport (med öppnings- Europeisk 3/8", gänga G, 19 tänder stängningsventil Hur man använder 1. Före användning, se till att det inte kan finnas något resttryck i tryckcylindern, om det finns kvarvarande tryck kan operatören dra upp Red Hat säkerhetsventilens avluftningsdragring på tryckcylinderns lock för att helt släppa lufttrycket inuti tryckcylindern för att garantera säkerheten .
- Page 137 5 . Stäng alla ventiler, sprutans inlopp är anslutet till cylinderns utlopp (24), och sprutans inlopp är anslutet till cylinderns utloppsventil (12) 6. Anslut luftintagsanslutningen (20) och öppna luftintagsventilen (25).
- Page 138 7. Justera insugningstrycksregulatorn och vrid medurs för att justera till önskat arbetstryck, eller moturs om du vill minska trycket i tryckcylindern . 8. Öppna utloppsventilen (12) Öppna utloppsventilen (24) 9.Om färgen sätter sig, vrid den manuella skakaren för att röra om.
- Page 139 Underhåll 8. Efter användning, skär av luftkällan. Öppna ballongventilens omkopplare på locket för att helt släppa ut luften i tunnan, lossa sedan fjärilsbulten, öppna locket på tunnan, häll ut resterande färg i tunnan och rengör alla delar som har berörts av färgen med en lämplig mängd lösningsmedel. Häll rengöringslösningsmedlet i hinken, stäng locket för att låsa det, öppna insugningsventilen och kör sprutan tills det rena lösningsmedlet dyker upp .
- Page 140 Felsökning Orsaken till Uteslutningsmetod misslyckandet Pekaren på 1. Luftkällan är inte normal 1. Justera luftkällan till tryckmätaren som 2. Insugningsventilen är normal är ansluten till inte öppen 2. Öppna lufttillförseln rör sig 3.Andra ventiler är inte insugningsventilen inte stängda 3. Stäng andra ventiler 1.
- Page 141 1. Utloppsventilen är inte 1.0penna Ingen färg öppen utloppsventilen 1. Trycket är för högt eller 1. Justera till normalt för lågt tryck Dålig färgeffekt 2. Problem med 2.Reparation av sprututrustning sprututrustning Se till att låsa hinkens lock diagonalt i arbetsordningen; 1-2 3-4...
- Page 142 Adress : Shuangchenglu 803nong11hao1602A-1609shi, baoshanqu, shanghai 200000 CN. Importerad till AUS: SIHAO PTY LTD, 1 ROKEVA STREETEASTWOOD NSW 2122 Australien Importerad till USA: Sanven Technology Ltd., Suite 250, 9166 Anaheim Place, Rancho Cucamonga, CA 91730 E-CrossStu GmbH Mainzer Landstr.69, 60329 Frankfurt am Main. YH CONSULTING LIMITED.
- Page 144 Teknisk support och e-garanticertifikat www.vevor.com/support...
Need help?
Do you have a question about the JY-SD20L and is the answer not in the manual?
Questions and answers