Table of Contents
Advertisement
Quick Links
Technical Support and E-Warranty Certificate www.vevor.com/support
ELECTRIC SPRAY GUN
We continue to be committed to provide you tools with competitive price.
"Save Half", "Half Price" or any other similar expressions used by us only represents an
estimate of savings you might benefit from buying certain tools with us compared to the major
top brands and doses not necessarily mean to cover all categories of tools offered by us. You
are kindly reminded to verify carefully when you are placing an order with us if you are
actually saving half in comparison with the top major brands.
Advertisement
Table of Contents

Summary of Contents for VEVOR JS-FB17AI
- Page 1 Technical Support and E-Warranty Certificate www.vevor.com/support ELECTRIC SPRAY GUN We continue to be committed to provide you tools with competitive price. "Save Half", "Half Price" or any other similar expressions used by us only represents an estimate of savings you might benefit from buying certain tools with us compared to the major top brands and doses not necessarily mean to cover all categories of tools offered by us.
- Page 2 CustomerService@vevor.com This is the original instruction, please read all manual instructions carefully before operating. VEVOR reserves a clear interpretation of our user manual. The appearance of the product shall be subject to the product you received. Please forgive us that we won't inform you again if there are any technology or software updates on our product.
-
Page 3: Important Safety Instructions
IMPORTANT SAFETY INSTRUCTIONS To reduce the risks of fire or explosion, electrical shock, and the injury to persons, read and understand all instructions included in this manual. Be familiar with the controls and the proper usage of the equipment. WARNING – To reduce the risk of fire or explosion: 1. - Page 4 WARNING – To reduce the risk of skin injection: 1. Do not aim the gun at, or spray any person or animal. 2. Keep hands and other body parts away from the discharge. For example, do not try to stop leaks with any part of the body. 3.
-
Page 5: Intend Use
Wall paints (emulsion paints) etc., alkali and acidic paints. The tool is to be used only for its prescribed purpose. Any other use is deemed to be a case of misuse. TECHNICAL SPECIFICATIONS Model JS-FB17AI Rated voltage 120V~ Rated frequency 60Hz Current draw 4.2A... -
Page 6: Parts List
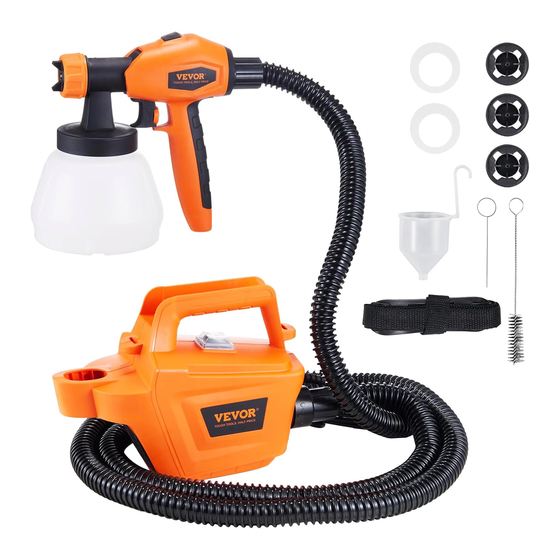
Parts list Description Description Description Container Nozzle Trigger Flow knob Spray gun handle Base handle Switch Hose Belt - 5 -... -
Page 7: Preparing The Coating Material
OPERATION INSTRUCTIONS Material Run out Time (seconds) Oil enamel 25-45 Oil based primer 30-50 Varnish 20-55 Lacquer / lacquer sanding sealer 25-40 Oil stain No thinning required Clear sealer No thinning required Polyurethane No thinning required Material flash point must be 55°C or higher. 1. - Page 8 2. Start-up Before connecting to the mains supply, be sure that the supply voltage is identical with the value given on the rating plate. 1) Mounting air hose. Insert the air hose coupler tightly in the connections on the machine and the spray gun. 2) Unscrew the container from the spray gun.
- Page 9 Three different spray jet settings can be chosen on the spray gun, depending on the application and target object. Setting Spray pattern 6) Push the ON / OFF switch on the machine and start painting. 7) Adjusting the Material Volume Set the material volume by turning the regulator knob on the trigger.
-
Page 10: Spray Technique
3. Spray Technique ● The spray result depends heavily on the smoothness and cleanliness of the surface to be sprayed. Therefore, the surface should be carefully prepared and kept free of dust. ● Cover all surfaces not to be sprayed. ●... -
Page 11: Interruption Of Work
10-30cm Fig 1 Fig 2 Interruption of Work ● Turn the machine off. ● Put the spray gun in the spray gun holder. Taking Out of Operation and Cleaning Turn the machine off. Activate the trigger guard so that the coating material in the spray gun flows back into the container. - Page 12 Then empty the container completely. Always keep the container seal free of coating material residue and check for damage. Press down the quick release button and pull out the front part of the spray gun. Clean it thoroughly. Clean the outside of the spray gun and container with a cloth soaked in solvent or water.
- Page 13 Maintenance 1. Change the air filter Change the air filter if it is soiled. Release the cover fastening from the machine, place the air filter in the cover. Push the cover back onto the machine. WARNING! Never operate the machine without the air filter; dirt could be sucked in and interfere with the function of the machine.
-
Page 14: Correction Of Malfunctions
2. Correction of Malfunctions Problem Cause Remedy No coating Nozzle clogged Clean material Feed tube clogged Clean emerges from Material volume setting turned too far Turn to the upside (+) the nozzle to the downside (-) Feed tube loose Insert No pressure build-up in container Tighten container Viscosity of coating material too high... - Page 16 Technical Support and E-Warranty Certificate www.vevor.com/support...


Need help?
Do you have a question about the JS-FB17AI and is the answer not in the manual?
Questions and answers