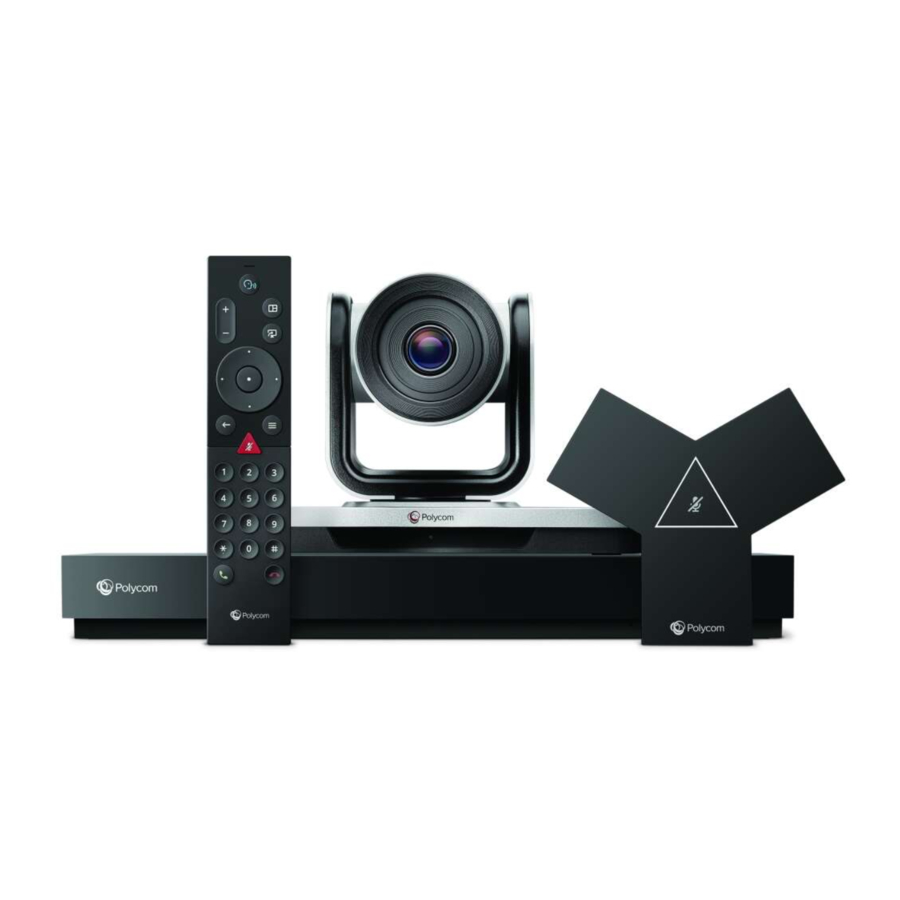
Poly G7500 User Manual
Video mode
Hide thumbs
Also See for G7500:
- Administrator's manual (156 pages) ,
- User manual (39 pages) ,
- Preparation manual (16 pages)
Table of Contents
Advertisement
Advertisement
Table of Contents

Related Manuals for Poly G7500


Summary of Contents for Poly G7500
- Page 1 Poly Video Mode (for Poly Studio G62, Poly G7500, Poly Studio X70, Poly Studio X52, Poly Studio X50, Poly Studio X30, and Poly Studio E70) User Guide 4.2.0 SUMMARY This guide provides the end-user with task-based user information for the featured product.
-
Page 2: Table Of Contents
2 Getting Started ..............................2 Product Overview of Poly Video Systems....................... 2 Poly Studio G62 product overview......................2 Poly G7500 System Features and Capabilities ..................2 Poly Studio X70 Features and Capabilities....................3 Poly Studio X52 Features and Capabilities....................3 Poly Studio X50 Features and Capabilities....................4 Poly Studio X30 Features and Capabilities.................... - Page 3 LED Status Indicators for the Poly G7500 System ................20 LED Status Indicators for the Poly Studio X70 System ................. 21 LED Status Indicators for Poly Studio X50 and Poly Studio X30 Systems ..........21 LED Status Indicators for the Poly Studio E70 Camera................. 22 Poly Studio E60 LED indicators ......................
- Page 4 Managing incoming calls when in Device Mode ..................45 Exit Device Mode and disconnect your computer ..................45 7 Using the Poly Control App ..........................46 Control the System with the Poly Control App ....................46 8 Settings ................................47 Video Adjustments ............................47 Change the Participant Layout.......................
- Page 5 Conferencing Application Doesn’t Use System Camera or Audio ............49 Can’t Use System’s Camera or Audio ....................49 Improve Audio Quality..........................50 Improve Laptop Screen Mirroring ......................50 Can’t Share Wireless Content........................ 50 View Content Help Tips..........................51 View Blackboard Help Tips ........................... 51 10 Getting help ..............................
-
Page 6: 1 About This Guide
Audience, purpose, and required skills This guide is intended for beginning users, as well as intermediate and advanced users, who want to learn how to use the features available with Poly G7500, and Poly Studio X series . Icons used in Poly documentation This section describes the icons used in Poly documentation and what they mean. -
Page 7: 2 Getting Started
Poly Studio G62 is designed with simplified mounting and PoE+ class 4 power, so you can place it behind a display, under a table, or in an A/V rack. The Poly Studio G62 system supports Poly audio and video products over IP LLN as well as Poly and third-party products using the USB and 3.5 mm system ports. -
Page 8: Poly Studio X70 Features And Capabilities
Camera tracking technology that can automatically zoom in on the person talking or frame the ● group of people in the room (depending on the paired camera and system configuration) Poly NoiseBlockAI, which eliminates background and extraneous sound during calls in common ● working environments Polycom Acoustic Fence technology, which enables video conferencing in open workspaces by ●... -
Page 9: Poly Studio X50 Features And Capabilities
Hi-fidelity, built-in stereo microphones that pick up sound within 7.62 m (25 ft) and use spatial ● audio for life-like presence and clarity Poly NoiseBlockAI, which eliminates background and extraneous sound during calls in common ● working environments Dual stereo speakers ●... -
Page 10: Poly Studio X30 Features And Capabilities
For information on mounting the Studio X30, see the Studio X30 setup sheet. Poly Studio E70 Camera Overview Poly Studio E70 is a dual-camera solution supported on Poly G7500, Studio X70, Studio X52, and Studio X50 systems. The Poly Studio E70 includes the following features: Standalone USB 4K camera with full tracking and framing capabilities ●... -
Page 11: Administrator Features And Capabilities
Administrator Features and Capabilities The G7500 and Studio X Family systems provide features for administrators to deploy, manage, and access systems. These systems provide the following features and capabilities: Remote access for managing standalone systems ● Provisioning with Poly Clariti Manager to support single system, small business, and large ●... -
Page 12: Poly Studio G62 System Ports
Poly Studio G62 system ports The following diagram describes the ports available on a Poly Studio G62 system. Table 2-1 Poly Studio G62 Ports Item Port Description 3.5 mm output Connects speakers to the system. 3.5 mm input Connects microphones to the system. -
Page 13: Poly G7500 Hardware
Port Description Security lock Physically secures the system. Poly G7500 Hardware The following figure displays the hardware features on the Poly G7500 system. The table lists each feature numbered in the figure. Table 2-2 Poly G7500 Feature Descriptions Ref. Number... -
Page 14: Poly Studio X70 Hardware
LED indicators Indicates the system status and information on the tracked speaker Poly Studio X70 System Hardware Ports The following illustration and table explain the hardware ports on your Poly Studio X70 system. Poly Studio X70 Hardware... -
Page 15: Poly Studio X70 Privacy Shutter Behavior
Table 2-5 Poly Studio X70 System Hardware Port Descriptions Ref. Number Port Description HDMI output for the secondary monitor HDMI output for the primary monitor HDMI input for sharing content (for example, from a laptop) USB-A ports USB-C port 3.5 mm audio line in 3.5 mm audio line out... -
Page 16: Poly Studio X52 Hardware
The system is in an active call and the video is muted Shutters are open Poly Studio X52 Hardware The following figure displays the hardware features on the Poly Studio X52 system. The table lists each feature numbered in the figure. Table 2-6 Poly Studio X52 Feature Descriptions Ref. -
Page 17: Poly Studio X52 Privacy Cover
HDMI port for content sharing and Device Mode USB-C port for Device Mode Poly Studio X52 Privacy Cover The Poly Studio X52 system provides a physical cover that you can place over the camera lens to protect your privacy. Poly Studio X50 Hardware The following figure displays the hardware features on the Poly Studio X50 system. -
Page 18: Poly Studio X50 System Ports
LED indicators Indicates the system status and information on the tracked speaker Poly Studio X50 System Ports The following illustration and table explain the ports on your Poly Studio X50 system. Table 2-9 Poly Studio X50 System Port Descriptions Ref. Number Port Description 3.5 mm audio line in... -
Page 19: Poly Studio X50 Privacy Cover
LAN connection for the system Power cord port Poly Studio X50 Privacy Cover The Poly Studio X50 provides a physical cover that you can place over the camera lens to protect your privacy. Poly Studio X30 Hardware The following figure displays the hardware features on the Poly Studio X30 system. The table lists each feature numbered in the figure. -
Page 20: Poly Studio X30 System Ports
HDMI input for sharing content (for example, from a laptop) USB-A ports LAN connection for the system Poly Studio X30 Privacy Cover The Poly Studio X30 provides a physical cover that you can place over the camera lens to protect your privacy. Poly Studio X30 System Ports... -
Page 21: Poly Studio E70 Camera Hardware
Poly Studio E70 Ports The following illustration and table explain the ports on your Poly Studio E70 camera. IMPORTANT: If you use an Ethernet port to power the Studio E70, the Ethernet port must be able to supply 30W PoE+ Type 2/Class 4 power. -
Page 22: Poly Studio E70 Privacy Shutter Behavior
The system is in an active call and the video is muted Shutters are open Poly Studio E60 Camera Hardware The following figures and tables explain the hardware features on the Poly Studio E60 camera. Poly Studio E70 Privacy Shutter Behavior... -
Page 23: Poly Studio E60 Ports
The following illustration and table explain the ports on your Poly Studio E60 camera. IMPORTANT: If you use an Ethernet port to power the Poly Studio E60, the Ethernet port must be able to supply 30W PoE+ Type 2/Class 4 power with a port voltage range of 50V to 57V. The maximum power to device is 25.5W with a voltage range to device of 42.5V to 57V. -
Page 24: Poly Studio E60 Privacy Shutter Behavior
Connects the camera to a power source using an optional power cable (available separately) Poly Studio E60 Privacy Shutter Behavior The Poly Studio E60 camera comes with a physical cover that blocks the camera lens to protect your privacy. Figure 2-1 Poly Studio E60 privacy cover Manually remove the privacy cover before starting your video conference to show your video. -
Page 25: Poly Studio G62 Led Behavior
Poly Studio G62 LED behavior Use the LED on the front left corner of the Poly Studio G62 system to get information on the state of your system. Table 2-16 Poly Studio G62 LED Behavior Indicator Status Blinking white Powering on... -
Page 26: Led Status Indicators For The Poly Studio X70 System
Solid green Active call in progress Solid red Audio mute LED Status Indicators for Poly Studio X50 and Poly Studio X30 Systems The system provides an LED light bar above the camera to help you understand the system’s behaviors. Table 2-19... -
Page 27: Led Status Indicators For The Poly Studio E70 Camera
LED Status Indicators for the Poly Studio E70 Camera The camera provides LED indicators on the front and right side of the camera to help you understand the camera’s behaviors when connected to a Poly Studio G62, Poly G7500, or Poly Studio X system. Table 2-20... -
Page 28: Poly Studio E60 Led Indicators
Powering the System On and Off The system powers on when you plug it in to a power source. Poly recommends the following when powering off or restarting your system: Don’t restart or power off the system during maintenance activities (for example, while a software ●... - Page 29 Ref. Number Description System information bar, which shows details such as date/time and system name. Task buttons for placing calls, sharing content, creating a blackboard, or launching Poly Device Mode. Menu for accessing other features. Local camera view. Home Screen Elements Some of the following interactive and read-only elements might not display on your system depending on the system configuration.
-
Page 30: Content Screen
HDMI, the Polycom Content App, or an AirPlay- or a Miracast-certified device. Creates a new blackboard, where you can share annotations or drawings. Blackboard Launches Poly Device Mode, which allows you to use the Poly Video system as an Poly Device Mode external camera, microphone, and speaker for your connected laptop. -
Page 31: Poly Ir Remote Control Button Functions
Content management functions. Poly IR Remote Control Button Functions When you connect a Poly IR receiver to your G7500 or Studio X system, you can use the Poly IR remote control to navigate your system. The following illustration and table show the buttons and functionality of the Poly IR remote control. -
Page 32: Bluetooth Remote Control Button Functions
Mute or unmute the system microphones Bluetooth Remote Control Button Functions When you pair the Poly Bluetooth remote control with your Poly Studio G62, Poly G7500, or Poly Studio X system, you can use the remote control to navigate your system. -
Page 33: Wake The System
Wake the System After a period of no activity, the system enters sleep mode (if configured by your administrator). You can wake it using a touch monitor, Poly TC8, or Poly Bluetooth Remote Control. ■ Do one of the following: If you’re using a touch monitor, tap the primary screen. -
Page 34: Users Who Are Blind, Have Low Vision, Or Have Limited Vision
Table 2-25 Accessibility Features for Users Who Are Deaf or Hard of Hearing Accessibility Feature Description Visual notifications Status and icon indicators let you know when you have incoming, outgoing, active, or held calls. Indicators also alert you of the device’s status and when features are enabled. - Page 35 Accessibility Features for Users with Limited Mobility (continued) Accessibility Feature Description Poly TC10 or Poly TC8 The Poly TC10 or Poly TC8 enables you to control the system and to perform tasks such as placing calls. Auto-answering You can enable the system to auto-answer calls.
-
Page 36: 3 Calling
Calling There are several ways to initiate calls on the system. You can place a call by entering your contact’s name or number, choosing a contact in the directory, calling a favorite or recent contact, or joining a scheduled meeting. You can place calls using the following methods: Call using the dialpad ●... -
Page 37: Answer A Call
● Call a Password-Protected Zoom Meeting Using Trio C60 Use these input options when calling into a password-protected Zoom meeting when using Poly Video Mode and a paired Trio C60. Make sure that you have the meeting password before you join. -
Page 38: Calling Contacts
Calling Contacts You can access and call contacts, recent contacts, and frequent contacts on your system. If configured by your administrator, contacts display on the Place a Call screen. Contact cards can display the following information: Contact name ● Contact number ●... -
Page 39: Favorite A Contact
Favorite a Contact Create favorites to display contacts that you call the most often. Go to Place a Call > Contacts. Select a contact card, then select Favorite. The contact receives a star icon and displays in the Contacts and Favorites lists. Unfavorite a Contact Unfavorite a contact to remove the contact from your Favorites list. -
Page 40: Join A Meeting From A Meeting Card
NOTE: Private meetings are labeled Private Meeting. Except for the time, meeting details are hidden. ■ Do one of the following: To view meeting information, choose a meeting card and select Info . ● To view upcoming scheduled meetings, select a card and scroll to the right. ●... -
Page 41: 4 Sharing Content
Polycom Content App The Polycom Content App enables you to share content from a computer connected to a Poly G7500, and Poly Studio X series system over an IP network. -
Page 42: Share Content Using An Hdmi Connection
Begin casting from your AirPlay- or Miracast-certified device. For casting information for your device, refer to the product documentation. If prompted, enter the security code shown on the Home screen. Share Content Using an HDMI Connection Share content from your device through an HDMI connection. This method doesn’t require you to connect using a wireless service. -
Page 43: Delete Snapshots Or Content
A limited number of snapshots are available. A prompt notifies you when you have reached the snapshot limit. NOTE: When you end the call or content sharing session, the system erases all snapshots and associated snapshot data. ■ With a board or content on the screen, select Snapshot The system captures the content and displays it as Snapshot-1 . -
Page 44: 5 Cameras
Cameras Camera controls are available in and out of calls. You can control cameras, depending on the camera type, in the following ways: Adjust an In-Room Camera To enhance the view of meeting participants, make adjustments to the in-room camera. If camera tracking is on, camera control is unavailable. -
Page 45: Turn Your Camera On Or Off
Turn Your Camera On or Off Turn your camera on to show local video or turn your camera off to hide your local video. NOTE: Turning the camera on or off doesn’t control the privacy shutter for the Studio E70 camera. When you turn the camera off, the Studio E70 camera stops sending video, but the privacy shutter remains open. -
Page 46: Select A Preset
Adjust the camera to the desired position. Do one of the following: On the screen, select an empty preset. ● On the screen, long press the preset and choose Save. ● On the remote control, press a number to select a preset. ●... -
Page 47: Select The Primary Camera From The Local Interface
Select the Primary Camera from the Local Interface In Poly Video Mode, when you attach multiple cameras to the system, select the primary camera from the local interface. Go to Menu > Camera > Select Camera. Select a camera from the list. -
Page 48: 6 Using Device Mode
For example, instead of using your computer’s camera for Zoom Rooms calls, connect the Studio X30 and use its 4K camera to automatically follow the conversation in the room. You also gain a Poly echo-cancelling microphone and speaker technology during calls. -
Page 49: Use Your System As A Computer Accessory
Access Device Mode and connect your computer to the system. NOTE: The controls on a connected Poly Trio phone don’t work if the system is in Device Mode. To mute the microphones, do one of the following: In a conference application on your computer, select mute. -
Page 50: Managing Incoming Calls When In Device Mode
NOTE: Ensure that you select the correct device when adjusting the volume. Changing the volume alone may not work. You must select the Poly video system as the audio device. To configure camera settings: From the right border of the TC10 or TC8 or the touchscreen, swipe left and select Camera Settings. -
Page 51: 7 Using The Poly Control App
Using the Poly Control App The Poly Control App enables you to control a video system using a personal device, such as your mobile device or computer. After you connect your personal device to the video system, you can place and manage calls, control camera settings, and interact with shared content. -
Page 52: 8 Settings
Settings Before or during calls, you can adjust video and audio settings, including adjusting the volume and changing the video layout. Video Adjustments You can manage video and certain user interface settings. Change the Participant Layout During a call, you can change from the current layout to another layout better suited for the meeting. The layout frames include the near site and far site. -
Page 53: Unmute Your Microphones
A notification displays that the system muted your local microphones. Unmute Your Microphones When your audio is muted and you’re ready to speak in a call, unmute your microphones. ■ NOTE: Your administrator can configure the microphones to mute when the system enters sleep mode. -
Page 54: 9 Troubleshooting
This section includes information related to troubleshooting issues with your system. You can also find information on pairing your remote, configuring your monitors, and where to find help tips. Poly Device Mode Use these topics to troubleshoot problems you may encounter using Device Mode. -
Page 55: Improve Audio Quality
When mirroring your laptop screen with an HDMI connection, the picture on the connected monitor isn’t ideal. The resolution on your laptop may need to be adjusted for the monitor connected to the Poly video system. Follow these steps until screen mirroring quality improves: Adjust your laptop’s resolution settings. -
Page 56: View Content Help Tips
■ Do one of the following: On the video system local interface or TC8 device (if you have one), select Exit ● Unplug the cables connecting your computer and video system. After two minutes, you see ● the video system home screen (even if you have not selected Exit ). View Content Help Tips Content help tips provide information on how to stream content using HDMI, the Polycom Content App, or an Airplay- or a Miracast-certified device. -
Page 57: 10 Getting Help
Getting help Poly is now a part of HP. The joining of Poly and HP paves the way for us to create the hybrid work experiences of the future. Information about Poly products has transitioned from the Poly Support site to the HP Support site. - Page 58 Last update: June 2024 Email us at documentation.feedback@hp.com with queries or suggestions related to this document. Document information...
Need help?
Do you have a question about the G7500 and is the answer not in the manual?
Questions and answers