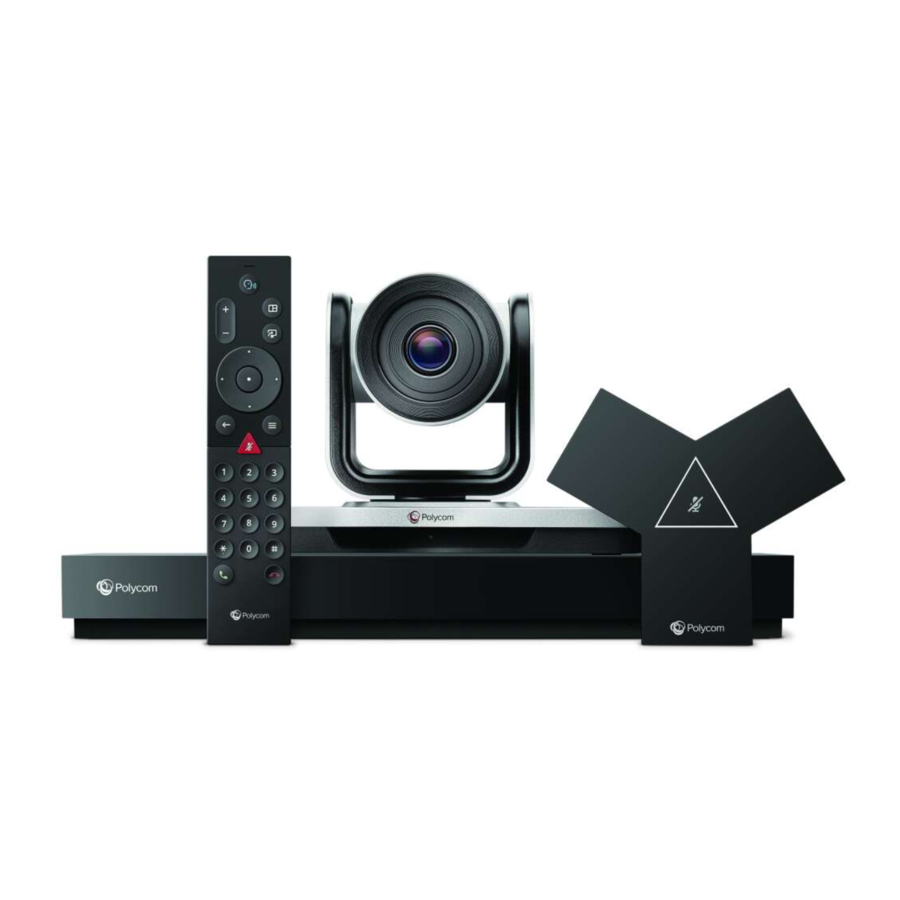
Poly G7500 Administrator's Manual
Hide thumbs
Also See for G7500:
- Administrator's manual (137 pages) ,
- User manual (58 pages) ,
- Preparation manual (16 pages)
Table of Contents

Related Manuals for Poly G7500


Summary of Contents for Poly G7500
- Page 1 Poly Partner Mode Administrator Guide 4.1.0 (for G7500, Studio X70, Studio X52, Studio X50, and Studio X30) SUMMARY This guide provides administrators with information about configuring, maintaining, and troubleshooting the featured product.
- Page 2 You may receive the open source herein is subject to change without notice. products and services process customer software from Poly up to three (3) years The only warranties for HP products and data in a manner consistent with the Poly...
-
Page 3: Table Of Contents
2 Getting Started ..............................2 Poly Partner Mode Overview .......................... 2 Product Overview of Poly Video Systems....................... 3 Poly G7500 System Features and Capabilities ..................3 Poly Studio X70 Features and Capabilities....................3 Poly Studio X52 Features and Capabilities....................4 Poly Studio X50 Features and Capabilities....................4 Poly Studio X30 Features and Capabilities.................... - Page 4 LED Status Indicators for Studio X50, and Studio X30 Systems ............18 LED Status Indicators for the Studio E70 Camera................. 19 3 Setting Up the System............................20 Set Up Your G7500 or Studio X System ....................... 20 Default System Configuration ........................20 Completing Initial System Setup ........................21 Complete Setup with the System Web Interface ...................
- Page 5 Connect a Studio E70 to a G7500 Using a USB Cable ................. 35 Unpair a Studio E70 camera from a G7500 to use it as a USB camera ..........35 Switch a Studio E70 USB-connected camera to LLN IP connected ............35 Connect a Studio E70 with a G7500 as an LLN IP camera ..............
- Page 6 Behavior When LLDP is Enabled......................52 Enable LLDP ............................52 Configure Wi-Fi as the Primary Network....................... 52 Configure Wi-Fi Settings from System Device Settings ................54 7 Securing the System ............................55 Managing System Access..........................55 Local Accounts............................55 Configure Password Policies ......................55 Create Local Administrator Credentials ..................
- Page 7 Configure NoiseBlockAI When Paired with Poly Trio ..............80 Configuring the Microphone Adapter ..................... 80 Audio Output ..............................80 Configure G7500 Audio Output for HDMI and 3.5 mm Audio ..............80 Configure Audio Output Settings on Studio X Systems ................. 81 Using Poly Trio Speakers ........................81 Choose Speakers When Paired with Poly Trio................
- Page 8 Unlock System Settings ..........................106 Updating Software............................106 Updating Paired Devices ........................106 Updating a Paired Poly TC8 or Poly TC10 ................... 107 Updating a Paired Poly Trio......................107 Updating Software in the System Web Interface ................. 107 Choose How to Get Software Updates..................107 Manually Update Software......................
- Page 9 Automatically Update Software..................... 110 Update Software Using a USB Flash Drive ..................110 Update Poly HDCI Cameras ........................ 111 Downgrading Software..........................111 Manually Downgrade Software in the System Web Interface.............. 111 Downgrade Software with a USB Flash Drive ..................111 Restart the System............................
- Page 10 Verify Poly Lens Registration Status......................132 16 Troubleshooting............................133 Audio Issues..............................133 On a G7500 with a Studio E70 Camera and 3.5 mm Audio DSP Echoes Are Heard on the Far End............................... 133 Poly Trio Audio Meter Not Displaying in System Web Interface ............133 Fix Polycom Acoustic Fence Issues with G7500 .................
- Page 11 System Doesn't Update Connected Peripherals.................. 141 Recovering a System After an Unsuccessful Update to VideoOS 4.0..........141 Studio E70 Powered by a G7500 LLN Port Becomes Disconnected After an Update ......142 Studio X70 Stuck in Reboot Loop After Enabling Device Mode ............142 Contacting Technical Support ........................
-
Page 12: 1 About This Guide
OpenSIP networks and VoIP endpoint environments ● Icons used in Poly documentation This section describes the icons used in Poly Documentation and what they mean. WARNING! Indicates a hazardous situation that, if not avoided, could result in serious injury or death. -
Page 13: 2 Getting Started
Getting Started The Poly G7500 and Studio X Family systems provide video conferencing capabilities and collaboration tools for any size meeting space or room. Poly Partner Mode Overview Poly Partner Mode allows you to run third-party conferencing applications on supported Poly video systems. -
Page 14: Product Overview Of Poly Video Systems
Product Overview of Poly Video Systems Poly G7500, Studio X70, Studio X52, Studio X50, and Studio X30 systems in Poly Video Mode support Poly video conferencing and content sharing features. Poly G7500 System Features and Capabilities G7500 systems support the following features: Peripheral cameras and microphones make the system scalable for medium rooms and up to ●... -
Page 15: Poly Studio X52 Features And Capabilities
Hi-fidelity, built-in stereo microphones that pick up sound within 7.62 m (25 ft) and use spatial ● audio for life-like presence and clarity Poly NoiseBlockAI, which eliminates background and extraneous sound during calls in common ● working environments Dual stereo speakers ●... -
Page 16: Poly Studio X30 Features And Capabilities
For information on mounting the Studio X30, see the Studio X30 setup sheet. Poly Studio E70 Camera Overview Poly Studio E70 is a dual-camera solution supported on Poly G7500, Studio X70, Studio X52, and Studio X50 systems. The Poly Studio E70 includes the following features: Standalone USB 4K camera with full tracking and framing capabilities ●... -
Page 17: Administrator Features And Capabilities
The figures and tables in the following topics provide information about hardware features available on your system. Poly G7500 Hardware The following figure displays the hardware features on the Poly G7500 system. The table lists each feature numbered in the figure. Table 2-1 Poly G7500 Feature Descriptions Ref. -
Page 18: Poly Studio X70 Hardware
Table 2-2 G7500 System Port Descriptions Ref. Number Port Description 3.5 mm audio line out 3.5 mm audio line in Security lock Mini-DIN/RS-232 serial port NOTE: The serial port is occasionally used by third party control system devices for automation. -
Page 19: Poly Studio X70 System Hardware Ports
Indicates the system status and information on the tracked speaker Poly Studio X70 System Hardware Ports The following illustration and table explain the hardware ports on your Poly Studio X70 system. Table 2-4 Poly Studio X70 System Hardware Port Descriptions Ref. -
Page 20: Poly Studio X70 Privacy Shutter Behavior
The system is in an active call and the video is muted Shutters are open Poly Studio X52 Hardware The following figure displays the hardware features on the Poly Studio X52 system. The table lists each feature numbered in the figure. Table 2-5 Poly Studio X52 Feature Descriptions Ref. -
Page 21: Poly Studio X52 System Ports
HDMI port for content sharing and Device Mode USB-C port for Device Mode Poly Studio X52 Privacy Cover The Poly Studio X52 system provides a physical cover that you can place over the camera lens to protect your privacy. Chapter 2 Getting Started... -
Page 22: Poly Studio X50 Hardware
Poly Studio X50 Hardware The following figure displays the hardware features on the Poly Studio X50 system. The table lists each feature numbered in the figure. Table 2-7 Poly Studio X50 Feature Descriptions Ref. Number Feature Feature Description Screen Protective screen that covers the front of your system... -
Page 23: Poly Studio X50 Privacy Cover
HDMI input for sharing content (for example, from a laptop) LAN connection for the system Power cord port Poly Studio X50 Privacy Cover The Poly Studio X50 provides a physical cover that you can place over the camera lens to protect your privacy. Chapter 2 Getting Started... -
Page 24: Poly Studio X30 Hardware
Poly Studio X30 Hardware The following figure displays the hardware features on the Poly Studio X30 system. The table lists each feature numbered in the figure. Table 2-9 Poly Studio X30 Feature Descriptions Ref. Number Feature Feature Description Microphone array... -
Page 25: Poly Studio X30 Privacy Cover
Poly Studio X30 Privacy Cover The Poly Studio X30 provides a physical cover that you can place over the camera lens to protect your privacy. Poly Studio E70 Camera Hardware Table 2-11 Poly Studio E70 Feature Descriptions Reference Number Feature... -
Page 26: Poly Studio E70 Privacy Shutter Behavior
Reset button Ethernet port (Can be used to provide power to the camera) USB-C port Power cord port Poly Studio E70 Privacy Shutter Behavior The privacy shutter automatically opens and closes depending on the state of the connected video system. NOTE: Shutter behavior may vary depending on the partner application. -
Page 27: Powering The System On And Off
The following topics list the LED behavior for your system. The tables list each LED indicator and its associated status. LED Status Indicators for the G7500 System Use the LED on the front right corner of the codec to get information on the state of your system. -
Page 28: Led Status Indicators For The Studio X70 System
Table 2-13 G7500 System LED Status Indicators Indicator Status Blinking white Powering on Solid white Working normally Solid green In a call Blinking amber Update in progress. Solid amber Sleeping Blinking red Error preventing normal operation Solid red Muted microphone LED Status Indicators for the Studio X70 System Use the LED on the right side of the system to help you understand the system's behaviors. -
Page 29: Led Status Indicators For Studio X50, And Studio X30 Systems
Table 2-15 Basic Studio X52 LED Indicators and Status Indicator Status System powered off System in sleep mode Solid white System is idle and standing by Pulsing white Boot initiation in progress Pulsing amber Firmware update or factor restore in progress Blinking blue and white Bluetooth pairing Solid blue... -
Page 30: Led Status Indicators For The Studio E70 Camera
LED Status Indicators for the Studio E70 Camera The camera provides LED indicators on the front and right side of the camera to help you understand the camera’s behaviors when connected to a G7500, Studio X series system, or a Windows PC. Table 2-17... -
Page 31: 3 Setting Up The System
Before powering on your system, connect a monitor, Ethernet cable, and any USB cameras. In most cases, your system defaults to Poly Video mode. To use another provider mode, such as Teams Rooms, Zoom Rooms, or Google Meet, you'll need an account and license per the provider requirements. -
Page 32: Completing Initial System Setup
If the specified conferencing application isn’t available after the update, the system defaults to Poly Video Mode. To change the conferencing application, go to the system web interface Provider section and select an option. -
Page 33: Complete Setup With The System Web Interface
To finish setting up your system, manually configure the system’s local administrator password, country, and timezone. After completing setup in the system web interface, you can pair a Poly TC10 or TC8 touch controller. NOTE: To avoid power frequency issues with your system, choose a location. -
Page 34: Using Your System With Google Meet
NOTE: Starting with VideoOS 4.0, you can use Google Meet with your Studio X70, Studio X50, Studio X52 (on VideoOS 4.1), or Studio X30 system. Google Meet is not supported on G7500 systems. To use your system with Google Meet, you'll need a Google Workspace account with Google Meet licenses. -
Page 35: Registering The System With Poly Lens
Registering the System with Poly Lens Poly Lens provides cloud-based management and insights for your system. You can register your system with Poly Lens during system setup or on the Poly Lens registration page. For more information, see Poly Lens Help. -
Page 36: Automatically Pair An Ip Device
Supported IP devices can pair to your video system over your primary local area network (LAN). Pairing a Poly Trio You can use a Poly Trio system as a controller and audio device with a G7500 or Studio X Family Release Notes for supported Poly Trio models. -
Page 37: Configure A Poly Trio For Pairing
The Poly Trio microphones are always on. Configure a Poly Trio for Pairing To pair with a video system, you must configure your Poly Trio system’s base profile and device role. On the phone’s local interface, go to Settings > Advanced > Administration Settings > Network Configuration. -
Page 38: Unpair An Ip Device
Release Notes for supported USB devices. system. See the latest NOTE: On G7500 systems running Teams Rooms, connect the USB device before powering on the system. ■ Connect the device to a USB port on the back of your system. -
Page 39: Configure Remote Control Behavior
Pair and unpair a remote control. ● NOTE: The remote control included with your G7500 system purchase is paired and ready to use without any extra setup. View the remote control name, pairing status, and battery level. ● Configure Remote Control Behavior You can customize how the remote control paired to your system behaves. -
Page 40: Unpair A Remote Control
Select Unpair Remote. The remote control unpairs. Poly IR Receiver and IR Remote Connect a Poly IR receiver to your G7500 or Studio X series system to control the system with a Poly IR remote. NOTE: The Poly IR Remote Control and Receiver are not certified accessories for use in Microsoft Teams native mode. - Page 41 NOTE: Remote control functionality may be limited in other partner applications. The following illustration and table show the buttons and functionality of the Poly IR remote control. Table 3-1 IR Remote Button Functions Item Description Function IR LED Sends IR signals to the IR receiver...
-
Page 42: Ip Microphones
IP Microphones You can use a combination of IP-based Polycom table and ceiling microphones with your G7500 system. These microphones also support Polycom Acoustic Fence technology. The Studio X70, Studio X52, Studio X50, and Studio X30 systems don’t support IP microphones. -
Page 43: Led Status Indicators For Ip Microphones
Paired successfully Poly Microphone IP Adapter The Poly Microphone IP Adapter lets you connect non-IP Polycom audio devices with your system. For example, if your Polycom microphone uses a Walta-Walta cable, you can connect it to your system through the microphone adapter. -
Page 44: Led Status Indicators For The Microphone Adapter
Table 3-5 Microphone Adapter Port Descriptions Ref. Number Port Description USB 2.0 debugging port Polycom microphone Walta-Walta connector Power Link-local network (LLN) connection LED status indicator Factory restore pinhole LED Status Indicators for the Microphone Adapter Use the LED to get information on the state of your microphone adapter. Table 3-6 Microphone Adapter LED Status Indicators Indicator... -
Page 45: Powering The Microphone Adapter On And Off
For more information, see the Move a Microphone Adapter to Another Location You might need to move your microphone adapter from a G7500 and Studio X series system in one room to a G7500 and Studio X series system in another room. -
Page 46: Connect A Studio E70 To A G7500 Using A Usb Cable
Unpair a Studio E70 camera from a G7500 to use it as a USB camera When you pair a Studio E70 to a G7500 as an LLN IP camera, you must unpair it to use it as a USB camera with the G7500 or another system. -
Page 47: Connect A Studio E70 With A G7500 As An Lln Ip Camera
Use an Ethernet cable to connect a Studio E70 to a G7500 as an LLN IP camera. If the Studio E70 is connected to the G7500 using a USB cable, disconnect the USB cable. If the Studio E70 is connected to a power supply, disconnect the power supply from the Studio E70. - Page 48 On the bottom of the Studio E70 camera, insert a straightened paper clip through the factory restore button pinhole. While holding the factory restore button, connect the Studio E70 camera to a power source. When the Studio E70 LED indicator light turns amber, release the restore button. The factory restore process completes when the LED indicator glows solid white.
-
Page 49: 4 Configuring General Settings
Configuring General Settings General settings include your system name, location, and language preferences. Name the System and Room Name your system and assign it a room name. In the system web interface, go to General Settings > System Settings. Edit the Device Name, Room Name, or both. The system supports double-byte characters. -
Page 50: Set The Date And Time
Select Save. Set the Date and Time Change the date and time settings in the G7500 and Studio X series system web interface. In the system web interface, go to General Settings > Date and Time. Configure the following settings (your changes save automatically):... -
Page 51: Set The Local Interface Language
Set the Local Interface Language Change the language that users see on the G7500 and Studio X series system local interface. In the system web interface, go to General Settings. Select System Language and choose a language. Configure Sleep Settings Configure when you want your device to go to sleep after a period of inactivity. -
Page 52: Shared Microsoft Teams Admin Center Settings
The system restarts and launches the selected conferencing provider application. Set the Conferencing Provider to Device Mode Choosing Device Mode as your provider locks your system in Poly Device Mode. When you set the conferencing provider to Device Mode, the local interface displays only the Device Mode interface. -
Page 53: Set The Device Mode Idle Timeout
Clear the Enable Device Mode check box and select Save. System Usage Data Collected by Poly By default, your system sends usage data to Poly to help improve its products and services. For information about the data that Poly collects, see the system privacy guide. -
Page 54: Send Usage Data To Poly
Send Usage Data to Poly You can help Poly improve its products and services by allowing the collection of usage data from your system. With your agreement, the system sends the following information to Poly Cloud Services and the Device Analytics service: Basic device information, including hardware and software versions ●... -
Page 55: 5 Using A Provisioning Service
Library. Register the System with Poly Clariti Manager Provisioning Service Before you can provision a G7500 and Studio X series system, you must register it with a provisioning service. NOTE: Make sure to configure your provisioning server (for example, Poly Clariti Manager) ahead of time so that it recognizes and works with your endpoint. -
Page 56: Download A Provisioning Template Configuration File
You can use this template to modify parameters and import the changes to your provisioning server. If you’re provisioning your system with a Poly Clariti Manager system, you can use the template to create a UC endpoint configuration profile to associate with your systems. For more information, see Poly Clariti Manager Administrator Guide. -
Page 57: Register The System Using Dhcp Auto Discovery
DHCP server. The DHCP server should send address information that matches one of the address formats. ■ Configure your DHCP server to send the username, password, and URL of your provisioning service in the following format: For Poly Clariti Manager use https://<shareduserID>:<sharedpassword>@<server> ● /ucservice For example, https://mySharedID:mySharedPW@video.example.com/ucservice For Poly Lens use https://<ServerUser>:<ServerPassword>@<ServerAddressURL ●... -
Page 58: 6 Configuring Network Settings
Configuring Network Settings Network settings include the G7500 and Studio X series system primary (wired LAN) and secondary (Wi-Fi) network configurations. You also can register your system with SIP and H.323 for calling. Configuring Wired LAN Settings You can set the wired LAN properties for your G7500 and Studio X series system. -
Page 59: Manually Configure Ipv6 Address Settings
You must have a DHCP server deployed in your environment. WARNING! If your network environment only supports IPv6, you must manually configure a static IPv4 address. For example, manually configure the IPv4 IP address to 192.168.0.4. In the system web interface, go to Network > LAN Network > IP Addresses. Select the Enable IPV6 checkbox. -
Page 60: Manually Configure Dns Settings
Select Save. Manually Configure DNS Settings You can manually configure the DNS server settings for your G7500 and Studio X series system. If your system gets its IP address automatically using DHCP, you can’t configure these settings. They display as read-only. -
Page 61: Configure Wired Lan Options
Select Save. Configure Wired LAN Options You can configure other LAN properties for your G7500 and Studio X series system in the local interface or the system web interface. In the system web interface, go to Network > LAN Network > LAN Options. -
Page 62: Lldp And Lldp-Med Support
(under General Settings in the local interface) Autonegotiation setting, this setting is read-only. Ignore Redirect Messages Enables the system to ignore ICMP redirect messages. Poly recommends that you enable this setting in most circumstances. ICMP Transmission Rate Limit (millisec) Specifies the minimum number of milliseconds between transmitted packets. -
Page 63: Behavior When Lldp Is Enabled
Behavior When LLDP is Enabled When LLDP is enabled on a G7500 and Studio X series system, it discovers VLANs advertised by the network switch and automatically configures the system for one of the VLANs. If the room system discovers any of the following VLAN types in LLDP data from the network switch, the system automatically configures itself for one of them. - Page 64 Web proxy ● Provisioning ● 802.1x authentication ● NOTE: You can pair a TC8 or TC10 to a system that’s using Wi-Fi as the primary network. To pair a TC8 or TC10 over Wi-Fi, the touch controller must be on the same subnet as the video system. In the system web interface, go to Network >...
-
Page 65: Configure Wi-Fi Settings From System Device Settings
Setting Description DNS Server Specifies the DNS server address for the Wi-Fi network. This setting is read-only if your system gets its IP address automatically. DNS Alternate Server Specifies the alternate DNS server address for the Wi-Fi network. This setting is read-only if your system gets its IP address automatically. -
Page 66: 7 Securing The System
Securing the System Your G7500 and Studio X series system includes features and settings to help you meet security requirements. Managing System Access You can control how users and administrators access the G7500 and Studio X series system. Set up local and external authentication for the following system interfaces: Local interface ●... -
Page 67: Change Administrator Credentials
Select Save. Configure Account Lockout Settings Account lockout controls prevent unauthorized access to your G7500 and Studio X series system. In the system web interface, go to Security > Local Accounts. Chapter 7 Securing the System... -
Page 68: Configure System Access Settings
Specifies whether you can access the system using the system web interface. IMPORTANT: If you disable web access, the Poly TC8 or TC10 won't be able to connect to the system. Enable Diagnostics Port Idle Session Timeout Specifies whether to allow the diagnostics port to time out and close the active session at the configured time interval of no activity or not. -
Page 69: Configure The System Web Interface Port Lock
Select Save. Configure the System Web Interface Port Lock You can limit the number of failed login attempts to the G7500 and Studio X series system web interface to protect against brute-force attacks. In the system web interface, go to Security > Access. -
Page 70: Pki Certificates
G7500 and Studio X series system. PKI certificates authenticate secure network connections to and from the G7500 and Studio X series system. The system uses standard PKI techniques to configure and manage certificates and certificate signing requests (CSRs). -
Page 71: Create A Certificate Signing Request
Create a Certificate Signing Request If you deploy a PKI in your environment, create a CSR to make sure your G7500 and Studio X series system or device is trusted by its network peers. NOTE: Only one CSR can exist at a time. After a CSR is generated, get it signed and installed on your system before creating another. -
Page 72: Create A Tc10 Or Tc8 Certificate Signing Request
Create a TC10 or TC8 Certificate Signing Request If you deploy a PKI in your environment, create a CSR to make sure your G7500 and Studio X series system or device is trusted by its network peers. Only one CSR can exist on your device at a time. After you generate a CSR, get it signed and install it on your device before generating another. -
Page 73: Configure Certificate Validation Options
G7500 and Studio X series system. NOTE: System certificates must be created on the Poly system and signed by an external CA before installation. Externally created device certificates won't work properly. This option isn’t available if your certificate is provisioned to the system. -
Page 74: View A Certificate
View a Certificate The G7500 and Studio X series system lists user-installed certificates in the system web interface, where you also can view the contents of those certificates. -
Page 75: Certificate Revocation
You must manually upload CRLs to your system. Manually Upload a CRL You can use CRLs to perform certificate revocation checks on your G7500 and Studio X series system. Uploading a CRL fails unless you install all of the certificates in the issuing CA’s chain of trust for that CRL. -
Page 76: System Allow List
The configuration requires a single IP address, a range of addresses, or an IP and netmask. (The netmask represents the number of valid bits of the IPv4 address to use.) The following are valid IPv4 formats for your G7500 and Studio X series system: 10.12.128.7 ●... -
Page 77: Ipv6 Address Formats
Check your conferencing application documentation for information about how calls are encrypted. Set Up a Security Banner You can create a security banner, which is a message that displays before users log in to the G7500 and Studio X series system remotely. -
Page 78: Enable The System To Use A Web Proxy
Select Enable Web Proxy. Set Up Automatic Web Proxy Configuration With automatic web proxy configuration, your G7500 and Studio X series system obtains a URL for downloading a proxy auto-configuration (PAC) file through DHCP option 252. In the system web interface, go to Network > LAN Network > Web Proxy Settings. -
Page 79: Manually Update The Pac File On The System
Manually Update the PAC File on the System Even if you set up your G7500 and Studio X series system for automatic or semi-automatic web proxy configuration, you can still manually download a new PAC file from the server. -
Page 80: Simple Certificate Enrollment Protocol
● Poly recommends your PAC files use the .pac or .proxy extension. ● Poly supports PAC JavaScript functions that return “PROXY host:port” and “DIRECT”. Poly ● doesn’t support return values of “SOCKS”, “HTTP host:port”, or “HTTPS host:port”. Simple Certificate Enrollment Protocol The Simple Certificate Enrollment Protocol (SCEP) enables you to automatically and securely provision multiple endpoints with a digital device certificate. -
Page 81: View Connections To The System
HDMI-connected laptop, you don’t see that this device is connected to the system. ■ In the system web interface, go to Diagnostics > Sessions. System Port Usage The following table lists the inbound, outbound, and bidirectional ports used by your G7500 and Studio X series system. Chapter 7 Securing the System... - Page 82 NOTE: Check your conferencing application’s documentation for firewall settings specific to their service. Table 7-3 G7500 and Studio X Family System Port Usage Port Direction Type Protocol Function Open by Configurable Default? Port? Outbound Static Inbound Static HTTP web server...
- Page 83 Table 7-3 G7500 and Studio X Family System Port Usage (continued) Port Direction Type Protocol Function Open by Configurable Default? Port? 4443 Bidirectional Static TCP/TLS Web server for peripheral device software downloads and log uploads 5001 Inbound Static TCP/TLS Polycom Content...
-
Page 84: 8 Configuring Audio Settings
Enabling this setting disables Polycom Acoustic Fence technology and vice versa. This feature isn’t available on the Studio X30 system. It also isn’t available when using a Poly Microphone IP Adapter or Poly Trio microphones with your system. Sound Effects Volume Sets the volume level of the ringtone. -
Page 85: Audio Input
● the video system. Configure IP Microphones You can configure IP table and ceiling microphone settings for your G7500 and Studio X series system. The Studio X70, Studio X52, Studio X50, and Studio X30 don’t support IP microphones. In the system web interface, go to Audio/Video > Audio > Audio Input. -
Page 86: Configuring The Microphone Adapter
For G7500 Systems: Once you enable Polycom Acoustic Fence, you must set up additional hardware to use this feature with your G7500 system. You need a primary microphone and at least one more microphone to create the fence. Configuring the Microphone Adapter... -
Page 87: Configure Polycom Acoustic Fence
Setting the sensitivity level to 0 doesn't mute the 3.5 mm or USB audio in input. For G7500 systems: Higher values increase the width of the audio fence beam between the ●... -
Page 88: Specify A Different Primary Microphone
Audible reverberations result in echoes in the audio on the far side. If you hear echo or reverb with NoiseblockAI enabled, Poly recommends using Sound Reflection Reduction. Sound Reflection Reduction isn't supported when using a Trio C60 for audio. -
Page 89: Configure Studio X70, Studio X52, X50 Microphone
Poly Studio table microphone behind your system to catch your voice as you walk around. Configure Studio X70, Studio X52, X50 Microphone You can enable the ability to switch between a built-in microphone that comes with the Studio X70, and Studio X52, or Studio X50 and a Poly Studio table microphone (formerly known as the RealPresence Debut expansion microphone). -
Page 90: Using Poly Trio Microphones
You can only pair two Poly Trios with your system. ● You can’t use a Poly Trio if your system is connected to Wi-Fi as the primary network. ● The built-in microphones don't transmit but may indicate activity in the system web interface. -
Page 91: Configure Noiseblockai When Paired With Poly Trio
You can choose a specific ouptut configuration for HDMI and 3.5 mm audio. By default, the G7500 is set to send audio through HDMI to the TV speakers. If you connect a 3.5. mm audio output, the audio is sent to both the HDMI output and the 3.5 mm audio output. -
Page 92: Configure Audio Output Settings On Studio X Systems
Use a connected TC8/TC10 or touch screen monitor to control your Microsoft Teams Rooms – environment. Choose Speakers When Paired with Poly Trio In or out of a call, you can toggle whether you want to use Poly Trio, connected monitor, or video system speakers. Configure Audio Output Settings on Studio X Systems... -
Page 93: Configure 3.5 Mm Audio Output
● Using the Shure IntelliMix P300 You can connect a Shure IntelliMix P300 audio conferencing processor to your G7500, Studio X70, Studio X52, or Studio X50 system using a USB-A port (USB-C isn’t supported). Note the following when using this audio processor: Once connected to the system, the processor handles all audio. -
Page 94: Support For Qsc Core Series And Biamp Audio Processors
Zoom Rooms mode. Using the EagleEye Cube USB Camera Microphone With a G7500 system, you can use the Poly EagleEye Cube USB camera as a microphone if you don’t connect other microphones to the system. Connect a USB Audio Device to the System To use a USB audio device with the system, enable USB audio. - Page 95 Table 8-2 G7500 System Audio I/O Specifications (continued) Characteristic Value Total harmonic distortion + noise vs. frequency Better than -75 dB, 50 Hz to 20 kHz Chapter 8 Configuring Audio Settings...
-
Page 96: 9 Configuring Video And Camera Settings
HDMI output devices can vary greatly, keep the distance from the HDMI source to the system input as short as possible. Poly claims no responsibility or liability for the quality, performance, or reliability of third-party HDMI cables, HDMI splitters, or HDMI USB adapters. -
Page 97: Supported Hdmi Output Resolutions For Single-Monitor Setups
1920 × 1080p 50, 60 Supported HDMI Output Resolutions for Dual-Monitor Setups The G7500, Studio X70, Studio X52, and Studio X50 systems support the following HDMI output resolutions and frame rates when using two monitors. NOTE: 4K resolution (3840 × 2160p) isn’t supported when you configure your system for dual monitors. -
Page 98: Supported Hdci Input Resolutions
The HDCI input resolution is fixed based on the supported Poly camera. HDCI input applies only to the G7500 system. Configure Monitor Settings You can optimize your G7500 and Studio X series system video output for single- and dual-monitor setups. The Studio X30 system doesn’t support dual monitors. -
Page 99: Monitors With Cec
Choose from the following: In Teams mode, select More > Settings > Device Settings > Touch Configuration. ● In all other applications, from the right border of your screen, swipe left and go to Settings > ● Diagnostics > Touch Configuration. On each screen, select the Hand icon. -
Page 100: Configure General Camera Settings
Configure General Camera Settings You can configure settings for cameras connected to your G7500 and Studio X series system. The system automatically discovers your camera model and displays the relevant settings in the system web interface. Release Notes for specific information about the cameras you can use with your See the latest system. -
Page 101: Calibrate Eagleeye Producer Group Framing
Select Save. The system reboots. Supported USB Cameras In Poly Video or Partner Mode, you can connect a supported USB camera to your system. You can configure the camera as a primary or secondary camera. Chapter 9 Configuring Video and Camera Settings... - Page 102 NOTE: Camera support is dependent on the provider mode used. While Poly Video mode supports all listed cameras, partner applications may not support all listed cameras. Refer to the documentation for your conferencing application for details on USB camera support, multicamera support/certification, and camera switching support.
-
Page 103: Selecting The Primary Camera
Selecting the Primary Camera In Poly Video Mode, if you have more than one camera attached to the system, you can select the primary camera in or out of a call. Camera Priority When you connect or disconnect a camera, camera priority determines the primary or active camera. -
Page 104: Adjust The White Balance
Adjust the White Balance Use white balance to compensate for light source variations in the room. Poly cameras automatically adjust the white balance when set to Auto. In the system web interface, go to Audio/Video > Video Inputs. Choose one of the following options for the White Balance setting (available options depend on the camera you’re using):... -
Page 105: Adjust Studio X70, Studio X52, Studio X50, Or Studio X30 Camera Lighting Based On Workspace
Select Save. Configure Camera Tracking Settings for Studio X Family Systems With Studio X Family systems, Poly camera tracking technology can automatically frame groups of people and follow conversations in meeting rooms. Tracking options and behavior depend on your connected camera. For example, if you use a standalone EagleEye IV camera with your system, you won’t see tracking options. -
Page 106: Select People Framing (Preview) On Studio X70, Studio X52, And Studio E70
NOTE: People framing is a preview feature. Preview features are fully tested and supported features that Poly continues to develop in alignment with customer feedback.To provide feedback, use one of the following options: In Poly Lens Desktop (v 1.1.18 or later), select Feedback. -
Page 107: Configure Camera Tracking Settings For G7500
From the Tracking Mode drop-down menu, select People Framing (Preview). Configure Camera Tracking Settings for G7500 With a G7500 system, Poly camera tracking technology can automatically frame groups of people or the active speaker in medium and large rooms. Tracking options and behavior depend on your connected camera. For example, if you use a standalone EagleEye IV camera with your system, you won’t see tracking options. -
Page 108: Presenter Mode
Poly Lens Feedback Portal. Your Poly system uses the area visible by the camera to locate and track meeting participants in a conference room. In situations such as a conference room with glass walls, the area visible by the camera may extend beyond the conference room. -
Page 109: Define The Directorai Perimeter
Using DirectorAI Perimeter, you can ensure that the camera only tracks participants within the defined conference room area. If a participant moves out of the perimeter, the camera no longer tracks their movement. Define the DirectorAI Perimeter Define the area used by your system to track participants in a conference room. Log in to the system web interface. -
Page 110: 10 Sharing Content
Default Option for Sharing Content Once your G7500 and Studio X series system is running and configured for your environment, users can share content from their personal devices with no additional setup using the following methods. -
Page 111: 11 Customizing The Local Interface
Customizing the Local Interface You can configure some of the G7500 and Studio X series system local interface settings according to your preferences. Configure Dual Monitor Display Settings You can choose your self view and content display preferences when you connect two monitors to your G7500 and Studio X series system. -
Page 112: Configure Digital Signage
NOTE: RingCentral doesn't support digital signage. Appspace ● Raydiant ● Configure Digital Signage Configure digital signage to display when the video system is idle during office hours. You must have an account with a digital signage provider to use this feature. The digital signage platform provides the tools necessary to configure the digital signage you want to display on the system. -
Page 113: 12 Configuring System Applications
Extron Environment Controls You can configure Extron Control for Poly TC8 or TC10 devices and enable users to control smart devices configured to work with Extron devices, such as lighting, window shades, and displays. You must have an Extron IPCP Pro control processor and a license for the Extron Control App to use this feature. - Page 114 If you have more than one user interface configured on the control processor, select a user interface to display on the TC8 or TC10 device. Select Submit. After you set up the Extron Controller app on the TC8 or TC10 device, users can access the application to control electronic shades, monitors, projectors, and any smart lighting configured with the Extron control processor.
-
Page 115: 13 Controlling The System Remotely
On a Studio X series system, use the system web interface to capture a 100-second clip of the room video and people tracking information from the built-in camera. The system sends the video clip and people tracking information to your Poly Lens portal. To enable diagnostic video capture on your system, you'll need to: Register and connect the system to Poly Lens ●... -
Page 116: Wake The System Remotely
Once complete, the system web interface reports that the video capture is complete and sent to Poly Lens. Diagnostics page to view the video recording. In your Poly Lens portal, go to the The video recording displays as a tvpr_ file, and is available for download. For more information, see Poly Lens Help. -
Page 117: 14 System Maintenance
System Maintenance You can perform several functions to keep your G7500 and Studio X series system running properly. Unlock System Settings Some settings in the local interface are locked by default. You can unlock these setting with your system’s local administrator credentials. -
Page 118: Updating A Paired Poly Tc8 Or Poly Tc10
● Updating a Paired Poly TC8 or Poly TC10 To update a Poly TC8 or Poly TC10, pair it with a G7500 or Studio X series system and ensure it has access to the Poly update server. When the system checks for new software, it also checks for peripheral software updates. If a TC8 or TC10 update is available, the TC8 downloads the software directly from the Poly update server and updates to the available software version. - Page 119 In the system web interface, go to General Settings > Device Management. Select one of the following options in the Download Update From field: Software Update Method Description Poly Online Support Center A software server hosted by Poly. Chapter 14 System Maintenance...
- Page 120 Config – studioe70-<version>.dfu – release.json – version ● eecube – Config – image.zip – version ● videocodec – Config – poly-video-<version>.zip – release.json – version ● ipmic – Config – image.zip – version ● micadapter – Config – image.zip –...
-
Page 121: Manually Update Software
If the system is asleep, wake the system by tapping the touch controller, touch screen, or using a connected remote control. NOTE: Poly recommends formatting your USB flash drive with the FAT32 file system. Get the software package you want to install from the Poly Online Support Center. -
Page 122: Update Poly Hdci Cameras
Downgrading from VideoOS 4.x to VideoOS 3.x versions isn’t supported. Manually Downgrade Software in the System Web Interface You can downgrade your G7500 and Studio X series system software and the software of some of its paired devices from a custom download server. -
Page 123: Restart The System
Select Save. Reset System Settings You can reset your G7500 and Studio X series system to its default configuration settings. You may need to perform a system reset for a variety of reasons, for example, when moving a device to a new location. -
Page 124: Locate The System Serial Number
Use the system serial number to help technical support troubleshoot issues with your system. The last 6-digits of the system serial number is the default system password. ■ On a G7500 or Studio X system, do one of the following: In the system web interface, go to Dashboard > System Detail. ●... - Page 125 ● Disconnect the power supply to turn off the system. Do one of the following: On the front of the G7500, insert a straightened paper clip through the factory restore ● pinhole. On the bottom of the Studio X70, insert a straightened paper clip through the factory restore ●...
-
Page 126: Factory Restore The Studio X52
Factory Restore the Studio X52 A factory restore completely erases the system’s flash memory and restores it to a stable software Poly VideoOS Release Notes , Version History section, for the current factory restore version. See the version. -
Page 127: Factory Restore A Ceiling Microphone
Factory Restore a Ceiling Microphone You can restore a microphone to its default settings. This process refreshes the device by deleting its configurations except the current version of software. Factory restoring the ceiling microphone requires the following tools: A small, thin block N45 magnet (for example, 76.2 mm [3 in.] × 12.7 mm [1/2 in.] × 3.18 mm [1/8 ●... -
Page 128: Factory Restore A Microphone Adapter
USB port. NOTE: Poly recommends formatting your USB flash drive with the FAT32 file system. Insert a straightened paper clip through the factory restore button pinhole. While continuing to hold the restore button, reconnect the power supply to turn the microphone adapter on. -
Page 129: Factory Restore The Studio E70 Camera
Factory Restore the Studio E70 Camera A factory restore completely resets the camera to default settings and restores it to the factory firmware version. Power off the Studio E70 by disconnecting the power source. On the bottom of the camera, insert a straightened paper clip through the factory restore button pinhole. -
Page 130: 15 Diagnostic Functions
A 473 Hz tone indicates that the local audio connections are correct. Test Audio Levels Audio meters show you real-time audio input and output signals for your G7500 and Studio X series system, including microphones, far-site audio, and other connected audio devices. -
Page 131: Test Polycom Stereosurround
+20dB corresponds to 0dBFS in the room system audio. A signal at this level is likely clipping the audio system. Test Polycom StereoSurround After you configure the G7500 and Studio X series system to use Polycom StereoSurround, you can place a test call to see if it works. Make sure the microphones are positioned correctly. -
Page 132: Checking System Status
Guide. Checking System Status You can verify the status of your G7500 and Studio X series system in the local and system web interfaces. Status information also include details about connected devices and system services. The system displays statuses using three colors: Green indicates the device or service is working or registered ●... -
Page 133: Check Status In The System Web Interface
File is expired. Verify the PAC File Contents You can check the contents of the PAC file on your G7500 and Studio X series system. In the system web interface, go to Network > LAN Network > Web Proxy Settings. -
Page 134: Logs
● Configure Log Preferences You can manage some basic aspects of your G7500 and Studio X series system logs, including how logs are transferred to a USB flash drive. Your system has limited storage space for logs. If you want logs to be overwritten less frequently, attach a USB flash drive to the system. -
Page 135: Configure Log Level
Select Save. Configure Log Level You can determine how much detail you want in your G7500 and Studio X series system logs. In the system web interface, go to Diagnostics > Logs > System Log Settings. Configure the following settings:... -
Page 136: Retrieve Log Files
Select Download system logs. A dialog window opens for you to specify how you want to open or save the .tgz file. Transfer Logs to a USB Flash Drive You can transfer logs to a USB flash drive to free up space on your G7500 and Studio X series system. NOTE: Poly recommends formatting your USB flash drive with the FAT32 file system. -
Page 137: Configure Logging To System Internal Storage
Enable logging to the system’s internal storage to help troubleshoot critical issues that are causing normal logging operations to fail. CAUTION: Poly recommends logging to the system’s internal storage only when tracking critical issues. Enabling for extended periods of time causes wear on the system’s storage and may cause the system to fail. -
Page 138: Sample Log File
Select the Save Logs to Internal Storage check box. IMPORTANT: The system saves logs to the internal storage for 2 weeks. After 2 weeks, the system reverts to the previously configured logging method and deletes the logs in the internal storage. -
Page 139: Run A Trace Route
DEBUG SecurityService: SecurityService: securityserviceproto.cpp errorResponsePack Run a Trace Route You can run a trace route to identify network connectivity issues with your G7500 and Studio X series system. This test isn’t available on the TC8, TC10, or the system web interface. -
Page 140: Configure Snmp
Supports a user-based security model ● Supports trap destination addresses ● Configure SNMP You can monitor your G7500 and Studio X series system remotely with SNMP. In the system web interface, go to Servers > SNMP. Configure the following settings: Setting Description... -
Page 141: Download Mibs
● Select Save. Download MIBs You can download MIB data for your G7500 and Studio X series system. A MIB helps your SNMP management console resolve SNMP traps and provide human-readable descriptions of those traps. In the system web interface, go to Servers > SNMP. -
Page 142: Test The Call Experience
Test the Call Experience Run a near end loop test to verify what others see and hear in a call with your G7500 and Studio X series system. This test isn’t available in a call, on the TC8, TC10, or the system web interface. -
Page 143: Verify Poly Lens Registration Status
Jitter ● Error concealment ● Verify Poly Lens Registration Status You can check if your system is registered with Poly Lens. ■ In the system web interface, go to Servers > Cloud to check the Registration Status. Chapter 15 Diagnostic Functions... -
Page 144: 16 Troubleshooting
On a G7500 with a Studio E70 Camera and 3.5 mm Audio DSP Echoes Are Heard on the Far End In a call using a G7500 system with a Studio E70 camera and connected audio DSP, the far end reports hearing echoes. -
Page 145: Camera Issues
On a G7500 in Teams Room mode, the system doesn't recognize a connected USB camera. If you connect a camera to a G7500 in Teams Rooms mode when the system is powered on, the system may not recognize the camera. Connect the camera before powering on the G7500. -
Page 146: Presenter Tracking Takes Longer Than Expected Or Doesn't Identify A Presenter
If you try to use AirPlay to share full screen video from a website or app on an Apple iOS device, the iOS device displays a message that the video is playing on the Poly VideoOS device, but the VideoOS device shows a black screen. -
Page 147: General Issues
IP Device Doesn’t Display On the Available Devices List Even though the G7500 and Studio X series device you want to pair is connected to the network, you don’t see it under Available Devices in the video system web interface. -
Page 148: Paired Ip Device Is Disconnected
IP Device Paired to Inaccessible Video System Your G7500 and Studio X series device was paired with a video system you can no longer access (for example, the video system lost its network connection or was moved to another location). Whatever the situation, the G7500 and Studio X series device screen now indicates it’s waiting to pair. -
Page 149: Ip Audio Device Is Disconnected From G7500
The device you’re unpairing should have an Unavailable status. IP Audio Device is Disconnected from G7500 You paired an IP audio device with your G7500 system but can’t use it. On the system web interface Device Management page, you see that the device is Disconnected. -
Page 150: Monitor Doesn't Fully Wake From Sleep With Cec Enabled
If you're having issues with networking, refer to the following topics for guidance. LDAP Directory Server Ignores the Minimum TLS Version Setting You’ve changed your G7500 and Studio X series system configuration to use TLS version 1.1 at minimum, but the system still connects to your LDAP directory server with TLS 1.0. -
Page 151: Provisioning Issues
Each LAN port has two LEDs: The left LED indicates network connectivity and traffic, while the right LED indicates Power over Ethernet (PoE) status for connected devices. The G7500 system has four LAN ports: one for the system’s network connection (farthest left) and three link-local network (LLN) connections for peripheral devices. -
Page 152: System Update Issues
– Disconnect and reconnect the Studio E70 power adapter. – After the Studio E70 powers on, the G7500 reports the Studio E70 as connected under Connected Devices in the system web interface. System Doesn't Update Connected Peripherals A G7500 or Studio X series system updates, but the system doesn't update attached peripherals. -
Page 153: Studio E70 Powered By A G7500 Lln Port Becomes Disconnected After An Update
Studio E70 Powered by a G7500 LLN Port Becomes Disconnected After an Update After updating a Studio E70 camera, attached to a G7500 system, the Studio E70 LED may indicate it's no longer connected to the system. After updating the Studio E70 camera powered by a G7500 LLN port, the Studio E70 disconnects from the system. -
Page 154: Contacting Technical Support
Contacting Technical Support If you’re not able to make test calls successfully on your system and you’ve verified that the equipment is set up correctly, contact your Poly distributor or Poly Technical Support. To contact Poly Technical Support, go to Poly Support. -
Page 155: 17 Getting Help
Getting help Poly is now a part of HP. The joining of Poly and HP will pave the way for us to create the hybrid work experiences of the future. During the merge of our two organizations, information about Poly products will transition from the... - Page 156 Email us at documentation.feedback@hp.com with queries or suggestions related to this document. Getting help...
Need help?
Do you have a question about the G7500 and is the answer not in the manual?
Questions and answers