Advertisement
Quick Links
INSTALLATION MANUAL
PRODUCT:
MODEL:
PART NO:
CAUTION!
To reduce the risk of serious injury or damage, please read and understand all instructions and
procedures before attempting to install or use this product.
Safety glasses must be worn at all times during installation or maintenance of this product.
Ensure all mounting bolts are tensioned after 600 miles (1000 kms) and periodically there after.
Do not use damaged product or hardware.
Ver. 4
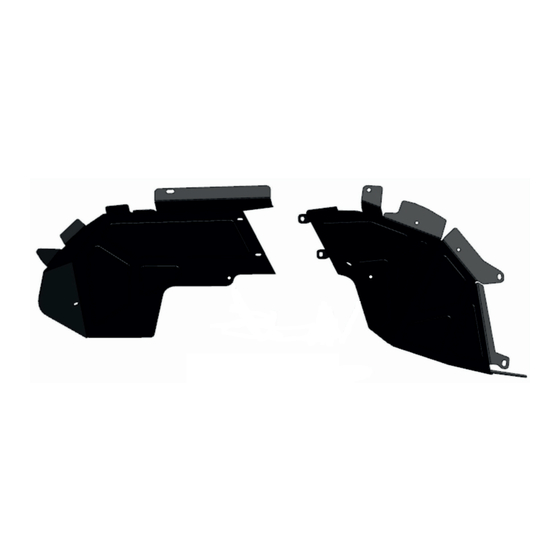
ALUMINUM FRONT INNER FENDERS
JEEP WRANGLER JL (2018 - ON),
GLADIATOR JT (2020 - ON)
2D.2729.1
www.rival4x4.com
www.rival4x4.com
Advertisement

Related Manuals for Rival 2D.2729.1


Summary of Contents for Rival 2D.2729.1
- Page 1 JEEP WRANGLER JL (2018 - ON), GLADIATOR JT (2020 - ON) PART NO: 2D.2729.1 CAUTION! To reduce the risk of serious injury or damage, please read and understand all instructions and procedures before attempting to install or use this product.
- Page 2 (2018 - ON) SAFETY NOTICE * The RIVAL Inner Fenders are designed to complement the use and design of the specified vehicle under conditions specified by the vehicle manufacturer. * While driving the vehicle at any speed, collision with any other vehicle, animal or object must always be avoided.
-
Page 3: Parts Listing
(passenger’s side)......Qty 1 side)............ Qty 1 4. Rear right part of inner fender 9. Insert nut M6........Qty 2 (passenger’s side)......Qty 1 PASSENGER’S SIDE DRIVER’S SIDE Installation manual 2D.2729.1 www.rival4x4.com < Page 3 of 14 > Date: 13-Jan-2023... - Page 4 H. U-nut M6......... Qty 12 D. Penny washer 6......Qty 21 I. Insert nut M6 with wire...... Qty 8 Е. Washer 8......... Qty 8 J. Spacer..........Qty 1 Installation manual 2D.2729.1 www.rival4x4.com < Page 4 of 14 > Date: 13-Jan-2023...
- Page 5 * Do not remove fender. You have risk to damage wiring harness. Fig. 5 Fig. 6 5. Disconnect the wiring ( g. 5). 6. Carefully remove OE fender with inner liners ( g. 6). Installation manual 2D.2729.1 www.rival4x4.com < Page 5 of 14 > Date: 13-Jan-2023...
- Page 6 7. Remove plastic push clips ( g. 7). Fig. 9 Fig. 10 8. Bend wire part of insert nut (item I) as shown ( g. 8-10). Fig. 11 Fig. 12 Installation manual 2D.2729.1 www.rival4x4.com < Page 6 of 14 > Date: 13-Jan-2023...
- Page 7 Fig. 14 9. Install insert nuts (item I) ( g. 11-14). Repeat steps 2-9 for the other side of the vehicle Fig. 16 Fig. 15 Fig. 18 Fig. 17 Installation manual 2D.2729.1 www.rival4x4.com Date: 13-Jan-2023 < Page 7 of 14 >...
- Page 8 (item D) and nut M6 (item F) ( g. 22-23), adjust the bracket parallel to body of the vehicle as shown on g.21. If OE bolt turning-o , x it under the hood near to the battery ( g. 24). * Tighten hardware after that. Installation manual 2D.2729.1 Date: 13-Jan-2023 www.rival4x4.com...
- Page 9 (item 4) ( g. 29). fender (item 4) to middle brackets (item 8) using screw M6 (item A), washers 6 (item D) ( g. 30). * Do not tighten yet. Installation manual 2D.2729.1 Date: 13-Jan-2023 www.rival4x4.com < Page 9 of 14 >...
- Page 10 6 (item D) and nuts M6 (item F) ( g. 34,35). washers 8 (item E) and nut M8 (item G) ( g. 32, * Do not tighten yet. 33). * Do not tighten yet. Fig. 36 Fig. 35 Installation manual 2D.2729.1 Date: 13-Jan-2023 www.rival4x4.com < Page 10 of 14 >...
- Page 11 6 (item D) ( g. 36, 37). * Do not tighten yet. Repeat steps 15-20 for the other side of the vehicle RIVAL Aluminum Front Inner Fenders installation with Rival Aluminum Fender Flares 2D.2719.1 To install RIVAL Aluminum Front Inner Fenders with OE Fender Flares follow step 25 М6х35 М6х35 М6х35...
- Page 12 RIVAL Aluminum Fender Flares 2D.2719.1 ( g. 43). Repeat steps 21-24 for the other side of the vehicle RIVAL Aluminum Front Inner Fenders installation with OE Fender Flares Fig. 44 Fig. 45 25. Dispart OE inner liner and OE fender by unscrewing 1 screw and 7 plastic push clips ( g. 44, 45).
- Page 13 М6х20 М6х35 Fig. 48 Fig. 49 29. Fix RIVAL Aluminum Inner Fender Flare on 28. Install OE inner fender are on the OE Fender the vehicle body, using screws M6x20 (item. A), are ( g. 48). screws M6x35 (item. B), washers 6(item. D) and insert nut (item.
- Page 14 INSTALLATION PROCEDURE Before operating a vehicle fitted with RIVAL Aluminum Inner Fenders 2D.2729.1: - make sure all fittings are tightened; - check all electrical wiring attached to lights. Installation manual 2D.2729.1 Date: 13-Jan-2023 < Page 14 of 14 >...
Need help?
Do you have a question about the 2D.2729.1 and is the answer not in the manual?
Questions and answers