Table of Contents
Advertisement
Quick Links
Advertisement
Table of Contents

Related Manuals for Key-Disp KD86


Summary of Contents for Key-Disp KD86
-
Page 2: Table Of Contents
Content Product Model ......................1 Specifications ......................1 Appearance and Size ....................1 Function Summary ....................1 General Operation ....................2 ◆Definition of Button ......................2 ◆Power on/off ........................2 ◆Display Interface ......................2 ◆6km/h Push-assistance ....................3 ◆Headlight .......................... 3 ◆PAS level .......................... - Page 3 ◆Current Limit Setting ..................... 12 ◆Speed Sensor Setting....................12 ◆Number of magnets for PAS sensor Setting ............. 12 ◆Assistant Sensitivity Setting ..................13 ◆Slow Start Setting ......................13 ◆Throttle-6km/h Setting ....................13 ◆Throttle-PAS Setting ..................... 14 ◆Exit Display Setting ....................... 14 Information(Software information): ..............
-
Page 4: Product Model
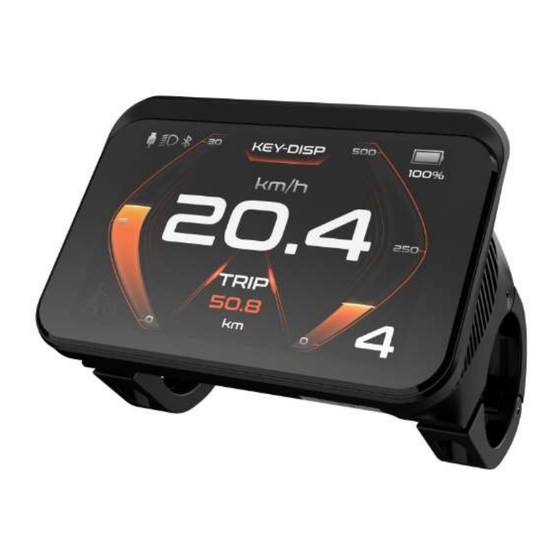
● :-20~60℃ Operating temperature ● :-30~70℃ Storage temperature Appearance and Size Display appearance and dimension drawing (unit: mm) Function Summary KD86 can provide a lot of functions to fit your needs. The indicating contents are as follows: ● Battery indicator... -
Page 5: General Operation
General Operation Definition of Button ◆ KD86 display matches K41-N/K42/K43/K5 buttons. K41-N/K42/K43 has 4 buttons: including on/off, i key, plus key, minus key/boost key; in the subsequent description, the on/off button is replaced by the word "ON/OFF"; i The key is replaced with the word "i"; the plus key is replaced with the word "UP"; the minus/boost key is replaced with the word "DOWN". -
Page 6: 6Km/H Push-Assistance
Display interface 6km/h Push-assistance ◆ Hold the “DOWN” button will activate the push-assistance function, after 2s, the E- bike will travel at a uniform speed of 6 Km/h while the screen displays “ ”. The push- assistance function is switched off as soon as you release the “DOWN” button. The E-bike system stops the power output immediately, and back to the status before push-assistance mode. -
Page 7: Pas Level
decreases. Press and hold the "UP" button again for more than 2 seconds to turn off the headlights and restore the backlight brightness. Headlight Interface PAS level ◆ Short press the "UP" or "DOWN" button to switch the power assist gear of the electric vehicle and change the output power of the motor. -
Page 8: Usb Connection
USB connection ◆ When the display is plugged into a USB external device, the meter will display the interface as shown in the figure below. USB Connection Interface Error code ◆ When the electronic control system fails, it will automatically display the error code. Here is the detailed message of the error code in Attached list 1. -
Page 9: Display Settings
Setting Interface ▉All the settings are operated on a parked e-bike. Display settings Trip Reset ◆ Short press "i" to confirm, short press "UP" or "DOWN" to switch between "NO (not clear)" and "YES (clear)"; (cleared data includes maximum speed (MAXS), average speed (AVG), Trip (TRIP), riding time (Time)), short press "i"... -
Page 10: Brightness
Toggle Unit Interface ◆Brightness "Brightness" indicates the backlight brightness setting. Short press "i" to enter the settings. By short pressing "UP" or "DOWN", the backlight brightness range is "100%- 75%-50%-30%-10%" 5 levels of brightness, 100% corresponds to the highest brightness, 10 % corresponds to the lowest brightness;... -
Page 11: Auto Power-Off Time
Auto Power-off Time ◆ “Auto Off” represents the automatic shutdown time of the display. Short press "UP" or "DOWN" to select "Auto Off", short press "i" to enter settings, and select the automatic shutdown time range by short pressing "UP" or "DOWN". The automatic shutdown time range is "9-8-7"... -
Page 12: Password Setting
Voltage setting interface Password Setting ◆ Short press the "UP" or "DOWN" key to select "Password", short press the "i" key to enter settings, and then short press the "i" key to select Start PassWord; by short pressing the "UP" or "DOWN" key, switch " OFF"/"ON", the following is the specific switching method. Password setting interface Start PassWord Setting ◆... -
Page 13: Back To Display Setting
Reset to default setting interface Back to Display Setting ◆ Short press "UP" or "DOWN" to select "BACK", and short press "i" to exit to "Display setting". Advanced settings: Power assist level selection and power assist ratio Setting ◆ "Power Set" represents power assist gear mode. There are 8 modes available: 0-3, 1-3, 0-5, 1-5, 0-7, 1-7, 0 -9, 1-9. -
Page 14: Wheel Diameter Setting
Assist level setting interface Assist ratio setting Wheel diameter Setting ◆ "Wheel" represents the wheel diameter setting. Short press the "i" key to enter the wheel diameter setting interface. Change by pressing "UP" or "DOWN". By short pressing "UP" "DOWN", select wheel diameter... -
Page 15: Current Limit Setting
Current Limit Setting ◆ “Current Limit” represents the current limit value setting. The adjustable range is 7A-25A. Change the maximum current value of the controller by short pressing the "UP" or "DOWN" key. Short press "i" to save and exit to "Current Limit". Current limit setting interface Speed Sensor Setting ◆... -
Page 16: Assistant Sensitivity Setting
Number of magnets for PAS sensor setting interface ◆Assistant Sensitivity Setting “Assistant Sensitivity” represents the assist sensitivity setting. Modify the settings by short pressing the "UP" or "DOWN" button. The boost sensitivity range is "0-5" and the default sensitivity is "2". Short press the "i" key to save and exit to "Assistant Sensitivity" Assistant sensitivity setting Slow Start Setting ◆... -
Page 17: Throttle-Pas Setting
Therottle-6km/h setting interface Throttle-PAS Setting ◆ "Therottle-PAS" stands for turning the handlebar, and the speed that the e-bike can achieve in each level is the same as the power assist. Select the handlebar working mode by short pressing the "UP" or "DOWN" button, short pressing "i" to save and exit to "Therottle-PAS"... -
Page 18: Quality Assurance And Warranty Scope
Software information interface Note: The software version number is only used for Kds internal traceability. Quality Assurance and Warranty Scope Ⅰ Warranty (1)The warranty will be valid only for products used in normal usage and conditions. (2)The warranty is valid for 24 months after the shipment or delivery to the customer. Ⅱ... -
Page 19: Operation Cautions
Operation Cautions Be careful of safe use. Don’t attempt to release the connector when battery is on power. ●Try to avoid hitting. ●Do not modify system parameters to avoid parameters disorder. ●Make the display repaired when error code appears. This operating instruction is a general-purpose version. Some of the version for the display software will be different from the specification, which should depend on the actual use version.
Need help?
Do you have a question about the KD86 and is the answer not in the manual?
Questions and answers