
Related Manuals for Rice Lake ISHIDA Uni-10 Series


Summary of Contents for Rice Lake ISHIDA Uni-10 Series
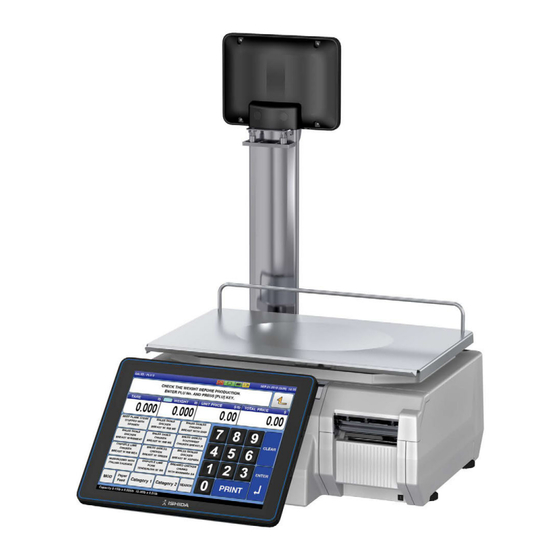
- Page 1 Uni-10 Series Scale and Printer Installation Manual October 22, 2024 PN 226359 Rev A...
- Page 2 All information contained within this publication is, to the best of our knowledge, complete and accurate at the time of publication. Rice Lake Weighing Systems reserves the right to make changes to the technology, features, specifications and design of the equipment without notice.
-
Page 3: Revision History
October 22, 2024 Initial manual release with product launch; Established revision history Table i. Revision History Technical training seminars are available through Rice Lake Weighing Systems. Course descriptions and dates can be viewed at www.ricelake.com/training or obtained by calling 715-234-9171 and asking for the training department. -
Page 4: Table Of Contents
4.12 Accumulator ..................49 Rice Lake continually offers web-based video training on a growing selection of product-related topics at no cost. -
Page 5: Introduction
Do not operate or work on this equipment unless this manual has been read and all instructions are understood. Failure to follow the instructions or heed the warnings could result in injury or death. Contact any Rice Lake Weighing Systems dealer for replacement manuals. -
Page 6: Disposal
Uni-10 Series Scale and Printer Installation Manual Disposal Product Disposal The product must be brought to appropriate separate waste collection centers at the end of its life cycle. Proper separate collection to recycle the product helps prevent possible negative effects on the environment and to health, and promotes the recycling of the materials. -
Page 7: Menu Structure
Shaded boxes* = hidden menu steps that can be accessed by pressing 951753 and PLU Unshaded boxes = can be password protected. See Section 1.5 on page 9 Table 1-1. Uni-10 Menu Structure © Rice Lake Weighing Systems ● All Rights Reserved... -
Page 8: Configuration Features With Menu Locations
Uni-10 Series Scale and Printer Installation Manual 1.4.1 Configuration Features with Menu Locations Feature Menu Step Comments Auto Print Delay Timer Setup Operation Settings Prod; Auto Print Delay. (Use for Fixed Price PLUs) Backup (by USB) Setup File Save/Load "Scale>USB": backup, "USB>Scale": restore Bakery Weight Print Format Setup Label Format... -
Page 9: Passwords
CAUTION: Do not provide the Service password to store personnel as they will then have full access to the scale menus. The Service password cannot be changed. NOTE: The manager's password is disabled by default. Passwords may be entered at any time from the Main menu. © Rice Lake Weighing Systems ● All Rights Reserved... - Page 10 Uni-10 Series Scale and Printer Installation Manual 4. Press 5. Select PASSWORD. 6. Enter a six-digit password, then press the button. PASSWORD NOTE: To clear the password, enter "000000". One password is used for all menus. Figure 1-2. Password Setup 7.
-
Page 11: Installation And Setup
PLU Key Figure 2-1. Main Menu and Keypad 5. Enter 495344 and press to access hidden menu steps. 6. Press 7. Select FIRMWARE DETAILS Firmware Version Number Figure 2-2. Firmware Details © Rice Lake Weighing Systems ● All Rights Reserved... -
Page 12: Updating The Scale Firmware
Uni-10 Series Scale and Printer Installation Manual 8. Verify the firmware shown as is the current or desired version number. TITLE SOFTWARE NOTE: The current firmware version as of August 2024 is: CM0001F Confirm the FPGA App. and Printer App. versions are also correct based on the Firmware Release Notes. 9. -
Page 13: Saving All Data
4. Press 5. Select FILE SAVE/LOAD. Figure 2-4. File Output to USB Memory Stick 6. Press the SCALE>USB tab 7. Press OUTPUT SELECT File Numbers Figure 2-5. Create Output File © Rice Lake Weighing Systems ● All Rights Reserved... -
Page 14: Initializing Data
Uni-10 Series Scale and Printer Installation Manual 8. Press an unused file number, the line color changes to yellow. 9. Press to name the file. EDIT 10. Enter a short name to describe the file, include the date if desired. 11. -
Page 15: Downloading Main Firmware
Figure 2-8. Uni-10 Default Configuration - European Mode 5. Press to enter the menus. 6. Press 7. Enter the password and press to access hidden menu steps. 495344 8. Press 9. Select DOWNLOAD © Rice Lake Weighing Systems ● All Rights Reserved... -
Page 16: Clearing Memory
Uni-10 Series Scale and Printer Installation Manual 10. Press the firmware version to be installed. The selected firmware will be highlighted in yellow. See Figure 2-9. Firmware version to install Figure 2-9. Select the Firmware File to Install 11. Press to confirm the selection. -
Page 17: Downloading Sub-Application Firmware
5. At the next screen, press to begin the firmware download. The screen will show the firmware download EXEC progress; it will take several minutes to complete. Selection Figure 2-12. Select the Sub-App Firmware File © Rice Lake Weighing Systems ● All Rights Reserved... -
Page 18: Restoring All Data
Uni-10 Series Scale and Printer Installation Manual 6. When message is displayed, the sub-application download is complete. The scale will Re-Boot Check 15029-0002 automatically reboot. 7. Press the green key at the confirmation screen. ENTER Date/Time 8. Enter the menu and repeat this procedure to load any other sub-application firmware as needed. Adjust Restoring All Data Load a saved database back into the scale from a USB memory stick. -
Page 19: Installing A Patch
3. Insert the USB memory stick into either of the two USB ports on the left side of the scale. See Figure 2-3 on page • No other USB devices should be connected. © Rice Lake Weighing Systems ● All Rights Reserved... -
Page 20: Memory Clear
Uni-10 Series Scale and Printer Installation Manual Downloading the Patch 1. Press to enter the Main menu. 2. Press 3. Enter and press to access hidden menu steps. 495344 4. Press 5. Select DOWNLOAD 6. Press the patch to be loaded. It will highlight in yellow. 7. -
Page 21: Basic Configuration
(lower right). Numeric Entry 7. Enter and press to enable country selection. 951753 8. Press COUNTRY 9. Select . Confirm is selected. ENGLISH Figure 2-16. Country Select 10. Press to exit. © Rice Lake Weighing Systems ● All Rights Reserved... -
Page 22: Calibration
Uni-10 Series Scale and Printer Installation Manual 11. Press Figure 2-17. Date and Time 12. Select DATE TIME 13. Press the field to enter the current date. Enter the date in the format noted on the display. Enter just the day of the DATE month if that is the only value to be changed. - Page 23 • Use a tamper-evident decal to seal the hole or a crimp seal to secure the hex sealing bolt. 17. Press to exit. 18. Press the key to return to Normal Operation mode. SALES 19. Verify calibration. © Rice Lake Weighing Systems ● All Rights Reserved...
-
Page 24: Ethernet Configuration
Uni-10 Series Scale and Printer Installation Manual Ethernet Configuration Ethernet Configuration This section covers setting the Uni-10 IP address, subnet mask, etc. After completing this section, refer to Section 3.2 complete communications setup for wireless scales. NOTE: The selection for hardwired or wireless communication must be made in the MACHINE No. menu under the WiFi tab. Use the WIFI USE setting to select YES (wireless) or NO (hardwired). - Page 25 NOTE: If the Com Check Period is set to zero the online indicator on the main operation screen will always show as connected (green) even when there is no connection. Do not change the (55201) or (2 seconds) unless instructed to do so by Rice Lake Weighing Port Number Com Check Time Out Systems technical support.
-
Page 26: Wireless Configuration
Uni-10 Series Scale and Printer Installation Manual Wireless Configuration If the Uni-10 will be part of a wireless communication network, use this section to set the Network Name (SSID), Encryption, etc. IMPORTANT: The standard IP address information must be entered (see Section 3.0 on page 24) and the scale must be rebooted before the wireless settings are entered. - Page 27 SAVE 18. Press to exit and save the WiFi settings. 19. Press to save and change the WiFi settings (message 14069-0009). EXEC Figure 3-7. Press EXEC to Save Network Settings © Rice Lake Weighing Systems ● All Rights Reserved...
-
Page 28: Dhcp Configuration
Uni-10 Series Scale and Printer Installation Manual 20. Press at the WiFi SETUP screen (message 14059-0010) and wait 30 seconds. 21. Press 22. Press EXEC on the Save Check screen (message 14069-0000). Check communication as needed. DHCP Configuration This section covers how to configure the scale for automatic IP address assignment for both wired and wireless applications. 1. -
Page 29: Scale Configuration
10. Select an unused file number. The line will be highlighted. 11. Press to name the file. EDIT 12. Enter a short name to describe the file, including the customer, department and date. © Rice Lake Weighing Systems ● All Rights Reserved... -
Page 30: Restore Data Files From Usb To Scale
Uni-10 Series Scale and Printer Installation Manual 13. Press to exit and save the file name. Figure 4-2. Select All Files for Output 14. Press the key to select all files for output. Selected files are highlighted. Individual files may be selected, but ALL SEL. - Page 31 (message 14013-0000 Figure 4-4. Input from USB Memory Stick Confirmation 15. Press to exit. 16. Press the key to return to normal operation mode. SALES 17. Remove the USB memory stick. © Rice Lake Weighing Systems ● All Rights Reserved...
-
Page 32: Label Setup
Uni-10 Series Scale and Printer Installation Manual Label Setup Labels are configured primarily in the menu. Any special parameters are set in the menu. Custom Cassette Label Specification label formats are created using the SLP-5 Maintenance Utility software and downloaded to the scale. 4.2.1 Label Cassette 1. - Page 33 Format No. (A) be used in pre-pack mode. Refer to the list of default label formats in Table 4-1 on page 32. ▶ 26. Press the button to move to the next page. © Rice Lake Weighing Systems ● All Rights Reserved...
- Page 34 Uni-10 Series Scale and Printer Installation Manual 27. Set the to one of the selections below: PLU NAME • – select for die-cut labels (default). FIXED • – select for continuous labels where the height of the field will expand as needed. VARIABLE PLU Name 28.
-
Page 35: Label Specification
Normal Operation mode. SALES NOTE: Under normal circumstances, there is no need to alter the Label Specifications. If changes are required please consult Rice Lake Retail Solutions technical support. © Rice Lake Weighing Systems ● All Rights Reserved... -
Page 36: Advertising Messages
Uni-10 Series Scale and Printer Installation Manual Advertising Messages This section covers programming Advertising Messages which are shown on the scale’s customer side display. Text, images, and video may be included in the messages. NOTE: The images and video linked to the Advertising Messages can be downloaded to the scale using SLP-5 or via USB memory stick. - Page 37 NOTE: If the Image Type Display is set as “None” the Ad Message images will not be displayed. 14. Select the tab if images or videos will be linked to the Ad Message, otherwise go to step 17. IMAGE Figure 4-8. AD Message Images © Rice Lake Weighing Systems ● All Rights Reserved...
-
Page 38: Video Ad Messages
Uni-10 Series Scale and Printer Installation Manual 15. Press and scroll through the image/video list. MEDIA 1 16. Select the desired media file and press 17. Repeat for remaining images to be used. One video or up to six images may be linked to each Ad Message. NOTE: Set the Display Count/Display Time high enough to ensure all images/videos are displayed. -
Page 39: Cassette Switching
1. Press to enter the menus. 2. Press 3. Enter and press to access hidden menu steps. 495344 4. Press 5. Select CASSETTE Figure 4-11. Cassette Switching © Rice Lake Weighing Systems ● All Rights Reserved... -
Page 40: Top Sellers
Uni-10 Series Scale and Printer Installation Manual 6. Select to change it to CAST SWITCHING PRESET KEY 7. Press to go back to the menus. 8. Select 9. Select PRESET KEY 10. Touch to highlight it, then press the key. MAIN DETAIL 11. - Page 41 Edit the Sub Data value to “2”, “3”, “4”, etc as needed. 10. To update the top seller preset keys manually, create a preset key with function No. 438 UPDATE TOP SELLER 11. Press © Rice Lake Weighing Systems ● All Rights Reserved...
-
Page 42: Remote Connection
Uni-10 Series Scale and Printer Installation Manual Remote Connection It is possible to access the Uni-10 remotely with a PC using VNC Viewer. Prepare a PC by downloading the VNC Viewer application. VNC Viewer version 6.19.325 from RealVNC has been tested with the Uni-10. NOTE: VNC+SSH option encrypts all data transmitted between the client and server, protecting sensitive information from potential interception. -
Page 43: Scheduler
• SLEEP - dim the scale’s displays • UPDATE - update the Top Seller presets • CLEAR - clear accumulated totals • DISTRIBUTION - send presets from a Master scale to the Satellite scales © Rice Lake Weighing Systems ● All Rights Reserved... -
Page 44: Barcode
Uni-10 Series Scale and Printer Installation Manual 10. Select the box under MASTER to set the function as needed. • AD MSG. (Activate) - start the specified Ad Message • CAMPAIGN. (Activate) - start the specified Campaign • PSET (Update) - update the Top Sellers •... - Page 45 If matching an existing barcode format, refer to the Rice Lake technical bulletin for step-by-step instructions to determine the barcode format. If the required barcode format is not listed, refer to the Rice Lake technical bulletin for instructions to create a custom barcode.
-
Page 46: Store Name And Address
Uni-10 Series Scale and Printer Installation Manual Store Name and Address Configure the Store name and address that prints on the label. 1. Press to enter the menus. 2. Press 3. Select STORE. Figure 4-20. Store Name and Address 4. Store 9999 is the default store number. To edit, select store 9999, and press DETAIL. 5. -
Page 47: 4.10 Plu Comm Setting
11. Set the default value to be used for any blocked field when new PLUs are downloaded to the scale. 12. Press to exit. 13. Press the SALES key to return to normal operation mode. © Rice Lake Weighing Systems ● All Rights Reserved... -
Page 48: 4.11 Key Lock
Uni-10 Series Scale and Printer Installation Manual 4.11 Key Lock Keylock is used to prevent access to function keys in operation mode unless a password is entered. To configure this feature, first select the keys to be locked and then add a function key to allow unlocking by a password. 1. -
Page 49: 4.12 Accumulator
20 PLUs. Additionally, label format No. 98 is used for receipt printing, while label format No. 97 is designated for total printing. © Rice Lake Weighing Systems ● All Rights Reserved... - Page 50 Uni-10 Series Scale and Printer Installation Manual Figure 4-24. Accumulation Menu 12. For the accumulator receipt label, the header text, footer text, header logo and footer logo can be adjusted in the RECEIPT SETTING page under the TITLE tab located in the SETUP menu. NOTE: The footer text, header logo and footer logo will only be shown if they have been added to label format No.
- Page 51 NOTE: RECEIPT = accumulator receipt label will use what is specified in the RECEIPT SETTING page under the BARCODE tab located in the SETUP menu. FIRST PLU = the accumulator receipt label will use the initial PLU’S BARCODE THAT WAS ADDED TO THE ACCUMULATOR. Figure 4-27. Receipt Setting (Barcode) © Rice Lake Weighing Systems ● All Rights Reserved...
- Page 52 Uni-10 Series Scale and Printer Installation Manual www.RiceLake.com Visit our website...
- Page 54 © Rice Lake Weighing Systems Content subject to change without notice. 230 W. Coleman St. • Rice Lake, WI 54868 • USA USA: 800-472-6703 • International: +1-715-234-9171 October 22, 2024 PN 226359 Rev A www.ricelake.com...
Need help?
Do you have a question about the ISHIDA Uni-10 Series and is the answer not in the manual?
Questions and answers