Advertisement
Quick Links
Advertisement

Related Manuals for Anzzi SD-AZ16-01


Summary of Contents for Anzzi SD-AZ16-01
- Page 1 ITEM: SD-AZ16-01** V1.0 08/25/2023 https://register.anzzihome.com/register/...
- Page 2 IMPORTANT: Warranty will not be recognized unless product is registered. We offer two options to register your product. https://register.anzzihome.com/register/ Register online at or Scan the QR code below. Registering online is fast, secure, and ensures we receive your information. Complete, cut out, and mail the registration card below. Returning this registration card will ensure your product's warranty and allow us to process any warranty claims.
- Page 3 TO KEEP GLASS FROM BREAKING: Use two people when installing. This product is heavy.
-
Page 5: Before You Begin
INSTALLATION GUIDE BEFORE YOU BEGIN ATTENTION Surface of the tub deck must be level for better sealing. This model requires a minimum 1" (25.4mm) flat level tub deck for sealing. Tools Required This product is heavy and requires two people to install. Screwdriver Level Tape... - Page 6 WARNING To prevent damage to glass and potential injury, make sure to follow the instructions on page 1. PARTS [01] X 1 [02] X 3 [03] X 1 [04] X 1 [05] X 4 [06] X 1 [08] X 1 [07] X 1 [09] X 8 [10] X 16...
- Page 7 WARNING To prevent damage to glass and potential injury, make sure to follow the instructions on page 1. ASSEMBLY [20] [08] [12] [11] [09] [10] [03] [04] [16] [17] [02] [01] [13] [14] [15] [07] [05] [18] [06] Part Description Qty.
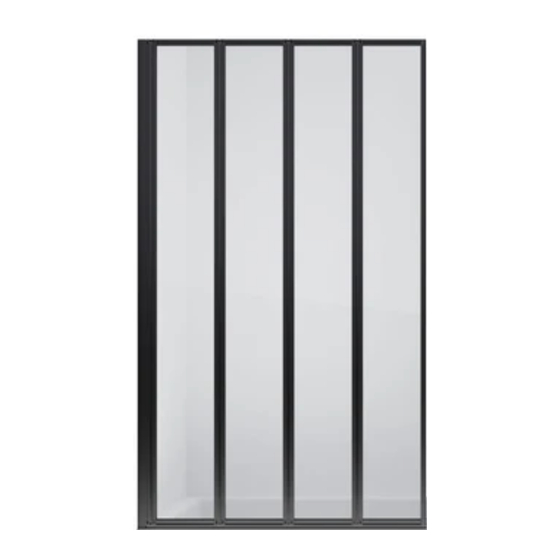
- Page 8 SD-AZ16-01** 31.5"X55" 31.5" [800mm]...
-
Page 9: Installation Instructions
ATTENTION To avoid personal injury or property damage, identify components and read all instructions before installing. This model requires a minimum 1" (25.4mm) flat level tub deck for sealing. WARNING To prevent damage to glass and potential injury, make sure to follow the instructions on page 1. INSTALLATION INSTRUCTIONS Step 1 1. - Page 10 WARNING To prevent damage to glass and potential injury, make sure to follow the instructions on page 1. Step 2 1. Install Bottom Gear [07] to Vertical Profile [03]. Make sure the Bottom Gear [07] is on the panels' Slot side. Install Top Gear [08] to another end of Vertical Profile [03].
- Page 11 WARNING To prevent damage to glass and potential injury, make sure to follow the instructions on page 1. Step 3 1. Install and push 16 Screw Gaskets [10] into the holes of Gears. (Fig 3) Gear Gear [10] Gear [10] Gear Fig 3...
- Page 12 WARNING To prevent damage to glass and potential injury, make sure to follow the instructions on page 1. Step 4 1. Install 16 Screws [11] to the holes of Screw Gaskets [10] on both sides and secure. (Fig 4.1, Fig 4.2) Do not over tighten! 2.
- Page 13 WARNING To prevent damage to glass and potential injury, make sure to follow the instructions on page 1. Step 5 1. Slide the Rib of Bottom Water Sealing Strip [06] to the Slot of panels starting from the end of Two Gear Door Panel [01] to Bottom Gear [07].
- Page 14 WARNING To prevent damage to glass and potential injury, make sure to follow the instructions on page 1. Step 6 1. Slightly pull Tip 1 of Bottom Water Sealing Strip [06] and insert it to the Groove of Bottom Gear [07]. Use a Slot Screw Driver to push the Rib which is outside the Slot into the Slot.
- Page 15 Step 7 1. This shower door must be mounted to a stud. Minimum tub deck space is required. IMPORTANT: Using a stud finder, ensure the wall intended to hold the door has a stud at the installation point. lf there is no stud in the shown area, we recommend employing a qualified contractor to install one. (Fig 7) 2.
- Page 16 Step 8 1. Mark the drill hole locations on the wall using the predrilled holes in the Wall Post [04]. (Fig 8.1) 2. Drill a 1/4"[6mm] hole at each location and insert 3 Anchors [16]. (Fig 8.2, Fig 8.3) 3. Apply silicone sealant along the back of the Wall Post [04]. (Fig 8.4) 4.
- Page 17 Step 9 Groove 1. Slide the assembled Door Panel assembly into the Groove of the Wall Post [04]. (Fig 9.1) [04] Door Panel 2. Slide the Supporting Bracket [18] to the assembly Bottom Water Sealing Strip [06] under the Two Gears Door Panel [01]. (Fig 9.5) 3.
- Page 18 Step 10 1. Apply a good quality Silicone Sealant at the outer corner formed by the wall and the WallPost [04]. (Fig 10) Allow 24 hours for the silicone to fully cure before using the shower. Fig 10...
Need help?
Do you have a question about the SD-AZ16-01 and is the answer not in the manual?
Questions and answers