Sign In
Upload
Download
Table of Contents
Contents
Add to my manuals
Delete from my manuals
Share
URL of this page:
HTML Link:
Bookmark this page
Add
Manual will be automatically added to "My Manuals"
Print this page
×
Bookmark added
×
Added to my manuals
Manuals
Brands
Kamstrup Manuals
Measuring Instruments
flowIQ 2200
Installation manual
Kamstrup flowIQ 2200 Installation Manual
Cellular
Hide thumbs
1
Table Of Contents
2
3
4
5
6
7
8
9
10
11
12
13
14
15
16
17
18
19
20
page
of
20
Go
/
20
Contents
Table of Contents
Bookmarks
Advertisement
Table of Contents
1
Table of Contents
2
Information
3
Installation of the External Antenna
4
Radio Activation
5
Network Performance Check
6
Cellular Network Performance
Download this manual
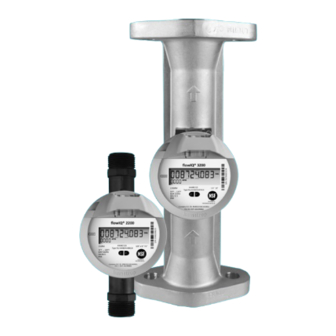
flowIQ® 2200 & 3200
Installation guide - Cellular
Kamstrup
kamstrup.com · info-us@kamstrup.com
Table of
Contents
Previous
Page
Next
Page
1
2
3
4
5
Advertisement
Table of Contents
Need help?
Do you have a question about the flowIQ 2200 and is the answer not in the manual?
Ask a question
Questions and answers
Related Manuals for Kamstrup flowIQ 2200
Measuring Instruments Kamstrup flowIQ 2102 Installation Manuals
(2 pages)
Measuring Instruments Kamstrup MULTICAL 21 Technical Description
Water meter (68 pages)
Measuring Instruments Kamstrup flowIQ 2101 Technical Description
Wired m-bus water meter (30 pages)
Measuring Instruments Kamstrup flowIQ 3100 Series Technical Description
(68 pages)
Measuring Instruments Kamstrup flowIQ 3100 Technical Description
Water meter (60 pages)
Measuring Instruments Kamstrup flowIQ 4200 Installation Manual
(16 pages)
Measuring Instruments Kamstrup MULTICAL 801 Technical Description
(121 pages)
Measuring Instruments Kamstrup MULTICAL 402 Installation And User Manual
Cooling meter (32 pages)
Measuring Instruments Kamstrup MULTICAL 6M2 Installation And User Manual
(20 pages)
Measuring Instruments Kamstrup 162M Technical Description
Electricity meters (75 pages)
Measuring Instruments Kamstrup MULTICAL 602 Technical Description
Thermal energy meter (130 pages)
Measuring Instruments Kamstrup MULTICAL 602 Installation And User Manual
(24 pages)
Measuring Instruments Kamstrup MULTICAL 62 Installation And User Manual
Water meter (20 pages)
Measuring Instruments Kamstrup MULTICAL 402 Technical Description
Static heat meter, cooling meter or combined heat/cooling meter based on the ultrasonic principle (113 pages)
Measuring Instruments Kamstrup MULTICAL 402 Installation & Maintenance Instructions Manual
(28 pages)
Measuring Instruments Kamstrup MULTICAL 602 Installation And User Manual
(28 pages)
This manual is also suitable for:
Flowiq 3200
Table of Contents
Save PDF
Print
Rename the bookmark
Delete bookmark?
Delete from my manuals?
Login
Sign In
OR
Sign in with Facebook
Sign in with Google
Upload manual
Upload from disk
Upload from URL


Need help?
Do you have a question about the flowIQ 2200 and is the answer not in the manual?
Questions and answers