Table of Contents
Advertisement
Quick Links
INSTALLATION, OPERATION
& MAINTENANCE INSTRUCTIONS
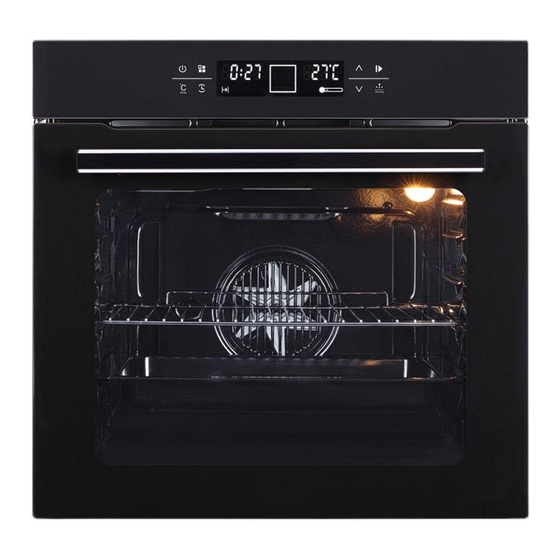
FOR EVERDURE 75L, 60CM BUILT-IN ELECTRIC OVENS
Model
NSTALLATION, OPERATION AND MAINTENANCE INSTRUCTIONS
OBEGS615P
INSTALLATION, OPERATION AND MAINTENANCE INSTRUCTIONS
FOR EVERDURE 77L, 60CM BUILT-IN ELECTRIC OVEN RANGE
OBEGS691 & OBEGS692 BUILT-IN ELECTRIC OVEN
EASY DECISION
Advertisement
Table of Contents

Subscribe to Our Youtube Channel
Related Manuals for Everdure OBEGS615P


Summary of Contents for Everdure OBEGS615P
- Page 1 INSTALLATION, OPERATION & MAINTENANCE INSTRUCTIONS FOR EVERDURE 75L, 60CM BUILT-IN ELECTRIC OVENS Model NSTALLATION, OPERATION AND MAINTENANCE INSTRUCTIONS OBEGS615P INSTALLATION, OPERATION AND MAINTENANCE INSTRUCTIONS FOR EVERDURE 77L, 60CM BUILT-IN ELECTRIC OVEN RANGE OBEGS691 & OBEGS692 BUILT-IN ELECTRIC OVEN EASY DECISION...
-
Page 2: Table Of Contents
CONGRATULATIONS Welcome to the Everdure Kitchen Community and thank you for choosing one of our many fantastic built in ovens. We are confident that you will now be able to meet your cooking needs. Before you use the oven we strongly recommend that you read though the whole user manual which provides the description of this product and the proper use of its functions. -
Page 3: Important Safety Instructions
IMPORTANT SAFETY INSTRUCTIONS IMPORTANT: Read the assembly instruction section and safety precautions of this booklet carefully before removing the contents of this carton. This appliance is not intended for use by persons (including children) with reduced physical, sensory or mental capabilities, or lack of experience or knowledge, unless they have been given supervision or instruction concerning the use of the appliance by a person responsible for their safety. - Page 4 IMPORTANT SAFETY INSTRUCTIONS 20. All cabinetry and materials used in the installation must be able to withstand a minimum temperature of 110°C above the ambient temperature of the room it is located in, whilst in use. Certain types of vinyl or laminate kitchen furniture are particularly prone to heat damage or discolouration at temperatures outside the guidelines given above.
-
Page 5: Appliance Details
APPLIANCE DETAILS ELECTRICAL DETAILS: OVENS: Rated Voltage: 220 to 240 Vac 50 Hz Max Rated Inputs: 3200W, Supply Connection: OVENS – Must be hardwired to power supply. This information can be found on the rating plate (data label) affixed to the inside of the door jamb. SIZES: Relevant Sizes: WIDTH (mm) -
Page 6: Electrical Connections
ELECTRICAL CONNECTIONS LOCAL AUTHORITY REQUIREMENTS Installation is only permitted by a licensed electrician and must be carried out according to instructions provided by the manufacturer. Incorrect installation might cause harm and damage which the manufacturer accepts no responsibility. ELECTRICAL INSTALLATION FOR THE LICENSED ELECTRICIAN This oven must be connected to a 220-240V 50Hz power supply. -
Page 7: Transportation
TRANSPORTATION Keep the original carton of the product and use this packaging if the item needs to be transported. Follow the transport signs on the carton. Place a paper between the upper cover and cooking panel, cover the upper cover, then tape to the side surfaces of oven. -
Page 8: Installation
INSTALLATION The adjacent furniture must be able to withstand a minimum temperature rise of 110°C above the ambient temperature of the room it is located in, during periods of use. The power supply to the appliance must be cut off before any adjustments or maintenance work is done on it. PREPARATION FOR INSTALLATION AND USE Manufactured with best quality parts and materials, this modern, functional and practical oven will meet your needs in all respects. - Page 9 INSTALLATION CABINET DIMENSIONS & VENTILATION REQUIREMENTS The figures below show the ventilation and cut-out requirements for the installation of the appliance into a standard kitchen cabinet. A gap is required at the rear, with ventilation below and above, allowing the air to enter below the appliance and exit above it.
-
Page 10: Operating Instructions
OPERATING INSTRUCTIONS A. Control panel On/off Cooking temperature/ Rapid heating key(hold for 3 seconds to activate Rapid heating) D. Cooking mode key Time key Digital display G. Adjust key up H. Adjust key down Pause/Confirm key Pyrolytic clean key Dripping pan or baking sheet Guides for sliding the racks or dripping pan in and out M. - Page 11 OPERATING INSTRUCTIONS Conventional mode Pre-set temperature: between 50°C and 250°C. On this setting, the top and bottom heating elements come on. This is the classic, traditional type of oven which has been perfected, with exceptional heat distribution and reduced energy consumption. The convection oven is still unequalled when it comes to cooking dishes made up of several ingredients, e.g.
- Page 12 OPERATING INSTRUCTIONS Grill and Half grill Pre-set temperature: between 50°C and 250°C. The top central heating element comes on. The extremely high and direct temperature of the grill makes it possible to brown the surface of meats and roasts while locking in the juices to keep them tender. The grill is also highly recommended for dishes that require a high temperature on the surface: beef steaks, veal, rib steak, filets, hamburgers etc…...
- Page 13 OPERATING INSTRUCTIONS Cooling ventilation In order to cool down the exterior of the appliance, some models are equipped with a cooling fan which comes on automatically when the oven is hot. When the fan is on, a normal flow of air can be heard existing between the oven door and the control panel. Set the clock When the machine is on, the LED screen displays 12:00 and the current time icon on the LED screen flashes continuously.
- Page 14 OPERATING INSTRUCTIONS Set the end of cooking time After the cooking time is already set, press key to switch the icon , set the end of cooking time by pressing keys The end time equals current time plus working time; for example: if the working time is set to 2 hours, the end time equals current time plus two hours.
-
Page 15: Cleaning
CLEANING The appliance should be disconnected from the power outlet or turned off at your isolation switch before commencing any cleaning process. Excess spillage must be removed before cleaning. Cleaning the oven exterior: Before starting to clean your oven, be sure that all control buttons are off and your appliance has cooled off. Unplug the appliance. - Page 16 CLEANING Replacing side racks (Optional) Warning: The racks became very hot. Never touch the hot racks. Always allow the appliance to cool down. Keep children away from the appliance. Detaching the racks 1. Lift the racks at the back and pull out (figure.1) 2.
-
Page 17: Troubleshooting
TROUBLESHOOTING If the oven does not operate: The oven may be unplugged from the power source or switched off at the power source. The household fuse has blown, or household power supply is off. The Timer may not be set correctly. ... - Page 18 The product will be repaired or replaced at the option of Everdure. Our Warranty is subject to the product being used for single family domestic household use.
- Page 19 EASY DECISION...
- Page 20 A division of Shriro Australia Pty Limited 2-34 Davidson Street, Greenacre NSW 2190 AUSTRALIA: 1300 355 541 www.everdure.com NEW ZEALAND: (09) 415 6000 www.everdure.co.nz IM Ref: OBEGS615P 05/2021/01FC F O R I N D O O R U S E O N L Y EASY DECISION...
Need help?
Do you have a question about the OBEGS615P and is the answer not in the manual?
Questions and answers