Table of Contents

Subscribe to Our Youtube Channel
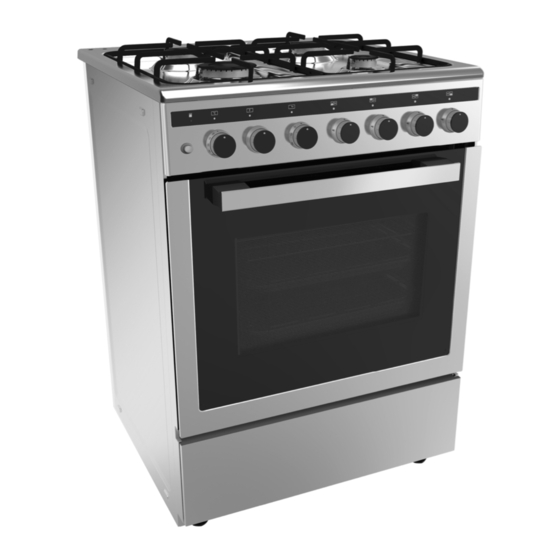
Related Manuals for Everdure UFGS69


Summary of Contents for Everdure UFGS69
- Page 1 INSTALLATION, OPERATION & MAINTENANCE INSTRUCTIONS FOR EVERDURE FREESTANDING ELECTRIC OVENS WITH GAS HOBS Models Included: UFGS69 OBES61 INSTALLATION, OPERATION AND MAINTENANCE INSTRUCTIONS FOR EVERDURE BUILT-IN ELECTRIC OVEN RANGE OBES61, OBES6 DESIGNED TO PERFECTION...
-
Page 2: Table Of Contents
Wiring Diagram …………….……………. CONGRATULATIONS Welcome to the Everdure Kitchen Community and thank you for choosing one of our many fantastic cooking appliances. We are confident that you will now be able to meet your cooking needs. Before you use the oven we strongly recommend that you read though the whole user manual which provides the description of this product and the proper use of its functions. -
Page 3: Important Safety Instructions
IMPORTANT SAFETY INSTRUCTIONS IMPORTANT: Read the assembly instruction section and safety precautions of this booklet carefully before removing the contents of this carton. To maintain the efficiency and safety of this appliance, always call the Service Centre for warranty & service issues. Always use original spare parts. This appliance is intended for non-professional use within the home. -
Page 4: Appliance Details
APPLIANCE DETAILS ELECTRICAL DETAILS UFGS69: OVEN RATING Rated Voltage: 220-240V / 50-60 Hz Top element 950W Max Rated Inputs: 3000W. This information can be found on the rating plate (data label) affixed to Bottom element 1100W the rear of the appliance. -
Page 5: Installation
INSTALLATION LOCAL AUTHORITY REQUIREMENTS Installation is only permitted by an authorised person, and carried out according to instructions provided by the manufacturer. Incorrect installation might cause harm and damage which the manufacturer accepts no responsibility. BEFORE INSTALLATION Read the following information about the appliance and the guidelines for ventilation. When unpacking the appliance, check for any damage. - Page 6 INSTALLATION POSITIONING Leave at least 65cm between the top of the gas hobs and any cabinet or range hood above it. Leave at least a 5cm gap behind the appliance and at least a 2cm gap to either side to allow heat to escape around the appliance.
- Page 7 The installation of a safety valve for opening and closing the gas supply is a compulsory requirement. Fit the safety valve between the gas connecting line to the appropriate room and the appliance. Ensure unhindered access to the valve. After connecting the gas line, check all connections for gas leaks using soapy water. Once fully connected, switch the appliance on as described in this manual.
-
Page 8: Operating Instructions
OPERATING INSTRUCTIONS PARTS 01) Ignition button 02) Trivets. 03) Burner control knobs. 04) Oven minute minder control knob. 05) Oven function control knob. 06) Oven temperature control knob. 07) Baking rack. 08) Oven door. 09) Adjustable feet. CONTROL PANEL Note: The control knob decals are printed on the bezels at the base of each control knob. When you first run your oven a certain smell will be emanated arising from the insulation materials and the heater elements. - Page 9 Never fill a pan more than 1/3 full of oil. Always dry food before frying. Never use gauze, metal pan diffusers or stands over the hobs, as they can cause the burners to overheat. Do not use trivets not supplied by Everdure for use with this appliance. Recommended vessel sizes are as follows: Auxiliary: Ø100mm-Ø220mm.
- Page 10 USING THE OVEN Note: The control knob decals are printed on the bezels at the base of each control knob. Choose an oven function with the oven function control knob (off at the top, with 9 other functions). Chose an oven temperature setting using the thermostat control knob. The temperature ranges from 0⁰C (top) to >200⁰C (rotated fully clockwise to Grill), depending on the function.
-
Page 11: Oven Function Chart
OVEN FUNCTION CHART Note: There are 5 rack positions inside the oven. DESIGNED TO PERFECTION... - Page 12 Light Only Function When the function control knob is in any position other than the “off” position, the oven light will comes on. This function allows the light to be on without any elements working & can be used during cleaning. Defrost Function Select this function to thaw food.
- Page 13 Fan Assist Function Based on the convection mode this combination of features increases the effectiveness of the thermal radiation of the heating elements through forced air circulation of the heat throughout the oven. This helps prevent food from burning on the surface, allowing the heat to penetrate into the food. Food backed on this function such as pastry often brown faster than on convection mode alone.
-
Page 14: Cooking Guides
COOKING GUIDES LOWER‐UPPER HEAT – (Conventional) LOWER‐UPPER HEAT + FAN (Fan Assist) FOOD Thermostat Rack Cooking Period Thermostat Rack Cooking Period (min) pos. (°c) pos. (min) pos (°c) pos. Scones Plain or fruit 220 2‐3 10‐15 210 2‐3 10‐15 Cake ‐ Butter cake (deep) 180 2‐3 40 170 2‐3 40 Cake ‐ Sponge 180 2‐3 25‐30 170 2‐3 25‐30 Cake – Cup cakes 180 2‐3 ... - Page 15 Cooking Pizza For the best results when cooking pizza use the Lower and Upper Heat Element function (Convection) and the lowest oven shelf position. Preheat the oven for at least 10 minutes. Use a non-stick pizza pan, ideally one with holes in the base specifically for pizza cooking. ...
-
Page 16: Replacing The Oven Lamp
Pavlova and Meringues Eggs should be at room temperature. Ensure that the bowl and beaters to be used are super clean and have no grease, oil or fat on them as this will retard the beating and peak forming process. ... -
Page 17: Cleaning
CLEANING NOTE: Cleaning and maintenance operations must only be carried out when the oven and hobs are cool. The appliance should be isolated from your mains supply before commencing any cleaning process. Before starting to clean your oven or hobs, be sure that all control knobs are off and your appliance is cooled off. -
Page 18: Troubleshooting
TROUBLESHOOTING PROBLEM SOLUTION Oven or hob not working Check the electricity is turned on. Check your fuses. If the fuse continues to blow, call Omega service. Check the circuit breaker. Ensure correct knob is positioned correctly. Dry or clean ignition electrodes. Make sure flame ports and ignition areas are clean and dry. -
Page 19: Wiring Diagram
WIRING DIAGRAM DESIGNED TO PERFECTION... - Page 20 104 Vanessa Street, Kingsgrove NSW 2208 AUSTRALIA: 1300 355 541 www.everdure.com NEW ZEALAND: (09) 415 6000 www.everdure.co.nz IM Ref: UFGS69 27/2016/09FC F O R I N D O O R U S E O N L Y DESIGNED TO PERFECTION...
Need help?
Do you have a question about the UFGS69 and is the answer not in the manual?
Questions and answers
How to take door of to clean between glass door