
Related Manuals for Everdure UFCW661


Summary of Contents for Everdure UFCW661
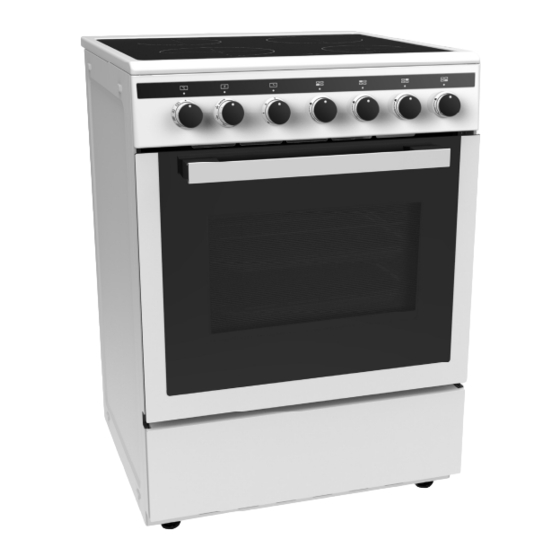
- Page 1 INSTALLATION, OPERATION & MAINTENANCE INSTRUCTIONS FOR EVERDURE FREESTANDING ELECTRIC OVENS WITH CERAMIC COOKTOP Models Included: UFCW661 OBES61 INSTALLATION, OPERATION AND MAINTENANCE INSTRUCTIONS FOR EASY DECISION...
-
Page 2: Table Of Contents
Wiring Diagram …………….………………. 18 CONGRATULATIONS Welcome to the Everdure Kitchen Community and thank you for choosing one of our many fantastic cooking appliances. We are confident that you will now be able to meet your cooking needs. Before you use the oven we strongly recommend that you read though the whole user manual which provides the description of this product and the proper use of its functions. -
Page 3: Important Safety Instructions
IMPORTANT SAFETY INSTRUCTIONS IMPORTANT: Read the assembly instruction section and safety precautions of this booklet carefully before removing the contents of this carton. This appliance is not intended for use by persons (including children) with reduced physical, sensory or mental capabilities, or lack of experience or knowledge, unless they have been given supervision or instruction concerning the use of the appliance by a person responsible for their safety. -
Page 4: Appliance Details
APPLIANCE DETAILS ELECTRICAL DETAILS UFCW661: Rated Voltage: 220-240V / 380-415V ~3N, 50 Hz Max Rated Inputs: 9000W (3000W for oven, 6000W for cooktop). This information can be found on the rating plate (data label) affixed to the rear of the appliance. -
Page 5: Electrical Connections
ELECTRICAL CONNECTIONS LOCAL AUTHORITY REQUIREMENTS Installation is only permitted by an authorized person, and carried out according to instructions provided by the manufacturer. Incorrect installation might cause harm and damage which the manufacturer accepts no responsibility. ELECTRICAL INSTALLATION Before carrying out the connection to the power supply, the voltage rating of the appliance (stamped on the appliance identification plate) must be checked for correspondence to the available mains supply voltage, and the mains electric wiring should be capable of handling the oven’s power rating (also indicated on the identification plate). -
Page 6: Installation
OVEN LAMP REPLACEMENT The appliance must first be disconnected from the power outlet or turned off at your isolation switch. Unscrew the glass cover attached to the lamp holder; anti-clockwise. Unscrew the lamp and replace it with another high-temperature lamp with the following characteristics: Type: Halogen E14 Voltage: AC220V-240V... - Page 7 The cooker is designed to fit between kitchen cabinets spaced over 600 mm apart. The space either side of the cooker needs only be sufficient to allow withdrawal of the cooker for servicing. It can be used with cabinets on one side or both sides as well as in a corner setting. It can also be used free-standing.
-
Page 8: Operating Instructions
OPERATING INSTRUCTIONS Note: The control knob decals are printed on the bezels at the base of each control knob. When you first run your oven a certain smell will be emanated arising from the insulation materials and the heater elements. For this reason, before using your oven, run it empty at maximum temperature for 45 minutes. - Page 9 Never use gauze, metal pan diffusers or stands over the hobs, as they can cause the elements to overheat. Do not use trivets not supplied by Everdure for use with this appliance. Never place aluminium foil on the glass while it is hot.
- Page 10 OVEN FUNCTION CHART Note: There are 5 rack positions inside the oven. Light Only Function When the function control knob is in any position other than the “off” position, the oven light will comes This function allows the light to be on without any elements working & can be used during cleaning. Conventional Cooking Function This function allows heat to radiate evenly from the lower and upper elements into the oven ensuring even cooking of both sides of the food.
- Page 11 Lower Heat Function On this function the lower heating element will come on. This function is recommended for finishing off the cooking of food (in baking dishes or trays) which is already superficially well-cooked and golden on the top but still soft inside. Adjust the function control knob so it indicates the Lower Heating function symbol.
- Page 12 Maxi-Grill Function This function is used for faster grilling and for grills with a lot of food. Adjust the function control knob so it indicates the Maxi-Grill Function symbol. After a preheating period of 10 minutes (ideally include the tray and grill rack in the pre-heat when cooking meat, fish or poultry), place your food into the oven by placing onto the grill rack, which is sitting in the tray.
-
Page 13: Cooking Guides
COOKING GUIDES LOWER-UPPER HEAT – LOWER-UPPER HEAT– (Conventional) (Conventional) FOOD FOOD Cooking Rack Temp. Rack Temp. (°c) Cooking Period (min) Period pos. (°c) pos. (min) 20 + 45/50 min per Scones Plain or fruit 220 middle 10-15 Roast Pork 230 + 190 middle kilo Cake - Butter cake... - Page 14 Grilling Cooking times may vary according to the nature of the foods, their homogeneity and their volume. When cooking a certain food for the first time, it is advisable to choose the lowest temperature and then increase temperature as required. When using the griller functions on the top oven –...
- Page 15 Pavlova and Meringues Eggs should be at room temperature. Ensure that the bowl and beaters to be used are super clean and have no grease, oil or fat on them as this will retard the beating and peak forming process. ...
-
Page 16: Cleaning
CLEANING NOTE: Cleaning and maintenance operations must only be carried out when the oven and cooktop are cool. The appliance should be isolated from your mains supply before commencing any cleaning process. Before starting to clean your oven or cooktop, be sure that all control knobs are off and your appliance is cooled off. -
Page 17: Troubleshooting
TROUBLESHOOTING If the oven does not operate: The oven may be off at your switched outlet. The timer may not be set to the manual function or have the timer set to function. If the interior lighting lamp does not light: ... -
Page 18: Wiring Diagram
WIRING DIAGRAM EASY DECISION... - Page 19 EASY DECISION...
- Page 20 A division of Shriro Australia Pty Ltd 104 Vanessa Street, Kingsgrove NSW 2208 AUSTRALIA: 1300 355 541 www.everdure.com NEW ZEALAND: (09) 415 6000 www.everdure.co.nz IM Ref: UFCW661 09/2017/20FC F O R I N D O O R U S E O N L Y EASY DECISION...
Need help?
Do you have a question about the UFCW661 and is the answer not in the manual?
Questions and answers