Table of Contents
Advertisement
Advertisement
Table of Contents

Subscribe to Our Youtube Channel
Related Manuals for Everdure OBES64


Summary of Contents for Everdure OBES64
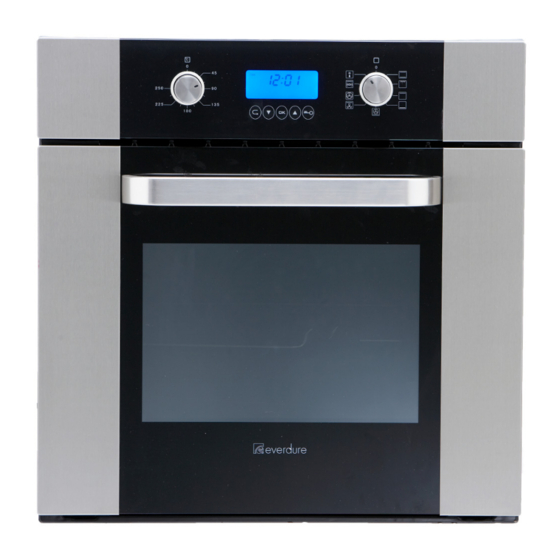
- Page 1 INSTALLATION, OPERATION & MAINTENANCE INSTRUCTIONS FOR EVERDURE 60CM BUILT-IN ELECTRIC OVENS Models Included: OBES64 OBES61 INSTALLATION, OPERATION AND MAINTENANCE INSTRUCTIONS FOR EVERDURE BUILT-IN ELECTRIC OVEN RANGE OBES61, OBES6 DESIGNED TO PERFECTION...
-
Page 2: Table Of Contents
OBES64 BUILT-IN ELECTRIC OVEN CONGRATULATIONS Welcome to the Everdure Kitchen Community and thank you for choosing one of our many fantastic built in ovens. We are confident that you will now be able to meet your cooking needs. Before you use the oven we strongly recommend that you read though the whole user manual which provides the description of this product and the proper use of its functions. -
Page 3: Important Safety Instructions
IMPORTANT SAFETY INSTRUCTIONS IMPORTANT: Read the assembly instruction section and safety precautions of this booklet carefully before removing the contents of this carton. This appliance is not intended for use by persons (including children) with reduced physical, sensory or mental capabilities, or lack of experience or knowledge, unless they have been given supervision or instruction concerning the use of the appliance by a person responsible for their safety. -
Page 4: Appliance Details
Rated Voltage: 220 to 240 Vac 50 Hz Max Rated Inputs: OBES64 – 3000W to 3400W Supply Connection: OVENS - 15 A electrical supply cord This information can be found on the rating plate (data label) affixed to the inside of the door jamb. - Page 5 OVEN LAMP REPLACEMENT • The appliance must first be disconnected from the power outlet or turned off at your isolation switch. The oven, lamp and lamp cover should be cold. • Unscrew the glass cover attached to the lamp holder by turning anti- clockwise ¼...
-
Page 6: Installation
INSTALLATION The adjacent furniture must be able to withstand a minimum temperature rise of 50°C above the ambient temperature of the room it is located in, during periods of use. The power supply to the appliance must be cut off before any adjustments or maintenance work is done on it. PREPARATION FOR INSTALLATION AND USE Manufactured with best quality parts and materials, this modern, functional and practical oven will meet your needs in all respects. - Page 7 INSTALLATION OF BUILT IN OVEN Insert the oven into cabinet partly by pushing it forward. Open the oven door and insert 2 screws into the holes on the oven frame. While the product frame touches the wooden surface of the cabinet, tighten the screws.
-
Page 8: Operating Instructions
OPERATING INSTRUCTIONS FRONT AND INTERNAL VIEW: 01. Thermostat Control. 08. Oven Door Gasket. 02. Insulation Plate 09. Baking Tray. 03. Oven Light. 10. Rotisserie. 04. Fan Cover. 11. Grill Tray. 05. Shelf Support. 12. Wire Grill. 06. Function Control. 13. Oven Door. 07. - Page 9 CONTROL PANEL THERMOSTAT TIMER FUNCTION OVEN THERMOSTAT CONTROL The oven thermostat control is used to select the desired temperature for cooking. When the temperature inside your oven reaches the value set, the thermostat will cut the circuit and the oven elements will go off. When the temperature falls below the set value, the thermostat will again be turned on alongside the oven elements.
- Page 10 SETTING THE CURRENT TIME: When not in use to set up timer functions, the oven timer display shows the time. Setting the clock correctly is critical when using any of the automatic timer functions. The display is a 24 hour clock (12.00 is 12 noon). Press the button and the button simultaneously.
- Page 11 USING THE TIMER TO SET COOKING END TIME: For instances where the cooking needs to be started immediately, and stopped at a certain time, this timer function should be used. For example, the oven needs to cook until 5.30pm, rather than 1 hour. Set the temperature and oven function as required.
- Page 12 OVEN FUNCTION/CONTROL The oven function control is used to select the different functions. Each is explained in detail. To select a function, turn the control knob to the desired oven function and then set the temperature with the thermostat control. OVEN FUNCTION CONTROL CHART Note: Oven shelves are numbered from 6 at the top down to 2 at the bottom, plus the base of the oven (1) when referring to the food cooking chart.
-
Page 13: Grill Function
OVEN FUNCTION CONTROLS Convection Cooking Function: This function, Convection, allows heat to radiate evenly from the lower and upper elements into the oven ensuring even cooking of both sides of the food. Adjust the function control so it indicates the Convection Cooking function symbol. - Page 14 Lower Heat Function: On this function, the lower heating element will come on. This position is recommended for finishing off the cooking of food (in baking dishes or trays) which is already superficially well-cooked and golden on the top but still soft inside. This is an ideal function for delicate cooking such as quiches, cheesecakes and custards where limited top browning of the food is required.
- Page 15 Grill with Rotisserie Function: This function is used for cooking with the rotisserie. Adjust the function control knob so it indicates the Grill with rotisserie function symbol. Set the oven’s thermostat control knob to the required temperature (note: do not set the temperature too high, keep below 175º). Place the rotisserie rack into the shelf position 4 & test that the rotisserie fits.
-
Page 16: Defrost Function
Fan Forced Function: This is the function where the air coming from the turbo heating elements is circulated evenly around the oven by the fan. Adjust the function control knob so it indicates the Fan Forced Function symbol and adjust the thermostat control knob to the temperature required and preheat oven for 10 minutes. - Page 17 ACCESSORIES It is recommended that you use the containers indicated depending on the food you will cook in your oven. You can also use glass containers, cake pans and special oven trays suitable for use in your oven (available in kitchenware shops). Pay attention to the information given by the supplier for use of this cookware. The information given below should be implemented for enamelled containers.
-
Page 18: Cleaning
CLEANING NOTE: Cleaning and maintenance operations must only be carried out when the oven is cool. The appliance should be disconnected from the power outlet or turned off at your isolation switch before commencing any cleaning process. Cleaning the oven when new: Before operating the oven for the first time, check for any internal packaging &... -
Page 19: Transportation
TROUBLESHOOTING If the oven does not operate, display is blank: • The oven may be unplugged from the power source or switched off at the power source. • The household fuse has blown or household power supply is off. • The timer has not been set. -
Page 20: Recommended Cooking Times
RECOMMENDED COOKING TIMES LOWER‐UPPER HEAT – (Convection) FOOD Thermostat Rack Cooking Period pos. (°c) pos. (min) Scones Plain or fruit 220 2‐3 10‐15 Cake ‐ Butter cake (deep) 180 2‐3 40 Cake ‐ Sponge 180 2‐3 25‐30 Cake – Cup cakes 180 2‐3 10‐15 Cookies – Choc chip 180 2‐3 15‐20 Biscuits ‐ Anzac 180 2‐3 15‐20 Brownie 180 2‐3 30‐40 Banana Loaf ... -
Page 21: Cooking Guides
Oven Shelf Location Your Everdure oven has six positions or racks for the oven shelves to be positioned depending on your choice of cooking function and size of roasting dishes or containers. These are numbered from 2 (the lowest shelf position) to 6 (the highest shelf position). - Page 22 Grilling Cooking times may vary according to the nature of the foods, their homogeneity and their volume. When cooking a certain food for the first time, it is advisable to choose the lowest temperature and then increase temperature as required. Cakes and Baking Organize the oven shelves while the oven is cold and before preparing a recipe.
- Page 23 OTHER PRODUCTS AVAILABLE FROM EVERDURE Barbecues Cooking Products Gas Heaters DESIGNED TO PERFECTION...
- Page 24 A division of Shriro Australia Pty Ltd 23-27 Chaplin Drive Lane Cove NSW 2066 1300 355 541 www.everdurekitchen.com.au IM Ref: OBES64 20/2010/01 F O R I N D O O R U S E O N L Y DESIGNED TO PERFECTION...
Need help?
Do you have a question about the OBES64 and is the answer not in the manual?
Questions and answers