Advertisement
Quick Links
TOYOTA TUN DR A 2 02 2+
DA S H ACCE SSORY
MO UN T
IN S TAL L I NSTRU C TIO NS
Please read the mounting instructions below carefully before attempting to install.
Be sure to check out the install video on the product page, if available.
Thank you for purchasing from Victory 4x4! Checkout our website, victory4x4.com for other great off-road
products. Be sure to rate and review our product online. If you have any questions or are missing parts, please
don't hesitate to call us at 269-459-8447!
Advertisement

Related Manuals for Victory 4x4 VTU22DAM


Summary of Contents for Victory 4x4 VTU22DAM
- Page 1 Be sure to check out the install video on the product page, if available. Thank you for purchasing from Victory 4x4! Checkout our website, victory4x4.com for other great off-road products. Be sure to rate and review our product online. If you have any questions or are missing parts, please...
-
Page 2: I Nc Lu D E D Ha R Dwar E
I NC LU D E D HA R DWAR E M6 Button Head M6 Clip Nut... -
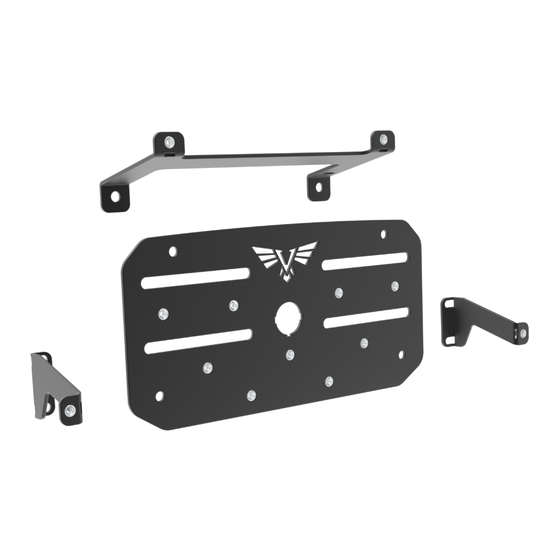
Page 3: Included Parts
INCLUD ED PARTS 1L/1R... - Page 4 I N S TA LL AT I ON Start by removing the plastic cover panel behind the monitor on the dash, use a plastic pry tool or a flat head screw driver to pop the clips free to remove the plastic, as shown below. Once the plastic piece is popped off, you need to disconnect the wire harness that powers the 12v plug on the back.
-
Page 5: Installation
INS TALL ATION With the harness dissconnected and the plastic tray free, you need to pop the 12v out from the tray. You will need to press down on the top tab with a flathead screw driver while pinching the side tabs. Once the harness pops free you pull it out from the front opening. - Page 6 INSTA L L AT I ON With the plastic tray out of the way, you need to remove the (2) factroy bolts on each side of the dash using a 10mm socket, as shown below. Take the (2) smaller provided brackets and use the factory hardware that was just removed, to secure the brackets to the dash again using a 10mm socket.
- Page 7 INSTA L L AT I ON Next, on the passenger side there will be an electrical connector that will need to be removed, by pinching the tabs on the bottom and pulling out. See the location below. Once removed, take the provided clip nut and slide it over the hole where the connector was clipped in.
- Page 8 INSTA L L AT I ON Take the larger provided bracket and the provided M6 button head bolts and thread one into the clip nut on the passenger side and the other into factory threaded hole on the driver side to secure the bracket, in the orientation shown below.
- Page 9 INS TALL ATIO N With all (3) of your brackets now secure to the dash, you can take the provided face plate with the factory 12v plug in it and plug the power connector back into it, as shown below. Then take (4) provided 1/4”-20 button heads and use them to secure the face plate to the brackets, in the orientation below, and tighten them down with a 5/32”...
Need help?
Do you have a question about the VTU22DAM and is the answer not in the manual?
Questions and answers