
Related Manuals for Tesla WF101490CSA


Summary of Contents for Tesla WF101490CSA
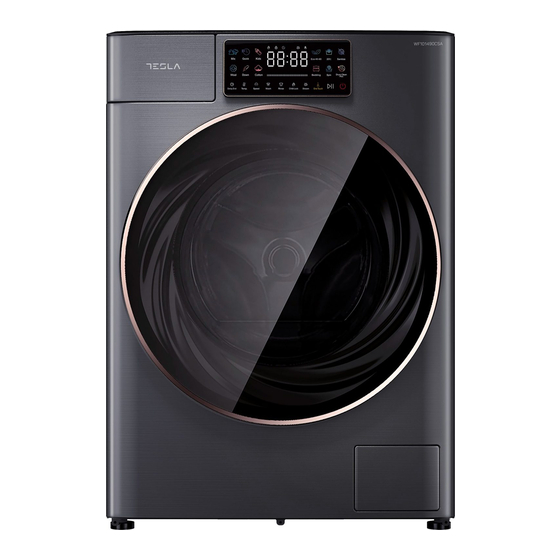
- Page 1 WASHING MACHINE WF101490CSA User Manual Product images are for illustrative purposes only and may differ from the actual product.
-
Page 2: Safety Instructions
SAFETY INSTRUCTIONS When properly cared for, your new appliance has Exercise caution when pumping out hot detergent been designed to be safe and reliable. Read and solution. understand all safety instructions before using the Do not fill water during washing cycle manually. appliance. -
Page 3: Electrical Warning
cover caps. is accessible, or by a multi-pole switch installed The appliance must be installed and operated in upstream of the socket in accordance with the a room with the drain. wiring rules and the appliance must be earthed in Keep the environment dry and vented. - Page 4 inlet valve(s), drain pump, heat sink of the motor DISPOSAL OF PACKAGE MATERIALS controller, PCBs. Always unplug the appliance from the power supply The packaging material is 100% recyclable and is before attempting any service. Disconnect the power marked with the recycle symbol cord by grasping the plug, not the cord.
-
Page 5: Installation
INSTALLATION This user manual should be kept in a safe place for future reference. If the washer is sold, transferred or moved, make sure that the user manual remains with the machine so that the new owner is able to familiarize himself/ herself with its operation and features. -
Page 6: Description Of The Parts
Description of the parts Water inlet valve Power cord and plug Drain hose Detergent drawer Control panel Cabinet Drum Drain filter cover Door Adjustable feet Accessories User manual Water inlet hose Wrench Cover caps 1copy 1pcs 1 pcs 4pcs Removing the transport bolts CAUTION! DAMAGE TO THE APPLIANCE OR INJURY POSSIBLE •... -
Page 7: Choosing The Right Location
1. Undo the four transport bolts A by the wrench (supplied) and remove them. 2. Remove the four spacer tubes B. During the removal of the bolts occasionally spacer tubes fall inside the machine, these can be remove by tilting the machine forward and recovering them from the floor or inside the base of the machine. -
Page 8: Leveling The Appliance
Leveling the Appliance Importance of leveling the appliance tightening the locknuts against the washer bottom. Be sure to do this without changing The appliance uses high spin speeds to remove the height of the foot (hold the foot while water at the end of the wash cycle. It is important tightening the locknut) that the appliance is level and that the appliance feet press with equal pressure against the floor. -
Page 9: Connecting The Drain Hose
3. Turn on the tap slowly and make sure there are no leaks. Do not twist, squash, modify or cut the hose. Tighten the end of the hose firmly by hand. The supply water pressure must be in the 0.03-1.0MPa range. If the water pressure exceeds this value, please fit a pressure reducing valve. -
Page 10: Electric Connection
We advise against the use of drain hose extensions; in case of absolute need, the max 100cm/39in. extension must have the same diameter as the min 60cm/24in. original hose and must not exceed 250cms in max 2,5m/ length. 8.2 feet ELECTRIC CONNECTION Before plugging the appliance into the mains socket, make sure that: •... -
Page 11: Technical Date
Technical date Rated washing capacity (kg) 10.0 Rated voltage 220-240V Rated frequency 50Hz Rated drying power (W) 1600 Rated power (W) 2000 Washing noise level (dB) Spinning noise level (dB) Spin speed (rpm) 1400 Water pressure (MPa) 0.03-1.0 Degree of waterproof IPX4 Net weight (kg) Outer dimension (WxDxH mm) - Page 12 B - FUNCTIONS AND OPTIONS BUTTON GROUP DETERGENT (Automatic dosing system) : Short press this key to set the Al intelligent dispensing RINSE button: Press to change the rinse count for function of washing liquid. the current cycle, the changed rinse count appears For a detailed description, see Various cycles and on digital display.
-
Page 13: Digital Display
7. DIGITAL DISPLAY 1. CHILD LOCK indicator The lit symbol indicates the CHILD LOCK function is 1. Remaining time of the wash activated, the control panel is locked (apart from the cycle POWER button ). 2. Delay end time 2. DOOR LOCK indicator The lit symbol indicates that the door is locked. -
Page 14: Degree Of Soiling
Preparing the laundry for drying • Only tumble-dry textiles which have been washed, rinsed and spun. • Remove as much water as possible from the laundry. Do not press the SPEED button for reducing the spin speed. • In order to ensure uniform drying, sort the items according to fabric type and degree of drying required. •... - Page 15 Sorting laundry according to their care label specifications The symbols on labels of your garments will help you in choosing the suitable wash program, the right temperature, wash cycles, and ironing methods. Don’t forget to give a glance to these useful indications! Wash type Machine wash, Machine wash,...
- Page 16 VARIOUS CYCLES AND FUNCTIONS Table of wash cycle Max. Kind of detergent Temp. Load (kg) Wash cycle Specification ºC Detergents (Max) 10.0 kg Softe-ner Universal Special For washing lightly to normally soiled mixed load of cotton and synthetic fabrics, white and colored items together For small amount or lightly soiled garments that you...
- Page 17 Max. Kind of detergent Temp. Load (kg) Wash cycle Specification ºC Detergents (Max) 10.0 kg Softe-ner Universal Special Clean the drum by Drum removing dirt and bacteria clean from the drum. Make sure the drum is empty Drum Clean Special cycle which is only Plus Drying used to remove the lint...
- Page 18 Various cycles One Touch wash cycle program. One Touch wash cycle can intelligently detect the • After the machine is powered and before startup, under any program, press and hold “ Drum Clean weight of laundry and match different washing time Plus”...
- Page 19 for 3 seconds to set or cancel the Child lock may be opened, you can add or take out laundry. function. After the operation is completed, close the door, 3. After the Child lock function is set, the Child long press the START/PAUSE button again, is lit, thedoor cannot be and the machine continues to run from the point at...
-
Page 20: How To Use The Appliance
HOW TO USE THE APPLIANCE Before loading your first load can hear it click shut. of laundry 3. Open the tap Make sure that the appliance is connected to the Your new appliance was tested before leaving the water mains. Open the tap. factory. - Page 21 1 Powder or liquid washing detergent compartment To change the settings of a running program: 2 Softener feeding compartment • Press START/PAUSE button put the running The fabric softener must not exceed the “MAX” program on pause. level. • Change your settings. 3 Intelligent delivery bin - liquid washing detergent •...
-
Page 22: Care And Maintenance
CARE AND MAINTENANCE Your appliance is designed to give you years of remove white spots on the washer drum caused by service. Observe the following instructions to lime or mineral deposits or small amounts of rust maintain and protect your appliance and keep it in caused by metal objects left in the drum. -
Page 23: Cleaning The Drain Pump
3. Reinsert the drawer and push it back into place. Note: during the cleaning process, do not open the cover of the intelligent liquid washing detergent delivery bin or tilt or turn the detergent drawer to prevent the liquid washing detergent in the intelligent delivery bin from flowing out. -
Page 24: Troubleshooting
4. Use the pull-out drain hose located in the pump turn freely. Remove any lint, debris or detergent access opening to drain the remaining water residue from the threads of the pump cover and into a suitable container (up to 5.3U.S.gallon/20 the pump cover housing. - Page 25 Problem Possible cause/ solutions • The appliance is not plugged into the socket fully, or not enough to make The machine does contact. not swtich on • There is not power to the socket, or the fuse has blown in the mains plug. •...
- Page 26 Problem Possible cause/ solutions The machine does • The top of the drain hose is too high - It must be fitted at a height between 65 and 100 cm from the floor o not drain , drains • The pump filter is blocked. slow or "E03"...
- Page 27 In case of the following faults, the fault state will be detected by the microcomputer system, with the buzzer sounds issued and the following fault codes display in the control panel: Fault codes Fault type Possible cause/ solutions • Check whether the faucet is turned on? Whether the water supply is cut off? Whether mesh filter in the water inlet hose and the water No inlet water inlet valve are blocked? and whether the water inlet hose of the...
- Page 28 tesla.info...
Need help?
Do you have a question about the WF101490CSA and is the answer not in the manual?
Questions and answers