Table of Contents
Troubleshooting

Related Manuals for Welbilt merco CrispyMax


Summary of Contents for Welbilt merco CrispyMax
- Page 1 Serving Quality on Demand™ CrispyMax ™ Crisp and Ready Serving Station Service Manual This manual is updated as new information and models are released. Visit our website for the latest manual. *8197929* Part Number: MER_SM_8197929 09/2024...
- Page 2 Safety Notices Warning Use caution when handling metal surface edges of all Warning equipment. Read this manual thoroughly before operating, installing or performing maintenance on the equipment. Failure Warning to follow instructions in this manual can cause property This appliance is not intended for use by persons damage, injury or death.
-
Page 3: Table Of Contents
Table of Contents Section 1 General Information Overview ......................1-1 Component Identification ................1-1 Service Personnel ....................1-1 Section 2 Troubleshooting Troubleshooting Chart ..................2-1 Sequence of Operation ..................2-1 LED Troubleshooting Chart ................2-2 Measuring Air Temperature ................2-4 Section 3 Wiring Diagrams Wiring Diagrams .................... -
Page 4: Section 1 General Information
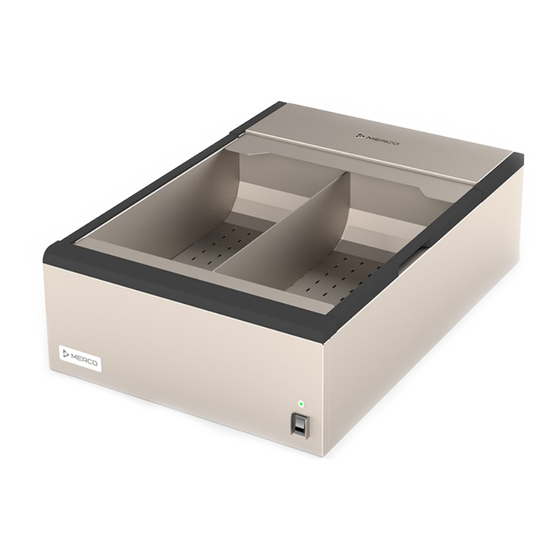
Section 1 General Information Overview The control boards are identical. 1 and 2 lane units do not require jumpers. In 3 lane units the primary and secondary boards are set with a jumper. Below The Merco Crispy Max is designed to warm prepared fried foods with a flow of heated air. - Page 5 General Information Section 1 Thermocouple Heater Heat Sink (Cools Triacs) Thermocouple Heater DC Fan Line Switch, LED, Jumper Voltage daisy chain Position between boards Thermocouple Heater Thermocouple Heater DC Tangential Fan High Limit Opens 275F ±6F...
- Page 6 Section 1 General Information Steps For Component Removal 5. Ensure the food tray is inserted correctly. The front edge should be flush with the cabinet. 1. Remove divider(s) if present. Correct placement of the food tray. 2. Remove food tray. Incorrect placement of the food tray.
-
Page 7: Section 2 Troubleshooting
Section 2 Troubleshooting Troubleshooting Chart Problem Probable Cause Corrective Action Machine doesn’t operate. No power. Check power source. Verify voltage. Call for service. Excessive time to reach Improper food tray installation / Install food tray properly / Remove temperature. Blocked airflow at rear of unit / any airflow blockages / Clean and Dirty or plugged air filter dry air filter then reinstall. -
Page 8: Led Troubleshooting Chart
Troubleshooting Section 2 LED Troubleshooting Chart for Units with serial number beginning with 2107 or before Front LED Indicator Control Board LED Indicators Front LED Control Board Description Probable Possible Parts Service Cause Required Procedure Status Solid Green Orange flashes Normal -IO COMM (2 &... - Page 9 Section 2 Troubleshooting Front LED Control Board Description Probable Possible Parts Service Cause Required Procedure Status Three (3)- Red One (1) -Zone 1 Thermocouple Open Thermocouple/ Check flashes and a or 2 error flash error Thermocouple Control Board thermocouple Three (3) second and a Three (3) or Control Board and control...
-
Page 10: Measuring Air Temperature
Troubleshooting Section 2 Measuring Air Temperature To determine if the CrispyMax is delivering the correct air temperature, use a thermocouple to measure the air temperature. Remove the holding pan to access the air grill. Tape a thermocouple over the air grill as shown, ensuring that the thermocouple does not touch the grill. - Page 11 Section 2 Troubleshooting LED Troubleshooting Chart for Units with serial number beginning with 2108 or later Front LED Indicator Control Board LED Indicators Front LED Control Board Description Probable Possible Parts Service Cause Required Procedure Status Solid Green Orange flashes Normal -IO COMM (2 &...
- Page 12 Troubleshooting Section 2 Front LED Control Board Description Probable Possible Parts Service Cause Required Procedure Status Two (2) -Amber One (1) -Zone 2 Temperature Heater, AC Heater, AC Check Zone flashes, Two Error flash and a Low Error Harness or Harness, 2 heater, AC (2) -Red flashes...
- Page 13 Section 2 Troubleshooting Front LED Control Board Description Probable Possible Parts Service Cause Required Procedure Status Four (4) -Amber Two (2) - Zone Temperature Heater, AC Heater, AC Check Zone flashes, Two 2 Error flashes High Error Harness or Harness, 4 (zone 2 on (2) -Red flashes and a Three (3)
- Page 14 Troubleshooting Section 2 Front LED Control Board Description Probable Possible Parts Service Cause Required Procedure Status One (1) -Amber One (1) -Zone 1 Low Fan Speed Fan or Control Fan/Control Check Zone flash, Four (4) Error flash and a error Zone 1 Board failure Board 1 fan and...
- Page 15 Section 2 Troubleshooting Front LED Control Board Description Probable Possible Parts Service Cause Required Procedure Status Four (4) -Amber Two (2) - Zone High Fan Speed Fan or Control Fan/Control Check Zone flashes, Four 2 Error flashes error Zone 3 Board failure Board 4 (zone 2 on...
-
Page 16: Section 3 Wiring Diagrams
Section 3 Wiring Diagrams CrispyMax Wiring Non-CE... - Page 17 Wiring Diagrams Section 3 CrispyMax Wiring with voltages...
- Page 18 Section 3 Wiring Diagrams CrispyMax Wiring CE...
- Page 19 Wiring Diagrams Section 3 CrispyMax MCT1812 Wiring Diagram...
- Page 20 Range™ and WMaxx™. Supported by service brands: FitKitchen®, kitchen systems, and KitchenConnect®, cloud-based open platform. Bringing innovation to the table · welbilt.com ©2024 Welbilt Inc. except where explicitly stated otherwise. All rights reserved. Continuing product improvement may necessitate change of specifications without notice. Part Number: MER_SM_8197929 09/2024...
Need help?
Do you have a question about the merco CrispyMax and is the answer not in the manual?
Questions and answers