Table of Contents
Advertisement
Quick Links
Advertisement
Table of Contents

Related Manuals for Welbilt Delfield ASM-P Series


Summary of Contents for Welbilt Delfield ASM-P Series
- Page 1 Fresh Solutions, Fit For You A Welbilt Brand ASM-P Series Original Instructions Installation, Operation and Maintenance Manual This manual is updated as new information and models are released. Visit our website for the latest manual. Part Number: 9291463A 11/21...
- Page 2 Safety Notices Warning This product contains chemicals known to the State Warning of California to cause cancer and/or birth defects or Read this manual thoroughly before operating, installing other reproductive harm. Operation, installation, and or performing maintenance on the equipment. Failure servicing of this product could expose you to airborne to follow instructions in this manual can cause property particles of glasswool or ceramic fibers, crystalline...
-
Page 3: Table Of Contents
Table of Contents Section 1 General Information Model Numbers ........................4 Serial Number Location ..................... 4 Warranty Information ......................4 Regulatory Certifications ....................4 Dimensioned Drawings ..................... 5 Section 2 Installation Location ..........................6 Weight of Equipment ......................7 Clearance Requirements ....................7 Dimensions ......................... -
Page 4: General Information
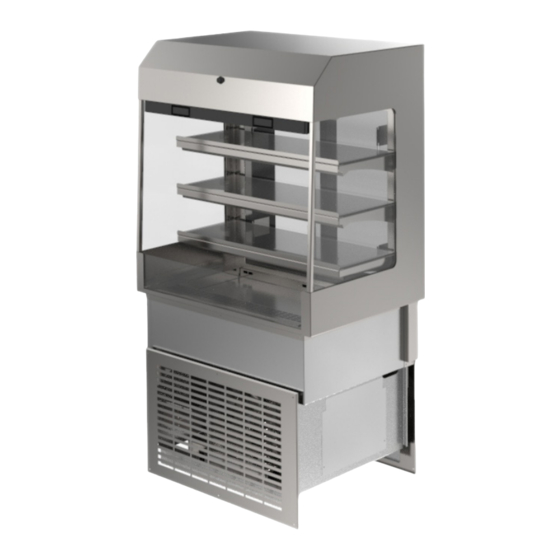
Section 1 General Information Model Numbers Warranty Information This manual covers standard units only. • Register your product for warranty. NOTE: For custom units, consult Manitowoc KitchenCare at • Verify warranty information. 1-844-724-CARE. • View and download a copy of your warranty. At www.delfield.com/warranty Drop-In Air Screen Merchandisers ASM-36P... -
Page 5: Dimensioned Drawings
Section 1 General Information Dimensioned Drawings 48.25” 36.25” 123cm 92cm 25.93” 25.93” 66cm 66cm Plan View, ASM-36P Plan View, ASM-48P 63.48” 63.48” 161cm 161cm 46.50” 118cm 34.50” 88cm Elevation View, ASM-48P Elevation View, ASM-36P 12.50” 38.65” 32cm 98cm 12.50” 32cm 12.50”... -
Page 6: Installation
Section 2 Installation Warning DANGER To avoid instability the installation area must be capable Installation must comply with all applicable fire and of supporting the combined weight of the equipment health codes in your jurisdiction. and product. Additionally the equipment must be level side to side and front to back. -
Page 7: Weight Of Equipment
Section 2 Installation Dimensions • Do not obstruct the flow of ventilation air. Make sure the air vents of the equipment are not blocked. Model Length Depth Height • Air movement in the room will adversely effect ASM ASM-36P 36.25” 25.93”... -
Page 8: Electrical Service
Installation Section 2 Electrical Service RATED AMPERAGES, HORSEPOWER, VOLTAGE & POWER CORD CHART DANGER Model ASM-36P ASM-48P Check all wiring connections, including factory Amps 5.0 / 3.7 11.8 / 7.7 terminals, before operation. Connections can become (with condensate evap. / without condensate evap) loose during shipment and installation. -
Page 9: Installation Instructions
Section 2 Installation Installation Instructions PREPARE THE CABINET 1. Install partitions between the Air Screen Merchandiser Installation Dimensions and other electrical appliances if they are located in the Cabinet Interior Minimum Dimensions same cabinet. Partitions must fully extend front to back and top to bottom. -
Page 10: Lower In The Asm
Installation Section 2 LOWER IN THE ASM 10. Remove the bolts and remove the lifting plates. Install plastic plugs in the bolt holes. 5. Remove the stainless steel pans in the bottom of the unit. 11. Install the stainless steel pan clip rail below the door track. -
Page 11: Plumbing
Section 2 Installation Plumbing Shelf Adjustments Standard models will have a 1/2” drain which will need Display cases come with three tempered glass shelves that to be run to an appropriate floor drain. The drain will be are adjustable in 1” increments. stubbed inside the machine compartment. -
Page 12: Operation
Section 3 Operation Operation DANGER An ON/OFF switch is located on the left side of the remote The on-site supervisor is responsible for ensuring that control panel. Simply turn the switch to ON to begin operators are made aware of the inherent dangers of operation. -
Page 13: Temperature Control Settings
Section 3 Operation Temperature Control Settings Parameter 36” 48” Description Set Point, Air 25.5°F 25.5°F Reference point, the Note Temperature temperature in which the unit cuts-out cooling. The temp displayed on the control is the air temperature at the top of the display. Press upper or lower right button. -
Page 14: Maintenance
Section 4 Maintenance Cleaning and Sanitizing Procedures DANGER It is the responsibility of the equipment owner to Caution perform a Personal Protective Equipment Hazard Assessment to ensure adequate protection during Maintenance and servicing work other than cleaning as maintenance procedures. described in this manual must be done by an authorized service personnel. -
Page 15: Exterior Cleaning
Section 4 Maintenance EXTERIOR CLEANING DRAIN Each unit has a drain located inside the unit that removes Notice the condensation from the evaporator coil and routes it Never use an acid based cleaning solution on exterior to an external condensate evaporator pan. Each drain can panels! Many food products have an acidic content, become loose or disconnected during normal use. - Page 16 DELFIELD 980 SOUTH ISABELLA ROAD, MOUNT PLEASANT, MI 48858 800-733-8821 WWW.DELFIELD.COM ©2019 Welbilt Inc. except where explicitly stated otherwise. All rights reserved. Part Number 9291463A 11/21...
Need help?
Do you have a question about the Delfield ASM-P Series and is the answer not in the manual?
Questions and answers