
Related Manuals for bemodern 4306


Summary of Contents for bemodern 4306
- Page 1 Instructions For Installation & Operation Model: 4306-22”, 4351-30”, 4304-36” 4352- 42”, 4353-50” R1- MAY 24 200874_1...
-
Page 2: Table Of Contents
Contents Page Technical Specification 2 - 3 Important Safety Information 4 - 5 Contents of the Box(es) Installation Preparation Installing The Fire User Instructions - Introduction User Instructions - Manual Control User Instructions - Remote Control 12-14 Maintenance & Troubleshooting General information 200874_1... -
Page 3: Technical Specification
Technical Specification Dimensions (mm) Fire 22” - 4306 30” - 4351 36” - 4304 42” - 4352 1067 1037 50” - 4353 1250 1220 Unboxed Visible Glass Area (mm) Boxed Weight Weight Fire (Kg) (Kg) 22” - 4306 11.1 30” - 4351 14.2... - Page 4 Technical Specification Continued….. Model No: 22” (4306), 30” (4351), 36” (4304), 42”(4352), 50”(4353) Supply Voltage: AC 230-240V 50Hz, Maximum power consumption: 2024W. Model: 4306 4351 4304 4352 4353 Power for Flame Effect Power for Fuel Bed N / A N / A...
-
Page 5: Important Safety Information
Important Safety Information Read all the instructions carefully before using the appliance. For indoor use only. This appliance is not suitable for use outside the house and only suitable for well insulated spaces or occasional use. If the fire is to be placed in front of an existing chimney opening and there is any risk of chimney debris falling down onto the fire or drafts from the chimney it is recommended that the flue or opening is sealed off with non-combustible non-fibrous insulation materials. - Page 6 Important Safety Information Continued….. Cleaning and user maintenance shall not be made by children without supervision. Children aged from 3 years and less than 8 years only can switch on / off the appliance provided that it has been placed or installed in its intended normal operating position and instructions and supervisions concerning the safe way of the use of the appliance are offered.
-
Page 7: Contents Of The Box(Es)
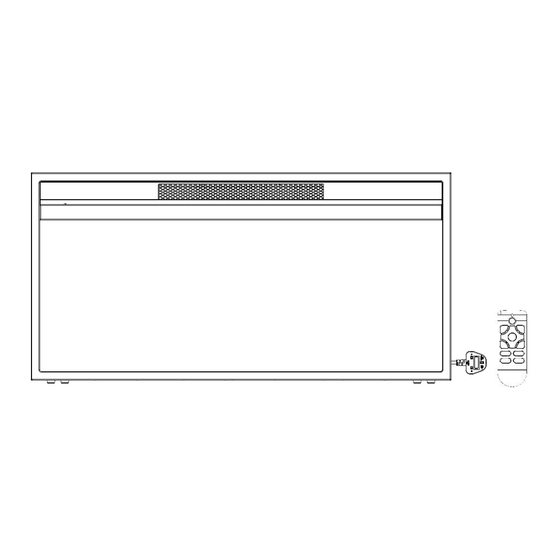
Fire Remote Control & 2 X AAA Batteries Trim (Fitted to the Fire with 12 x 2mm Magnets.) Please ensure all fixings are present before commencing installation. If anything is missing please call Customer Services on 01914300901 or email us at customerservices@bemodern.co.uk 200874_1... -
Page 8: Installation Preparation
If installing into an opening with a finished face material of MDF or MFC, please ensure all internal dimensions are adhered to. See Diagram 2. Required Opening & Minimum Internal Dimensions REQUIRED Opening Dimensions (mm) Rebate (mm) FIRE 22” (4306) 145* 30” (4351) 145* 36” (4304) 145* 42”... -
Page 9: Installing The Fire
Installing the Fire Note: The fire is a two adult person lift. A second person will be required to lift and support the fire during installation. Before the fire can be installed, consideration will need to be given to routing the power supply to the fire. This will affect the stages of the installation process. - Page 10 Installing The Fire Continued….. Ensure all the Magnets are positioned on the brackets on the rear of the Trim. Note: See P6 for the quantity required - dependant on the model purchased. See Diagram 6. Diagram 6 Finally offer the Trim up to the Fire and centralise. See Diagram 7.
-
Page 11: User Instructions - Introduction
User Instructions - Introduction WARNING! Do not operate the appliance if it is damaged or has malfunctioned. If you suspect the appliance is damaged or has malfunctioned call a qualified service engineer to inspect the appliance, and replace any part of the electrical system if necessary, before reuse. WARNING! To reduce the risk of fire, keep textiles, curtains, or any other flammable material a minimum distance of 1 meter from the air outlet. -
Page 12: User Instructions - Manual Control
User Instructions – Manual Controls Switching ON / OFF Use the ON / OFF switch to power on the heater (set it to standby mode). In standby mode, the heater can be operated either manually by the switches located at the front right hand side of heater or by the supplied remote control. -
Page 13: User Instructions - Remote Control
User Instructions – Remote Control Remote Operation NOTE: The heater should be powered on using the ON/OFF switch before it can be operated using remote control. The remote control requires 2xAAA size batteries. Open the battery compartment by sliding the cover down and insert the batteries noting the polarity indicated in the battery compartment. - Page 14 User Instructions – Remote Control Continued….. Display Settings Setting weekday and time Press the key. When the day is flashing press the key to select the day. Press the key again, then press the + or – key to set the hour. Press the key again, then press the + or –...
- Page 15 User Instructions – Remote Control Continued….. Setting timer Up to 10 different timer settings can be programmed. Each timer setting has its day, power-on time and power-off time. The maximum duration of each timer setting is 23 hours 50 minutes. If the power-off time of the timer setting falls on the following day, it is unnecessary to set the day, just set the power-off time.
-
Page 16: Maintenance & Troubleshooting
Fault with temperature sensor either loose or damaged Display showing E2 Dry or broken solder on track of PCB Should you be experiencing any problems with your fire please call Customer Services on 01914300901 or email us at customerservices@bemodern.co.uk 200874_1... -
Page 17: General Information
General Information Environment Meaning of crossed –out wheeled dustbin: Electrical appliances should not be disposed as unsorted municipal waste. Separate collection facilities should be used in the disposal of electrical appliances. Contact your local government for the information about the available collection systems. If electrical appliances are disposed of in landfills or dumps, hazardous substances can leak into the groundwater and get into the food chain, damaging your health and well- being.
Need help?
Do you have a question about the 4306 and is the answer not in the manual?
Questions and answers