Advertisement
Quick Links
Advertisement

Related Manuals for HOOKE ROAD BXG.9810-S


Summary of Contents for HOOKE ROAD BXG.9810-S
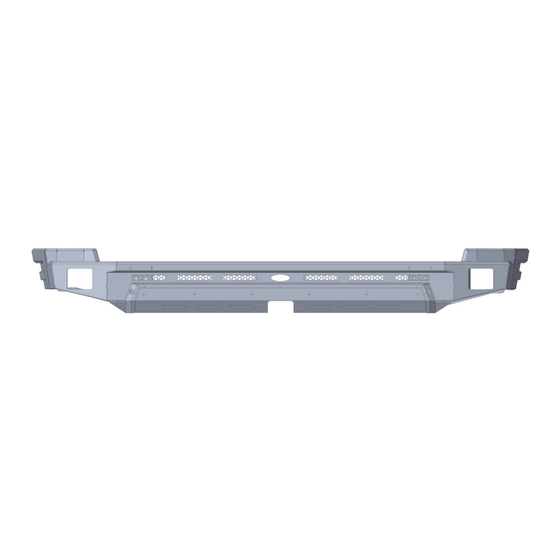
- Page 1 BXG.9810-S Rear Bumper (1) Contents:...
- Page 2 Part Name Size(mm) Picture Flanged Hex Head Bolts M12*1.25*50 Hex Bolt M10*25 Button Head Socket Cap Bolts Screws M8*20 Button Head Socket Cap Bolts Screws M6*16 Button Head Socket Cap Bolts Screws M6*16 Split Lock Washer Flat Washer M12*30*2 Flat Washer M10*25*2 Flat Washer M8*20*1.5...
- Page 3 About 2 hours, 2-3 people may be needed. Installation time may differ according to your mechanical skill level. (PLEASE VERIFY ALL PARTS ARE PRESENT AND READ INSTRUCTIONS CAREFULLY BEFORE STARTING INSTALLATION!) To view the electronic version (BXG.9810-S), please scan the QR code.
- Page 4 (4) Installation instruction: Cutting The Factory Bumper: Step 1: Ready to cut the factory bumper. It is strongly recommended to find a professional for cutting operations. Step 2: Take safety precautions: Ensure the vehicle is parked in a safe location and wear appropriate safety goggles and gloves during the cutting process.
- Page 5 Step 4: Cut the bumper: Carefully cut the bumper using the chosen tool, following the marked positions. Exercise caution to avoid accidental damage or injury, and follow proper cutting techniques. Finishing and refinement: After completing the cut, clean up any debris and refine the cut edges to achieve a neat and smooth appearance.
- Page 6 Install The Bumper: Step 1: According to the schematic diagram of the original vehicle shown in the figure below, identify the twelve installation holes circled to prepare for the installation of our product. Note: 1. You will still need to use the six factory screws removed from the location marked within the red circle.
- Page 7 Step 2: First, in the initial step, connect the wing to the main body using (M6*16) Button Head Socket Cap Bolts Screws and (M6)Flange Hex Lock Nuts. Repeat the same procedure on the other side. Step 3: Assemble the mounting bracket (A) to the bumper using (M10*25)Hex Bolts.
- Page 8 Step 4: Install the mounting bracket (B) to the rear frame with (M8*20) button head socket cap bolts screws. Repeat the same procedure on the other side. Step 5: Before installation, please apply rubber strips along the edges of the factory bumper and the wing of the bumper to prevent scratching the bumper.
- Page 9 Step 6: Lift the bumper, align it with the original vehicle mounting holes. Step 7: Use the factory screws or Flanged Hex Head Bolts (M12*1.25*50) to secure the bumper to the vehicle via mounting bracket (A). Also, reinstall the tow hook on the driver's side. As shown in the picture. Repeat the same procedure on the other side.
- Page 10 Step 8: Use (M8*20)Button Head Socket Cap Bolts Screws, (M8*20*1.5)Flat Washer, (M8)Flange Hex Lock Nuts to attach mounting bracket (B) to the bumper. The bracket can support the bumper. Repeat the same procedure on the other side. Reattach the exhaust pipe on the rear passenger side.
- Page 11 Step 10: Use the factory screws or (M12*1.25*50)Flanged Hex Head Bolts to secure the bumper in this area. Step 11: Install the Decorative Panel onto the bumper. Repeat the same procedure on the other side.
- Page 12 Step 12: The installation is complete. We hope you enjoy a wonderful off-road life with this quality Hooke Road product! Attention: 1.The product parts in this instruction may differ slightly from the actual product contents but generally does not affect the installation of the product.
Need help?
Do you have a question about the BXG.9810-S and is the answer not in the manual?
Questions and answers