Advertisement
Quick Links
Advertisement

Related Manuals for HOOKE ROAD BXG.9915-S


Summary of Contents for HOOKE ROAD BXG.9915-S
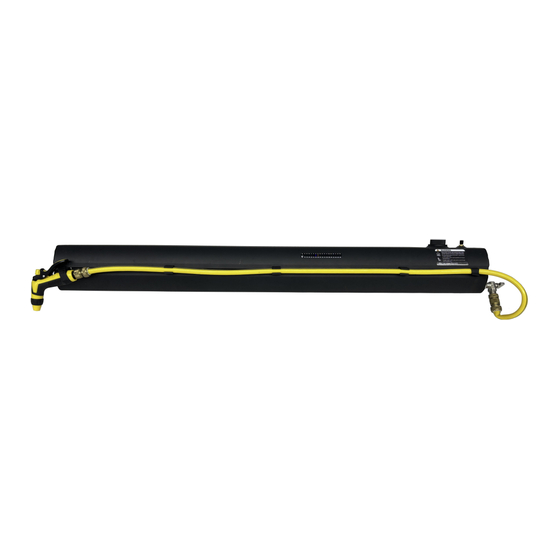
- Page 1 BXG.9915-S Road Shower (1) Contents:...
- Page 2 Part Name Size(mm) Picture Long Carriage Bolts M8*80 Short Carriage Bolts M8*40 Button Head Socket Cap Bolts Screws M4*12 Flat Washer M8*20*2 Flat Washer M4*16*1 Nylon Insert Lock Nut Tee Sliding Slot Nuts (2) Tools required: a. Drive Socket Ratchet Wrench; b.
- Page 3 (PLEASE VERIFY ALL PARTS ARE PRESENT AND READ INSTRUCTIONS CAREFULLY BEFORE STARTING INSTALLATION!) To view the electronic version (BXG.9915-S), please scan the QR code. (4) Installation instruction: WARNING: (1) Safety warnings are affixed to the tank below the fill cap and air valve as an important reminder that you must adhere to those safety protocols when operating Road Shower.
- Page 4 (4) Do not use an automated car wash with Road Shower installed. You must remove the Road Shower from your vehicle prior to entering an automated car wash to avoid damaging your vehicle and Road Shower. (5) Check and tighten the mounting brackets periodically. In addition, always stop and check and tighten mounting brackets while driving on rough roads.
- Page 5 Troubleshooting: If you have a leaking air valve use a schrader valve core tightening tool to tighten the valve. If you have leaks around the on/off valve uninstall the valve, apply thread seal tape, then reinstall the valve according to these instructions.
- Page 6 Step 3: You should remove the quick connector from the one side of the hose .Install the nozzle to the other end of the hose and firmly tighten (hand tighten only). Step 4: Press the another side of the hose into on/off elbow on the Road Shower.
-
Page 7: Installation
Step 5: Snap the hose into the clips and use the velcro straps to secure it in place. Then remove the backing from the adhesive of the thermometer and place the thermometer directly on the tank in the position of your choice. WARNING: Always check the thermometer and test the water on your hand to avoid being scalded. - Page 8 Step 7: Set the Road Shower onto your crossbars inboard of the towers with the bolts straddling your crossbars. Step 8: Put the EVA form strips into the clamps. Assemble the clamps around the crossbar as shown and use a 13mm wrench to install the washers and nuts. Tighten completely to 2 Nm.
- Page 9 FILLING AND PRESSURIZING ROADSHOWER WITH A GARDEN HOSE Note: Clean the tank before using road shower for the first time. Step 9: Remove the nozzle from the garden hose. Install the quick connector into the water supply. Attach the end of the garden hose to a water supply. Step 10: Open the valve on the tank.
- Page 10 Step 11: Remove the air valve cap and use a tire pressure gauge to check the pressure at the air valve. When the pressure reaches 50-65 PSI turn off the water supply and reinstall the air valve cap. Step 12: Close the tank valve,remove the garden hose,and reconnect the sprayer hose.
- Page 11 FILLING AND PRESSURIZING ROADSHOWER WITH A PUMP Step 13: Remove the fill cap from the tank. Fill the tank with clean water. Step 14: Reinstall the fill cap. Step 15: Remove the air valve cap and connect a pump to the air valve.You may use a 12 volt tire compressor,or other suitable pump.Pressurize the tank to 55-65 PSI then reinstall the air valve cap.
- Page 12 65 PSi. If the pressure is not released before it hit reaches 75 PSl,the fill cap should be replaced. Step 16: The installation is complete. We hope you enjoy a wonderful off-road life with this quality Hooke Road product!
- Page 13 Attention: 1.The product parts in this instruction may differ slightly from the actual product contents but generally does not affect the installation of the product. 2.Please feel free to contact your distributor if you have any kind of question about your purchase.
Need help?
Do you have a question about the BXG.9915-S and is the answer not in the manual?
Questions and answers