Table of Contents
Advertisement
Quick Links
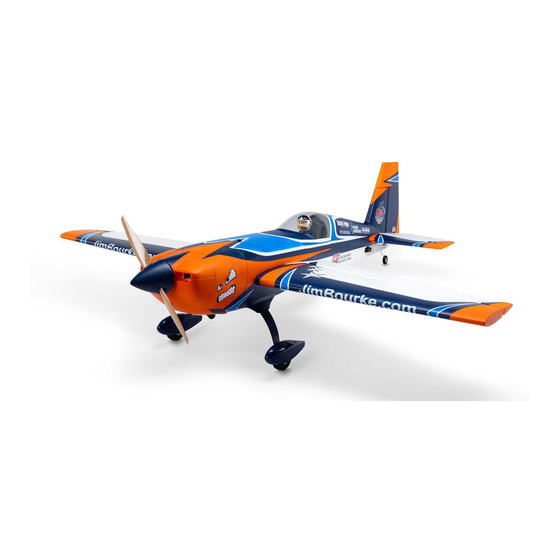
Extra 330 SC 1.3m
Instruction Manual
Scan the QR code and select the Manuals and Support quick links from the
product page for the most up-to-date manual information.
Bedienungsanleitung
Scannen Sie den QR-Code und wählen Sie auf der Produktseite die Quicklinks
Handbücher und Unterstützung, um die aktuellsten Informationen zu Handbücher.
Manuel d'utilisation
Scannez le code QR et sélectionnez les liens rapides Manuals and Support sur la
Manuale di Istruzioni
page du produit pour obtenir les informations les plus récentes sur le manuel.
Scannerizzare il codice QR e selezionare i Link veloci Manuali e Supporto dalla
pagina del prodotto per le informazioni manuali più aggiornate.
EFL05050
EFL05075
760800.1
Created 5/24
Advertisement
Table of Contents

Related Manuals for Horizon Hobby E-flite Extra 330 SC


Summary of Contents for Horizon Hobby E-flite Extra 330 SC
- Page 1 Extra 330 SC 1.3m Instruction Manual Scan the QR code and select the Manuals and Support quick links from the product page for the most up-to-date manual information. Bedienungsanleitung Scannen Sie den QR-Code und wählen Sie auf der Produktseite die Quicklinks Handbücher und Unterstützung, um die aktuellsten Informationen zu Handbücher.
-
Page 2: Safety Precautions And Warnings
Product in a safe and responsible manner could result in injury or damage to the product or other property. This product is not intended for use by children without direct adult supervision. Do not use with incompatible components or alter this product in any way outside of the instructions provided by Horizon Hobby, LLC. -
Page 3: Table Of Contents
Registration Specifications Wingspan 51.5" (1308mm) Register your product today to join our mailing list and Length 49.6" (1260mm) keep up to date with product updates, offers and E-flite ® Without Battery: 63.6oz (1804g) news. Weight With Recommended 4S 3200mAh Flight Battery: 75oz (2131g) Included Equipment Receiver* Spektrum... -
Page 4: Safe ® Select Technology (Bnf Basic)
SAFE Select Technology (BNF Basic) ® The evolutionary SAFE Select technology can offer an extra level of protection ON for takeoffs to counter the torque of the propeller. Turn it OFF in flight for ® so you can perform the first flight with confidence. No complex transmitter unrestricted aerobatic performance, and turn it back ON when a buddy wants programming is required. -
Page 5: Model Assembly
Model Assembly Landing Gear Installation 1. Fit the landing gear into the slot. 2. Install the landing gear cover and secure using four 3 x 15mm screws. 3. Install the tailwheel mount and tailwheel in the bottom of the fuselage using two 2.6 x 12mm flat head screws. Tail Installation Horizontal Stabilizer 1. - Page 6 Wing Installation 1. Remove the magnetic bottom hatch cover. 2. Slide the wing joiner into one of the wing panels. Insert that panel into the wing opening in the fuselage and install the other wing panel onto the wing joiner. Make sure the aileron servo leads from each wing are routed inside the wing saddle and out the bottom hatch.
-
Page 7: Control Surface Centering
Control Surface Centering After assembly and transmitter setup, bind a transmitter to the aircraft receiver and set the trims and sub-trims to 0. If the control surfaces are not centered, adjust the linkages by turning the pushrod end on the linkage to change its length. •... -
Page 8: General Binding Tips And Failsafe
General Binding Tips and Failsafe • The included receiver has been specifically programmed for operation of this • Once bound, the receiver will retain its bind settings for that transmitter until aircraft. Refer to the receiver manual for correct setup if the receiver is replaced. you re-bind. -
Page 9: Safe ® Select Switch Designation
SAFE Select Switch Designation ® SAFE Select technology can be easily assigned to any open switch (2 or 3 ® Mode 1 and 2 Transmitters position) on your transmitter. With this feature, you have the flexibility to enable or disable the technology while in flight. IMPORTANT: Before assigning your desired switch, ensure that the travel for that channel is set at 100% in both directions and the aileron, elevator, rudder and throttle are all on high rate with the travel at 100%. -
Page 10: Control Horn And Servo Arm Settings
Control Horn and Servo Arm Settings NOTICE: If control throws are changed from the factory settings, the AR631 Factory Settings gain values may need to be adjusted. Refer to the Spektrum AR631 manual Control Horns Servo Arms for adjustment of gain values. The table to the right shows the factory settings for the control horns and servo Elevator arms. -
Page 11: Control Surface Throws
Control Surface Direction Test Switch on the transmitter and connect the battery. Use the transmitter to Transmitter command Control Surface Response operate the aileron, elevator, rudder and flap controls. View the aircraft from the rear when checking the control directions. Elevator 1. -
Page 12: In Flight Trimming (Bnf Basic)
In Flight Trimming (BNF Basic) During your first flight, trim the aircraft for level flight at 3/4 throttle. Make small trim adjustments with your transmitter’s trim switches to straighten the aircraft’s flight path. After adjusting the trim, do not touch the control sticks for 3 seconds. This 3 Seconds allows the receiver to learn the correct settings to optimize AS3X performance. -
Page 13: Motor Service
Motor Service CAUTION: Always disconnect the flight battery before performing 3 x 15 mm motor service. Phillips head Disassembly self tapping 1. Remove the spinner screw and spinner. 2. Use a tool to remove the propeller nut and then the prop washer and prop. 3. -
Page 14: Troubleshooting Guide As3X
Troubleshooting Guide AS3X Problem Possible Cause Solution Damaged propeller or spinner Replace propeller or spinner Imbalanced propeller Balance the propeller Motor vibration Replace parts or correctly align all parts and tighten fasteners as needed Oscillation Loose receiver Align and secure receiver in fuselage Loose aircraft controls Tighten or otherwise secure parts (servo, arm, linkage, horn and control surface) Worn parts... -
Page 15: Important Federal Aviation Administration (Faa) Information
What this Warranty Covers BASED IN CONTRACT, WARRANTY, TORT, NEGLIGENCE, STRICT LIABILITY OR Horizon Hobby, LLC, (Horizon) warrants to the original purchaser that the ANY OTHER THEORY OF LIABILITY, EVEN IF HORIZON HAS BEEN ADVISED OF product purchased (the “Product”) will be free from defects in materials and THE POSSIBILITY OF SUCH DAMAGES. -
Page 16: Contact Information
Horizon Technischer Service service@horizonhobby.eu Hanskampring 9 European Union D 22885 Barsbüttel, Germany Sales: Horizon Hobby GmbH +49 (0) 4121 2655 100 FCC Information FCC ID: BRWSPMSR6200A Supplier’s Declaration of Conformity EFL Extra 330 1.3M BNF Basic and PNP (EFL05050, EFL05075);... -
Page 17: Compliance Information For The European Union
EU; RoHS 3 Directive - Amending 2011/65/EU Annex II 2015/863. Champaign, IL 61822 USA EFL Extra 330 1.3M PNP (EFL05075); Hereby, Horizon Hobby, LLC declares that EU Importer of Record: the device is in compliance with the following: EU EMC Directive 2014/30/EU;... - Page 18 ©2024 Horizon Hobby, LLC. E-Flite, Plug-N-Play, Bind-N-Fly, BNF, the BNF logo, DSM, DSM2, DSMX, AirWare, IC3, AS3X, SAFE, the SAFE logo, ModelMatch, and the Horizon Hobby logo are trademarks or registered trademarks of Horizon Hobby, LLC. The Spektrum trademark is used with permission of Bachmann Industries, Inc. All other trademarks, service marks and logos are property of their respective owners.
Need help?
Do you have a question about the E-flite Extra 330 SC and is the answer not in the manual?
Questions and answers