
Subscribe to Our Youtube Channel
Related Manuals for Horizon Hobby E-FLITE Ultrix


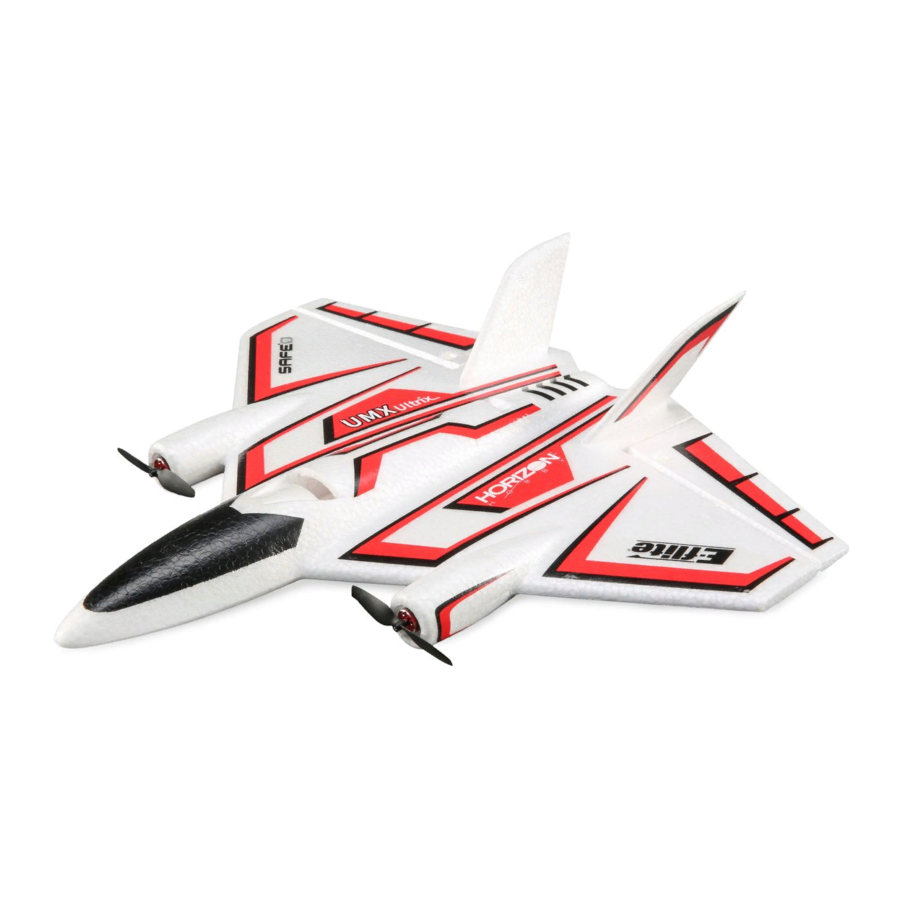
Summary of Contents for Horizon Hobby E-FLITE Ultrix
- Page 1 600mm Instruction Manual Bedienungsanleitung Manuel d’utilisation Manuale di Istruzioni...
-
Page 2: Safety Precautions And Warnings
WARNING AGAINST COUNTERFEIT PRODUCTS: If you ever need to replace your Spektrum receiver found in a Horizon Hobby product, always purchase from Horizon Hobby, LLC or a Horizon Hobby authorized dealer to ensure authentic high-quality Spektrum product. Horizon Hobby, LLC disclaims all support and warranty with regards, but not limited to, compatibility and performance of counterfeit products or products claiming compatibility with DSM or Spektrum technology. -
Page 3: Table Of Contents
Box Contents Table of Contents Safety Precautions and Warnings ........2 Smart Technology Telemetry ..........8 Box Contents ..............3 SAFE Technology ............9 ® Table of Contents .............3 Flying Tips and Repairs ............9 Specifications ..............3 Post Flight Checklist ............10 Components ..............3 Service of Power Components ........10 Preflight Checklist ............4 Replacement Parts List ..........10 Transmitter Setup ............4... -
Page 4: Preflight Checklist
Preflight Checklist 1 Remove and inspect contents. 8 Make sure all linkages move freely. 2 Read the instruction manual thoroughly. 9 Perform the control direction test. 3 Charge the flight battery. 10 Adjust the flight controls and transmitter as needed. 4 Program your transmitter. -
Page 5: Install The Vertical Stabilizers
Install the Vertical Stabilizers Press the vertical stabilizers into position. Optional Nose Gear Invert the aircraft and press the optional nose gear into the slot on the bottom of the fuselage. -
Page 6: Battery Placement And Center Of Gravity (Cg)
Battery Placement and Center of Gravity (CG) The CG location is 290mm back from the nose, which was determined with the recommended battery at the front of the battery tray. -Sport Flying Battery Location: Install the battery in the front of the battery compartment. -Extreme 3D Location: Install the battery so that the back edge of the battery is aligned with the front edge of the battery hatch opening. -
Page 7: Arming The Esc
Arming the ESC Arming the ESC also occurs after binding as previously described, but subsequent connection of a flight battery requires the steps below. Lower throttle and throttle trim Install the flight battery and Keep plane immobile, to lowest settings. connect it to the ESC. -
Page 8: Control Direction Test
Control Direction Test Properly bind your aircraft and transmitter before doing these tests. Verify the linkages move freely. Switch ON the transmitter and connect the battery. Use the transmitter to operate the aileron and elevator controls. View the aircraft from the rear when checking the control directions. -
Page 9: Safe ® Technology
SAFE Technology ® The Ultrix has two flight modes on Channel 5, SAFE and through a turn. To fly smoothly with SAFE, avoid making AS3X. frequent control changes and don’t attempt to correct for When flying in SAFE mode, the aircraft will return to level minor deviations. -
Page 10: Post Flight Checklist
Post Flight Checklist 1 Disconnect the flight battery from the ESC. 5 Repair or replace all damaged parts. 2 Power OFF the transmitter. Store the flight battery apart from the aircraft and monitor the battery charge. 3 Remove the flight battery from the aircraft. Make note of the flight conditions and flight plan 4 Recharge the flight battery. -
Page 11: Recommended Parts List
Recommended Parts List Part # Description SPMX8503S30 850mAh 3S Smart G2 30C; IC2 SPMXC1080 Smart S1100 AC Charger, 1x100W SPMXCA320 Adapter: IC3 Batt / IC2 Dev 6 Optional Parts Part # Description EFL02205 LED Set: Ultrix 600mm Receiver Wiring Diagram Reference the following diagram for all wiring connections to the receiver. -
Page 12: Troubleshooting Guide
Troubleshooting Guide Problem Possible Cause Solution Reset controls with throttle stick and throttle Throttle stick and/or throttle trim too high trim at lowest setting Aircraft will not respond to throttle but responds to other Throttle channel is reversed Reverse throttle channel on transmitter controls Open fuselage and make sure motor is Motor disconnected from receiver... -
Page 13: Limited Warranty
Product, (iv) attempted Product securely using a shipping carton. Please note that service by anyone other than a Horizon Hobby authorized original boxes may be included, but are not designed to service center, (v) Product not purchased from an authorized withstand the rigors of shipping without additional protection. -
Page 14: Warranty And Service Contact Information
Horizon Technischer Service service@horizonhobby.de Hanskampring 9 European Union D 22885 Barsbüttel, Germany Sales: Horizon Hobby GmbH +49 (0) 4121 2655 100 FCC Information Contains FCC ID: BRWWACO1T harmful interference in a residential installation. This This equipment complies with FCC and IC radiation equipment generates, uses and can radiate radio exposure limits set forth for an uncontrolled environment. -
Page 15: Compliance Information For The European Union
EFL Ultrix 600mm BNF Basic (EFL02250) This appliance is labeled in accordance with European Directive 2012/19/EU concerning Hereby, Horizon Hobby, LLC declares that waste of electrical and electronic equipment the device is in compliance with the following: EU Radio (WEEE). This label indicates that this product... - Page 16 E-flite, Ultrix, AS3X, DSM, DSM2, DSMX, Spektrum Airware, Bind-N-Fly, BNF, the Bind-N-Fly logo, SAFE, the SAFE logo, ModelMatch, IC2, and the Horizon Hobby logo are trademarks or registered trademarks of Horizon Hobby, LLC. The Spektrum trademark is used with permission of Bachmann Industries, Inc. All other trademarks, service marks and logos are property of their respective owners.
Need help?
Do you have a question about the E-FLITE Ultrix and is the answer not in the manual?
Questions and answers