Table of Contents
Advertisement
Quick Links
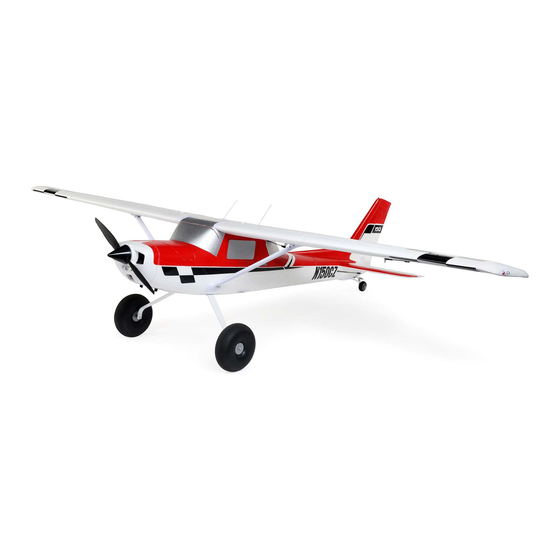
Carbon-Z Cessna 150T 2.1m
Scan the QR code and select the Manuals and Support quick links from the
product page for the most up-to-date manual information.
Scannen Sie den QR-Code und wählen Sie auf der Produktseite
die Quicklinks Handbücher und Unterstützung, um die aktuellsten
Informationen zu Handbücher.
Scannez le code QR et sélectionnez les liens rapides Manuals and Support
sur la page du produit pour obtenir les informations les plus récentes sur
le manuel.
Scannerizzare il codice QR e selezionare i Link veloci Manuali e Supporto
EFL12750
EFL12775
dalla pagina del prodotto per le informazioni manuali più aggiornate.
Instruction Manual
Bedienungsanleitung
Manuel d'utilisation
Manuale di Istruzioni
Advertisement
Table of Contents

Related Manuals for Horizon Hobby E-FLITE Carbon-Z Cessna 150T 2.1m


Summary of Contents for Horizon Hobby E-FLITE Carbon-Z Cessna 150T 2.1m
- Page 1 Carbon-Z Cessna 150T 2.1m Scan the QR code and select the Manuals and Support quick links from the product page for the most up-to-date manual information. Scannen Sie den QR-Code und wählen Sie auf der Produktseite die Quicklinks Handbücher und Unterstützung, um die aktuellsten Informationen zu Handbücher.
- Page 2 This product is not intended for use by children without direct adult supervision. Do not use with incompatible components or alter this product in any way outside of the instructions provided by Horizon Hobby, LLC. This manual contains instructions for safety, operation and maintenance.
-
Page 3: Table Of Contents
Box Contents Quick Start Information Set up your transmitter Transmitter Setup using the transmitter setup chart High Rate Low Rate p = 30mm p = 25mm Aileron: q = 30mm q = 25mm Dual Rates* p = 35mm p = 25mm Elevator: q = 35mm q = 25mm... -
Page 4: Select Technology (Bnf Basic)
SAFE Select Technology (BNF Basic) ® The BNF Basic version of this airplane includes SAFE Select technology which can SAFE Select can be configured three ways; offer an extra level of protection in flight. Use the following instructions to make the •... -
Page 5: Binding
Binding General Binding Tips and Failsafe • The included receiver has been specifically programmed • Once bound, the receiver will retain its bind settings for operation of this aircraft. Refer to the receiver manual for that transmitter until you re-bind. for correct setup if the receiver is replaced. -
Page 6: Model Assembly
Model Assembly Required Adhesives: Thin CA Tip: There are spare screws included with the airplane in case a fastener is lost. Rudder Installation 1. Slide the rudder’s CA hinges (A) into the hinge slots (B) of the vertical fin. Make sure to place the tail light and wire (C) on the left side of the rudder. - Page 7 Tail Gear Installation 1. Install the tail gear springs (A) as shown. 2. Install the opposite ends of the tail gear springs to the tail gear assembly (B). 3. Secure the tail gear assembly into place using the included M3 x 30mm screw (C) in the front hole and the M3 x 10mm screw (D) for the rear hole.
- Page 8 Horizon Hobby does not warrant replacement if the servos are used under extreme vibration or the stabilization system is used with an unbalanced propeller. 2.5 x 10mm CAUTION: Remove the propeller before radio system setup or accidental injury may occur.
- Page 9 Horizontal Tail Installation 1. Slide the horizontal tail tube (A) into the hole in the rear of the fuselage. 2. Install the 2 piece (left and right) horizontal tail as shown. Ensure the control horn faces down. 3. Install two M3 x 12mm screws (B) in the holes in the bottom of the horizontal tail.
- Page 10 Main Wing Installation 1. Secure each wing strut to the wing using the included M2.5 nut (A) and M2.5 x 20mm M2.5 x 20mm bolt (B). Tighten the M2 nut and M2.5 x 20mm screw using a 5mm nut driver and a 2.0 hex wrench. Note the orientation of the fuselage end of the strut.
-
Page 11: Pnp Receiver Selection And Installation
Scale Antenna Installation Install the antenna (I) by pushing them into place. PNP Receiver Selection and Installation The recommended receiver for this aircraft is the Spektrum AR637T. If you choose to install a different receiver, ensure that it is at least a 6-channel AR637T Port full range receiver. -
Page 12: Optional Tricycle Gear Installation (Sold Separately)
Optional Tricycle Gear Installation (Sold Separately) Main Gear Installation 1. Place the two main landing gear halves (A) into the pocket on the bottom M3 X 18mm of the fuselage. 2. Secure them into place using the mounting plate (B) and 6 included M3 x 18mm screws (C). - Page 13 Nose Gear Installation Continued 1. Remove the top hatch (A) to access the nose gear/rudder servo arm. 2. Attach the nose gear pushrod (B) to the servo arm (C). Attach the pushrod to the third outermost hole as shown and re-install the pushrod retainer. When needed, disassemble in reverse order.
-
Page 14: Battery Installation And Esc Arming
Battery Installation and ESC Arming Battery Selection We recommend the Spektrum 5000mAh 22.2V 6S 30C Li-Po battery (SPMX50006S30). Refer to the Optional Parts List for other recommended batteries. If using a battery other than those listed, the battery should be within the range of capacity, dimensions and weight of the Spektrum Li-Po battery packs to fit in the fuselage. -
Page 15: Control Surface Centering And Adjusting A Ball Link
Control Surface Centering and Adjusting a Ball Link IMPORTANT: Perform the Control Direction Test before performing control surface centering. While SAFE is inactive, mechanically center the control surfaces. IMPORTANT: Correct operation of the SAFE system requires sub-trim and trim at 0. After binding a transmitter to the receiver, set the trims and sub-trims to 0, ensure the servo arms are in the correct positions, then adjust the linkages to center the control surfaces. -
Page 16: Integrated Esc Telemetry
Integrated ESC Telemetry BNF: This aircraft includes telemetry between the ESC and receiver, which can Telemetry Setup provide information including RPM, voltage, motor current, throttle setting (%), and 1. Begin with the transmitter bound to the receiver. FET (speed controller) temperature. 2. -
Page 17: Thrust Reversing (Optional)
Thrust Reversing (Optional) The Avian™ Smart ESC in this aircraft is equipped with thrust reversing, but it must be enabled before it will function. Reversing the motor can be helpful when Set up the transmitter according to the setup chart, and bind your transmitter to the taxiing or for shortening ground roll after a landing. -
Page 18: Control Direction Test
Control Direction Test Switch on the transmitter and connect the battery. Use the transmitter to operate Transmitter Command Control SurfaceResponse the aileron, elevator and rudder controls. View the aircraft from the rear when checking the control directions. The BNF Basic version of this model has a built in aileron to rudder mix, when the ailerons are deflected the rudder will move. -
Page 19: As3X Response Test
AS3X Response Test This test ensures that the AS3X ® control system is functioning properly. Aircraft movement AS3X Reaction Assemble the aircraft and bind your transmitter to the receiver before performing this test. 1. Raise the throttle just above 25%, then lower the throttle to activate AS3X. CAUTION: Keep all body parts, hair and loose clothing away from a moving propeller, as these items could become entangled. -
Page 20: Flying Tips And Repairs
Flying Tips and Repairs Consult local laws and ordinances before choosing a flying location. Flying Field WARNING: Always decrease throttle at propeller strike. NOTICE: When using flaps with this airplane, down elevator to flap mixing is Always choose a wide-open space for flying your aircraft. It is recommended that required. -
Page 21: Flying Tips And Repairs Continued
Flying Tips and Repairs Continued Water Takeoff and Landing Using the Optional Float Set (Float Set EFLA5600 and Wire Mounting Set EFLA5605) Only use the floats if you are comfortable flying your aircraft and have repeatedly CAUTION: Never go alone to get a downed model in the water. taken off, flown and landed with success. -
Page 22: Post Flight
Post Flight 5. Repair or replace all damaged parts. 1. Disconnect the flight battery from the ESC (Required for Safety and battery life). 6. Store the flight battery apart from the aircraft and monitor the battery charge. 2. Power OFF the transmitter. 7. -
Page 23: Replacement Parts
Troubleshooting Guide Continued Problem Possible Cause Solution Control surface, control horn, linkage or servo Replace or repair damaged parts and adjust controls damage Wire damaged or connections loose Do a check of wires and connections, connect or replace as needed Control surface does not Transmitter is not bound correctly or the incorrect move... -
Page 24: Ama National Model Aircraft Safety Code
(iii) modification of or to any part process found on our website or call Horizon to obtain a Return Merchandise of the Product, (iv) attempted service by anyone other than a Horizon Hobby authorized Authorization (RMA) number. Pack the Product securely using a shipping carton. -
Page 25: Contact Information
It should be deposited at an appropriate facility to enable recovery and recycling. EFL Carbon-Z Cessna 150T BNF Basic (EFL12750); Hereby, Horizon Hobby, LLC EU Manufacturer of Record: declares that the device is in compliance with the following: EU Radio Equipment... - Page 26 E-flite, Avian, Plug-N-Play, Bind-N-Fly, BNF, the BNF logo, DSM, DSM2, DSMX, Spektrum AirWare, IC3, IC5, AS3X, SAFE, the SAFE logo, the Smart Technology logo, ModelMatch, and the Horizon Hobby logo are trademarks or registered trademarks of Horizon Hobby, LLC. The Spektrum trademark is used with permission of Bachmann Industries, Inc.
Need help?
Do you have a question about the E-FLITE Carbon-Z Cessna 150T 2.1m and is the answer not in the manual?
Questions and answers