Table of Contents
Advertisement
Quick Links
Advertisement
Table of Contents

Subscribe to Our Youtube Channel
Related Manuals for VOSS VKI60340HV


Summary of Contents for VOSS VKI60340HV
- Page 1 VKI60340HV User Manual Cooker USER MANUAL...
-
Page 2: Table Of Contents
14. ENVIRONMENTAL CONCERNS................41 DEAR CUSTOMER Thank you for choosing this Voss-Electrolux product. We have created it to give you impeccable performance for many years, with innovative technologies that help make life simpler – features you might not find on ordinary appliances. Please spend a few minutes reading to get the very best from it. -
Page 3: Safety Information
ENGLISH SAFETY INFORMATION Before the installation and use of the appliance, carefully read the supplied instructions. The manufacturer is not responsible for any injuries or damage that are the result of incorrect installation or usage. Always keep the instructions in a safe and accessible location for future reference. - Page 4 This appliance may be used in, offices, hotel guest • rooms, bed & breakfast guest rooms, farm guest houses and other similar accommodation where such use does not exceed (average) domestic usage levels. Only a qualified person must install this appliance and •...
- Page 5 ENGLISH In case the appliance is connected to the mains directly using junction box, remove the fuse to disconnect the appliance from power supply. In either case contact the Authorised Service Centre. After use, switch off the hob element by its control and •...
-
Page 6: Safety Instructions
2. SAFETY INSTRUCTIONS 2.1 Installation • Do not use multi-plug adapters and extension cables. WARNING! • Do not let mains cables touch or Only a qualified person must come near the appliance door or the install this appliance. niche below the appliance, especially when it operates or the door is hot. - Page 7 ENGLISH • Do not use the appliance as a work • Do not keep hot cookware on the surface or as a storage surface. control panel. • Users with a pacemaker must keep a • Do not let cookware boil dry. distance of minimum 30 cm from the •...
-
Page 8: Installation
2.6 Service • Do not clean the catalytic enamel (if applicable) with any kind of detergent. • To repair the appliance contact the Authorised Service Centre. 2.5 Internal lighting • Use original spare parts only. WARNING! 2.7 Disposal Risk of electric shock. -
Page 9: Product Description
ENGLISH 3.3 Anti-tilt protection CAUTION! Install the anti-tilt protection to prevent the appliance from falling under incorrect loads. The anti-tilt protection only works when the appliance is put in a correct area. Your appliance has the symbols shown on the Make sure you install the pictures (if applicable) to anti-tilt protection at the... -
Page 10: Before First Use
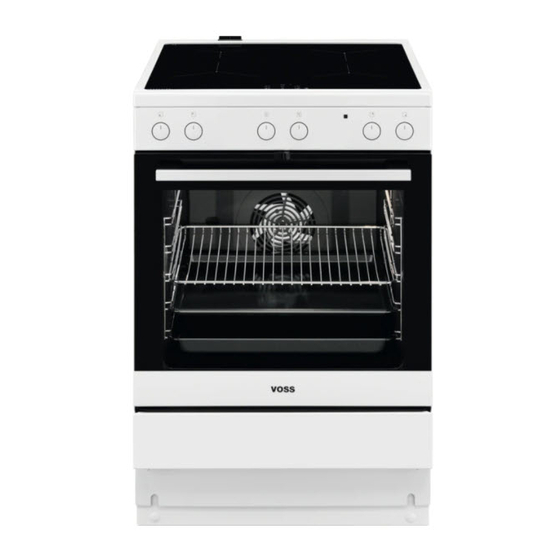
4.2 Hob overview Induction cooking zone Control Panel 4.3 Accessories • Telescopic runners For shelves and trays. • Wire shelf • Storage drawer For cookware, cake tins, roasts. The storage drawer is below the oven • Baking tray cavity. -
Page 11: Hob - Daily Use
ENGLISH To open the door move the lock to the 4. Hold the door trim B at each side and right. position it on the inner edge of the door. Put the door trim into the top edge of the door. Close the door without pressing the lever. - Page 12 6.1 Hob control panel Use the sensor fields to operate the appliance. The displays, indicators and sounds tell which functions operate. Sen‐ Function Comment field Heat setting display To show the heat setting. Timer indicators of cooking To show for which zone you set the time.
- Page 13 ENGLISH Display Description Pause operates. Automatic Heat Up operates. PowerBoost operates. There is a malfunction. + digit OptiHeat Control (3 step Residual heat indicator): continue cooking / keep warm / residual heat. Lock / Child Safety Device operates. Incorrect or too small cookware or no cookware on the cooking zone. Automatic Switch Off operates.
- Page 14 To set the cooking zone: touch Heat setting The hob deacti‐ again and again until the indicator of a vates after necessary cooking zone comes on. 6 hours To activate the function: touch , 1 - 2 the timer to set the time (00 - 99 minutes).
- Page 15 ENGLISH Minute Minder When you deactivate the You can use this function as a Minute hob, you also deactivate this Minder when the hob is activated and function. the cooking zones do not operate. The heat setting display shows 6.11 Child Safety Device To activate the function: touch This function prevents an accidental operation of the hob.
- Page 16 Both the hob and the hood have Changing the automatic mode an infrared signal communicator. Speed 1. Deactivate the appliance. of the fan is defined automatically on 2. Press until you hear a beep and basis of mode setting and temperature of keep it pressed until you hear the the hottest cookware on the hob.
-
Page 17: Hob - Hints And Tips
ENGLISH • The function reduces the power of the The light on the hood other cooking zones connected to the deactivates 2 minutes after same phase. deactivating the hob. • The heat setting display of the reduced zones changes between two 6.14 Power management levels. - Page 18 7.3 The noises during count down timer sounds. The difference in the operation time depends on the operation heat setting level and the length of the cooking operation. If you can hear: • crack noise: cookware is made of 7.5 Examples of cooking...
-
Page 19: Hob - Care And Cleaning
ENGLISH Heat setting Use to: Time Hints (min) 5. - 7 Gentle fry: escalope, veal cor‐ as nec‐ Turn over when needed. don bleu, cutlets, rissoles, essary sausages, liver, roux, eggs, pancakes, doughnuts. 7 - 8 Heavy fry, hash browns, loin 5 - 15 Turn over when needed. - Page 20 Symbol Oven function Application Off position The oven is off. Hot Air To bake on up to two shelf positions at the same time and to dry food. Set the temperature 20 - 40 °C lower than for Con‐...
- Page 21 ENGLISH 9.2 Activating and deactivating the oven It depends on the model if your appliance has knob symbols, indicators or lamps: • The indicator comes on when the oven heats up. • The lamp comes on when the oven operates. •...
-
Page 22: Oven - Hints And Tips
Put the baking tray or deep pan on the telescopic runners. 10. OVEN - HINTS AND TIPS You can extend the baking time by 10 – WARNING! 15 minutes if you bake cakes on more Refer to Safety chapters. - Page 23 ENGLISH Baking results Possible cause Remedy The cake is not ready in The oven temperature is too Next time set a slightly higher the baking time speci‐ low. oven temperature. fied in a recipe. 10.3 Hot Air Baking Food Temperature Time (min) Shelf posi‐...
- Page 24 Food Temperature Time (min) Shelf posi‐ (°C) tion Fruit tarts, short crust pastry 150 - 160 finishing 35 - 45 2 + 4 Fruit tarts, crumble pastry 170 - 180 30 - 40 2 + 4 10.4 Hot Air Cooking...
- Page 25 ENGLISH Food Temperature Time (min) Shelf posi‐ (°C) tion Ciabatta rolls 210 - 230 10 - 20 3 - 4 Foccacia 220 - 230 15 - 20 3 - 4 Pita bread 5 - 15 3 - 4 Pretzels 180 - 200 12 - 15 3 - 4 White loaf...
- Page 26 Food Temperature (°C) Time (min) Shelf posi‐ tion Meatloaf 175 - 200 45 - 60 Danish meatballs 175 - 200 30 - 45 Liver pâté 180 - 200 50 - 60 Gratin 180 - 200 50 - 60 Potato gratin...
- Page 27 ENGLISH Food Temperature (°C) Time (min) Shelf posi‐ tion Tarts, home made finishing 175 - 200 35 - 45 Tarts, frozen 190 - 210 15 - 25 1) Preheat the oven. 10.8 Moist Fan Baking Bread and pizza Food Temperature (°C) Time (min) Shelf posi‐...
- Page 28 Small baked items Food Temperature (°C) Time (min) Shelf posi‐ tion Cookies 25 - 35 Macaroons 25 - 35 Muffins 25 - 35 Savoury cracker 20 - 30 Short crust pastry biscuits 25 - 35 Tartelettes 15 - 25...
- Page 29 ENGLISH Veal Food Temperature Time (min / kg) Shelf posi‐ (°C) tion 60 - 70 2 - 3 Fillet of beef 1) Other. Can be browned off after roasting under the grill or with top / bottom heat at 250°C. If you are using a meat probe, remove it before grilling.
- Page 30 Food Temperature (°C) Time (min / kg) Shelf posi‐ tion Rump steak - browning total 10 2 - 3 Rump steak - roasting 50 - 60 2 - 3 Roast beef 90 - 120 1 - 3 1) Other. Can be browned off after roasting under the grill or with top / bottom heat at 250°C. If you are using a meat probe, remove it before grilling.
- Page 31 ENGLISH Food Temperature (°C) Time (min / kg) Shelf posi‐ tion Turkey breast 70 - 80 Whole chicken 60 - 90 1) Other. Can be browned off after roasting under the grill or with top / bottom heat at 250°C. If you are using a meat probe, remove it before grilling.
- Page 32 Poultry Food Quantity Temperature Time (min) Shelf posi‐ (°C) tion Poultry portions 200 - 250 g each 200 - 220 30 - 50 Duck 1.5 - 2 kg 180 - 200 80 - 100 Goose 3.5 - 5 kg...
- Page 33 ENGLISH Vegetables Shelf position Temperature Food Time (h) 2 posi‐ (°C) 1 position tions Beans 60 - 70 6 - 8 2 / 4 Peppers 60 - 70 5 - 6 2 / 4 Vegetables for sour 60 - 70 5 - 6 2 / 4 Mushrooms...
-
Page 34: Oven - Care And Cleaning
Food Function Temper‐ Time (min) Accesso‐ Shelf ature ries position (°C) Apple pie, 2 tins (ø Pie / Pizza 60 - 80 Grid 20 cm) on the grid, diagonally shifted Fatless sponge cake, Conventional 30 - 40 Grid 1 tin (ø 26 cm) on the... - Page 35 ENGLISH Clean the cavity after each use. Fat accumulation or other residue may cause fire. Do not store the food in the appliance for longer than 20 minutes. Dry the cavity only with a microfibre cloth after each use. Everyday Use Clean all accessories after each use and let them dry.
- Page 36 11.6 Removing and cleaning the door glasses The door glass in your product can be different in type and shape from the examples you see in the images. The number of glasses can also be different. 1. Hold the door trim B on the top edge...
-
Page 37: Troubleshooting
ENGLISH The back lamp 3. Clean the glass cover. 4. Replace the lamp with a suitable 300 The lamp glass cover is at °C heat-resistant lamp. the back of the cavity. 5. Install the glass cover. 6. Install the left shelf support. 1. - Page 38 Problem Possible cause Remedy You cannot activate the ap‐ The fuse is blown. Make sure that the fuse is pliance. the cause of the malfunction. If the fuse is blown again and again, contact a quali‐ fied electrician. You cannot activate or oper‐...
-
Page 39: Energy Efficiency
......... Serial number (S.N.) ......... 13. ENERGY EFFICIENCY 13.1 Product Information according to EU Ecodesign Regulations for hob Model identification VKI60340HV Type of hob Hob inside Freestanding Cooker Number of cooking zones Heating technology Induction Diameter of circular cooking Left front 21.0 cm... - Page 40 13.3 Product Information and Product Information Sheet according to EU Ecodesign and Energy Labelling Regulations for ovens Supplier's name Voss Model identification VKI60340HV 947942462 Energy Efficiency Index 95.3 Energy efficiency class Energy consumption with a standard load, conven‐ 0.95 kWh/cycle...
-
Page 41: Environmental Concerns
ENGLISH 13.4 Oven - Energy saving Residual heat When the cooking duration is longer than The appliance has features 30 min, reduce the appliance which help you save energy temperature to minimum 3 - 10 min during everyday cooking. before the end of cooking. The residual heat inside the appliance will continue to Make sure that the appliance door is cook. - Page 44 www.voss.dk...
Need help?
Do you have a question about the VKI60340HV and is the answer not in the manual?
Questions and answers