Table of Contents
Advertisement
Quick Links
Advertisement
Table of Contents

Subscribe to Our Youtube Channel
Related Manuals for VOSS VKI67382S


Summary of Contents for VOSS VKI67382S
- Page 1 VKI67382S User Manual Cooker USER MANUAL...
-
Page 2: Table Of Contents
17. ENVIRONMENTAL CONCERNS................44 DEAR CUSTOMER Thank you for choosing this Voss-Electrolux product. We have created it to give you impeccable performance for many years, with innovative technologies that help make life simpler – features you might not find on ordinary appliances. Please spend a few minutes reading to get the very best from it. -
Page 3: Safety Information
ENGLISH SAFETY INFORMATION Before the installation and use of the appliance, carefully read the supplied instructions. The manufacturer is not responsible for any injuries or damage that are the result of incorrect installation or usage. Always keep the instructions in a safe and accessible location for future reference. - Page 4 This appliance may be used in, offices, hotel guest • rooms, bed & breakfast guest rooms, farm guest houses and other similar accommodation where such use does not exceed (average) domestic usage levels. Only a qualified person must install this appliance and •...
- Page 5 ENGLISH In case the appliance is connected to the mains directly using junction box, remove the fuse to disconnect the appliance from power supply. In either case contact the Authorised Service Centre. After use, switch off the hob element by its control and •...
-
Page 6: Safety Instructions
2. SAFETY INSTRUCTIONS 2.1 Installation • Do not use multi-plug adapters and extension cables. WARNING! • Do not let mains cables touch or Only a qualified person must come near the appliance door or the install this appliance. niche below the appliance, especially when it operates or the door is hot. - Page 7 ENGLISH • Do not use the appliance as a work • Discoloration of the enamel or surface or as a storage surface. stainless steel has no effect on the • Users with a pacemaker must keep a performance of the appliance. distance of minimum 30 cm from the •...
- Page 8 • Small pets can also be highly cleaning pads, solvents or metal sensitive to the localized temperature objects. changes in the vicinity of all Pyrolytic • If you use an oven spray, follow the Ovens when the Pyrolytic cleaning safety instructions on the packaging.
-
Page 9: Installation
ENGLISH • Cut off the mains electrical cable • Remove the door catch to prevent close to the appliance and dispose of children or pets from becoming trapped in the appliance. 3. INSTALLATION WARNING! Refer to Safety chapters. 3.1 Technical data Dimensions Height 850 - 936 mm... -
Page 10: Product Description
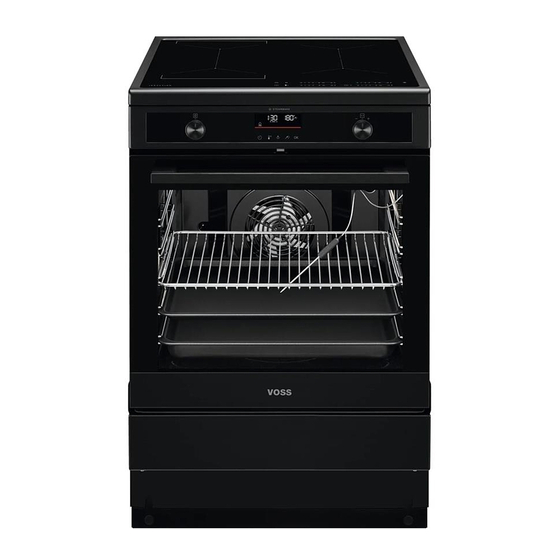
Make sure you install the anti-tilt protection at the correct height. For more information about the installation of the appliance refer to a separate installation booklet 4. PRODUCT DESCRIPTION 4.1 General overview Knob for the heating functions Display Control knob... -
Page 11: Before First Use
ENGLISH To bake and roast or as pan to collect • Storage drawer fat. The storage drawer is below the oven • Core temperature sensor cavity. To measure how far the food is To open the drawer, push the drawer. cooked. - Page 12 Use the sensor fields to operate the appliance. The displays, indicators and sounds tell which functions operate. Sen‐ Function Comment field ON / OFF To activate and deactivate the hob. Lock / Child Safety Device To lock / unlock the control panel.
- Page 13 ENGLISH Display Description Lock / Child Safety Device operates. Incorrect or too small cookware or no cookware on the cooking zone. Automatic Switch Off operates. 6.3 OptiHeat Control (3 step • all cooking zones are deactivated, • you do not set the heat setting after Residual heat indicator) you activate the hob, •...
- Page 14 To activate the function the cooking zone must be cold. To activate the function for a cooking zone: touch comes on). Immediately touch a desired heat setting. 6.7 Using the cooking zones After 3 seconds comes on. Put the cookware on the cross / square To deactivate the function: change the which is on the surface that you cook.
- Page 15 ENGLISH remaining time counts back to 00. The When the function operates, you cannot indicator of the cooking zone goes out. change the heat setting. The function does not stop the timer When the time comes to an functions. end, the sound operates and 00 flashes.
- Page 16 6.15 OffSound Control Automatic modes (Deactivating and activating Auto‐ Boil‐ the sounds) Frying matic light Deactivate the hob. Touch for 3 seconds. The display comes on and Mode H0 Off goes out. Touch for 3 seconds. Mode H1 On comes on.
-
Page 17: Hob - Hints And Tips
ENGLISH 6.17 Power management When you finish cooking and function deactivate the hob, the hood fan may still operate for a • Cooking zones are grouped according certain period of time. After to the location and number of phases that time the system in the hob. - Page 18 • water boils very quickly on a zone set • crack noise: cookware is made of to the highest heat setting. different materials (a sandwich • a magnet pulls on to the bottom of the construction). cookware. • whistle sound: you use a cooking...
-
Page 19: Hob - Care And Cleaning
ENGLISH Heat setting Use to: Time Hints (min) 3 - 5 Simmer rice and milk-based 25 - 50 Add at least twice as much liq‐ dishes, heat up ready-cooked uid as rice, mix milk dishes meals. halfway through the proce‐ dure. -
Page 20: Oven - Daily Use
After cleaning, wipe the surface with a cloth. hob dry with a soft cloth. • Remove shiny metallic discoloration: use a solution of water 9. OVEN - DAILY USE WARNING! Refer to Safety chapters. - Page 21 ENGLISH 3. Turn the knob for the temperature to choose the position you need and press Position Default Setting Setting Options hour Time of Day set Time of Day Display Brightness 1-2-3-4-5 Key Tones 1-beep/2-click/3-none Buzzer Volume 1-2-3-4 Food Sensor 1-alarm+STOP/2-alarm Uptimer ON-OFF...
- Page 22 Symbol Oven function Application Steam Bake To add humidity during the cooking. To get the right colour and crispy crust during baking. To give more juiciness during reheating. Pizza Function To bake pizza. To make intensive browning and a crispy bottom.
- Page 23 ENGLISH 9.4 Activating and 5. Put food in the appliance and close the oven door. deactivating the oven CAUTION! It depends on the model if Do not refill the cavity your appliance has knob embossment with water symbols, indicators or during cooking or when lamps: the oven is hot.
- Page 24 9.11 Using the Core temperature sensor This function prevents an accidental change of the oven function. The core temperature sensor measures the core temperature inside of food. Turn it on when the oven works - the set When the food reaches the set cooking continues, the control panel is temperature, the appliance turns off.
- Page 25 ENGLISH 9.13 Telescopic runners - 7. Turn off the appliance. inserting the oven WARNING! accessories Be careful when you remove the tip and plug of the core temperature sensor. The Keep the installation core temperature sensor is instructions for the hot.
-
Page 26: Oven - Clock Functions
10. OVEN - CLOCK FUNCTIONS 10.1 Clock functions 3. Turn the knob for the temperature to set the Minute Minder. 00:00 pulses on the display 4. Press when you connect the 5. The timer starts counting down appliance to the electrical immediately. -
Page 27: Assisted Cooking With Recipes
ENGLISH 1. Turn the knob for the heating 3. Select the dish and press functions to enter the menu 4. Insert the dish to the oven and press 2. Turn the knob for the temperature to to confirm the setting. select Assisted Cooking press 12. - Page 28 Dish Weight Shelf level / Accessory Duration time Roast Beef, ~ 105 min rare, LTC 2; baking tray ; roasting dish 1 - 1,5 kg; 4 Roast Beef, on wire shelf - 5 cm thick ~ 125 min medium,LTC...
- Page 29 ENGLISH Dish Weight Shelf level / Accessory Duration time Lamb leg 1,5 - 2 kg; 7 ~ 130 min 2; roasting dish on baking with bones - 9 cm thick tray pieces Fry the meat for a few minutes on a hot pan.
- Page 30 Dish Weight Shelf level / Accessory Duration time Fish Whole fish, 0,5 - 1 kg ~ 30 min 2; baking tray grilled per fish Season the fish with butter and use your favourite spices and herbs. Fish fillet 40 min 3;...
-
Page 31: Oven - Hints And Tips
ENGLISH Dish Weight Shelf level / Accessory Duration time Croquets, 0,5 kg 30 min 3; baking tray frozen Pommes, 0,75 kg 30 min 3; baking tray frozen Gratins, bread and pizza Lasagna / 1 - 1,5 kg 60 min 3; casserole dish on wire shelf Noodle cas‐... - Page 32 Always stand back from the Trays in the oven can distort during appliance when you open the appliance baking. When the trays are cold again, door while cooking. To decrease the the distortions disappear. condensation, operate the appliance for 13.3 Baking cakes...
- Page 33 ENGLISH 13.6 Cooking times setting, cooking time, etc.) for your cookware, recipes and quantities when Cooking times depend on the type of you use this appliance. food, its consistency, and volume. Initially, monitor the performance when you cook. Find the best settings (heat 13.7 Moist Fan Baking Bread and pizza Food...
- Page 34 Small baked items Food Temperature (°C) Time (min) Shelf posi‐ tion Cookies 25 - 35 Macaroons 30 - 40 Muffins 20 - 30 Savoury cracker 25 - 30 Short crust pastry biscuits 25 - 35 Tartelettes 20 - 30...
- Page 35 ENGLISH 13.10 Information for test institutes Food Function Temper‐ Time (min) Accesso‐ Shelf ature ries position (°C) Small cakes (20 Conventional 20 - 30 Tray small cakes per tray) Small cakes (20 Hot Air 20 - 35 Tray small cakes per tray) Small cakes (20 Hot Air 20 - 40...
-
Page 36: Oven - Care And Cleaning
Food Function Temper‐ Time (min) Accesso‐ Shelf ature ries position (°C) Beef burger Grill 15 - 20 first Grid/Drip‐ side. ping pan 10 - 15 sec‐ ond side. 1) Add 150 ml of water to the cavity embossment. 14. OVEN - CARE AND CLEANING WARNING! Refer to Safety chapters. - Page 37 ENGLISH 14.3 How to use: Pyrolytic 14.4 Cleaning reminder Cleaning The oven reminds you when to clean it with: pyrolytic cleaning. CAUTION! Remove all accessories and - flashes in the display for 5 sec after removable shelf supports. each activation and deactivation of the oven.
- Page 38 CAUTION! Make sure that the longer fixing wire is in the front. The ends of the two wires must point to the rear. Incorrect installation can cause damage to the enamel. 14.6 Removing the oven door 2. Pull the door trim to the front to remove it.
-
Page 39: Troubleshooting
ENGLISH Use the same oven lamp type. 5. Install the glass cover. 4. Install the glass cover. 6. Install the left shelf support. The side lamp 14.9 The drawer Find the lamp glass cover at the left side WARNING! of the cavity. Do not put food inside the drawer. - Page 40 Problem Possible cause Remedy You cannot activate or oper‐ STOP+GO function oper‐ Refer to "Hob - Daily use" ate the hob. ates. chapter. You cannot activate or oper‐ There is water or fat stains Clean the control panel. ate the hob.
- Page 41 ENGLISH Problem Possible cause Remedy The cookware does not cov‐ Cover the cross / square comes on the hob dis‐ er the cross / square. fully. play. The oven does not heat up. The oven is deactivated. Activate the oven. The oven does not heat up.
-
Page 42: Energy Efficiency
......... Serial number (S.N.) ......... 16. ENERGY EFFICIENCY 16.1 Product Information according to EU Ecodesign Regulations for hob Model identification VKI67382S Type of hob Hob inside Freestanding Cooker Number of cooking zones Heating technology Induction Diameter of circular cooking Left front 21.0 cm... - Page 43 16.3 Product Information and Product Information Sheet according to EU Ecodesign and Energy Labelling Regulations for ovens Supplier's name Voss Model identification VKI67382S 947942525 Energy Efficiency Index 81.4 Energy efficiency class Energy consumption with a standard load, conven‐ 0.98 kWh/cycle...
-
Page 44: Environmental Concerns
Moist Fan Baking cook. Function designed to save energy during cooking. Use the residual heat to warm up other dishes. Keep food warm Choose the lowest possible temperature setting to use residual heat and keep a meal warm. - Page 48 www.voss.dk...
Need help?
Do you have a question about the VKI67382S and is the answer not in the manual?
Questions and answers