
Related Manuals for Omcan AURORA DA-CN-0353


Summary of Contents for Omcan AURORA DA-CN-0353
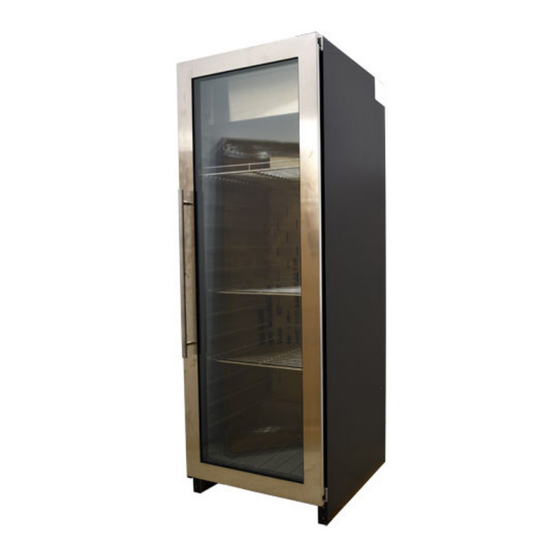
- Page 1 Dry Aging Cabinets Models DA-CN-0353, 0098 Items 47101, 48401 Instruction Manual Revised - 08/09/2024 Toll Free: 1-800-465-0234 Fax: 905-607-0234 Email: service@omcan.com www.omcan.com...
-
Page 2: Table Of Contents
Table of Contents Model DA-CN-0353 / Model DA-CN-0098 Section Page Disclaimer ----------------------------------------------------------------------------------------------------- 3 General Information --------------------------------------------------------------------------------- 4 - 5 Safety and Warranty --------------------------------------------------------------------------------- 5 - 8 Technical Specifications ------------------------------------------------------------------------------- 9 Installation --------------------------------------------------------------------------------------------- 9 - 13 Operation ---------------------------------------------------------------------------------------------- 13 - 19 Troubleshooting ----------------------------------------------------------------------------------- 19 - 22 Parts Breakdown... -
Page 3: Disclaimer
Disclaimer OMCAN IS NOT RESPONSIBLE FOR ANY DAMAGES DUE TO WATER LEAKS. WARRANTY FOR WATER LEAKS IS VOID IF THE AMBIENT ROOM TEMPERATURE EXCEEDS 75°F AND 55% RELATIVE HUMIDITY, AND THE APPLIANCE DRAIN IS NOT CONNECTED DIRECTLY TO A FLOOR DRAIN. -
Page 4: General Information
If the package has suffered rough handling, bumps or damage (visible or concealed), please note it on the bill of lading before accepting the delivery and contact Omcan within 24 hours, so we may initiate a claim with the carrier. A detailed report on the extent of the damage caused to the machine must be filled out within three days, from the delivery date shown in the shipping documents. -
Page 5: Safety And Warranty
Si el paquete ha sufrido un manejo de poco cuidado, golpes o daños (visible o oculto) por favor anote en la factura antes de aceptar la entrega y contacte Omcan dentro de las 24 horas, de modo que podamos iniciar una reclamación con la compañia. - Page 6 Safety and Warranty • This appliance can be used by children aged from 8 years and above and persons with reduced physical, sensory or mental capabilities or lack of experience and knowledge if they have been given supervision or instruction concerning use of the appliance in a safe way and understand the hazards involved. Children shall not play with the appliance.
- Page 7 1 YEAR PARTS AND LABOUR BENCH WARRANTY Within the warranty period, contact Omcan Inc. at 1-800-465-0234 to schedule a drop off to either an Omcan authorized service depot in the area, or to an Omcan Service warehouse to repair the equipment.
- Page 8 Safety and Warranty Please see https://omcan.com/disclaimer for complete info. WARNING: The packaging components (cardboard, polyethylene, and others) are classified as normal solid urban waste and can therefore be disposed of without difficulty. In any case, for suitable recycling, we suggest disposing of the products separately (differentiated waste) according to the current norms.
-
Page 9: Technical Specifications
Technical Specifications Model DA-CN-0353 DA-CN-0098 Item Number 47101 48401 Description Single Zone Steak Ager Installation Built-in / Free-Standing Installation Capacity 353 L / 12.47 cu.ft. 98 L / 3.46 cu.ft. Meat Loading Capacity 132.3 - 165.3 lbs. / 60 - 75 kgs. 55.1 lbs. -
Page 10: Installation
Installation 4. Since this product uses flammable refrigerants and flammable thermal insulation foam materials, you should avoid damaging the refrigeration pipeline when scrapping the product; keep it away from the fire and leave it to a qualified recycling company for disposal. THE LOCATION YOU HAVE SELECTED FOR YOUR CABINET SHOULD: 1. - Page 11 Installation Allow 24 hours before switching on the cabinet. During this time we recommend that you leave the door open to clear any residual odors. BEFORE LOADING & PLUGGING IN THE CABINET RECOMMENDATIONS: Cabinet should be install at suitable ambient temperature. If the temperature is higher or lower the ambient temperature range, it will affect temperature fluctuation and can’t reach cooling performance.
- Page 12 Installation This air vent or grid must not be opened on the same side as other appliances such as ovens or an area that is sealed and without access to fresh cool air. Failing to comply with the above specifications could result in WARRANTY void.
-
Page 13: Operation
Installation HANDLE INSTALLATION METHOD Note: not all products need to install handles by themselves, please follow the configuration of the actual purchased product. 1. Take out handle from cabinet, then take out 4 pcs 4x35 screws from accessory bag. 2. Pull open door seal from the side of door, then insert screws into the 2 handle holes on side of door, then put the screws alignment the hole of handle, tighten the screws by Phillips screwdriver, then compress the door seal. - Page 14 Operation This is normal and it is due to the length of the activation time. Once the cabinet is running for a few hours everything will stabilize. Important: if the unit is unplugged, power is lost, or turned off, wait 3 to 5 minutes before restarting the unit. The cabinet will not start if you attempt to restart before this time delay.
- Page 15 Operation 6. Hang the complete back on the hangers of your cabinet or put the individual cuts on the shelves. 7. Load capacity: max. 2x half strip loins on the bone with a length of 0.5m, therefore you will need 2 hangers. 8.
- Page 16 Operation 2. Manual control: the cabinet is power on. Please press this button 3 seconds, you will hear 2 beeps, the UV light will stay on. Please press light button 3 seconds again, you will hear 1 beep, and then the UV light will turn off.
- Page 17 Operation REMOVING SHELF Shelf taking: according to below instruction drawing to press one side of shelf limit pin 1, extract and remove the shelf from the other side of support bracket 1, then take off the shelf following the arrow mark 2. Shelf installation will be opposite with shelf taking.
- Page 18 Operation 2. After pulling out the water tank, replace the humidification filter element as shown in the figure. ITEM 47101 MANUALLY WATER EXCHANGE AND REPLACEMENT OF ABSORBENT COTTON STEPS 1. Observe the scale window and add water when the water level is lower than the lowest water level scale of the water tank.
-
Page 19: Troubleshooting
Operation 3. After pulling out the water tank, replace the humidification filter element as shown in the figure. Troubleshooting OPERATION ANOMALIES Ensure that there is power to the electrical supply plug by connecting another electrical appliance to it. Check fuse, if any. Make sure that the door is closed properly. If your cabinet appears to be malfunctioning, unplug it and contact your after sales service. - Page 20 Troubleshooting revert to a preset temperature setting. Most power failures are corrected within a short period of time. An hour or two’s loss of power will not affect cabinet’s temperatures. To avoid sudden change of temperature while the power is off, you should avoid opening the door.
- Page 21 Troubleshooting Screws Fig. 1 Plug Fig. 2 Buckle Fig. 3 Buckle Common problems may easily be solved, saving you the cost of a possible service call. Please read carefully the instruction manual and revert to troubleshooting guide chart.
- Page 22 Troubleshooting PROBLEM POSSIBLE CAUSE Cabinet does not operate. Not plugged in. The appliance is turned off. The circuit breaker tripped or the fuse is broken. Cabinet is not cold enough. Check the temperature control setting. External environment may require a higher setting. The door is opened too often.
-
Page 23: Parts Breakdown
Parts Breakdown Model DA-CN-0353 47101... - Page 24 Parts Breakdown Model DA-CN-0353 47101 Item No. Description Position Item No. Description Position Item No. Description Position Right Slide Rail for Water Box for AR575 Carton Box for 47101 AR588 AI483 Heating Strip for 47101 47101 AI457 M5 Trunk-Nail for 47101 AR589 Cooling Fan - SAD12025B12L 15, 39...
- Page 25 Parts Breakdown Model DA-CN-0098 48401...
- Page 26 Parts Breakdown Model DA-CN-0098 48401 Item No. Description Position Item No. Description Position Item No. Description Position AR602 Carton Box for 48401 AR597 UV Light Cover for 48401 AI486 VI88 Kick Plate for 48401 AI457 M5 Trunk-Nail for 48401 AR609 Evaporator for 48401 AR615 Black Right Hinge for 48401...
-
Page 27: Electrical Schematics
Electrical Schematics Model DA-CN-0353 47101 Model DA-CN-0098 48401... -
Page 28: Notes
Notes ________________________________________________________________________________________ ________________________________________________________________________________________ ________________________________________________________________________________________ ________________________________________________________________________________________ ________________________________________________________________________________________ ________________________________________________________________________________________ ________________________________________________________________________________________ ________________________________________________________________________________________ ________________________________________________________________________________________ ________________________________________________________________________________________ ________________________________________________________________________________________ ________________________________________________________________________________________ ________________________________________________________________________________________ ________________________________________________________________________________________ ________________________________________________________________________________________ ________________________________________________________________________________________ ________________________________________________________________________________________ ________________________________________________________________________________________ ________________________________________________________________________________________ ________________________________________________________________________________________ ________________________________________________________________________________________ ________________________________________________________________________________________ ________________________________________________________________________________________ ________________________________________________________________________________________... - Page 29 Notes ________________________________________________________________________________________ ________________________________________________________________________________________ ________________________________________________________________________________________ ________________________________________________________________________________________ ________________________________________________________________________________________ ________________________________________________________________________________________ ________________________________________________________________________________________ ________________________________________________________________________________________ ________________________________________________________________________________________ ________________________________________________________________________________________ ________________________________________________________________________________________ ________________________________________________________________________________________ ________________________________________________________________________________________ ________________________________________________________________________________________ ________________________________________________________________________________________ ________________________________________________________________________________________ ________________________________________________________________________________________ ________________________________________________________________________________________ ________________________________________________________________________________________ ________________________________________________________________________________________ ________________________________________________________________________________________ ________________________________________________________________________________________ ________________________________________________________________________________________ ________________________________________________________________________________________...
- Page 30 Notes ________________________________________________________________________________________ ________________________________________________________________________________________ ________________________________________________________________________________________ ________________________________________________________________________________________ ________________________________________________________________________________________ ________________________________________________________________________________________ ________________________________________________________________________________________ ________________________________________________________________________________________ ________________________________________________________________________________________ ________________________________________________________________________________________ ________________________________________________________________________________________ ________________________________________________________________________________________ ________________________________________________________________________________________ ________________________________________________________________________________________ ________________________________________________________________________________________ ________________________________________________________________________________________ ________________________________________________________________________________________ ________________________________________________________________________________________ ________________________________________________________________________________________ ________________________________________________________________________________________ ________________________________________________________________________________________ ________________________________________________________________________________________ ________________________________________________________________________________________ ________________________________________________________________________________________...
-
Page 31: Warranty Registration
Warranty Registration Thank you for purchasing an Omcan product. To register your warranty for this product, complete the information below, tear off the card at the perforation and then send to the address specified below. You can also register online by visiting: Merci d’avoir acheté... - Page 32 à plus de 6500 produits provenant du monde entier. Desde 1951 Omcan ha crecido hasta convertirse en un líder en la distribución de equipos y suministros de alimentos en América del Norte industria de servicios. Nuestro éxito en estos años se puede atribuir a nuestro compromiso de fortalecer y desarrollar nuevas relaciones...
Need help?
Do you have a question about the AURORA DA-CN-0353 and is the answer not in the manual?
Questions and answers