
Subscribe to Our Youtube Channel
Related Manuals for Omcan DI-CN-0005


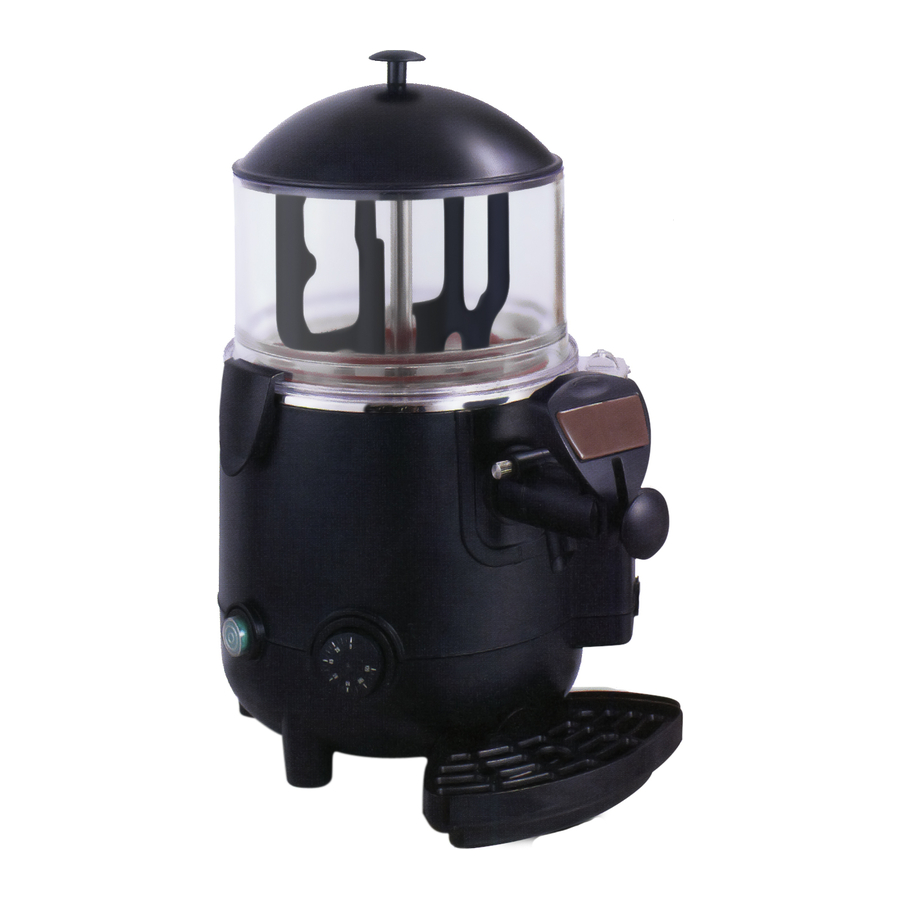
Summary of Contents for Omcan DI-CN-0005
- Page 1 Hot Chocolate Dispensers Models DI-CN-0005, 0010 Items 39482, 31840 Instruction Manual Revised - 10/04/2016 Toll Free: 1-800-465-0234 Fax: 905-607-0234 Email: service@omcan.com www.omcan.com...
-
Page 2: Table Of Contents
Table of Contents Model DI-CN-0005 / Model DI-CN-0010 Section Page General Information --------------------------------------------------------------------------- 3 - 4 Safety and Warranty --------------------------------------------------------------------------- 4 - 6 Technical Specifications -------------------------------------------------------------------------- 7 Installation --------------------------------------------------------------------------------------- 8 - 9 Operation --------------------------------------------------------------------------------------- 9 - 11 Maintenance --------------------------------------------------------------------------------- 11 - 21... -
Page 3: General Information
If the package has suffered rough handling, bumps or damage (visible or concealed), please note it on the bill of lading before accepting the delivery and contact Omcan within 24 hours, so we may initiate a claim with the carrier. A detailed report on the extent of the damage caused to the machine must be filled out within three days, from the delivery date shown in the shipping documents. -
Page 4: Safety And Warranty
Si el paquete ha sufrido un manejo de poco cuidado, golpes o daños (visible o oculto) por favor anote en la factura antes de aceptar la entrega y contacte Omcan dentro de las 24 horas, de modo que podamos iniciar una reclamación con la compañia. - Page 5 Safety and Warranty • Connected to a system provided with a differential switch and circuit breaker. • Connected to a system that has been certified according to the current standards and regulations in the country of use. The power cord must not be: •...
- Page 6 1 YEAR PARTS AND LABOR BENCH WARRANTY Within the warranty period, contact Omcan Inc. at 1-800-465-0234 to schedule a drop off to either an Omcan authorized service depot in the area, or to an Omcan Service warehouse to repair the equipment.
-
Page 7: Technical Specifications
13. Product dispenser unit (tap). 14. Drip tray maximum level indicator. 15. Drip tray grid. 16. Drip tray. 17. Boiler tank drainage cap. TECHNICAL DATA The technical data and features are listed below: Model DI-CN-0005 DI-CN-0010 Capacity Power 1000 W Electrical 110/60/1 Dimensions 16.14”... -
Page 8: Installation
Installation The machine must be installed indoors in a well-lit and well-ventilated room with a firm, solid, level floor (slope less than 20°); during installation, place the machine well out of the reach of children and unauthorized persons. The machine may only operate in places with an ambient temperature ranging between 10°C (50°F) and 32°C. (89,6°F). -
Page 9: Operation
Installation DISPOSAL OF PACKING MATERIALS After opening the box, make sure to separate the packing materials according to type and dispose of them in accordance with the current regulations in the user’s country. We recommend keeping the box for future conveyance or transport. - Page 10 Operation Warning: fill the boiler tank by pouring in water slowly and check for a few seconds to make sure that the water level has reached the MAX level and that it is stable. When filling an empty boiler rank for the first time, the amount of water needed to completely fill the tank is approximately 3.25 liters(0.86 GAL US).
-
Page 11: Maintenance
Operation To dispense hot chocolate proceed as follows: Note: It is advisable to keep the rod in the maximum dispensing position to help the product to flow at the required rate. • Place a cup beneath the tap. • Use the lever on the tap (the product is dispensed when the level is pressed or pulled) until the required amount of product has been poured inside the cup. - Page 12 Maintenance machine is used. When performing the Cleaning and Maintenance operations, follow these instructions: • Wear protection accident-proof gloves. • Do not use solvents or in flammable materials. • Do not use abrasive and/or metal sponges to clean the machine and its components. •...
- Page 13 Maintenance REMOVING THE BOWL Warning: before removing the bowl, make sure that the main switch is off and that the machine is unplugged from the mains electricity and sufficiently cooled down. Removing the bowl is prohibited if it contains the product or any other liquid. It Is fundamentally important to remove the bowl and its component parts if the machine is to be correctly cleaned and sainted.
- Page 14 Maintenance • Release the bowl from the machine body, using two fingers to pry it away from the fixed steel part of the mixer auger(A) and the others to grip the outlet edge of the bowl(B): Gradually pull the bowl harder until it comes away from its seating.
- Page 15 Maintenance CLEANING THE PAN It is necessary to remove all parts fitted to the pan: • Remove any product left in the bowl. • Remove the bowl from the machine. • Remove the tap from the machine. • Clean the entire surface of the pan using a damp cloth and/or a non-abrasive sponge. •...
- Page 16 Maintenance • Unscrew the knob(E) by turning it counterclockwise while holding the rod in place. • Pull out the rod(G) and spring(H) from the tap body (the pin/gasket assembly(I) will slide out together with the rod). • Detach the rod(G) from the pin/gasket assembly(I). •...
- Page 17 Maintenance ASSEMBLING THE WASHED COMPONENTS All washed and sanitized component parts must be re-assembled with care and then subsequently refitted to the machine, following the relevant steps. Assembling the Bowl Warning: make sure that the gasket is correctly assembled. The first image shows a seal correctly assembled; here the seal perfectly adheres to the bowl edge. The second image shows a seal which is not correctly assembled;...
- Page 18 Maintenance • Fix the bowl to the machine body using the relevant hook-on handles. • Insert the mixer auger into its seating. • Insert the mixer into its seating following the steps described in “Removing the Bowl” in reverse order. Assembling the bowl To assemble the tap, carry out in reverse all of the disassembly steps illustrated previously.
- Page 19 Maintenance Carry out the following steps: • Prepare the sanitizing solution. • Fill the bowl with the sanitizing solution. • Leave the solution to act for about 30 mins. • Empty out the sanitizing solution from the bowl. • Then rinse out the bowl and inside surfaces thoroughly to eliminate all residues of sanitizing solution. CLEANING THE DRIP TRAY The drip tray should be emptied and cleaned daily.
- Page 20 Maintenance Warning: The boiler may be emptied only when the bowl is empty and the machine has cooled down sufficiently. The use of water from the boiler tank for food purposes is prohibited. To empty the boiler proceed as follows: •...
- Page 21 Maintenance Warning: after the temperature sensor has intervened to shut down the machine, it is indispensable to drain out any product contained inside the bowl and to clean all components before restoring the machine function. Warning: before resetting the temperature sensor, switch off the machine using the relevant switch and unplug it from the electrical main socket, then wait for the machine to cool down.
-
Page 22: Troubleshooting
Troubleshooting Problem Cause Remedy Does not heat. No power. Make sure that the machine is plugged in properly. Switch set to OFF. Set the switch to ON. Thermoprobe intervention. Reset the thermal protector. Thermostat on “0”. Adjust the thermostat. Mixing Paddle does not turn. No power. -
Page 23: Parts Breakdown
39482 DI-CN-0005 CHOCOFAIRY5L 1.3 HP / 1000 W 110V/60/1 Hot Chocolate Dispenser 10 L / 3 GAL 31840 DI-CN-0010 CHOCOFAIRY10L 1.34 HP / 1000 W 110V/60/1 Parts Breakdown Model DI-CN-0005 39482 Item Item Item Description Position Description Position Description Position... - Page 24 Parts Breakdown Model DI-CN-0010 31840 Item Item Item Description Position Description Position Description Position Cover of Overheat Protector for 73902 Tank Cover for CHOCOFAIRY10L 73918 73934 Moving Pin for CHOCOFAIRY10L CHOCOFAIRY10L Button of Overheat Protector for 73903 Knob of Tank Lid for CHOCOFAIRY10L 73919 73935 Faucet Spring for CHOCOFAIRY10L...
- Page 25 Parts Breakdown Model DI-CN-0005 39482 Model DI-CN-0010 31840...
-
Page 26: Electrical Schematics
Electrical Schematics Model DI-CN-0005 39482 Model DI-CN-0010 31840 ITEM DESCRIPTION POWER SWITCH SAFETY THERMOSTAT MIXER MOTOR ADJUSTMENT THERMOSTAT HEATING ELEMENT... -
Page 27: Warranty Registration
Warranty Registration Thank you for purchasing an Omcan product. To register your warranty for this product, complete the information below, tear off the card at the perforation and then send to the address specified below. You can also register online by visiting: Merci d’avoir acheté... - Page 28 Since 1951 Omcan has grown to become a leading distributor of equipment and supplies to the North American food service industry. Our success over these many years can be attributed to our commitment to strengthen and develop new and existing relationships with our valued customers and manufacturers.
Need help?
Do you have a question about the DI-CN-0005 and is the answer not in the manual?
Questions and answers