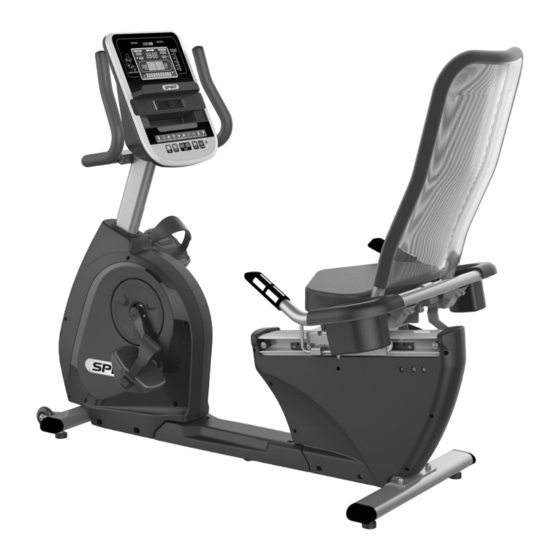
Spirit XBR95 Owner's Manual
Hide thumbs
Also See for XBR95:
- Manual (48 pages) ,
- Owner's manual (43 pages) ,
- Service manual (26 pages)

Subscribe to Our Youtube Channel
Related Manuals for Spirit XBR95


Summary of Contents for Spirit XBR95
- Page 1 Owner’s Manual Model No. 16207683950 XBR95 - Assembly - Operation - Adjustments - Parts - Warranty CAUTION: Read and understand this manual before operating unit Retain For Future Reference...
-
Page 2: Table Of Contents
TABLE OF CONTENTS Product Registration Important Safety Instructions Important Electrical Instructions Assembly Instructions Operation of Your Recumbent Bike Programmable Feature Using Heart Rate Transmitter Exploded View Diagram Parts List General Maintenance Manufacturer’s Limited Warranty Customer Service 1-888-707-1880 Dyaco Canada Inc. 2016 Email: customerservice@dyaco.ca... -
Page 3: Product Registration
CONGRATULATIONS ON YOUR NEW FITNESS BIKE Thank you for your purchase of this quality fitness bike trainer from Dyaco Canada Inc. Your new bike was manufactured by one of the leading fitness manufacturers in the world and is backed by one of the most comprehensive warranties available. Through your dealer, Dyaco Canada Inc. -
Page 4: Important Safety Instructions
IMPORTANT SAFETY INSTRUCTIONS READ ALL INSTRUCTIONS BEFORE USING THIS FITNESS BIKE When using an electrical appliance, basic precautions should always be followed, including the following: • Before beginning, this or any exercise program, consult a physician. This is especially important for persons over the age of 35 or persons with pre-existing health conditions. •... -
Page 5: Important Electrical Instructions
IMPORTANT ELECTRICAL INSTRUCTIONS WARNING! NEVER expose this Semi-Recumbent Bike to rain or moisture. This product is NOT designed for use outdoors, near a pool or spa, or in any other high humidity environment. The operating temperature specification is 40 to 120 degrees Fahrenheit, and humidity is 95% non-condensing (no water drops forming on surfaces). -
Page 6: Assembly Instructions
ASSEMBLY INSTRUCTIONS Pre-Assembly Using a razor knife (Box Cutter), cut the banding straps that wrap around the car ton. Reach under the bottom edge of the car ton and pull it away from the cardboard underneath, separating the staples that join the two together. Lift the box over the unit and unpack. - Page 7 STEP 1: Rear Stabilizer & Seat Back Attach the REAR STABILIZER (7) to the MAIN FRAME (1) with the 2 BOLTS (65) and 2 FLAT WASHERS (84) and 2 CAP NUTS (191). Tighten completely with the WRENCH (112). Attach the SEAT BACK FRAME (5) to the SEAT CARRIAGE (4) of the mainframe. Slide 1 BOLT (67) through each side, then attach a NYLOC NUT (89) to each bolt.
- Page 8 STEP 2: Console Mast 1. Slide the COMPUTER CABLE (44), HANDLEBAR RESISTANCE CONTROL CABLE (148), and HAND PULSE SENSOR CABLE (45) through the bottom of the CONSOLE MAST COVER (31) and then the bottom of the CONSOLE MAST (2). Make sure the Console Mast Cover is correctly oriented (see illustration). 2.
- Page 9 STEP 3: Seat & Handle Bar 1. Install the SEAT (61) on the SEAT CARRIAGE (4) with 4 PHILLIPS HEAD SCREWS (98). Tighten with the PHILLIPS HEAD SCREWDRIVER (114). 2. Attach the SEAT HANDLEBAR (6) to the SEAT CARRIAGE (4) with the 4 Hex Head Bolts (71), 4 FLAT WASHERS (77), and 4 Nyloc Nuts (89).
- Page 10 STEP 4: Plastic Parts 1. Install the GAS CYLINDER (57) on the SEAT BACK FRAME (5) with 1 BOLT (70), 1 FLAT WASHER (76) and 1 NYLOC NUT (91) by using the WRENCHES provided (112 & 113). 2. Attach the PEDALS (116L, 117R) to the CRANK ARMS (51L, 51R). Tighten with the WRENCH (113). Remember that the LEFT PEDAL (116L) has a reverse thread and will be threaded onto the Crank arm in a COUNTERCLOCKWISE motion.
-
Page 11: Operation Of Your Recumbent Bike
Control Buttons Power Spirit Fitness commercial Semi - Recumbent Bikes have a built-in generator for power and do not need to be plugged into an AC outlet. To power up the Semi - Recumbent Bike, simply start to pedal, the console will turn on automatically. - Page 12 Dot Matrix Center Display Twenty columns of boxes (10 high) indicate each segment of a workout. The boxes only show an approximate level (resistance) of effort. They do not necessarily indicate a specific value - only an approximate percent to compare levels of intensity. In Manual Operation, the resistance dot matrix window will build a profile “picture”...
- Page 13 Heart Rate % Profile The console LCD screen will display your current heart rate anytime a pulse is detected. The Bar Graph, located to the right of the LCD screen, will show your current heart rate % in relation to your projected maximum heart rate, which is determined by your age that you entered during the programming phase of any of the 10 programs.
- Page 14 Program Keys The program keys are used to preview each program. When you first turn the console on, you may press each program key to preview what the program profile looks like. If you decide that you want to try a program, press the corresponding program key and then press the Enter key to select the program and enter into the data-setting mode.
-
Page 15: Programmable Feature
PROGRAMMABLE FEATURES MANUAL The Manual program works, as the name implies, manually. This means that you control the workload yourself and not the computer. To start the Manual program, follow the instructions below or just press the Manual button, then the Enter button and follow the directions in the Message center. - Page 16 CALORIES PROGRAM 1. Press the Calories key. Press Enter to select the program. The display will prompt you through the programming. 2. If Enter was pressed, the Message Center will now be blinking a value, indicating your Age (default is 35). Entering your correct age affects the heart rate Bar Graph Display and the Heart Rate programs.
- Page 17 FUSION PROGRAM In this interval program, you will alternate between mid-high intensity cardiovascular intervals on the bike, strength exercises off of the bike, and low intensity recovery intervals on the bike. You will need a pair of objects that can be comfortably held in your hands (dumbbells, water jugs, soup cans, etc.) for 4 of the 5 strength exercises performed in this program.
- Page 18 PRESET PROGRAMS The Semi - Recumbent Bike has seven different programs that have been designed for a variety of workouts. These seven programs have factory preset work level profiles for achieving different goals. HILL This program follows a triangle or pyramid type of gradual progression from approximately 10% of maximum effort (the level that you chose before starting this program) up to a maximum effort which lasts for 10% of the total workout...
- Page 19 CALORIES This program follows a quick progression up to the maximum resistance level (default or user input level) that is sustained for 2/3 of the workout. This program will challenge your ability to sustain your energy output for an extended period of time. FUSION This program takes you through high levels of cardio &...
- Page 20 CUSTOM USER DEFINED PROGRAMS There are two customizable User programs that allow you to build and save your own workout. The two programs, User 1 and User 2, operate exactly the same way, so there is no reason to describe them separately. You can build your own custom program by following the instructions below, or you can save any other preset program you complete as a custom program.
- Page 21 HEART RATE PROGRAMS The old motto, “no pain, no gain,” is a myth that has been overpowered by the benefits of exercising comfortably. A great deal of this success has been promoted by the use of heart rate monitors. With the proper use of a heart rate monitor, many people find that their usual choice of exercise intensity was either too high or too low, and exercise is much more enjoyable by maintaining their heart rate in the desired benefit range.
- Page 22 RATE OF PERCEIVED EXERTION Heart rate is important but listening to your body also has a lot of advantages. There are more variables involved in how hard you should workout than just heart rate. Your stress level, physical health, emotional health, temperature, humidity, the time of day, the last time you ate and what you ate all contribute to the intensity at which you should workout.
-
Page 23: Using Heart Rate Transmitter
USING HEART RATE TRANSMITTER How to wear your wireless chest strap transmitter: 1. Attach the transmitter to the elastic strap using the locking parts. 2. Adjust the strap as tightly as possible as long as the strap is not too tight to remain comfortable. - Page 24 HEART RATE PROGRAM OPERATION Note: You must wear the heart rate transmitter strap for these programs Both programs operate the same; the only difference is that HR1 is set to 60%, and HR2 is set to 80% of the maximum heart rate. They both are programmed the same way. To start an HR program, follow the instructions below or just select the HR1 or HR2 program, then the Enter button and follow the directions in the Message Center.
-
Page 25: Exploded View Diagram
EXPLODED VIEW DIAGRAM Customer Service 1-888-707-1880 Dyaco Canada Inc. 2016 Email: customerservice@dyaco.ca... -
Page 26: Parts List
PARTS LIST KEY NO. PART NO. DESCRIPTION Q'TY 6839501 Main Frame 6839502 Console Mast 6839503 Handlebar Assembly 6839504 Seat Carriage 6839505 Seat Back Frame 6839506 Seat Handlebar 6839507 Rear Stabilizer 6839508 Crank Axle 6839509L Seat Wheel Adjustment Plate (L) 6839509R Seat Wheel Adjustment Plate (R) 6839510 Idler Wheel Assembly... - Page 27 KEY NO. PART NO. DESCRIPTION Q'TY Drink Bottle Holder (R) 6839538 Drink Bottle Holder (L) 6839539 6839540 Release Lever 6839542 300m/m Hand Pulse Sensor Assembly W/Cable 6839543 Generator/Brake Controller 6839544 Computer Cable 6839545 2300m/m Hand Pulse Sensor Assembly W/Cable 6839546 300m/m Sensor W/Cable 6839547 800m/m Wire Brake Coil Harness...
- Page 28 KEY NO. PART NO. DESCRIPTION Q'TY 6839582 5/16" × 1.5T_Split Washer 6839583 Ø5/16" × 19 × 1.5T_Curved Washer 6839584 Ø3/8" × Ø25 × 2T_Flat Washer 6839585 Ø17_C Ring 6839586 Ø20_C Ring 6839587 M8 × 170m/m J Bolt 6839588 M8 × 7T_Nyloc Nut 6839589 3/8"...
- Page 29 KEY NO. PART NO. DESCRIPTION Q'TY 68395130 13/14m/m Wrench 68395140 Sensor Rack 68395141 Handle Bar Cover 68395143 Seat Track Fixing Plate 68395144 Handgrip End Cap 68395145 Resistance Button W/Cable 68395146 Handgrip Resistance Label (UP) 68395147 Handgrip Resistance Label (DOWN) 68395148 2300m/m Switch Cable (Upper) 68395149 300m/m Handle Switch Bracket...
- Page 30 KEY NO. PART NO. DESCRIPTION Q'TY 68395191 3/8" × UNC16 × 12.5T_Cap Nut Customer Service 1-888-707-1880 Dyaco Canada Inc. 2016 Email: customerservice@dyaco.ca...
-
Page 31: General Maintenance
GENERAL MAINTENANCE 1. Wipe down all areas in the sweat path with a damp cloth after each workout. 2. If a squeak, thump, clicking or rough feeling develops, the main cause is most likely one of two reasons: The hardware was not sufficiently tightened during assembly. All bolts that were installed during assembly need to be tightened as much as possible. -
Page 32: Manufacturer's Limited Warranty
REPAIR PARTS AND SERVICE All of the parts for the Spirit cycle shown in figure can be ordered from Dyaco Canada Inc. 5955 Don Murie Street, Niagara Falls, Ontario L2G 0A9. When ordering parts, the parts will be sent and billed at the current prices. - Page 33 Please visit us online for information about our other brands and products manufactured and distributed by Dyaco Canada Inc. spiritfitness.ca solefitness.ca xterrafitness.ca dyaco.ca/products/everlast.html dyaco.ca/UFC/UFC-home.html spiritfitness.ca/johnnyg.html trainorsports.ca For more information, please contact Dyaco Canada Inc. T: 1-888-707-1880 ⏐ 5955 Don Murie St., Niagara Falls, Ontario L2G 0A9 ⏐ sales@dyaco.ca Customer Service 1-888-707-1880 Dyaco Canada Inc.
Need help?
Do you have a question about the XBR95 and is the answer not in the manual?
Questions and answers