Advertisement
Advertisement
Table of Contents

Related Manuals for Contura i41


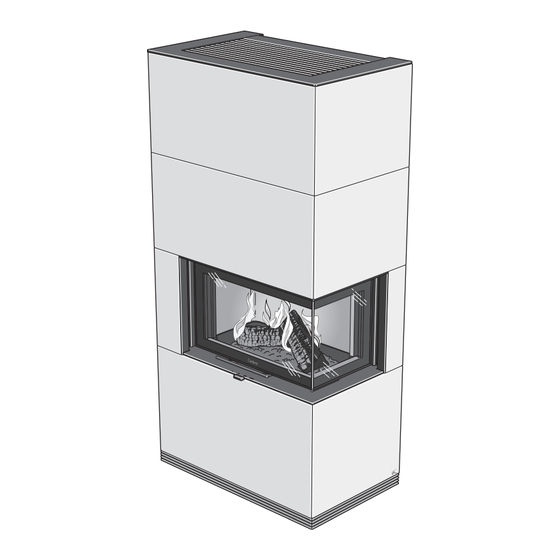
Summary of Contents for Contura i41
- Page 1 Installation instruction contura.eu...
-
Page 2: Planning Permission
You should also read the "Lighting instructions" before lighting the stove for the first time. Contura reserves the right to change dimensions and procedures specified in these instructions at any time without notice. Access the latest version at www.contura.eu... -
Page 3: Connection To Chimney
Connection to chimney • The insert must be connected to a chimney designed to withstand flue gas temperatures of up to 400°C. • The external diameter of the connection sleeve is 150 mm. • In normal operating mode, draft in the chimney should be 20-25 Pa close to the connection sleeve. -
Page 4: Installation Distances
Installation distances Ci41 / Ci41A / Ci41T Important! The dimension diagrams only show the minimum permitted chimney must also be observed. A clearance of at least 1,5 m installation distances for the stove. When connecting to a must be allowed as a safe distance between the front of the steel chimney, the requirements for safe distance to the stove and combustible building elements or furnishings. - Page 5 Trade name Contura i41 Intended area of use Heating of rooms in residential buildings Fuel Wood MANUFACTURER Name NIBE AB / Contura Address Box 134, Skulptörvägen 10 SE-285 23 Markaryd, Sweden VERIFICATION According to AVCP System 3 European standard EN 13240:2001 / A2:2004 / AC:2007 Test institute Rein-Ruhr Feuerstätten Prüfstelle, NB 1625.
-
Page 6: Eu Declaration Of Conformity
+46 433 275100 THIS DECLARATION OF CONFORMITY IS ISSUED UNDER OUR SOLE RESPONSIBILITY FOR THE FOLLOWING PRODUCT: Trade name Contura i40-series: i40 / i41 (A/T/S) Identification of product www.contura.eu THE OBJECT OF THE DECLARATION DESCRIBED ABOVE IS IN CONFORMITY WITH -... - Page 7 Insex 4 Insex 3 8 mm Inbusschraube 4 Inbusschraube 3 Sekskant 4 Sekskant 3 10 mm Six pans creux 4 Six pans creux 3 Allen screw 4 Allen screw 3 13 mm Unbrako 4 Unbrako 3 Kuusiokolo 4 Kuusiokolo 3 Brugola 4 Brugola 3 Inbus 4...
- Page 8 Assembling the surround Ci41 / Ci41A / Ci41T Montering af omramning Montering av omramning Kuoren asennus Montage der Verkleidung Montaggio del rivestimento Montering av omramming Omlijsting monteren Montage de l’habillage 6 st M5 x 16 Verktyg T25 M5 x 16 Werkzeug T25 6 stk.
- Page 9 3 st M5 x 9 3 st M5 x 9 7 st M5 x 9...
- Page 10 10 st M5 x 9 6 st M5 x 9...
- Page 12 Placement and adjustment of insert Ci41 / Ci41A / Ci41T Placering og justering af indsats Placering och injustering av insats Takkasydämen asentaminen ja Platzierung und Einstellung des Einsatzes säätäminen Plassering og justering av innsats Collocazione e regolazione dell’inserto Positionnement et réglage de l’insert Plaatsing en afstelling van inzet 13 mm 13 mm...
- Page 13 Gå till sidan 61 för fortsatt montering av sten- eller täljstensomramning. Gehen Sie auf Seite 61 für die weitere Montage der Stein- oder Specksteinverkleidung. Gå til side 61 for fortsatt montering av stein- eller klebersteinomramming. Aller à la page 61 pour continuer le montage de l’habillage en pierre ou en stéatite. Turn to page 61 to continue with assembly instructions for a stone or soapstone surround.
- Page 14 Ci41 16 st 8 mm 90° 12 st 8 mm...
- Page 15 8 st 8 st M5 x 12 8 mm 3 mm 2 st 2 st 2 st M5 x 12 M5 x 12 M5 x 9 2 st 6 st M5 x 9 8 mm...
- Page 16 2 st M5 x 9 2 st M5 x 9...
- Page 19 Gå till sidan 68 för montering av galler och topp. Zur Montage von Gitter und Oberseite siehe Seite 68. Gå til side 68 for montering av gitter og topp. Allez à la page 68 pour le montage de de la grille et de la partie supérieure. Turn to page 68 to continue with assembly instructions for a stone or soapstone surround.
- Page 20 Ci41A / Ci41T Montage der Verkleidung Montering av omramming Fassen Sie die Steine nur mit sauberen Händen Ha alltid rene hender eller bruk hansker oder Handschuhen an. Gehen Sie vorsichtig ved håndtering av steinen. Håndter steinen Montering av omramning mit den Steinen um, damit empfindliche Ecken varsomt for å...
- Page 23 Ci41T 4 st M6 x 10 Ci41A 4 st M6 x 10...
- Page 27 Montering av galler och topp Montering af gitre og top Ved tilslutning på bagside Vid bakåtanslutning Montage von Gitter und Oberseite Lämminilmaritilän ja kannen asennus Liitäntä taaksepäin Bei rückseitigem Anschluss Montering av gitter og topp Montaggio delle griglie e del top Ved bakmontering Con collegamento dal retro Montage de la grille et de la partie...
- Page 28 ~ 2 5 m...
- Page 29 Vid toppanslutning Ved toptilslutning Bei oberseitigem Anschluss Liitäntä ylöspäin Ved toppmontering Con collegamento dal top Lors de raccordement par le haut Bij bovenaansluiting For top connection...
- Page 30 ~ 2 5 m...
- Page 31 Lamellsockel Lamelsokkel Lamellensockel Lamellisokkeli Lamellsokkel Zoccolo in acciaio Socle à lamelles Lamellenkader Disc base...
- Page 32 811448 IAV SE-EX Ci41Plåt / Sten-1 NIBE AB · Box 134 · 285 23 Markaryd · Sweden 2023-07-10 contura.eu...
Need help?
Do you have a question about the i41 and is the answer not in the manual?
Questions and answers