
Related Manuals for Contura C 470


Summary of Contents for Contura C 470
- Page 1 Installations- Monteringsvejledning Istruzioni di montaggio Guide d’installation anvisning Installatie instructies C 470 www.contura.eu...
- Page 2 See rating plate on the stove Intended area of use Heating of rooms in residential buildings Fuel Wood MANUFACTURER Name NIBE AB / Contura Address Box 134, Skulptörvägen 10 SE-285 23 Markaryd, Sweden CHECKS According to AVCP System 3 European standard...
-
Page 3: Table Of Contents
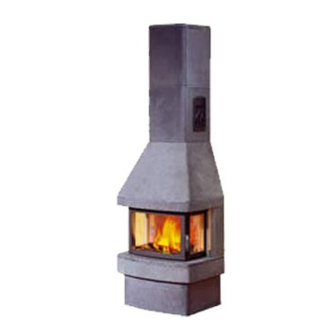
A warm welcome to the Contura family. We hope you will get a great deal of pleasure from your new stove. As a new owner of a Contura stove, you have secured a product with timeless design and long service life. -
Page 4: Technical Details
This folder contains instructions on how to assemble and The draught in the chimney must generate a neg ative pressure install stoves in the Contura 470. The stove also comes with of at least 12 Pa. The draught is affected both by the length and comprehensive Lighting and Maintenance Instructions. -
Page 5: Installation Distances To Walls And Ceiling
Installation distances to walls and ceiling Stand the stove on a floor plate which meets the requirements Important! laid down on page 76. Measure to make sure that the size of When placing the stove in a corner close to combustible the floor plate and the distance between the stove and the wall wall materials or against a wall with a gap of only 305 mm are at least as great as specified in the diagrams below. -
Page 6: Air Supply
Air supply Combustion air for the stove can be supplied through a duct Important! directly from outside, or indirectly through a vent in the wall of To prevent condensation in air ducts which pass through heated the room where the stove is installed. Flexible tubing is available areas, the duct must be insulated with 30 mm of mineral wool as an accessory. -
Page 7: Unpacking
Unpacking Lift and transport the stove as The cast-iron door and fire-bed may be removed to shown in these sketches. make the stove lighter and easier to move. Remove the grate disc by lifting the edge furthest away from the draught control bar. Remove the cast-iron cover strips below the side windows. -
Page 8: Fitting The Fire-Box Surrond
Lift the door upwards until it disengages from the Ease the bottom of the door slightly sideways until it lower hinge. clears the hinge pin. Fitting the fire-box surrond Remove the cast-iron cover strips below the side windows. Unscrew the metal brackets from the rear edge of the side windows. -
Page 9: Fitting The Smoke Baffle
Fitting the smoke baffle Raise the folded front edge of the smoke baffle up over the side pegs. Then lift the rear edge of the baffle up over the vermiculite holder. Stödtapp, sida Vermiculitehållare Side peg Vermiculite- holder IMPORTANT! When correctly placed on top of the supporting pegs, the baffle slopes upwards from the back to the front. - Page 10 Check to ensure that the stove-body is standing straight and perpendicular. Slide the flue base over the collar. Make sure that the seal round the collar is not dislodged. If further sealing material is required, Chimney module heat-resistant sealant may be used. Skorstensmodul When using a Premodul chimney system, attach the sealing plate and insulating panel to the start pipe.
- Page 11 90° Bend up the fixing lugs on the supporting structure and screw the chimney frame into place on the structure. Hole in ceiling Hål i innertak 90° Poke the corners of the block of insulating material out through the holes in the corners of the chimney frame. Screw the back- panel of the chimney onto the chimney frame.
- Page 12 Undo the top adjusting nuts on the supporting structure. Adjust the entire frame so that the chimney back is flush with the rear panel on the stove body, making sure that the chimney frame is vertical and true at all times. Leave the top adjusting nuts loose so you can adjust the height, if necessary, when fitting the soapstone tiles.
-
Page 13: Rear Flue Connection To Masonry Chimney
Rear flue connection to masonry chimney Mark out the centre of the hole to be made in the wall for a rear Check the height to make sure that the hole aligns with the flue connection. Make a hole at least 180 mm in diameter and chimney connection on the rear of the stove. - Page 14 Medium high model with flue height 940 mm. Cut away the partly punched metal covers and connect as described on page 85. Take hold of the ends of the vent screen and bend it to a U-shape. Hook it in place on the supporting structure . Cirka 200 mm Bend up the fixing lugs on the supporting structure and fit the lower section of the chimney frame by following the instructions...
- Page 15 ° Fold in the metal tabs in the middle of the chimney frame. Put the sealing plate and block of insulating material in place. Poke the corners of the insulating block out through the holes in the corners of the chimney frame. Check to make sure that the insulation forms a tight seal with the chimney frame: this is important to prevent hot convection currents from rising up to the ceiling.
- Page 16 Heat-resistant sealant Pannkitt Cut away the partly punched metal cover and slide the sealing Spread sealant over all joints. Fit the elbow joint in place and slide plate and the block of insulating material down into place it into the connecting flue. around the connecting flue.
-
Page 17: Fitting The Soapstone Surround
Fitting the soapstone surround Each tile is assigned a name and number, according to the scheme illustrated below. Certain tiles can be used in more than one position and therefore have the same number. We recommend that the tiles are fitted in the order described on the following pages. Important! Handle soapstone with care. - Page 18 Fit a stud bolt to the hood-front base and secure it. Justerskruv Adjustment screw The top of the tile should be flush with the edge of the metal by the screws. Adjust so that there is a 105 mm gap between the hood-front base and the stove frame.
- Page 19 Adjust the height of the entire hood by turning all of the adjusting sides. Make sure that the measurements on page 90 are correctly nuts on the supporting structure by the same amount. When adjusted and check them in accordance with the instructions on making the adjustment, all the locknuts on the top must be loose page 84.
- Page 20 Screw two stud bolts into the hood front. Squeeze two blobs of silicone onto the bottom half of the metal hood seat and put the hood front in place. 3 mm Montage- Assembly skruvar screws Unscrew the angle-irons from the guides and screw them in Lay the tiles that form the top of the border (left, front and place on the side tiles of the border.
- Page 21 Release the springs from the guide arms and fold down the metal frame for the border tiles. Screw the short stud bolts into the tile that forms the front of the border and squeeze out five small vertical beads of silicone onto the back of the tile.
- Page 22 Hook the springs on the guide arms. If they have come loose supported by the body of the stove to the side and top. Test to from their mounting on the inside, start by hooking them into make sure that the spring has hooked in place. Then extend it and place there.
- Page 23 The simplest way to ensure that the chimney tiles are at the right height is to proceed as follows: • Fit the bottom clips as low down as possible and the top ones as high up as possible. • Hang the tile in place and measure the gap to the tile below. •...
-
Page 24: Fitting Extra Side Windows
Fit the air vent grilles in place by squeezing out two large blobs of silicone on the side of each hole and pressing the grille into place. Secure the magnets to the plinth front with screws and Remove the sides and squeeze out a little silicone onto the plugs. -
Page 25: How To Use The Stove
How to use the stove Under normal conditions we recommend that the stove burns 2 Pulling out the damper bar opens the grate disc. This should only kg of wood per hour. The maximum permissible amount is 3.5 kg be done for a short time when lighting or re-stoking the fire to per hour. - Page 28 NIBE AB · Box 134 · SE-285 23 Markaryd · Sweden www.contura.eu Contura reserves the right to change dimensions and procedures described in these instructions at any 511435 IAV SE- EX C470 - 5 time without special notice. The current edition can be 2014-01-27 downloaded from www.contura.eu...
Need help?
Do you have a question about the C 470 and is the answer not in the manual?
Questions and answers