Table of Contents
Advertisement
Available languages
Available languages
Quick Links
Advertisement
Table of Contents

Related Manuals for Concept2 VR3520n


Summary of Contents for Concept2 VR3520n
- Page 1 Roboterstaubsauger Robotický vysavač Aspirateur robot Robotický vysávač Robot aspirapolvere Odkurzacz automatyczny Aspiradora robótica Robotporszívó Aspirator robot Robots putekļsūcējs Robotic vacuum cleaner VR3520n...
-
Page 2: Důležitá Bezpečnostní Upozornění
PODĚKOVÁNÍ Děkujeme Vám, že jste si zakoupili výrobek značky Concept a přejeme Vám, abyste byli s naším výrobkem spokojeni po celou dobu jeho používání. Před prvním použitím prostudujte pozorně celý návod k obsluze a potom si jej uschovejte. Zajistěte, aby i ostatní osoby, které... - Page 3 • Nevkládejte vlasy, oblečení, prsty nebo jiné části těla do blízkosti hlavního • Neponořujte přívodní kabel, zástrčku nebo spotřebič do vody ani do jiné kartáče. Hlavní kartáč a sací část vysavače udržujte v čistotě, odstraňujte kapaliny. vlasy a prach, které mohou snížit sací vlastnosti vysavače a kvalitu úklidu. •...
-
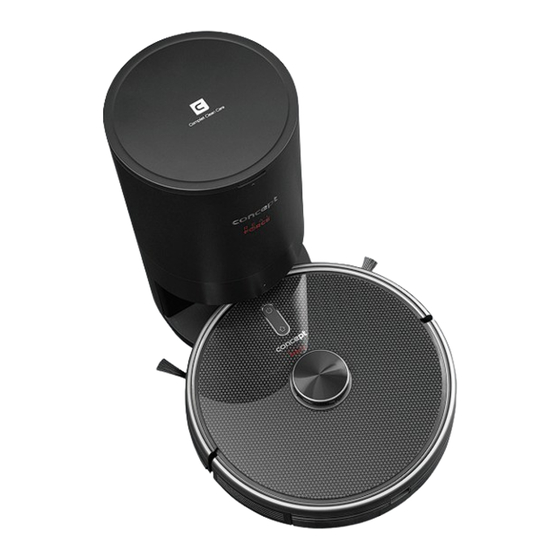
Page 4: Popis Výrobku
POPIS VÝROBKU Seznam součásti 1 Carpet kartáč 8 Pet kartáč 1 LDS laserový dálkoměr 8 Boční kartáček 2 Kryt kartáče 9 Boční kartáč 2 Antikolizní senzor pro radarové čidlo 9 Kryt akumulátoru 3 Hardfloor kartáč 10 Čisticí kartáček 3 Antikolizní senzory 10 Hnací... - Page 5 5. Připojení mobilní aplikace (tento krok můžete • Pokud je úroveň nabití akumulátoru nižší než 15 %, ÚKLID MÍSTNOSTÍ uslyšíte zvuk "zaklapnutí" a zařízení vydá hlasové přeskočit) oznámení. Po zásobníku 2v1 vložte modul pro přístroj se automaticky vrátí do dokovací stanice. Pomocí...
-
Page 6: Každodenní Údržba
NASTAVENÍ PRŮTOKU VODY Nastavení času 2. Robot při sterilizačním režimu zapne UV světlo a sníží Průtok vody můžete nastavit pomocí mobilní aplikace. Na 1. Stisknutím tlačítka na dálkovém ovladači svoji rychlost na polovinu pro důkladnější úklid. dálkovém ovladači nelze měnit průtok vody. Průtok bude vstoupíte do nastavení... -
Page 7: Řešení Problémů
Akumulátor Senzor proti pádu Při použití se ozývá Hlavní kartáč, boční kartáček nebo kolečko mohou být obaleny cizími předměty, • Přístroj je vybaven vysoce výkonnými lithium- neobvyklý hluk vypněte robota a cizí předměty odstraňte. Nabíjecí kontakt iontovými akumulátory. Chcete-li zachovat výkon •... - Page 8 OVLÁDÁNÍ POMOCÍ APLIKACE Error 12: Please place me correctly! Robot je nakloněn. Error 13: Please check if my wheels have become blocked Hnací kolečko je zaseknuté nebo zamotané. Dříve než bude možné ovládat zařízení přes aplikaci, je nutné spojit ho s vašim telefonem a umožnit mu přístup do vaši WiFi sítě.
-
Page 9: Ochrana Životního Prostředí
POĎAKOVANIE Ďakujeme vám, že ste sa rozhodli kúpiť si výrobok značky Concept, a prajeme vám, aby ste boli s naším výrobkom spokojní po celý čas jeho používania. Pred prvým použitím si prosím pozorne preštudujte celý návod na obsluhu a dobre ho odložte. Zabezpečte, aby všetci, ktorí... - Page 10 • Do blízkosti hlavnej kefy nevkladajte vlasy, oblečenie, prsty ani iné časti • Spotrebič neopravujte sami. Obráťte sa na autorizovaný servis tela. Hlavnú kefu a saciu časť vysávača udržujte v čistote, odstraňujte vlasy a predchádzajte zraneniam pri neodbornej manipulácii. a prach, ktoré môžu znížiť sacie vlastnosti vysávača a kvalitu vysávania. •...
- Page 11 POPIS VÝROBKU Zoznam súčastí 1 Carpet kefa 8 PET kefa 1 LDS laserový diaľkomer 8 Bočná kefka 2 Kryt kefy 9 Bočná kefa 2 Antikolízny senzor pre radarový senzor 9 Kryt akumulátora 3 Hardfloor kefa 10 Čistiaca kefka 3 Antikolízne senzory 10 Hnacie koliesko 4 Diaľkový...
- Page 12 5. Pripojenie mobilnej aplikácie (tento krok môžete • Ak je úroveň nabitia akumulátora nižšia ako 15 %, VYSÁVANIE MIESTNOSTÍ vytieranie. Keď sa ozve zvuk "zaklapnutia", modul je preskočiť) správne zasunutý. prístroj sa automaticky vráti do nabíjacej stanice. Pomocou mobilnej aplikácie vyberte miestnosti, ktoré Prečítajte si pokyny na pripojenie Wi-Fi a pripojte •...
- Page 13 Nastavenie času STERILIZAČNÝ REŽIM Čistenie mriežky filtra (pravidelne čistite) sacej sily na najvyšší stupeň. UPOZORNENIE - koberec je správne detegovaný iba s Carpet kefkou. 1. Stlačením tlačidla na diaľkovom ovládači vstúpite 1. Po dlhodobom používaní vyberte penový filter do nastavenia času, na LCD displeji bliká symbol pre 1.
-
Page 14: Riešenie Problémov
Akumulátor Senzor proti pádu Znižuje sa schopnosť • Nádoba na prach je plná. Vyčistite ju. • Prístroj je vybavený vysokovýkonnými lítiovo- čistenia, alebo z prístroja • Mriežka filtra je zanesená. Vyčistite ju alebo vymeňte. Nabíjací kontakt iónovými akumulátormi. Ak chcete zachovať výkon vypadáva prach •... - Page 15 OVLÁDANIE POMOCOU APLIKÁCIE Error 13: Please check if my wheels have become blocked Hnacie koliesko je zaseknuté alebo zamotané. somewhere Prv než bude možné ovládať zariadenie prostredníctvom aplikácie, treba ho spojiť s vaším telefónom a umožniť mu prístup do vašej WiFi siete. Error 14: Please check if the main brush has become Hlavná...
-
Page 16: Ochrana Životného Prostredia
PODZIĘKOWANIE Dziękujemy za zakup produktu marki Concept i życzymy Państwu zadowolenia z naszego produktu przez cały czas jego użytkowania. Przed pierwszym użyciem prosimy o uważne przeczytanie całej instrukcji obsługi oraz zachowanie jej na przyszłość. Należy zadbać o to, aby także inne osoby, które będą obchodziły się z produktem, zapoznały się z niniejszą instrukcją. Parametry techniczne Pobór mocy 50 W... - Page 17 do 40°C. Przedłuży to żywotność baterii. • Przed użyciem należy upewnić się, że pojemnik na kurz i tkanina mopa są • Należy upewnić się, że podłączane napięcie zgadza się z wartościami prawidłowo zamocowane. podanymi na tabliczce znamionowej produktu. Nie wolno podłączać •...
-
Page 18: Opis Produktu
z uszkodzonym przewodem zasilającym. • Odkurzacza automatycznego należy używać wyłącznie z oryginalnym 1 Pokrywka filtrów 2 Przycisk do wyjęcia pojemnika adapterem sieciowym dostarczanym wraz z nim. Nigdy nie wolno używać 3 Czujnik ściany adaptera innego typu, aby uniknąć powstania niebezpiecznej sytuacji. 4 Przycisk restartu sytemu 5 Połączenie do upgrade systemu (to łącze Nieprzestrzeganie wskazówek producenta może prowadzić... - Page 19 KLUCZOWE FUNKCJE UŻYWANIE słabego akumulatora, naładuj go w stacji dokującej, a urządzenie włączy się automatycznie. Urządzenie Sprzątanie / włączenie i wyłączenie WŁĄCZENIE/WYŁĄCZENIE może rozpocząć normalną pracę tylko w przypadku, gdy • Krótkim naciśnięciem uruchamia się lub wstrzymuje Naciśnij i przytrzymaj przez 3 s przycisk - zapala się...
- Page 20 ładującej. do mycia podłóg, nie pojedzie do tego obszaru. Jeśli obrotów szczotki głównej i szczotek bocznych. i naciskamy przycisk , aby potwierdzić wszystkie urządzenie będzie tylko odkurzało, wyjedzie do tego ustawienia czasu. Jeśli tego nie zrobimy, nasze Pamiętaj: Podczas sprzątania nie ruszaj odkurzacza obszaru.
-
Page 21: Codzienna Konserwacja
Akumulator zmniejszeniu. kolejności: kratka - filtr piankowy - filtr HEPA. Czujnik przeciwko upadkowi 3. Odkurzacz będzie przemieszczał się najpierw wzdłuż • Urządzenie posiada akumulator litowo-jonowy Styk ścian, a następnie rozpocznie stopniową sterylizację ładowania o wysokiej pojemności. Aby zachować pojemność wnętrza obszaru. Uchwyt filtrów akumulatora, należy... -
Page 22: Rozwiązywanie Problemów
Nienormalne zachowanie Wyłącz odkurzacz i zrestartuj go. Error 9: Master, please clean the dust container and filter Pojemnik na kurz jest pełny albo trzeba wymienić kratkę filtra. W czasie pracy odzywa Do szczotki głównej, małej szczotki bocznej albo kółka mogą przywierać ciała obce - się... - Page 23 Kompatybilność: System operacyjny urządzenia typu Smart - Android 5.0 lub wyższy - IOS 9.0 lub wyższy Sieć WiFi - 2,4 GHz - zabezpieczenie WPA1 i WPA2 (zalecane WPA2) UWAGA: Urządzenie nie może pracować w sieciach WiFi zabezpieczonych za pomocą protokołu IEEE 802.1X (najczęściej firmowe sieci WiFi).
-
Page 24: Ochrona Środowiska
SERWIS KÖSZÖNETNYILVÁNÍTÁS Bardziej kompleksową konserwację lub naprawy wymagające ingerencji w wewnętrzne elementy produktu powinien Köszönjük, hogy megvásárolta ezt a Concept márkájú készüléket, és kívánjuk, hogy használata során végig elégedett wykonywać wykwalifikowany specjalista lub serwis. legyen termékünkkel. Az első használat előtt figyelmesen tanulmányozza át az egész használati útmutatót, és őrizze meg. Gondoskodjon OCHRONA ŚRODOWISKA róla, hogy a terméket kezelő... - Page 25 • Haját, ruháját, ujjait vagy más testrészeit ne tegye a főkefe közelébe. • A készülék tisztításához ne használjon durva és kémiailag agresszív A főkefét és a porszívó szívó részét tartsa tisztán, távolítsa el belőle a hajat anyagokat. és a port, mert ezek gyengíthetik a szívási tulajdonságokat és a takarítás •...
-
Page 26: A Termék Leírása
A TERMÉK LEÍRÁSA Az alkatrészek jegyzéke 1 Carpet kefe 8 Pet kefe 1 LDS lézeres távolságmérő 8 Oldalkefe 2 A kefe burkolata 9 Oldalkefe 2 Ütközésgátló érzékelő a radarhoz 9 Az akkumulátor borítása 3 Hardfloor kefe 10 Tisztítókefe 3 Ütközésgátló érzékelők 10 Hajtókerék 4 Távirányító... - Page 27 HASZNÁLAT kapcsolhatja be. Ha a tápellátás kontroll-lámpája követi a tervezett útvonalat és folytatja a munkát. Ha normálisan be van kapcsolva, töltse fel a robotot a tájékozódás nem sikerül, a robot törli az előző feladatot, BEKAPCSOLÁS/KIKAPCSOLÁS a dokkoló állomáson. térképet készít, és újra kitakarít. Akkor is, ha nem találja Hosszan, 3 másodpercig tartsa lenyomva a gombot, a töltőalapzatot.
- Page 28 a robotporszívó elülső oldala felé, és nyomja meg nyomva 3 másodpercig egyszerre a és a gombot, gombot a robotporszívó takarítási tervének míg fel nem hangzik a „WiFi lost, please follow app Retesz jóváhagyásához. instruction for reconnection” (A WiFi jel elveszett. Az 4.
- Page 29 Érzékelők (havonta tisztítsa) A LEGGYAKORIBB PROBLÉMÁK Megjegyzés: • A szűrőrácsot tiszta vízzel öblítse le, ne adjon hozzá LDS lézeres semmilyen tisztítószert. Hiba Megoldás távolságmérő • Ne tisztítsa a rácsot kefével vagy az ujjaival. Ütközésgátló A robot nem indul be • Ha az akkumulátor töltöttsége alacsony, helyezze a robotot a dokkoló állomásra és •...
- Page 30 zavarják a csatlakozást (pl. lakótelepen, lakóházban stb.). Az ilyen esetek nem adnak alapot a készülékre vonatkozó Error 4: Please scrub the cliff sensor, and restart me from Az esés elleni érzékelő le van takarva, vagy magasban reklamációra. a new location van.
- Page 31 SZERVIZ Nagyobb mértékű, vagy a termék belső részeire is vonatkozó karbantartást vagy javítást szakembernek vagy szakszerviznek kell elvégeznie. A KÖRNYEZET VÉDELME • Lehetőleg gondoskodjon a csomagolóanyagok és a régi készülék újrahasznosításáról. • A készülék dobozát a szelektív gyűjtőbe dobhatja. • A polietilén (PE) műanyagzacskókat adja le újrahasznosítható anyagokat gyűjtő helyen. A készülék újrahasznosítása az élettartama végén: 1.
-
Page 32: Svarīga Informācija
PATEICĪBA ķermeņa daļas. Nodrošiniet galvenās birstes un putekļsūcēja sūkšanas daļas tīrību, noņemiet matus un putekļus, kas var samazināt putekļsūcēja Pateicamies par šīs “Concept” ierīces iegādi. Ceram, ka būsiet apmierināti ar šo izstrādājumu visu tā kalpošanas laiku. sūkšanas jaudu un uzkopšanas kvalitāti. Pirms lietošanas rūpīgi izlasiet šo lietošanas instrukciju un uzglabājiet to drošā... -
Page 33: Ierīces Apraksts
• Ierīce ir paredzēta tikai mājsaimniecības vajadzībām. Tā nav paredzēta IERĪCES APRAKSTS ekspluatācijai komercnolūkos. 1 LDS lāzera tālmērs 8 Sānu birste • Nepieļaujiet elektrības vada, kontaktdakšas vai ierīces nokļūšanu ūdenī 2 Pretsadursmes sensors radara sensoram 9 Akumulatora vāks 3 Pretsadursmes sensori 10 Piedziņas ritenis vai citā... - Page 34 Komponentu saraksts akumulatora uzlādes līmenis ir ≥15 %. daļu. Tvertne “2 vienā” ir uzstādīts vietā, tiklīdz 1 Paklāja (Carpet) birste 8 PET birste dzirdat klikšķi un atskan ierīces balss paziņojums. 5. Mobilās lietotnes savienošana (šo darbību varat 2 Birstes pārsegs 9 Sānu birste Pēc tvertnes “2 ...
- Page 35 • Pirms lietošanas noņemiet no grīdas dažādus vadus AIZLIEGTĀ ZONA ŪDENS PLŪSMAS REGULĒŠANA Laika iestatīšana (ieskaitot bāzes stacijas elektrības vadu), lai novērstu Izmantojiet mobilo lietotni, lai iestatītu vienu vai Ūdens plūsmu var iestatīt, izmantojot mobilo lietotni. 1. Nospiediet taustiņu uz tālvadības pults, lai darbības atteici un priekšmetu vai vadu bojājumus, ja vairākas aizliegtās zonas.
- Page 36 STERILIZĀCIJAS REŽĪMS Akumulators 3. Noslaukiet atsevišķas daļas un ļaujiet brīvi izžūt. Kritiena sensors 4. Pēc žāvēšanas pakāpeniski uzstādiet tos pareizā secībā: • Ierīce ir aprīkota ar augstas veiktspējas litija jonu Uzlādes 1. Lai ieslēgtu sterilizācijas režīmu, nospiediet taustiņu režģis – putu filtrs – HEPA filtrs. kontakts akumulatoriem.
-
Page 37: Problēmu Risināšana
Izmantošanas laikā ir Galvenā birste, sānu birste vai ritenīši var būt aptinušies ar svešķermeņiem. Izslēdziet Error 11: I'm stuck, please help me! Robots ir iestrēdzis. dzirdams neparasts robotu un noņemt svešķermeņus. Error 12: Please place me correctly! Robots ir sasvēries. troksnis Error 13: Please check if my wheels have become blocked Piedziņas ritenis ir iestrēdzis vai aptinies. -
Page 38: Vides Aizsardzība
IERĪCES VADĪBA, IZMANTOJOT LIETOTNI Lai ierīci varētu vadīt ar lietotni, tā ir jāsavieno ar tālruni un jāļauj tai piekļūt WiFi tīklam. Ieteicamais attālums iestatīšanas laikā: mazāk nekā 4 metri. Pārliecinieties, ka robots putekļsūcējs, maršrutētājs un Jūsu mobilais tālrunis atrodas tuvumā, lai savienošana noritētu bez problēmām. -
Page 39: Important Safety Precautions
ACKNOWLEDGMENT • Do not put your hair, clothes, fingers or other body parts near the main brush. Keep the main brush and the suction part of the vacuum robot Thank you for purchasing a Concept product. We wish you much joy with your new appliance every day you use it. clean, remove all hair and dust that can lower the suction properties of Please read the instruction manual carefully before initial use. -
Page 40: Product Description
appliance. PRODUCT DESCRIPTION • The appliance is only suitable for home use and is not intended for 1 LDS laser range-finder 8 Side brush commercial use. 2 Anti-collision sensor for radar sensor 9 Battery cover 3 Anti-collision sensors 10 Drive wheel •... -
Page 41: Key Features
List of parts 5. Connecting a mobile app (you can skip this step) the 2-in-1 container, insert the wiping module. Once 1 Carpet brush 8 Pet brush Read the instructions for connecting Wi-Fi and connect you hear a “click” sound, the module is correctly 2 Brush cover 9 Side brush the mobile app. - Page 42 WATER FLOW SETTING appliance automatically returns to the docking Use the mobile app to select the rooms you want to clean. the time setting, the Sunday symbol flashes on the station. You can adjust the water flow using the mobile app. The LCD.
-
Page 43: Daily Maintenance
Battery cleaning. The rotation speed of the main brush and Cliff sensor side brushes is also reduced. • The appliance is equipped with high-performance Charging 3. The robot first moves along the walls and then contact lithium-ion batteries. maintain battery Filter holder gradually begins to sterilize the inner part of the area. -
Page 44: Troubleshooting
Unusual noise is heard The main brush, side brush or wheel may be wrapped with foreign objects, turn off the Error 11: I'm stuck, please help me! The robot is stuck somewhere. during use robot and remove foreign objects. Error 12: Please place me correctly! The robot is tilted. - Page 45 OPERATING USING THE APP Before you can control the device using the app, it is necessary to connect it to your phone and give it access to your Wi-Fi network. Recommended distance during set-up: less than 4 meters Make sure your robotic vacuum cleaner, router, and your mobile phone are close together so that you can pair your phone with the device with no problems.
-
Page 46: Environmental Concerns
SERVICE DANKSAGUNG Extensive maintenance or repair, which requires access to internal parts of the product, has to be performed by Vielen Dank, dass Sie ein Produkt der Marke Concept eingekauft haben. Wir wünschen Ihnen, dass Sie mit unserem a qualified specialist or the service centre. Produkt über seine gesamte Gebrauchsdauer zufrieden sein werden. - Page 47 0 °C bis 40 °C genutzt werden. • Im Falle, wenn Sie das Elektrogerät transportieren oder wenn Sie es • Vergewissern Sie sich vor der Nutzung, dass der Staubbehälter und das lange nicht nutzen werden, schalten Sie den Schalter in die Position Moppgewebe richtig eingesetzt sind.
- Page 48 • Das beschädigte Netzkabels lassen Sie bei einer Fachwerkstatt ersetzen, um Entstehung einer gefährlichen Situation zu vermeiden. Es ist verboten, 1 Filterabdeckung 2 Taste zum Herausnehmen des Behälters das Gerät mit beschädigtem Netzkabel zu benutzen. 3 Wandsensor • Der Staubsauger-Roboter ist nur mit dem mitgelieferten originalen 4 Taste zum System-Neustart Netzadapter zu benutzen.
- Page 49 KERNFUNKTIONEN • Beim aufgesetzten Aufwischmodul des Roboters normal eingeschaltet ist, laden Sie den Roboter in der Dockingstation auf. werden die Schmutzpartikel aus dem 2in1 Behälter Reinigung / Ein- und Ausschalten nicht abgesaugt. • Durch kurzes Drücken wird die Reinigung gestartet Anmerkung: Wenn das Gerät aufgrund eines schwachen oder gestoppt.
- Page 50 intelligent in einzelne Bereiche verteilt. Anschließend einzugreifen. einzustellen. 2. Durch Drücken der linken und der rechten Taste wird fegt er die Bereiche nacheinander gründlich, effizient • Sobald die Karte erneut wird, wird die dauerhaft der Tag in der Woche gewählt, und durch Drücken der UV-LAMPE UND STERILISIERUNG und ordentlich entlang der Wand aus, und plant die gesperrte Zone aufgehoben.
- Page 51 STERILISIERUNGSMODUS Akku gewährleisten. Dockingstation im unteren Teil des Geräts (schalten Sie das Gerät bei der Reinigung aus). Staubbehälter und Filtergitter (sind regelmäßig zu • Das Gerät ist mit leistungsstarken Li-Ion-Akkus 1. Drücken Sie die Taste auf der Fernbedienung 5. Signalübertragungsbereich der Dockingstation reinigen) ausgestattet.
-
Page 52: Problemlösung
Der Roboter kann nicht Der Roboter befindet sich zu weit weg von der Dockingstation, legen sie diesen in die Error 6: Please scrub the right-hand sensor, and restart Der Wandsensor ist verschmutzt oder abgedeckt. nachgeladen werden. Nähe der Dockingstation und versuchen Sie es erneut. me from a new location Außerordentliches Schalten Sie den Roboter aus und starten Sie diesen neu. - Page 53 keinen Grund für die Beanstandung des Geräts dar. • Die Applikation wird vom dritten Subjekt (nachfolgend nur „Subjekt“) besessen und betrieben, das mit der Gesellschaft Jindřich Valenta - CONCEPT (nachfolgend nur „Verkäufer") nicht übereinstimmt. Es werden keine personenbezogenen Daten seitens des Verkäufers an das Subjekt übermittelt. Bei der Eintragung in die Applikation übermittelt der Kunde seine personenbezogenen Daten direkt an das Subjekt, das zum Verwalter der personenbezogenen Daten wird.
- Page 54 • Sobald der Staubsauger mit Ihrer Smart-Einrichtung mittels der Applikation „Concept Home“ gepaart wurde, MERCI bewegen Sie mit der Dockingstation, bzw. versetzen Sie diese nicht. Der Staubsauger benutzt die Ladestation als Nous vous remercions d’avoir acheté le produit de la marque Concept et nous espérons qu’il vous apportera votre einen Orientierungspunkt in der Karte.
- Page 55 brosse principale et la partie aspirante de l’aspirateur propres, supprimer • Ne jamais nettoyer l’appareil à l’aide des agents abrasifs ou des produits les cheveux et la poussière qui peut réduire les performances de chimiques agressifs. l’aspirateur et la qualité du nettoyage. •...
-
Page 56: Description Du Produit
DESCRIPTION DU PRODUIT Liste de composants 1 Brosse Carpet 8 Brosse PET 1 Télémètre laser LDS 8 Brossette latérale 2 Cache de la brosse 9 Brosse latérale 2 Capteur anti-collision du capteur radar 9 Capot de batterie 3 Brosse Hardfloor 10 Brossette de nettoyage 3 Capteurs anti-collision 10 Roue motrice... - Page 57 USAGE batterie faible, le charger dans le bloc d'alimentation et déterminer sa position. Un positionnement réussi sera l'appareil démarrera automatiquement. Le robot ne peut suivi d'un parcours du chemin planifié et d'un nettoyage MARCHE / ARRET fonctionner normalement que lorsque le niveau de la continu.
-
Page 58: Entretien Quotidien
UTILISATION DE LA TÉLÉCOMMANDE ENTRETIEN QUOTIDIEN une fois le travail terminé. télécommande et l'aspirateur robot. 1. Nettoyage planifié REINITIALISER le WIFI Plan de nettoyage Brosse principale (à nettoyer régulièrement) 2. Avancer Si le téléphone mobile ne peut pas se connecter 1. -
Page 59: Problèmes Courants
PROBLÈMES COURANTS Capteur anti-chute Broche de Problème Solution charge Support filtre Impossible de mettre en • Si la batterie est faible, mettre l'appareil dans son bloc d'alimentation et aligner marche l'appareil les broches, l'appareil démarrera automatiquement (si le robot est complètement Filtre mousse éteint, il peut redémarrer automatiquement après un certain temps). - Page 60 est en quelque sorte perturbé. En outre, un certain nombre de facteurs, notamment la configuration matérielle Erreur 3 : Please place me in a new location and try again Ramassez le robot ou soulevez-le en l'air. et logicielle, affectent également le succès de la communication Wifi sans fil. La connexion entre le robot et votre Erreur 4 : Please scrub the cliff sensor, and restart me Le capteur anti-chute est couvert ou situé...
-
Page 61: Entretien
ATTENTION AUX PROBLÈMES D'APPARIEMENT • Vérifiez que le mot de passe saisi de votre réseau WiFi est correct. • L'appareil ne supporte que les réseaux WiFi 2,4 GHz. • Le routeur est submergé par la connexion de nombreux autres appareils (en particulier dans les lotissements ou de grandes concentrations d'appareils intelligents connectés). - Page 62 RINGRAZIAMENTO • Prima di procedere all’uso dell’apparecchio controllare se il contenitore per la raccolta della polvere e il tessuto del mop sono inseriti correttamente. Grazie per aver acquisito il prodotto di marchio Concept e vi auguriamo che vi dia la massima soddisfazione per tutta •...
-
Page 63: Descrizione Del Prodotto
prese e/o alle prolunghe. Un eventuale danno causato dal mancato rispetto delle indicazioni previste dal produttore non può essere coperto dalla garanzia. • Allo staccare dell’apparecchio dalla presa di corrente non tirare mai il cavo di alimentazione, bensì prendere la spina in mano e staccarla estraendola. Controllare attentamente se sono stati disimballati tutti gli accessori, •... -
Page 64: Funzioni Chiave
FUNZIONI CHIAVE si avvia automaticamente. L’apparecchio può lavorare normalmente solo se il livello di ricarica dell’accumulatore Pulizia / accensione e spegnimento Stazione di ricarica è ≥15 %. • Premendo brevemente si avvia o ferma la pulizia. 1 Coperchio • Premendo per 3 s, l’apparecchio si accende o spegne. 5. - Page 65 UTILIZZO PROGRAMMAZIONE DELLE PULIZIA torna automaticamente alla stazione di ricarica. Il tempo fisso della pulizia può essere impostato tramite Nota: Durante la pulizia non muovere il robot inutilmente ATTIVAZIONE/SPEGNIMENTO: l’applicazione mobile. L’apparecchio comincia a pulire e frequentemente. Se spostato, rimettere il robot nella Premere il pulsante per 3 s, la spia si accende automaticamente all’ora impostata e terminato lavoro...
-
Page 66: Utilizzo Del Telecomando
UTILIZZO DEL TELECOMANDO MANUTENZIONE GIORNALIERA 5. In questo modo si completa l’impostazione dell’ora per 1. Programmazione della pulizia il telecomando e per il robot aspirapolvere. Spazzola principale (da pulire regolarmente) 2. Movimento avanti Piano di pulizia Portafiltri 1. Girare l’apparecchio e premere il fermo sul coperchio 3. -
Page 67: Soluzione Dei Problemi
Accumulatore Sensore anticaduta Comportamento Spegnere il robot e riavviarlo. • L’apparecchio è munito degli accumulatori agli ioni di anomalo Contatto di ricarica litio ad alta potenza. Se si vogliono mantenere le alte L'apparecchio emette il Sulla spazzola principale, la spazzola laterale o sulla ruota possono essere avvolte delle prestazioni dell’accumulatore, utilizzare l’apparecchio suono strano durante il impurità, spegnere il robot ed eliminare le impurità. - Page 68 Compatibilità: Errore 9: Master, please clean the dust container and Il contenitore per la raccolta della polvere è pieno Sistema operativo del dispositivo Smart - Android 5.0 e superiore filter oppure occorre sostituire la griglia del filtro. - IOS 9.0 e superiore Errore 10: Dust container has been removed, please Segnalato l’errore 9 l’utente aveva estratto il contenitore Rete Wifi...
-
Page 69: Protezione Dell'ambiente
ASSISTENZA La manutenzione più impegnativa e/o la riparazione che richiede l’intervento sulle parti interne dell’apparecchio devono essere effettuate esclusivamente dal centro di assistenza autorizzato o da una persona esperta e qualificata. PROTEZIONE DELL’AMBIENTE • Riciclare imballi e prodotti vecchi, alla fine di loro ciclo di vita. •... -
Page 70: Advertencias Importantes De Seguridad
AGRADECIMIENTO Mantenga limpios el cepillo principal y la boca de la aspiradora, retire el pelo y el polvo que podrían afectar la succión y la calidad de la limpieza. Gracias por comprar este producto de la marca Concept y esperamos que quede satisfecho con él durante todo el •... -
Page 71: Descripción Del Producto
físicas o mentales reducidas, o con insuficiente experiencia DESCRIPCIÓN DEL PRODUCTO y conocimientos pueden utilizar el artefacto únicamente bajo supervisión 1 Telémetro láser LDS 8 Cepillo lateral o si se les ha enseñado a utilizarlo de una manera segura y son conscientes 2 Sensor anticolisión para radar 9 Tapa de la batería 3 Sensor anticolisión... -
Page 72: Funciones Principales
Lista de componentes 5. Conexión de aplicación celular (este paso puede ha instalado correctamente cuando se oye un clic. 1 Cepillo Carpet 8 Cepillo Pet saltearse) 8. Desmontar el módulo de fregado 2 Cubierta del cepillo 9 Cepillo lateral Lea las instrucciones para conectarse al Wi-Fi y conecte Una vez que el robot haya terminado su labor, presione 3 Cepillo Hardfloor 10 Cepillo de limpieza... -
Page 73: Mantenimiento Diario
cambio grande en la posición de la base de carga únicamente con el colector de polvo. No la active con el remoto al frente de la aspiradora y presione el botón a objetos o cables. y los muebles. Por este motivo, durante la limpieza módulo de fregado. -
Page 74: Problemas Comunes
Batería principal para poder extraerlo. Sensor contra caídas 2. Limpie el polvo del recinto y del interior del cepillo con • El artefacto está equipado con baterías de iones Contacto un cepillo pequeño y limpie el cepillo principal. Soporte del de carga de litio de alto rendimiento. -
Page 75: Solución De Problemas
Ruido inusual durante El cepillo principal o lateral, o la rueda pueden estar cubiertas con objetos extraños. Error 12: Please place me correctly! El robot está inclinado. el uso Apague el robot y retire los objetos. Error 13: Please check if my wheels have become blocked La rueda motriz está... - Page 76 CONTROL CON LA APLICACIÓN Antes de poder controlar el artefacto con la aplicación, debe sincronizarlo con su teléfono y permitirle acceder a la red Wi-Fi. Distancia recomendada: menos de 4 metros Asegúrese de que la aspiradora robótica, el router y su teléfono estén cerca para poder sincronizar sin problemas. Descargar e instalar la aplicación, instrucciones para sincronizar el artefacto Nota: Sincronice la aspiradora con la batería cargada o directamente en la base de carga.
- Page 77 SERVICIO MULȚUMIRE El mantenimiento de carácter más amplio o las reparaciones que requieran intervenir en las piezas internas del Vă mulțumim pentru cumpărarea produsului marca Concept și vă dorim să fiți mulțumiți de produsul nostru pe producto deben ser realizados por un servicio profesional. întreaga durată...
- Page 78 • Nu puneți părul, îmbrăcămintea, degetele sau alte părți ale corpului pentru a curăța aparatul. în apropierea periei principale. Mențineți peria și partea de aspirare • Aparatul este destinat doar utilizării casnice, nu este destinat uzului a aspiratorului curate, îndepărtați părul și praful care ar putea să reducă comercial.
-
Page 79: Descrierea Produsului
DESCRIEREA PRODUSULUI Listă de componente 1 Perie Carpet 8 Perie Pet 1 Aparat măsurat lungimi LDS 8 Periuța laterală 2 Carcasă perie 9 Peria laterală 2 Senzor anti coliziune pentru senzorul radar 9 Carcasa acumulatorului 3 Perie Hardfloor 10 Perie de curățare 3 Senzori anti coliziune 10 Roata de acționare 4 Telecomandă... - Page 80 UTILIZARE iar aparatul va porni automat. Aparatul poate să lucreze După găsirea cu succes a poziției va continua cu traseul normal doar atunci când nivelul acumulatorului este planificat și va continua cu munca. Dacă poziția nu est PORNIRE/OPRIRE ≥15%. găsită, robotul anulează sarcina anterioară, va crea o hartă Butonul apăsat lung, timp de 3 s, indicatorul se aprinde nouă...
- Page 81 RESETARE Wi-Fi treceți pe setarea minutelor. După aceasta direcționați În cazul în care nu vă puteți conecta la aparat cu telefon telecomanda spre partea frontală a aspiratorului robot, Clichet din cauza modificării configurației router-ului și a parolei iar prin apăsarea butonului confirmați această...
- Page 82 • Limpeziți grila filtrului cu apă curată fără adăugarea Senzori (curățați în fiecare lună) PROBLEME OBIȘNUITE vreunui agent de curățare. Aparat măsurat • Nu curățați grila filtrului cu pensulă sau degete. Defecțiunea Soluția lungimi LDS • Grila filtrului lăsați să se usuce la aer timp de cel puțin Senzor anti coliziune Robotul nu poate fi •...
- Page 83 dintre robot și rețeaua dumneavoastră Wi-Fi poate fi influențată negativ de rețele Wi-Fi din jur care pot fi setate Error 4: Please scrub the cliff sensor, and restart me from Senzorul împotriva căderii este acoperit sau este pe același canal și prin aceasta să perturbe conexiunea (de ex. cartiere, blocuri ș.a.m.d.). Acest fapt nu prezintă un a new location amplasat la înălțime.
-
Page 84: Protecția Mediului
• Din momentul în care împerecheați aspiratorul cu dispozitivul smart prin intermediul aplicației „Concept Home“, nu mai mișcați cu stația de încărcare și nici nu o mutați. Aspiratorul folosește stația de încărcare ca punct de orientare pe hartă. • Prin mutarea stației de andocare riscați pierderea hărții generate, inclusiv a zonelor de curățenie și interzise definite! Aspiratorul va crea o hartă...
Need help?
Do you have a question about the VR3520n and is the answer not in the manual?
Questions and answers