
Related Manuals for Atlanta Attachment Company 1390HCE


Summary of Contents for Atlanta Attachment Company 1390HCE
- Page 1 1390HCE Model Preliminary Copy Revision 0 November 30 2022(wr) Technical Manual & Parts Lists Atlanta Attachment Company 362 Industrial Park Drive Lawrenceville, GA 30046 770-963-7369 • www.atlatt.com...
- Page 2 The materials contained herein are confidential and proprietary information of Atlanta Attachment Company. In addition to any confidentiality and non-disclosure obligations that currently exist between you and Atlanta Attachment Company, your use of these materials serves as an acknowledgment of the confidential and proprietary nature of these materials and your duty not to make any unauthorized use or disclosure of these materials.
-
Page 3: Table Of Contents
Contents CONFIDENTIAL AND PROPRIETARY INFORMATION ............1 SAFETY INSTRUCTION ......................3 Important Notices............................6 Maintenance ..............................8 INSTALLATION ......................... 11 ........................11 ARTS AND OMPONENTS Infeed End ............................. 11 Machine Controls ........................... 11 Seal Area ............................11 Outfeed End ........................... 11 ........................ -
Page 4: Confidential And Proprietary Information
1390HCE-WD2 W ..................58 IRING IAGRAM ERIAL 1390HCD-WD3 W & E-S ............... 59 IRING CHEMATIC AUSE 1390HCE-WD4 S , 1390HCE & 1306FF ............60 AFETY IRING IRCUIT 1390500 L ....................61 OWER OLDER RAME 1406240 H ....................62 YDRAULIC SSEMBLY 13061105 V ....................... - Page 5 13901150 Outfeed Conveyor Motor Assembly, Left .................. 128 13901155 Outfeed Conveyor Motor Assembly, Right ................129 1406942 Regulator Assembly, Modified ..................... 130 13901130 Rear Table Assembly ........................ 131 TRAINING ........................133 ATLANTA ATTACHMENT COMPANY (AAC) STATEMENT OF WARRANTY ..... 134 ......................134 ANUFACTURED RODUCTS : ........................134...
-
Page 6: Safety Instruction
Safety Instruction This part of the Instruction Material is provided for the safe use of your equipment. It contains important information to help work safely with the unit and describes the dangers inherent in machinery. Some of these dangers are obvious, while others are less evident. - Page 7 The personnel's awareness of the dangers and compliance with the safety regulations should be checked at irregular intervals. Choice and Qualification of Personnel Ensure that work on the machine is only carried out by reliable persons who have been appropriately trained for such work - either within the company, by our field staff or at our office - and who have not only been duly appointed and authorized but are also fully familiar with the local regulations.
- Page 8 shift. Damage found shall be immediately remedied by a duly authorized person before resuming operation of machine. The machine should only be operated when in perfect working order and when all protective mechanisms and safety equipment, such as detachable protective mechanisms, emergency STOP systems, etc.
-
Page 9: Important Notices
Important Notices Reporting and Fighting Fires Read the instructions posted in your factory about reporting fires and the emergency exits. Make sure you know exactly where the fire extinguishers and sprinkler systems are located and how they are operated. Pass on the corresponding information to the firemen when they arrive. Ensure there are enough signs to avoid fire hazards. - Page 10 The packaging and machine must immediately be examined for signs of damage in transit. Such damage must be reported to the shipper/transporter within the applicable time limits. Contact Atlanta Attachment Company and/or your transport insurer immediately, if signs of damage are visible. Never operate a damaged machine.
-
Page 11: Maintenance
Local Regulations Particular attention must be paid to local and statutory regulations, etc. when installing machines and the plant (e.g. with regard to the specified escape routes). Note the safety zones in relation to adjacent machines. Maintenance General Safety Instructions The machine shall be switched off, come to a standstill, and be secured so that it cannot be switched on again inadvertently before starting any maintenance work whatsoever. - Page 12 rating. The machine must be switched off immediately if a fault develops in the electrical power supply. The electrical equipment of our machines must be checked at regular intervals and any defects found must be remedied immediately. If it is necessary to carry out work on live parts, a second person should be on hand to operate the emergency OFF switch or master switch with voltage release in the event of an emergency.
- Page 13 • Follow daily and weekly checklists, making sure hoses are tightly secured and bolts are tightened. • ALWAYS watch and avoid holes or deep depressions. ALWAYS wear adequate eye protection when servicing the hydraulic system and battery. • NEVER operate a poorly maintained machine. •...
-
Page 14: Installation
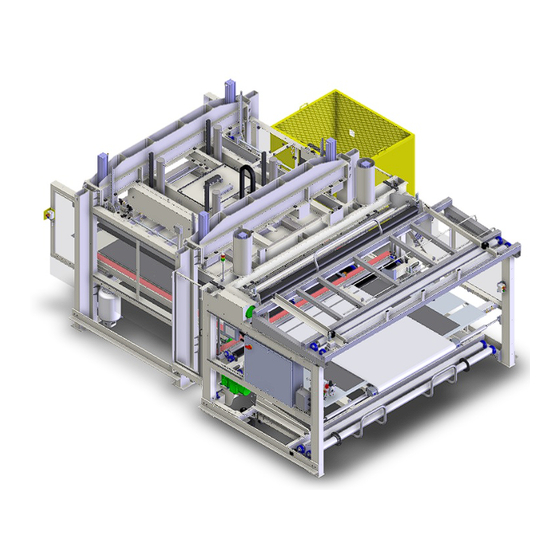
INSTALLATION NOTE: It is important that the machine technician read this manual and is familiar with all the functions and safety concerns of the unit before Installing and operating. Parts and Components Infeed End 1. Top Film Roll storage 2. Bottom Film Roll Storage Optional : Overhead roll holder not shown Optional : Hoist for loading the Top Film rolls not shown. -
Page 15: Machine Specifications
Machine Specifications Capacity & Production Specs. 85” inches Max. Width of Infeed: Min. Width of Infeed: 29” inches Max Height under Pressure Roller: 20” inches Roll capacity, top & bottom (12” DIA) 4 rolls ( 12” dia) Infeed/outfeed conveyor height (inch) 36.0 inches 104”... -
Page 16: Machine Safety
Machine Safety The 1390HCE Auto-Pack is large machine and has many powerful drives and mechanisms. ANYONE assigned to operate and/or maintain this machine must be properly trained by an Atlanta Attachment technician, or a trained and qualified factory mechanic. Operation and/or maintenance of this machine by untrained personnel may result in a serious injury or even death. - Page 17 WARNING 1 In auto mode, this machine can start automatically at any time. Therefore, when the machine is turned on: - NEVER ENTER INSIDE THE MACHINE - NEVER CRAWL UNDER THE MACHINE - NEVER CLIMB ON TOP OF THE MACHINE - NEVER REACH INSIDE THE MACHINE FOR ANY REASON - NEVER PLACE ANY PART OF YOUR BODY INSIDE THE MACHINE - AFTER PRESSING START, THE INFEED BELTS WILL RUN CONTINUOUSLY AND WILL...
-
Page 18: Lockout/Tagout Program
The following references provide information about the LOTO process. Equipment Energy Control Procedure Lockout/Tagout Program Description: Auto Pack Workstation Model: 1390HCE Manufacturer: Atlanta Attachment Co. Location Energy Location Magnitude Control Method... -
Page 19: Operation
OPERATION Machine Start (Cold) 1. Turn the Main On/Off switch to the ON position. See Fig. 3. 2. Turn the Main Air valve to the ON position. The pressure gauge should be set to 80 PSI. See Fig. 4. 3. Press the green POWER ON push button. See Fig. 5. The Seal Bars begin to heat up at this point. -
Page 20: Side Doors
Film Loading Bottom Film Loading The standard 1390HCE machine comes with a pull-out Bottom Film Roll storage rack that can handle up to (3) 12” diameter x 120” long rolls of plastic film. The Bottom Film Rack can be assembled two ways so it can be pulled out to the left or to the right of the machine for loading. -
Page 21: Top Film Loading
Top Film Loading The standard 1390HCE machine comes with a Top Film Roll storage rack that can handle up to (4) 12” diameter x 120” long rolls of plastic film. Important note! The film rolls must be loaded such that they unwind counterclockwise, looking from the left side of the machine (see “Film Routing”... -
Page 22: Film Routing
Film Routing The Top and the Bottom plastic film routing is very important. The illustration below (Figure 11) must be carefully followed. For the operator’s convenience, a copy of this illustration is attached to the left input post of the machine. -
Page 23: Machine Controls
Machine Controls Main Screen This is the main screen. From this screen you can start the machine, see the temperature of all three seal bars, and view the piece count. You can also access the setup, manual and piece count screens. Piece Count When this button is pressed and from this screen you can reset the piece count and/or the optional External count display. -
Page 24: Setup
Setup Pressing the Setup button on the Main screen will bring you to the Setup screen. From here you can access advanced settings, advanced setup, and advanced manual controls. Note: When in the Advanced Manual screen, the heat to the seal bars is turned off. Use extreme caution when in Advanced Manual mode. -
Page 25: Main Control Panel
Main Control Panel Contains: serial bus modules, main breaker, and individual breakers, along with VFD Drives,... -
Page 26: Other Operator Controls
Other Operator Controls 1. Emergency Stop & Reset buttons - Allows the machine to be stopped and safety circuit reset if tripped. Located on each side of input and output end of the machine for operator convenience. Note: It is recommended that the emergency stop and power on buttons be used for normal, everyday machine power up and power down needs. -
Page 27: Light Tower Indicator
• ALL LIGHTS OFF means that one or more of the E-STOP buttons are pressed, or the Main Power is turned OFF, or otherwise disabled. Note: If the above indications do not solve the problem, please refer to “Troubleshooting” on page 44 of this manual for additional help or call Atlanta Attachment Company’s service department at 770-963-7369. -
Page 28: Service
SERVICE Seal Bar Maintenance and Replacement WARNING: Wait until the heat-sealing bar has cooled enough (approx. 3 hours) before servicing seal bars or the areas near the bars. If maintenance on the machine is necessary before sealing bars have had a chance to cool down, the person performing the maintenance must use safety equipment approved by OSHA or local law to protect against burns. - Page 29 There are four major variables for obtaining a good weld. 1. Temperature: The value is set via the control panel. The degrees are expressed in Fahrenheit. Try not to alter the temperature settings as much as possible. A variation of 5 degrees in Fahrenheit temperature will change the clarity of welded materials.
-
Page 30: Side Sealing Bars
Side Sealing Bars WARNING: Wait until the heat-sealing bar has cooled enough (approx. 3 hours) before servicing seal bars or the areas near the bars. If maintenance on the machine is necessary before sealing bars have had a chance to cool down, the person performing the maintenance must use safety equipment approved by OSHA or local law to protect against burns. - Page 31 Note: Upper bar should always fully contact tape and silicone cushion. At no time should any part of the upper seal bar contact the metal of the lower bar assembly Alignment of Seal Bars Loosen the clevis screws (a) and adjust up or down to meet the proper angle.
-
Page 32: Symptoms And Adjustments Of The Cross-Seal Bar
Symptoms and adjustments of the cross-seal Bar (a) through (g) as described in the previous paragraphs are types of heat-sealing problems that also apply to the cross-seal bar with the following additions: (I). Bar-Gradient Position cross seal bar to the height as pictured until you see the four bolts (C) &... -
Page 33: Replacement Of Nonstick Tape
Replacement of Nonstick Tape 1. Make sure heat seal bars are in the up position. 2. Open the clamping system (a) peal back non-stick tape 3. Inspect the silicone rubber backing under tape for cuts. If cut or damaged, replace silicone rubber cushion in that area as they are all glued together. -
Page 34: Side Seal And Cross Seal Bladder Adjustments
Side Seal and Cross Seal Bladder Adjustments Reference parts 1406995 and 13901145 ------------------------------------------------------------------------------------------------------------------------------- 1406995 Cross Seal Note: 10 – 15 psi is average setting ------------------------------------------------------------------------------------------------------------------------------- 13901145 Side Seals Note: 10 – 15 psi is average setting... -
Page 35: Adjusting The Seal Bar Downward Pressure
Adjusting the Seal Bar Downward Pressure Note: For side seal and cross seal bars. WARNING: Wait until the heat-sealing bar has cooled enough (approx. 3 hours) before servicing seal bars or the areas near the bars. If maintenance on the machine is necessary before sealing bars have had a chance to cool down, the person performing the maintenance must use safety equipment approved by OSHA or local law to protect against burns. - Page 36 Example A Good seal Good seal Good seal Example B Lack Good seal Good seal depth...
-
Page 37: Upper Seal Bar Element Replacement
Upper Seal Bar Element Replacement WARNING: Wait until the heat-sealing bar has cooled enough (approx. 3 hours) before servicing seal bars or the areas near the bars. If maintenance on the machine is necessary before sealing bars have had a chance to cool down, the person performing the maintenance must use safety equipment approved by OSHA or local law to protect against burns. - Page 38 5) On the three tallest studs remove the top nut and back out the bottom nut to the end of stud without removing.
- Page 39 6) Remove all the remaining nuts from shorter studs. This will allow the seal bar assembly to slide out pass stainless steel guards far enough for servicing. Warning: It is imperative to lay out a large pad to protect parts being removed from this point on.
- Page 40 On one end of the new heating element make a mark 3 ½” in from the tip with a sharpie. Starting with your mark begin inserting the heating element into the open slot of seal bar. Once in place, you should have 3 ½ “of extra heating element protruding from both ends of the seal bar.
- Page 41 (4) Bend heat element up approximately 30 degrees. After replacement is complete refer to Adjusting the Seal bar beginning on page 315 for final adjustments.
-
Page 42: Shimming The Seal Bar
Shimming the Seal Bar Note: For cross seal bar see symptoms and adjustment of cross seal bar; once adjustment is complete, move to #3 on this page 29. Follow procedures for replacing Left and Right seal edge or heating element page.34. After replacement, some very important steps are needed for the system to perform properly. -
Page 43: Mattress Size Adjustments
Mattress Size Adjustments The 1390HCE basic machine is designed to assist with manually centering the mattress by showing its position as referenced by the numerical numbers shown on the position laser Note: It will not automatically detect and adjust for variations in bed sizes unless it is equipped with optional centering guide part number 1390HCE-KIT1 Before this machine is shipped, it is adjusted and tested according to the customer’s bed... -
Page 44: Maintenance
Maintenance Under normal operating circumstances, the 1390B machine does not require much maintenance. The following list outlines the normal machine maintenance that should be performed on periodic bases to keep the machine in a good working order: Daily Clean the three Seal bars at least once a day, preferably at the beginning of the first shift, before the seal bars begin to heat up. -
Page 51: Lockout Procedure
Lockout Procedure Make sure all seal bar cylinders are in the desired position (up or down). It is necessary to observe the position of these cylinders. When the main air is turned off to the machine, the cylinders are pneumatically locked in the position they are at that moment. Turn off the main air lockout valve and let the airlines and the air tank bleed-off completely. -
Page 52: Troubleshooting
Troubleshooting Machine does not power up when the Power ON button is pressed. 1. Check to make sure all four Emergency Stops are pulled out and operational. 2. Check for a short circuit. Turn off all breakers and turn the machine back ON. If it comes ON, switch ON one breaker at a time. -
Page 53: Sensor Adjustments
Sensor Adjustments Proximity Switch All proximity switches used on the 1390B machine have 8mm sensing range. The distance between the end of the sensor and the target flag should be set at about 5/32” for best performance. Cross Seal Photo Detector The amplifier sensitivity adjustment for the Cross Seal bar is in the bottom-right corner of the main control box. -
Page 54: Assembly Drawings & Parts Lists
The materials contained herein are confidential and proprietary information of Atlanta Attachment Company. In addition to any confidentiality and non-disclosure obligations that currently exist between you and Atlanta Attachment Company, your use of these materials serves as an acknowledgment of the confidential and proprietary nature of these materials and... -
Page 55: 11390Hce Auto Pack, Hyd Comp, Without Infeed Center Guide
11390HCE Auto Pack, Hyd Comp, Without Infeed Center Guide AAC Drawing Number 9009011 Rev 2... -
Page 58: 1390Hc-Hd Hydraulic Diagram
1390HC-HD Hydraulic Diagram AAC Drawing Number 125990C Rev 0... -
Page 59: 1390Hce-Pd Pneumatic Diagram
1390HCE-PD Pneumatic Diagram AAC Drawing Number 125788D Rev 0... -
Page 60: 1390Hce-Wd1 Wiring Diagram, Power Control Box
1390HCE-WD1 Wiring Diagram, Power Control Box AAC Drawing Number 125953D Rev 0... -
Page 61: 1390Hce-Wd2 Wiring Diagram, Serial Bus
1390HCE-WD2 Wiring Diagram, Serial Bus AAC Drawing Number 125787D Rev3... -
Page 62: 1390Hcd-Wd3 Wiring Schematic, Safe Pause & E-Stop
1390HCD-WD3 Wiring Schematic, Safe Pause & E-Stop AAC Drawing Number 125685D Rev 0 E-Stop... -
Page 63: 1390Hce-Wd4 Safety Wiring Circuit, 1390Hce & 1306Ff
1390HCE-WD4 Safety Wiring Circuit, 1390HCE & 1306FF AAC Drawing Number 125882D Rev 2... -
Page 64: 1390500 Lower Roll Holder Frame
1390500 Lower Roll Holder Frame AAC Drawing Number 1390500 Rev 5 NO QTY PART # DESCRIPTION NO QTY PART # DESCRIPTION 4 1390198 ROLL RELEASE DISK NNH1/2-13 NUT,HEX,1/2-13 2 1390458 ROD, ROLL STOP 16 NNK5/16-18 KEP NUT, 5/16-18 4 1390459 NUT PLATE-SIDE ROLLER ADJ SSAS024024 SHOULDER BOLT 3/8 X 3/8L... -
Page 65: 1406240 Hydraulic Pump Assembly
1406240 Hydraulic Pump Assembly AAC Drawing Number 1406240 Rev 0... - Page 66 1406240 Parts List Item # Part Number Description Item # Part Number Description 1406240 0411-1063 ROD, FULL THREAD, 5/8-11 X 5" NNE10-32 NUT, ELASTIC LOCK, 10-32 1406250 FRAME, PUMP, HYDRAULIC NNH1/2-13 NUT, HEX, 1/2-13 1406275 GUARD MOUNT ANGLE NNH3/8-16 NUT, HEX, 3/8-16 1406276 GUARD MOUNT BRACKET NNH5/16-18...
-
Page 67: 13061105 Valve Assembly
13061105 Valve Assembly AAC Drawing Number 13061105 Rev 1... -
Page 68: 13901331 Pc Hmi Mount Assembly
13901331 PC HMI Mount Assembly AAC Drawing Number 13901331 Rev 0... -
Page 69: 13901100 Input Conveyor
13901100 Input Conveyor AAC Drawing Number 13901100 Rev 1... -
Page 72: 13901091 Safety Interlock Switch Assembly
13901091 Safety Interlock Switch Assembly AAC Drawing Number 13901091 Rev 2... -
Page 73: 13901120 Roller Assembly, 58
13901120 Roller Assembly, 58” AAC Drawing Number 13901120 Rev 0... -
Page 74: 1391054 Roll Holder Frame
1391054 Roll Holder Frame AAC Drawing Number 1391054 Rev 3... - Page 75 1391054 Parts List...
-
Page 76: 1391056 Lower Roll Feed
1391056 Lower Roll Feed AAC Drawing Number 1391056 Rev 2 NO. QTY PART # DESCRIPTION NO. QTY PART # DESCRIPTION 1390405 SUPPORT ROLLER WELDT MMGRPA207-20 1.25" BEARING, GRIP-IT 1390804 BOTTOM ROLLER MTG BRKT FO NNE10-32 NUT,ELASTIC LOCK 1390810 GUIDE PLATE ASSY, LOWER R NNH5/8-11 NUT,HEX,5/8-11 1390811... -
Page 77: 1406847 Belt Guide Pulley Assembly
1406847 Belt Guide Pulley Assembly AAC Drawing Number 1391056 Rev 2... -
Page 78: 13901104 Input Conveyor Assembly. # 4
13901104 Input Conveyor Assembly. # 4 AAC Drawing Number 13901104 Rev 1... - Page 79 13901104 Parts List...
-
Page 80: 1406519 Seal Bar 120" Assembly
1406519 Seal Bar 120” Assembly AAC Drawing Number 1406519 Rev 3... -
Page 81: 1406995 Bladder Seal Kit 120
1406995 Bladder Seal Kit 120” AAC Drawing Number 1406995 Rev 10... -
Page 82: 1490345 Idler Roller Assembly Seal Kit 120
1490345 Idler Roller Assembly Seal Kit 120” AAC Drawing Number 1490345 Rev 0... -
Page 83: 1390484 Shaft Assembly, Idler Sprockets
1390484 Shaft Assembly, Idler Sprockets AAC Drawing Number 1390484 Rev 3... -
Page 84: 13901103 Input Conveyor Assembly. # 4
13901103 Input Conveyor Assembly. # 4 AAC Drawing Number 13901104 Rev 1... - Page 86 1390443 Sensor Assembly, Film Out AAC Drawing Number 1390443 Rev 0...
- Page 87 13901102 Input Conveyor Assembly # 2 AAC Drawing Number 13901102 Rev 1...
- Page 90 1390473 Motor Reducer Assembly AAC Drawing Number 1390473 Rev 3...
- Page 91 1390979 Motor Assembly AAC Drawing Number 1390979 Rev 0...
- Page 92 1391035 Cross Seal Valve Assembly AAC Drawing Number 1391035 Rev 1 QTY PART # DESCRIPTION 1391086 MOUNT, VALVE,JUNCTION BOX AAE4V41015 VALVE, 1/2" PORTED, 24VDC AAFAN400N04 MUFFLER,1/2NPT,PLASTIC AAQME-2-2S FITTING,ELBOW,1/2NPT,1/2 AAQMT-2-2S TEE,1/2NPT-1/2 TUBE FF3234 STRAIN RELIEF,LIQ TIGHT FF8465 NUT,LOCK,3/4NPT,NYLON,BLK NNK10-32 KEP NUT, 10-32 SSSC98112 SCR, SOC CAP 10-32 X 1-3/4 WWFS10...
- Page 93 1391062 Cylinder Assembly, Large Infeed Roll AAC Drawing Number 1391062 Rev 0 QTY PART # DESCRIPTION AA1983201FU0311 FLOW CONTL 3/8UNIFIT X3/8 AACDNCB63380PPV CYLINDER,AIR,ISO,63BX380S AAFASV510F3R QUICK EXHAUST,3/8R,3/8T AAFSGSM16x15 BEARING,ROD END, FOR DNCB50 AAFSNC63 REAR PIVOT BRKT, 63MM BORE FESTO...
- Page 94 1391063 Cylinder Assembly, Large Infeed Roll AAC Drawing Number 1391063 Rev 1 QTY PART # DESCRIPTION AA1983201FU0311 FLOW CONTL 3/8UNIFIT X3/8 AACDNCB63380PPV CYLINDER,AIR,ISO,63BX380S AAFASV510F3R QUICK EXHAUST,3/8R,3/8T AAFSGSM16x15 BEARING,ROD END, FOR DNCB50 AAFSNC63 REAR PIVOT BRKT, 63MM BORE FESTO...
- Page 95 1391071 Cross Seal Cylinder Assembly AAC Drawing Number 1391071 Rev 2...
- Page 96 1391145 Cross Seal Cylinder Assembly AAC Drawing Number 1391145 Rev 2...
- Page 97 13901040 Valve Bank Assembly AAC Drawing Number 13901040 Rev 0...
- Page 98 13901101 Input Conveyor Assembly #1 AAC Drawing Number 13901101 Rev 3...
- Page 102 1390378 Pinch Roller Air Clamp AAC Drawing Number 1390378 Rev 1...
- Page 103 1390HCE-KIT1 (Optional) Centering Guide AAC Drawing Number 9009059 Rev 2...
- Page 104 Centering Guide Parts Diagram...
- Page 105 1390HCE-KIT1 parts list ITEM PART NUMBER DESCRIPTION SSFC98128 #10-32 X 2 FLAT CAP WWL1/2 1/2 LOCK WASHER SSHC45096 1/2-13X1-1/2 HEX CAP SSSC01056 1/4-20 X 7/8 SOC CAP SSHC01048 1/4-20 X 3/4 HEX CAP SSSC01032 1/4-20X1/2 SOC CAP SSHC25352 3/8-16X5-1/2,HEX CAP AATP3/8 3/8"...
-
Page 106: 13901200 Exit Assembly / Conveyor
13901200 Exit Assembly / Conveyor AAC Drawing Number 13901200 Rev 1... -
Page 110: 1406570 Hydraulic Compression, 120" Side Seal
1406570 Hydraulic Compression, 120” Side Seal AAC Drawing Number 1406570 Rev 8... -
Page 112: 1406573 Valve Assembly, Side Seal, Lh
1406573 Valve Assembly, Side Seal, LH AAC Drawing Number 1406573 Rev 2... -
Page 113: 1406595 Cylinder Assembly Side Seal Front W/ Sensor
1406595 Cylinder Assembly Side Seal Front W/ Sensor AAC Drawing Number 1406595 Rev 4 NO QTY PART # DESCRIPTION 1391073 CROSS SEAL CYL. MNT 1406677 SPACER,MOUNTING PLT,- DNC AACDNCB100610PP CYLINDER,AIR,ISO,100BX610S AR* AAESME8KLED24 SENSOR FOR FESTO DNCB CYL AAFNC100 FLANGE,MOUNTING PLT,- AAFSGM20X15 CLEVIS,ROD,M20 X 1.5 AAQME-2-2U... -
Page 114: 1406596 Cylinder Assembly Side Seal Rear Wo/Sensor
1406596 Cylinder Assembly Side Seal Rear WO/Sensor AAC Drawing Number 1406596 Rev 4... -
Page 115: 1406640 Side Seal Sync Bar Assembly
1406640 Side Seal Sync Bar Assembly AAC Drawing Number 1406640 Rev 3... -
Page 116: 1406260 Upper Stop Eye Assembly
1406260 Upper Stop Eye Assembly AAC Drawing Number 1406260 Rev 1... -
Page 117: 1406715 Mattress Pivot Assembly
1406715 Mattress Pivot Assembly AAC Drawing Number 1406715 Rev 6... -
Page 118: 1406830 Air Tank Assembly
1406830 Air Tank Assembly AAC Drawing Number 1406830 Rev 0... -
Page 119: 1406645 Side Seal Bar Assembly 110
1406645 Side Seal Bar Assembly 110” AAC Drawing Number 1406645 Rev 0... -
Page 120: 1406635 Seal Bar 110
1406635 Seal Bar 110” AAC Drawing Number 1406635 Rev 2... -
Page 121: 13901173 Outfeed Full Eye Assembly
13901173 Outfeed Full Eye Assembly AAC Drawing Number 13901173 Rev 0... -
Page 122: 14061320 Platen Height Detect Assembly
14061320 Platen Height Detect Assembly AAC Drawing Number 14061320 Rev 0... -
Page 123: Eeo1D102-Ins1 Programming Instructions
EEO1D102-INS1 Programming Instructions AAC Drawing Number 9009082 Rev 0... -
Page 124: 14061322 Valve Assembly, Side Seal Rh
14061322 Valve Assembly, Side Seal RH AAC Drawing Number 14061322 Rev 0... -
Page 125: 13901160 Outfeed Conveyor Assembly
13901160 Outfeed Conveyor Assembly AAC Drawing Number 13901160 Rev 3... -
Page 128: 13901163 Belt Guide Pulley Assembly
13901163 Belt Guide Pulley Assembly AAC Drawing Number 13901163 Rev 0... -
Page 129: 13901140 Front Table Assembly
13901140 Front Table Assembly AAC Drawing Number 13901140 Rev 1... -
Page 130: 13901145 Lower Side Seal Bladder And Tray Assembly
13901145 Lower Side Seal Bladder and Tray Assembly AAC Drawing Number 13901145 Rev 2... -
Page 131: 13901150 Outfeed Conveyor Motor Assembly, Left
13901150 Outfeed Conveyor Motor Assembly, Left AAC Drawing Number 13901150 Rev 0... -
Page 132: 13901155 Outfeed Conveyor Motor Assembly, Right
13901155 Outfeed Conveyor Motor Assembly, Right AAC Drawing Number 13901155 Rev 0... -
Page 133: 1406942 Regulator Assembly, Modified
1406942 Regulator Assembly, Modified AAC Drawing Number 1406942 Rev 2... -
Page 134: 13901130 Rear Table Assembly
13901130 Rear Table Assembly AAC Drawing Number 13901130 Rev 0... - Page 135 1406845 Idler Roller Assembly AAC Drawing Number 1406845 Rev 0...
-
Page 136: Training
TRAINING Check Description Time Hrs. Safety Instructions Installation • Set up • Power On cycle Operation • Individual components • Serial Bus operator label • Operation Description • With / without dustcover • Maintenance Operator Label Service • Lock out tag out •... -
Page 137: Atlanta Attachment Company (Aac) Statement Of Warranty
Atlanta Attachment Company (AAC) Statement of Warranty Manufactured Products Atlanta Attachment Company warrants manufactured products to be free from defects in material and workmanship for a period of eight hundred (800) hours of operation or one hundred (100) days whichever comes first. Atlanta Attachment Company warrants all electrical components of the Serial Bus System to be free from defects in material or workmanship for a period of thirty-six (36) months. -
Page 138: Declaración De Garantia
Declaración de Garantia Productos Manufacturados Atlanta Attachment Company garantiza que los productos de fabricación son libres de defectos de mate-rial y de mano de obra durante un periodo de ochocientos (800) horas de operación o cien (100) días cual llegue primero. Atlanta Attachment Company garantiza que todos los componentes del Serial bus son libres de defectos de material y de mano de obra durante un periodo de treinta y seis (36) meses. -
Page 139: Notes
Notes... -
Page 140: Index
INDEX Mattress Location Mattress Size Adjustments Mechanical Adjustments Adjusting the Seal Bar Nonstick Tape Notes Bottom Film Loading OPERATION Cross Seal Bar Operator Controls cross-seal Bar Parts and Components Electrical 3, 6, 8 PARTS LISTS Element Replacement Patents & Patents Pending E-Stop Piece Count Pneumatic... - Page 141 Atlanta Attachment Company Inc. 362 Industrial Park Drive Lawrenceville, GA 30046 Phone: +1 (770) 963-7369 www.atlatt.com Printed in USA Digital Version of this Manual Available at: http://atlatt.com/tech_manuals.php Atlanta Attachment Company 362 Industrial Park Drive, Lawrenceville, GA 30046 E-mail: Sales@atlatt.com Phone: +1 (770) 9637369...
Need help?
Do you have a question about the 1390HCE and is the answer not in the manual?
Questions and answers