
Related Manuals for Charlton & Jenrick K101


Summary of Contents for Charlton & Jenrick K101
- Page 1 Inset LED Electric Fire Model No. K101 INSTALLATION AND OPERATION INSTRUCTIONS Please read the instructions carefully before use and keep for future reference.
-
Page 2: Table Of Contents
CONTENTS 1. Important Safety Information ·········································································1 2. Technical Specifications ··················································································3 3. Parts and Hardware ························································································4 4. Appliance Dimensions ·····················································································5 5. Installation Instructions ··················································································5 6. Operating Instructions ····················································································7 6a. Manual Controls ···················································································8 6b. Remote Controls ···················································································9 7. Maintenance ································································································ 14 8. Others ·········································································································· 15... -
Page 3: Important Safety Information
1. IMPORTANT SAFETY INFORMATION 1.1 Read these instructions carefully before using the appliance. 1.2 For indoor use only. This appliance is not suitable for use outside the house and only suitable for well insulated spaces or occasional use. 1.3 The appliance must not be installed in a bath or shower room or where it or its controls can be contacted by persons with wet hand. - Page 4 1.10 To reduce the risk of fire, keep textiles, curtains, or any other flammable material a minimum distance of 60cm from the air outlet. 1.11 Keep the power cord away from hot surfaces and hot conditions. Do not route the power lead in front of the appliance.
-
Page 5: Technical Specifications
13A fuse or plug being 13A BS1363A approved. 2. TECHNICAL SPECIFICATIONS Model No.: K101 Supply Voltage: AC 220-240V 50Hz Maximum power consumption: 1800-2000W Power for flame effect: 6.5W (LED 2.5W + Motor for flame 4W) -
Page 6: Parts And Hardware
Other Control Options Room temperature control, with presence detection Room temperature control, with open window detection With distance control option With adaptive start control With working time limitation With black bulb sensor 3. PARTS AND HARDWARE 3.1 Unpack the fire carefully, make sure that the appliance is intact with no signs of damage caused by transport and no part has been exposed to water. -
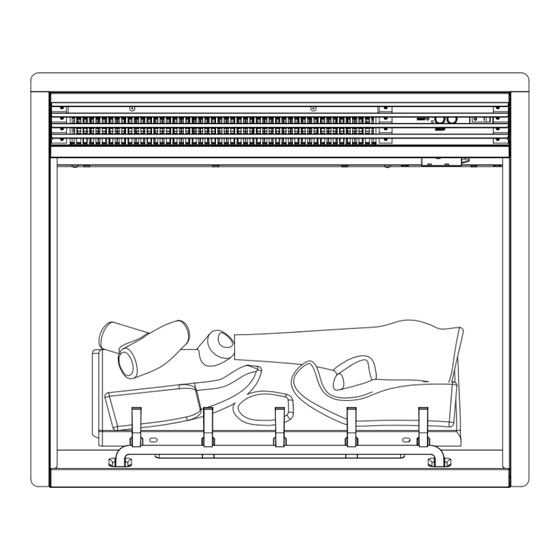
Page 7: Appliance Dimensions
4. APPLIANCE DIMENSION Unit: mm 5. INSTALLATION INSTRUCTIONS Tools Required A screw driver will be needed. Locating the Appliance Your new electric fire will already be fixed into a purpose made suite which can be fixed back to the wall with the brackets provided. The 4 suite may be installed virtually anywhere in your home. - Page 8 5.4 Put the fireplace engine into the suite from the front following the direction shown as below. Make sure the engine box is fully inserted and well positioned. 5.5 Fix the engine box with the suite with four ST4*16 screws supplied. 5.6 Place the ‘trim’...
-
Page 9: Operating Instructions
5.7 The product is fitted with a non-rewireable plug with a 13Amp fuse. Only competent persons should attempt replacement. 6. OPERATING INSTRUCTIONS WARNING! Do not operate this appliance if it has damage or malfunctions in anyway. If you suspect the appliance is damaged or malfunctions call a qualified service engineer to inspect the appliance, and carryout any necessary repair. -
Page 10: 6A. Manual Controls
6a. MANUAL CONTROL PANEL NOTE: The manual button controls basic functions, not a full range of controls. Use the remote hand set to carry out all functions. 6a.1 The manual buttons are located at the upper front of the appliance. 6a.2 Press “LIGHTS ON/OFF”... -
Page 11: 6B. Remote Controls
6b. REMOTE CONTROLS NOTE: This is thermostatic remote control. The remote should be in the same room as fireplace and placed on a flat surface. It must be placed away from the fire so the hot air will not blow on it and affect thermostatic reading. Standby for remote control 6a.1 The screen shown to the right is when the remote is in standby mode. - Page 12 Flame Effect 6a.4 Press to enter the flame effect adjustment screen. 6a.5 Press the ‘←’ and ‘→’ button to select the 3 Kinds of flame effect. 6a.6 Press the ‘+’ and ‘-’ button to select the 5 brightness of flame effect and OFF settings. Normal Mode 6a.7 Normal control mode is factory set.
- Page 13 The heater can be automatically run by using daily timer and weekly timer on the side switch. Set up Day, Time, Comfortable temperature. 6a.11 Press to turn on the remote. Hold the button for 3 seconds to enter the setting screen.
- Page 14 6a.17 Adjusting the set temperature Press the ‘+’ or ‘-’ button to increase or decrease the set temperature on the basis of your comfortable temperature setting. ECO means 2℃ lower than your comfortable temperature setting, ECO- means 4℃ lower, COMF+ means 2℃...
- Page 15 the time period setting area. Press ‘←’ or ‘→’ to choose hour or minute, press ‘+’ or ‘-’ to set the number. Max 3 heating periods for a day. Minute will increase/decrease by 15 minutes per press. Press the to set the heating time for the selected day(s) and return to the week line.
-
Page 16: Maintenance
displayed and the heating will be turned off automatically. 6a.30 After the indoor temperature has risen or a manual override of warning (by operating side switch) has been done, the fire will return to normal working state. Resetting the Thermal Cut Out 6a.33 The appliance is fitted with an Electronic Safety Control (E.S.). -
Page 17: Others
Cleaning the Fireplace Cleaning or polishing products are not recommended. Fingerprints or other marks on the front glass panel can be removed by a piece of soft, damp, lint-free cloth with a good quality household glass cleaner. The front glass panel should always be completely dried with a clean, lint-free cloth or paper towel. - Page 18 Control PCB Remote Control Receiver Remote Control Transmitter Frequency: ASK/OOK 433.92MHZ Hardware: Hardware: RF290B V1.2 Maximum transmit power: 10mW RC01-040A04 Hardware:RF290A-TX-V1.3 Software: 20171024 Software:V2.4.1 478-480 Durham Way North, Aycliffe Industrial Park, Newton Aycliffe, Co. Durham DL5 6HP Tel: (01325) 379060 Fax (01325)309120 www.katell.co.uk A member of Charlton &...
Need help?
Do you have a question about the K101 and is the answer not in the manual?
Questions and answers