Table of Contents
Advertisement
Quick Links
D E G E L M A N
I N D U S T R I E S
B O X
8 3 0 - 2 7 2
I N D U S T R I A L
R E G I N A ,
S K ,
C A N A D A ,
F A X 3 0 6 . 5 4 3 . 2 1 4 0
P H 3 0 6 . 5 4 3 . 4 4 4 7
1 . 8 0 0 . 6 6 7 . 3 5 4 5
D E G E L M A N . C O M
L P
D R I V E ,
S 4 P
3 B 1
TEMPORARY
HEAVY DUTY STAGGERED RIPPER
930 | 1320
MANUAL
143650 v0.1
HDSR
Advertisement
Table of Contents

Related Manuals for Degelman HDSR 930


Summary of Contents for Degelman HDSR 930
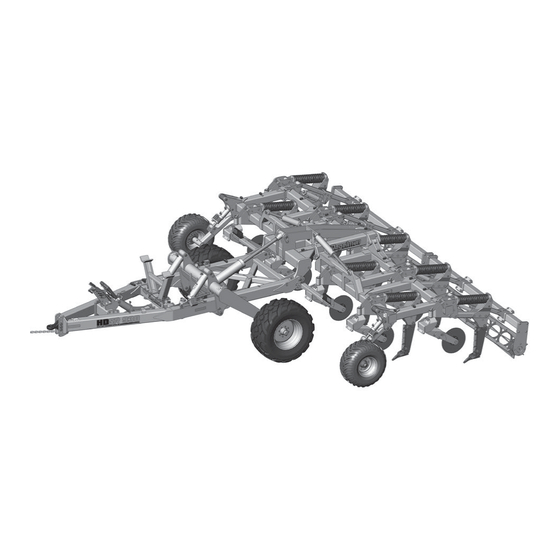
- Page 1 TEMPORARY MANUAL 143650 v0.1 HDSR D E G E L M A N I N D U S T R I E S B O X 8 3 0 - 2 7 2 I N D U S T R I A L D R I V E , HEAVY DUTY STAGGERED RIPPER R E G I N A ,...
- Page 3 QUICK-START GUIDE CONSTANT Connect Hydraulics PRESSURE CONSTANT PRESSURE WHEELS SHANKS/CHOPPERS (If equipped) TRANSPORT/WINGS JACK IMPORTANT: The Shank Circuit includes a Pressure Reducing Valve. Operator must engage shank circuit hydraulics constantly in the extended direction to ensure constant shank pressure. Adjust shank circuit and transport circuit ow down to 20-30% to reduce heat build-up.
- Page 4 • Leave remote engaged after folding in wings so wheels can be retracted to lowest transport position. • Ensure wing rollers are resting in transport cradles before road transport. Transport Speed: 40 km/h (25 MPH) © 2024 Degelman Industries LP...
-
Page 5: Table Of Contents
* Reference Sheet Quick-Start Guide OPERATORS SECTION - TABLE OF CONTENTS IMPORTANT Safety Notice Introduction Safety Hook-Up Transport Transport to Field Position Field to Transport Position Operation Pre-Operation Checklist Operation Specification/Overview Setting Ripping Depth Troubleshooting Service & Maintenance Maintenance Checklist Repair - Replacement Parts Repair - Accumulator Adjustment Maintenance Free Pins &... -
Page 7: Introduction
Degelman HDSR shatters subsoil compaction in even the hardest, most compacted dirt, when your operation demands it. With an engineered tough frame, narrow transport width, and minimal maintenance design, the Degelman HDSR is the most versatile piece of deep tillage equipment you will ever own. -
Page 8: Safety
CAUTION: Indicates a potentially hazardous situation CAUTION that, if not avoided, MAY result in minor or moderate injury if proper practices are not taken, or, serves as a reminder to follow appropriate safety practices. 143650 - HDSR 930/1320 (19-August-2024) - Page 9 GENERAL SAFETY YOU are responsible for the safe operation and 1. Read and understand the Operator’s maintenance of your Degelman HDSR. Manual and all safety signs before YOU must ensure that you and anyone else who operating, maintaining or adjusting.
-
Page 10: Hook-Up
8. Install a safety chain between the tractor and the hitch. 9. Connect lights (electrical socket plug) to tractor. 10. Raise the hydraulic hitch jack. 11. When unhooking from the tractor, reverse the above procedure. 143650 - HDSR 930/1320 (19-August-2024) - Page 11 4. Re-connect the HDSR to the tractor and raise the parking jack. 5. Evaluate if further adjustment is needed. If the machine is level working in the field, re-torque 1” hitch clevis hardware to 770 ft·lb (1044 N·M). 143650 - HDSR 930/1320 (19-August-2024)
-
Page 12: Transport
389 AGRIFLEX+: 500/60 R22.5: 58 PSI (400 kPa) Standard Field Operation Inflation Rates: 389 AGRIFLEX+: 500/60 R22.5: 45 PSI (310 kPa) IMPORTANT Under NO CIRCUMSTANCES should there RIDERS ever be riders while the HDSR is in transport. 143650 - HDSR 930/1320 (19-August-2024) -
Page 13: Transport To Field Position
Wing Cylinders, STOP the unfolding process and consult the troubleshooting section. C. Extend wing cylinders (#3) to unfold. D. Continue extending the wing cylinders (#3) circuit and the transport cylinder will automatically extend in sequence. 143650 - HDSR 930/1320 (19-August-2024) -
Page 14: Field To Transport Position
IMPORTANT - If the Wing Cylinders start to retract before the Transport Cylinders, STOP the unfolding process and consult the troubleshooting section. B. Retract the Transport Cylinders (#3), fully raising the complete rear section (center & both wing sections). 143650 - HDSR 930/1320 (19-August-2024) -
Page 15: Operation
Ripping Depth as outlined 500 ft·lb (678 N·M). in the adjustments section. If excessive wear is 3. Check all hydraulic system connections. evident, replacement may be required. Refer to Tighten if any are leaking. maintenance section. 143650 - HDSR 930/1320 (19-August-2024) - Page 16 100m. Stop, check depth and re-adjust the height higher or lower, if needed, based on your preference. Remember: Removing a depth stop lowers ripping depth 1” deeper. Adding a depth stop raises shanks up 1” shallower. -10- 143650 - HDSR 930/1320 (19-August-2024)
- Page 17 STAY CLEAR! Do not attempt to manually reset and do pressure and examine the pressure gauge on the not attempt to service without Degelman support. shank pressure valve to ensure the system is operating at 2050 to 2100 psi. This valve may be adjusted...
- Page 18 4. Take note of the closest mark on the rod to All Degelman HDSR points are designed to fracture the soil surface at this point. Each mark on compacted soil when operated at a depth of 6” to 24"...
-
Page 19: Setting Ripping Depth
To Raise Shanks - Add one spacer for ripping depth settings will also need to be adjusted each 1” you want to Raise it. accordingly. 6. Repeat above procedure until proper depth is achieved. -13- 143650 - HDSR 930/1320 (19-August-2024) - Page 20 Add Spacers to Gauge Wheels High Middle - Loosen all 3 bolts (Pivot & Slot) with provided wrench. - Move bolt to notch for expected ripping depth. - Re-tighten all 3 bolts. (Repeat for all coulter arms.) -14- 143650 - HDSR 930/1320 (19-August-2024)
-
Page 21: Troubleshooting
• Ensure hitch height has been calibrated for the connected tractor drawbar. Adjust wing pitch by adjusting hitch clevis height if necessary. • Contact Degelman Service if issues persist as transport cylinders have threaded adjustment in case issue cannot be resolved with steps above. - Page 22 • Ensure coulter discs are adjusted to the correct depth and tracking straight in front of shank. Correct coulter depth opens the trench ahead of the shank to prevent furrow blowout. • Wait for higher moisture conditions on the surface of the soil. -16- 143650 - HDSR 930/1320 (19-August-2024)
-
Page 23: Service & Maintenance
• Bolt tightness • Repack wheel bearings • Shank mount U-Bolt torque: 500 lb·ft (678 N·m) IMPORTANT: Safely secure HDSR in winged forward transport position when changing or servicing points or shank savers. -17- 143650 - HDSR 930/1320 (19-August-2024) - Page 24 1250 (1695) 1785 (2420) installation and prevent possible damage or hazards. installation and prevent possible damage or hazards. 1600 (2175) 2290 (3110) v1.1 -18- 143650 - HDSR 930/1320 (19-August-2024)
- Page 25 2. Align, thread into place and hand tighten. 8. Inspect to ensure that O-ring is not pinched and that washer is seated fl at on the face of the port. 3. Tighten to proper torque from the table shown above. -19- 143650 - HDSR 930/1320 (19-August-2024)
-
Page 26: Repair - Replacement Parts
Do not attempt to manually reset and do not attempt to service without Degelman support. Contact your dealer or Degelman Service immediately at: (800) 667-3545 Wrenches and spare shear bolts are included on the wing frames of the HDSR to assist in replacing shear bolts if needed. -
Page 27: Repair - Accumulator Adjustment
This step ensures you do not have to bleed fluid from all three accumulators to perform service. Shank Circuit Bleed Screw Accumulator Gas Valve Shank Circuit Branch Isolation Valve -21- 143650 - HDSR 930/1320 (19-August-2024) - Page 28 Ensure that the gas side is depressurized. Only then may the appropriate work (e.g. disassembly of the hydraulic accumulator) be carried out. -22- 143650 - HDSR 930/1320 (19-August-2024)
- Page 29 Dust Cap 9. Fill dust cap half full of grease and gently tap into position. 10. Pump grease into hub through grease fitting until lubricant can be seen from dust seal. -23- 143650 - HDSR 930/1320 (19-August-2024)
- Page 30 5. Apply Loctite anti-seize before installing cylinder end cap. 6. Torque cylinder end cap to 440 lb.ft (600 N.m). 7. Tighten Set Screw on end cap to 6 lb.ft (8 N.m). -24- 143650 - HDSR 930/1320 (19-August-2024)
- Page 31 8. When both bushings are installed to the Install proper depth, install the new seals. Seal 9. Re-assemble all other necessary components. 5/16" IMPORTANT: DO NOT use oil or grease on pins or bushing surfaces when re-installing. -25- 143650 - HDSR 930/1320 (19-August-2024)
-
Page 32: Decal Location Overview
143075 - Decal, Constant Shank Pressure (1) 143083 - Decal, Danger Hyd Energy (3) 143076 - Decal, Warning 142008 - Decal, Degelman - 6 (2) Extend Before Folding (2) 142513 - Decal, 142513 - Decal, Degelman - Degelman - 4-1/4 (2) -
Page 33: Parts Section - Table Of Contents
RH Gauge Wheel RH Wing *Optional Frame Choppers Center Frame Hitch Frame LH Wing Frame Rockshaft LH Gauge *Accumulator assemblies are required for Wheel hydraulic shank models. *Optional Shank Type, Spacing, and Coulter option. -27- 143650 - HDSR 930/1320 (19-August-2024) - Page 34 -see above- 246759 - Collar, 2-1/8 (1) 575278 - Spacer, 3 (2) 118729 - Lock Nut, 1/2 (1) 575279 - Bushing, 2 (1) 246751 - Pin, 1-7/16 (1) 116302 - Safety Chain Assembly (1) -28- 143650 - HDSR 930/1320 (19-August-2024)
- Page 35 5/8 - F436 (24) 117442 - Bushing, 118447 - Lock Nut, 576465 - 572815 - Pin, 14 Ga (8) 5/8 Unitorque (12) Jack Base (1) 1-1/4 x 8-3/8 (1) 810280 - Retaining Ring (8) -29- 143650 - HDSR 930/1320 (19-August-2024)
- Page 36 576363 - Tip, 1/2 OD (1) 576362 - Tip, 0.73 OD (1) 576361 - T-Bar (1) mounts with... 118998 - Screw, #10-24 x 1/2 (2) 117481 - Flat washer, #10 (2) 118000 - Nut, #10-24 (2) -30- 143650 - HDSR 930/1320 (19-August-2024)
- Page 37 131618 - Bearing Cup, CTD #28921 (1) 131629 - Hub Cap (1) 131619 - Bearing Cup, CTD #25520 (1) 131627 - Castle Nut, #WB81 (1) 131022 - Bearing Cone, CTD #25580 (1) 131626 - Flat Washer, 2-7/16 x 1/8 (1) -31- 143650 - HDSR 930/1320 (19-August-2024)
- Page 38 141703 - Adaptor, 1/2 ORB M x 1/2 ORFS M 141715 - 90° Elbow, 1/2 ORFS M x F-SW 141728 - Tee, 1/2 ORFS M x M x F-SW 576530 - Piston Accumulator, Charged (1) 576532 - Piston Accumulator, Uncharged (1) -32- 143650 - HDSR 930/1320 (19-August-2024)
- Page 39 131028 - Bearing Cup, 382A (1) 131739 - Hub Cap (1) 131746 - Bearing Cup, LM501310 (1) 131740 - Castle Nut, 1-1/4 (1) 131745 - Bearing Cone, LM501349 (1) 131741 - Flat Washer, 1-5/16 x 1/4 (1) -33- 143650 - HDSR 930/1320 (19-August-2024)
- Page 40 141597 - Ball Valve - 3/4 ORB F 141703 - Adaptor, 1/2 ORB M x ORFS M 141715 - 90° Elbow, 1/2 ORFS M x F-SW 141781 - Adaptor, 1/2 ORFS M x 5/8 ORB M -34- 143650 - HDSR 930/1320 (19-August-2024)
- Page 41 Shank Position Overview - 930/1320 HDSR 930 Shank Position Overview 60" 60" 60" 60" 30" 30" 30" 30" 30" 30" 30" 30" 2-1/2" 2-1/2" 3-7/8" 3-7/8" 13-1/2" 13-1/2" 13-7/8" 13-7/8" 3-1/4" 3-1/4" 3-1/4" 3-1/4" HDSR 1320 Shank Position Overview 40"...
- Page 42 576108 - U-Bolt, 7/8 x 8-7/8 (2) Bushing (Shank specific) (1) IMPORTANT: Torque to: 500 lb . ft (678 N . m) 118911 - Lock Nut, 1 (1) Point Options (Min-Till 7" wing shown) -36- 143650 - HDSR 930/1320 (19-August-2024)
- Page 43 Wing Point (1) 576564 - 2" Min-Till Narrow Point (1) 576560 - 5" Wing Point (1) 576563 - 7" Min-Till Winged Point (1) 576561 - 7" Wing Point (1) 576562 - 10" Wing Point (1) -37- 143650 - HDSR 930/1320 (19-August-2024)
- Page 44 Hub Unit (1) Disc Hub Components 131415 - Disc Hub Unit (Varied Suppliers) - Replacement O-Rings INA - Markings SKF - Markings 121080 - O-Ring, 121082 - O-Ring, Nitrile M6x 88 (1) Nitrile M5.3x87.5 (1) -38- 143650 - HDSR 930/1320 (19-August-2024)
- Page 45 576119 - Spacer Bushing, 3 OD (2) Bushing, 2 576230 - Spring Arm (1) OD x 2 (2) 576270 - Spring Rod (1) 117240 - Bushing, 2 OD (1) 133134 - Wiper Seal, 2 OD (4) -39- 143650 - HDSR 930/1320 (19-August-2024)
- Page 46 Between Endplates endplate approx 44-5/8" away from Approx. 44-5/8" clamp plate edge (both sides). 2. Use a hold distance of 3-1/4" between the two roller endplates. (Adjust the difference equally on both sides if necessary). -40- 143650 - HDSR 930/1320 (19-August-2024)
- Page 47 117225 - Bushing, 2-1/2 OD x 2-1/2 (4) (Seal Kit: 123214) (Seal Kit: 123484) Maintenance Free Pins & Bushings IMPORTANT: INSTALL DRY Do NOT use any oil/grease/lubricant on pin or bushing surfaces when installing the maintenance free pins into composite bushings. -41- 143650 - HDSR 930/1320 (19-August-2024)
-
Page 48: Warranty
Re-torque of fastening hardware, Hydraulic fluid purities, drive train alignments, and clutch operation) 3. If parts not made or supplied by Degelman have been used in the connection with the unit, if, in the sole judgement of Degelman such use affects its performance, safety, stability or reliability. -
Page 49: B O X
It is the retail customer’s responsibility to deliver the product to the authorized Degelman dealer, from whom he purchased it, for service or replacement of defective parts, which are covered by warranty. Repairs to be submitted for warranty consideration must be made within forty-five days of failure.
Need help?
Do you have a question about the HDSR 930 and is the answer not in the manual?
Questions and answers