Table of Contents
Advertisement
Quick Links
OPERATOR & PARTS
MANUAL
143397 v1.0
SCORPION HITCH
D E G E L M A N
I N D U S T R I E S
L T D.
B O X
8 3 0 - 2 7 2
I N D U S T R I A L
D R I V E ,
REAR TOW HITCH
R E G I N A ,
S K ,
C A N A D A ,
S 4 P
3 B 1
F A X 3 0 6 . 5 4 3 . 2 1 4 0
P H 3 0 6 . 5 4 3 . 4 4 4 7
FOR PRO-TILL 33/40
1 . 8 0 0 . 6 6 7 . 3 5 4 5
D E G E L M A N . C O M
Advertisement
Table of Contents

Related Manuals for Degelman PRO-TILL SCORPION HITCH


Summary of Contents for Degelman PRO-TILL SCORPION HITCH
- Page 1 OPERATOR & PARTS MANUAL 143397 v1.0 SCORPION HITCH D E G E L M A N I N D U S T R I E S L T D. B O X 8 3 0 - 2 7 2 I N D U S T R I A L D R I V E , REAR TOW HITCH R E G I N A ,...
-
Page 3: Table Of Contents
* Reference Sheet Quick-Start Guide OPERATORS SECTION - TABLE OF CONTENTS Introduction Safety Detaching / Attaching Air Cart Hook-up Transport Troubleshooting Service & Maintenance PARTS SECTION - TABLE OF CONTENTS Base / Rear Frame Components Single / Double Shoot Kit Components Mounted / Floating Hose Mounts Rear Tower Mount Kit Components Deflector Mounting Frame Kit - Pro-Till 33... -
Page 5: Introduction
Use this manual as your first source of information about this attachment. TO THE NEW OPERATOR OR OWNER - Safe, efficient and trouble free operation of your Degelman PRO-TILL Scorpion Hitch attachment requires that you and anyone else who will be operating or maintaining it, read and understand the Safety, Operation, Maintenance and Troubleshooting information contained within this manual. -
Page 6: Safety
•Accidents Can Be Avoided SAFETY ALERT SYMBOL The Safety Alert Symbol means: he Safety Alert Symbol identifies important safety messages applied to the PRO-TILL Scorpion Hitch ATTENTION! and in this manual. When you see this symbol, be BECOME ALERT! alert to the possibility of injury or death. Follow the YOUR SAFETY IS INVOLVED! instructions provided on the safety messages. - Page 7 YOU must ensure that you and anyone else who is going to operate, maintain or work around 2. Install and properly secure all shields and the PRO-TILL Scorpion Hitch be familiar with the guards before operating. Use hitch pin with a operating and maintenance procedures and related mechanical locking device.
-
Page 8: Detaching / Attaching
Detaching Scorpion Hitch Rear Frame DETACHING SCORPION HITCH REAR FRAME 6. The sixth step is to swing the Scorpion Hitch parking legs down into position. The trick here is to make The Scorpion Hitch should always be parked on a level, sure that the Scorpion Hitch hydraulic dry area that is free of debris and foreign objects. - Page 9 Attaching Scorpion Hitch Rear Frame ATTACHING SCORPION HITCH REAR FRAME 4. The forth step is to The Scorpion Hitch should always be parked on a level, unclip and place dry area that is free of debris and foreign objects. The the parking leg following procedure outlines how to attach the Scorpion braces and the...
-
Page 10: Air Cart Hook-Up
Hook-Up Air Cart Procedure to Hook-up Scorpion Hitch: In order to hook-up the detached rear frame of the Scorpion Hitch, simply reverse the steps listed for the detaching procedure found on the previous page. NOTE: One precaution when hooking-up is to make sure that the Pro-Till approaches the parked hitch as straight as possible. -
Page 11: Transport
Transport TRANSPORT SAFETY TRANSPORTING 1. Read and understand ALL the information in Use the following guidelines while transporting: the Operator’s Manual regarding procedures 1. Use a safety chain and a pin with provisions for and SAFETY when operating the PRO-TILL in the a mechanical retainer. -
Page 12: Troubleshooting
Troubleshooting - Scorpion Hitch 143397 - PRO-TILL HITCH (03-September-2019) -
Page 13: Service & Maintenance
Service & Maintenance MAINTENANCE SAFETY 1. Review the Operator’s Manual and all safety items before working with, maintaining or operating the PRO-TILL. 2. Stop the tractor engine, set park brake, remove ignition key and wait for all moving parts to stop before servicing, adjusting, repairing or unplugging. - Page 14 Service & Maintenance HARDWARE SPECIFICATIONS HYDRAULIC SAFETY Note: Unless stated otherwise, hardware is typically: • Make sure that all components in the hydraulic Hex, Plated GR5 UNC or P8.8 (metric) system are kept in good condition and are clean. • Replace any worn, cut, abraded, fl attened or TORQUE SPECIFICATIONS crimped hoses and metal lines.
- Page 15 Service & Maintenance HYDRAULIC FITTING INSTALLATION Note: A DASH size refers to a diameter of a hose (inside) or of a tube (outside) measured in 1/16” increments. The following info is to help you identify and properly For example, a Hose specifi ed as dash 8 or -8 would install some of our standard hydraulic fi...
- Page 16 Service & Maintenance Service & Maintenance HYDRAULIC CYLINDER REPAIR 5. Take the plastic removal ring from the seal kit: PREPARATION Types of Cylinders a) Straighten the ring and remove any kinks or When cylinder repair (Wire Ring / Threaded Head) excessive curl to make installation easier and is required, clean off prevent it from falling out.
- Page 17 Service & Maintenance REPLACING A PRESSED BUSHING STORAGE NOTE: You may need the following tools: The PRO-TILL should be carefully prepared for Press, hammer, punch, pry-bar, "Step-Tool" storage to ensure that all dirt, mud, debris and moisture has been removed. Use the following as a guideline for repair: Follow this procedure when preparing to store: 1.
-
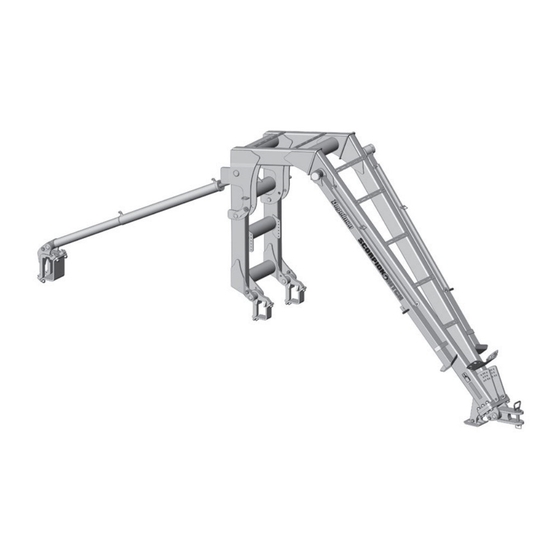
Page 18: Base / Rear Frame Components
Base / Rear Frame Components Base/Rear Frame Overview 142009 - Decal, Degelman (2) 123111 - Cylinder, CTD 142648 - Decal, Scorpion - 4 x 56 x 2 (1) Hitch (2) 142557 - Decal, 142966 - Decal, Reflector Warning - Pinch... - Page 19 Base / Rear Frame Components Rear Frame Components 574009 - Coupler Mount Assembly (1) comes with... 118420 - Lock Nut, 1/2 (4) 574011 - Clamp 118587 - Flat Washer, Plate (2) 1/2 F436 (8) 118008 - Bolt, 1/2 x 1 (4) 574010 - Base Plate (1) mounts with...
-
Page 20: Single / Double Shoot Kit Components
Common Kit Components Quick Connector Kit Options Single Shoot - 2.5" (4 Port) Double Shoot - 2.5" (8 Port) 574012 - Quick Connector Kit - 2.5" SS (1) 574013 - Quick Connector Kit - 2.5" DS (1) Single Shoot - 3.0" (4 Port) Double Shoot - 2.5"... -
Page 21: Mounted / Floating Hose Mounts
Common Kit Components Rear Tower Mount Assembly Components Rear Hitch Floating Hose Mount Components 574158 - Rear Tower Mount Assembly (1) 574114 - Suspended DS Hose Mount Kit (1) comes with... comes with... 101041 - Eyebolt, 118420 - Lock Nut, 1/2 - Unitorque (8) 1/2 (4) 574096 - Bolt Plate, 3/8 (4) 118512 - Flat Washer, 1/2 (16) -
Page 22: Deflector Mounting Frame Kit - Pro-Till
Deflector Mounting Frame Kit for Pro-Till 33 Deflector Mounting Frame Kit Components 574084 - Deflector 574149 - Deflector Mounting Frame Kit (1) Assembly, 2 Outlet - LH (2) comes with... 574085 - Deflector Assembly, 2 Outlet - RH (2) 574129 - Deflector Assembly, Wing Frame - 5 Outlet - RH (1) 574128 - Deflector Assembly, Wing Frame - 5 Outlet - LH (1) - Page 23 Deflector Mounting Frame Kit for Pro-Till 40 Deflector Mounting Frame Kit Components 574084 - Deflector Assembly, 2 Outlet - LH (2) 574150 - Deflector Mounting Frame Kit (1) comes with... 574085 - Deflector Assembly, 2 Outlet - RH (2) 574082 - Deflector Assembly, Wing Frame - 8 Outlet (2) 574080 - Deflector Assembly, Center Frame - 8 Outlet (1)
-
Page 24: Secondary Tower Kit Components
Common Kit Components Secondary Tower Kit Components 574087 - Secondary Tower Mounting Kit (1) 574142 - Secondary Riser Clamping Kit (1) comes with... comes with... 101046 - U-Bolt, Clamp (24) 574089 - Distribution Tower Bracket - STD (6) 101027 - U-Bolt, 1/2 574127 - Distribution UNC (16) Tower Bracket... -
Page 25: Primary / Secondary Tower Components
Common Kit Components Primary Tower Components 101034 - Riser Head, Primary 101037 - Riser 6.0 - 8 Port x 2.5 Head, Primary 5.0 - 8 Port x 2.5 101035 - Riser 101038 - Riser Head, Primary Head, Primary 6.0 - 4 Port x 2.5 5.0 - 4 Port x 2.5 101036 - Riser Head, Primary... -
Page 26: Tubing Layout Overview
Tubing Layout Overview Riser Head Location & Grouping Overview - 33' Layout Riser Head Location & Grouping Overview - 40' Layout Tubing Layout Example (on Pro-Till 40) -22- 143397 - PRO-TILL HITCH (03-September-2019) - Page 27 Tubing Layout Overview Tubing Installation Overview Tubing Layout Example - LH Wing (on Pro-Till 40) • Tubing is provided in large rolls for both secondary (2.5" or 3") and tertiary (1.5") distribution routing. Tubing is to be routed and cut-to-length as needed. •...
-
Page 28: Hydraulic Layout
Hydraulic Layout Hydraulic Fittings Required 141581 - Coupler Tip, 3/4 ORB F (2) 141581 - Coupler Tip, 3/4 ORB F 141676 - Connector, 141676 - Connector, 3/4 ORB M x M 141681 3/4 ORB M x M (2) – 141680 - Coupler, Grey (+) Coupler, 141680 - Coupler, Grey (-) (1) -
Page 29: Warranty
Re-torque of fastening hardware, Hydraulic fluid purities, drive train alignments, and clutch operation) 3. If parts not made or supplied by Degelman have been used in the connection with the unit, if, in the sole judgement of Degelman such use affects its performance, safety, stability or reliability. - Page 30 It is the retail customer’s responsibility to deliver the product to the authorized Degelman dealer, from whom he purchased it, for service or replacement of defective parts, which are covered by warranty. Repairs to be submitted for warranty consideration must be made within forty-five days of failure.
Need help?
Do you have a question about the PRO-TILL SCORPION HITCH and is the answer not in the manual?
Questions and answers