Table of Contents
Advertisement
OPERATOR MANUAL
& PARTS CATALOG
143251 v2.2
CASE STX / NH TJ
D E G E L M A N
I N D U S T R I E S
L T D.
B O X
8 3 0 - 2 7 2
I N D U S T R I A L
D R I V E ,
480-530
R E G I N A ,
S K ,
C A N A D A ,
S 4 P
3 B 1
F A X 3 0 6 . 5 4 3 . 2 1 4 0
P H 3 0 6 . 5 4 3 . 4 4 4 7
1 . 8 0 0 . 6 6 7 . 3 5 4 5
D E G E L M A N . C O M
Advertisement
Table of Contents

Related Manuals for Degelman 7900 Series


Summary of Contents for Degelman 7900 Series
- Page 1 OPERATOR MANUAL & PARTS CATALOG 143251 v2.2 CASE STX / NH TJ D E G E L M A N I N D U S T R I E S L T D. B O X 8 3 0 - 2 7 2 I N D U S T R I A L D R I V E , 480-530...
- Page 3 QUICK GUIDE INDEX Introduction Safety Operation Maintenance Transport & Storage Troubleshooting Blade Attachments Blade Components Pivot & Main Frame Mounting Brackets Bracket Installation Hose Guide Bracket Routing Cylinders Hydraulic Routing D-lock Operation Mounting Procedure Warranty Record Serial Number: ............IMPORTANT: D E G E L M A N I N D U S T R I E S L T D.
-
Page 5: Proof Of Ownership
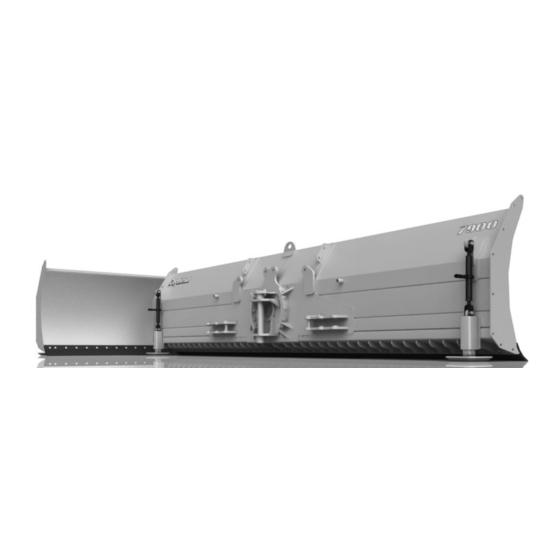
Introduction WELCOME PROOF OF OWNERSHIP Degelman is proud to welcome you to our rapidly Serial Number Plate increasing family of high quality and dependable product owners. This product was designed and built specifically for you, the customer. Through our research and with your input and feedback, we present to you our 7900 Series Dozer Blade. -
Page 6: Safety Alert Symbol
YOU are responsible for the SAFE operation and SAFETY ALERT SYMBOL maintenance of your Degelman implement. YOU must ensure that you and anyone else who is going to operate, maintain, or work around the machine be familiar with the operating and maintenance procedures, and related SAFETY information contained in this manual. -
Page 7: General Safety
D-lock during mounting or dismounting. fire department near your phone. Doctor TRANSPORTING Ambulance • Lift blade up then hold with safety chain. Hospital • Make sure SMV sign & reflectors are clean. • Use your hazard lights. Fire Department 143251 - 7900 Series (26-August-2016) -
Page 8: Tractor Preparation
Operation TO THE NEW OPERATOR OR OWNER TRACTOR PREPARATION The Degelman Dozer Blade is a push type tractor 1. Wheel Spacing attachment designed primarily for excavating, Important: To avoid possible damage from levelling and filling of dirt, snow and silage. -
Page 9: Operator's Responsibility
• Hydraulics: Important: To avoid damage to tractor or - Tractor’s oil reservoir blade, the hydraulic system must be hooked up - Condition of hoses, lines & fittings properly including line to hydraulic tank drain. 143251 - 7900 Series (26-August-2016) -
Page 10: Maintenance Safety
4. If fittings will not take grease, remove and clean thoroughly. Also clean lubricant passageway. Replace fitting if necessary. 5. Inject grease until you see grease being expelled from the pin or bushing areas. Main Pivot Pin (Typical both sides) 143251 - 7900 Series (26-August-2016) -
Page 11: Hydraulic Safety
1600 (2175) 2290 (3110) Unless otherwise stated: HYDRAULIC FITTING TORQUE Hardware - Hex, GR5 UNC (imperial) or P8.8 (metric) Size lb.ft (N.m) Hoses - 3/8, ends come with 3/4 JIC female swivel. 75 (100) 90 (122) 143251 - 7900 Series (26-August-2016) - Page 12 4. Using the mallet and punch, push the head tube. into the cylinder tube until the internal tube groove is fully exposed. This will also move the internal wire ring into its removal position. Inner Ring Outer Wire Ring Internal Groove (Removed) 143251 - 7900 Series (26-August-2016)
- Page 13 Note: Make sure the cam of the band clamp is c) Install External not overtop of the gap in the ring. Wire Ring Inner Ring External Ring 18. Before using the cylinder, ensure that you double check your work. 143251 - 7900 Series (26-August-2016)
- Page 14 6. Torque cylinder end cap to 440 lb.ft (600 N.m). end cap to align ports. 7. Tighten Set Screw on end cap to 6 lb.ft (8 N.m). 7. Tighten Locking Ring against end cap using a punch and hammer. 143251 - 7900 Series (26-August-2016) -10-...
-
Page 15: Safety Decals
Degelman Logo, 25-3/4” lg 3. Measure and mark positions for welding. 143209 7900 Blade Decal 4. Tack weld into place (if desired). 5. Remove and weld fully. 6. Clean and paint. 7. Reinstall into place. 143251 - 7900 Series (26-August-2016) -11-... -
Page 16: Transport Safety
5. Slow down and pull off to the side of the road when meeting other traffic. 7. Select an area that is dry, level and free of debris. 6. Use hazard flashers on tractor unless prohibited by law. 143251 - 7900 Series (26-August-2016) -12-... -
Page 17: General Troubleshooting
Heights are not aligned. Use dozer hydraulic lift circuit to adjust main frame front lug bracket roller with height. main frame front Use jacks on side on main frame to adjust height. quick attach lug. 143251 - 7900 Series (26-August-2016) -13-... - Page 18 143251 - 7900 Series (26-August-2016) -14-...
- Page 19 118043 - Bolt, 3/4”x 2” (8) Extension Hardware 118509 - Lock Washer, 3/4” (8) 118410 - Nut, 3/4” (8) 118410 - Nut, 3/4” (8) Side Plate Hardware 118509 - Lock Washer, 3/4” (8) 118743 - Bolt, 3/4”x 2-1/4” (8) 143251 - 7900 Series (26-August-2016) -15-...
- Page 20 112274 - Blade Pivot Pin (1) 790022 - Angle Pin, 1-1/2”x 5-1/2” (2) 118587 - Flat Washer, 1/2” SAE (2) 118504 - Lock Washer, 1/2” (2) 118405 - Nut, 1/2” (2) 790030 - Skid Shoe (2) 143251 - 7900 Series (26-August-2016) -16-...
- Page 21 118611 - Bolt, 1/2 x 2-1/4 (2) 132039 -Sidewind Jack (2) 118587 - Flat Washer, 1/2 SAE F436 (4) 118504 - Lock Washer, 1/2 (2) 118405 - Nut, 1/2 (2) 790022 - Angle Pin, 1-1/2 x 5-1/2 (2) 143251 - 7900 Series (26-August-2016) -17-...
- Page 22 118048 - Bolt, 3/4 x 2-1/2 (10) Regular Duty - Models 117405 - Bolt, M24 x 240 (8) 779982 - Axle Bracket, LH (1) (Regular Duty - Models) 779981 - Axle Bracket, RH (1) 143251 - 7900 Series (26-August-2016) -18-...
- Page 23 118503 - Lock Washer, 3/8 (4) 118403 - Nut, 3/8 (4) Radar Unit Extend radar unit back in order to clear main frame by installing radar mount. 784325 - Radar Unit Extension Mount (1) 143251 - 7900 Series (26-August-2016) -19-...
- Page 24 (M12 bolts) from step removal and new side bracket except bolts, will be reused. mounting hardware. Mount rear template using new Install Degelman axle bracket loosly using the side bracket mounting hardware. new supplied M24x240 bolts (4) and existing Center punch holes through templates to scribe points, nuts and flat washers from Step E.
- Page 25 (M12 bolts) from step removal and new side bracket except bolts, will be reused. mounting hardware. Mount rear template using new Install Degelman axle bracket and loosely attach side bracket mounting hardware. using the new supplied M24x500 bolts (4) and Center punch holes through templates to scribe points, existing nuts and flat washers from Step E.
- Page 26 Front Quick-Coupler Connection Option (Optional Quick Coupler Routing) Optional Quick-Coupler Connection IMPORTANT - Do NOT run hoses through front hose guide if quick-coupler option is used. 143251 - 7900 Series (26-August-2016) -22-...
- Page 27 122966 - Open Cap (1) UNF GR5 unitorque (1) 122783 - Lock 122974 - Piston, Unitised (1) Ring (1) 122962 - Rod & Ball (1) 123081 - Seal Kit 122978 - Seal Kit (1) 143251 - 7900 Series (26-August-2016) -23-...
- Page 28 Optional Quick Coupler Routing 141515 - Connector, 3/4 Optional Quick JIC-m x ORB (12) Coupler Mount From Angle, T o Rear From Angle, Lift, To Rear Hose Lift, & Tilt Hose & Tilt Cylinders Connections Cylinders Connections 143251 - 7900 Series (26-August-2016) -24-...
- Page 29 Previous 141504 - 90° Elbow, 3/4 JIC-m x ORB (1) Connection Detail for connection options. 141515 - Connector, 3/4 JIC-m x ORB (2) Previous 141503 - Tee, 3/4 JIC-F-SW x m x m (1) 143251 - 7900 Series (26-August-2016) -25-...
- Page 30 118427 - Nut 5/16 (2) 118508 - Lock Washer, 5/8 (2) 118514 - Flat Washer, 5/8 (4) 118378 - Bolt, 5/8 x 1-3/4 (2) 784213 - Relief Valve Bracket (1) 117413 - Bolt, 5/16 x 3-3/4 (2) 143251 - 7900 Series (26-August-2016) -26-...
- Page 31 ® 243500 - Clip Pin (1) 243375 - D-lock Handle (1) Typical Clip Pin Mount 243373 - D-lock Handle, short (w/roll pin) (1) 243374 - D-lock Handle (w/roll pin) (1) Typical Roll Pin Mount 143251 - 7900 Series (26-August-2016) -27-...
- Page 32 5. Check that connection points are Side gap (3/8”-1/2”) disconnected and clear to back out. Bracket Pin Hook between the inside of 6. Unhook hydraulics. the hook to the front 7. Back tractor out. of the bracket pin. 143251 - 7900 Series (26-August-2016) -28-...
- Page 33 2. To any goods that have sustained damage or deterioration attributable to a lack of routine maintenance (eg. Re- torque of mounting hardware.) 3. If parts not made or supplied by Degelman have been used in the connection with the unit, if, in the sole judgement of Degelman such use affects its performance, safety, stability or reliability.
Need help?
Do you have a question about the 7900 Series and is the answer not in the manual?
Questions and answers