Degelman Pro-Till 33 Operator's & Parts Manual
Hide thumbs
Also See for Pro-Till 33:
- Operator's & parts manual (56 pages) ,
- Operator's & parts manual (45 pages)
Table of Contents
Advertisement
Quick Links
D E G E L M A N
I N D U S T R I E S
B O X
8 3 0 - 2 7 2
I N D U S T R I A L
R E G I N A ,
S K ,
C A N A D A ,
F A X 3 0 6 . 5 4 3 . 2 1 4 0
P H 3 0 6 . 5 4 3 . 4 4 4 7
1 . 8 0 0 . 6 6 7 . 3 5 4 5
D E G E L M A N . C O M
L T D.
D R I V E ,
S 4 P
3 B 1
OPERATOR & PARTS
MANUAL
143347 v1.5
PRO-TILL 33/40
Serial Numbers from 1040 to 1727
Advertisement
Table of Contents

Related Manuals for Degelman Pro-Till 33


Summary of Contents for Degelman Pro-Till 33
- Page 1 OPERATOR & PARTS MANUAL 143347 v1.5 PRO-TILL 33/40 D E G E L M A N I N D U S T R I E S L T D. B O X 8 3 0 - 2 7 2 I N D U S T R I A L...
- Page 3 QUICK-START GUIDE WARRANTY PRO-TILL 33/40 REMEMBER! You must complete Product * Refer to operators manual for complete safety and operation info. Registration to be eligible for Warranty. Connect Hydraulics FLOAT FLOAT WHEELS ROLLERS TRANSPORT WINGS JACK (if available) Maintenance (Check Machine Daily) Grease Points •...
- Page 4 Put in Field Position 1” iii) Set Cutting Depth Front Disc Depth Adjustment Rear Disc Depth Adjustment (2 Inner Wheel Cylinders) (2 Outer Roller Frame Cylinders) (Start with 12 stops per cylinder, test depth & adjust) Typically Typically Set to 2” Set to 2”...
- Page 5 UNLOADING INSTRUCTIONS UNLOADING GUIDELINES - Lowboy Trailer 1. Position trailer on level ground with lots of room on the unloading side for unloading and driving unit of trailer. 2. Use appropriate forklifts to unload front “A” frame hitch, hardware container, and unloading ramps from trailer.
- Page 6 UNLOADING INSTRUCTIONS UNLOADING GUIDLINES - Flatbed Truck The weight of the Pro-Till is over 30,000 lbs. Any lifting of the Pro-Till main assembly during loading or unloading must be accomplished using an overhead crane capable of safely lifting the unit at the designated secure lift locations.
-
Page 7: Table Of Contents
OPERATORS SECTION - TABLE OF CONTENTS Reference Sheet Quick-Start Guide Introduction Safety Hook-Up Transport Transport to Field Position Field to Transport Position Operation Pre-Operation Checklist Operation Guidelines / Suggestions Setting Disc Depth Scraper Settings Service & Maintenance Maintenance Checklist Repair - Wheel Hub Repair - Hydraulic Cylinder PARTS SECTION - TABLE OF CONTENTS Pro-Till Section Overview... - Page 8 IMPORTANT SAFETY REMINDER DANGER NEVER PARK, UN-HOOK, or RAISED SERVICE Pro-Till with REAR WINGS DANGER If the front hitch becomes disconnected in this position the front hitch will raise suddenly and the back of the machine will drop! Changing Discs and Servicing The best postion to safely change or service the discs on the Pro-Till is when it is secured in the winged...
-
Page 9: Introduction
Degelman PRO-TILL is the fastest and most versatile piece of tillage equipment you will ever own. Use this manual as your first source of information about this machine. -
Page 10: Safety
Safety Why is SAFETY important to YOU? 3 BIG Reasons: •Accidents Can Disable and Kill •Accidents Are Costly •Accidents Can Be Avoided SAFETY ALERT SYMBOL The Safety Alert Symbol means: he Safety Alert Symbol identifies important safety messages applied to the PRO-TILL and in this ATTENTION! manual. - Page 11 GENERAL SAFETY YOU are responsible for the safe operation and 1. Read and understand the Operator’s maintenance of your Degelman PRO-TILL. Manual and all safety signs before YOU must ensure that you and anyone else who operating, maintaining or adjusting.
-
Page 12: Hook-Up
Hook-Up HOOK-UP / UNHOOKING The PRO-TILL should always be parked on a level, dry area that is free of debris and foreign objects. Follow this procedure to hook-up: 1. Clear the area of bystanders and remove foreign objects from the machine and working area. WARNING/DANGER Never disconnect 2. -
Page 13: Transport
Transport TRANSPORT SAFETY TRANSPORTING 1. Read and understand ALL the information in Use the following guidelines while transporting the the Operator’s Manual regarding procedures PRO-TILL: and SAFETY when operating the PRO-TILL in the 1. Use a safety chain and a pin with provisions for field/yard or on the road. -
Page 14: Transport To Field Position
Transport to Field Position Overview TRANSPORT TO FIELD POSITION FOLLOW PROCEDURE BELOW: D. After fully opening the wings, extend the Transport Cylinders (#3) to completely lower all the PRO-TILL rear A. On level ground, frame sections to the ground. position the PRO-TILL so it is straight in-line behind the tractor. -
Page 15: Field To Transport Position
Field to Transport Postion Overview FIELD TO TRANSPORT POSITION C. After raising all the rear sections together, FOLLOW PROCEDURE BELOW: retract the Wing Cylinders (#4) to bring both wings inward towards the frame. A. Fully extend the Wheel & Roller Cylinders (#1 & #2) to completely raise the disc frames. -
Page 16: Operation
Operation OPERATING SAFETY PRE-OPERATION CHECKLIST 1. Read and understand the Operator’s Manual It is important for both personal safety and maintaining and all safety signs before using. good operational condition of the machine that the pre- operational checklist be followed. 2. - Page 17 Operation OPERATING GUIDELINES 1. Place both the Transport Cylinders (#4) and the Wing Cylinders (#3) into the FLOAT position before operation. IMPORTANT Transport Cylinders and Wing Cylinders MUST both be in the FLOAT position for the PRO-TILL to contour properly and to avoid possible cylinder or equipment damage.
-
Page 18: Setting Disc Depth
Operation Front Disc SETTING DISC DEPTH - FRONT AND REAR Depth Front Disc Depth Rear Disc Depth Adjustment Adjustment Rear Disc Depth Typically Typically Set to 2” Set to 2” DEPTH SETTING OVERVIEW Use the following as a guideline for setting depth: Adjusting the cutting depth of the front and rear 1. - Page 19 Operation SCRAPER POSITION OVERVIEW SETTING SCRAPER POSITION Change into Storage Position: • Loosen & remove the 4 bolts (2 per arm). • Rotate section upward to new position. Storage Position • Reinstall bolts and tighten in place. Remove the 4 bolts •...
-
Page 20: Service & Maintenance
142979 - Decal, Rear Disc Depth - Loc 4 142008 - Decal, Degelman - 6” 143198 - Decal, Degelman - 8-1/4” 142961 - Decal, Pro-Till 33 - 4” 142962 - Decal, Pro-Till 33 - 7” 142949 - Decal, Pro-Till 40 - 4”... -
Page 21: Maintenance Checklist
Service & Maintenance MAINTENANCE CHECKLIST SERVICE After reviewing the Maintenance and Hydraulic GREASING Safety Information, use the Maintenance Checklist Grease: Use an SAE multipurpose grease with provided for regular service intervals and keep a extreme pressure (EP) performance. Also acceptable record of all scheduled maintenance: is an SAE multipurpose lithium. - Page 22 Service & Maintenance TORQUE SPECIFICATIONS CHECKING BOLT TORQUE WHEEL NUT & WHEEL BOLT TORQUE The tables shown below give correct torque values Wheel Nut/Bolt Torque for various bolts and capscrews. Tighten all bolts to Size lb.ft (N.m) the torques specified in chart unless otherwise noted. 280-300 (380-405) Check tightness of bolts periodically, using bolt torque chart as a guide.
- Page 23 Service & Maintenance WHEEL HUB REPAIR COMMON HUB & SPINDLE COMPONENTS Dust Inner Inner Flat Seal Cone Spindle Washer Outer Outer Slotted Dust Cone Nut & Cotter Pin IMPORTANT Be sure to block up unit securely before removing tires. DISASSEMBLY ASSEMBLY 1.
- Page 24 Service & Maintenance HYDRAULIC CYLINDER REPAIR 5. Take the plastic removal ring from the seal kit: PREPARATION Types of Cylinders a) Straighten the ring and remove any kinks or When cylinder repair (Wire Ring / Threaded Head) excessive curl to make installation easier and is required, clean off prevent it from falling out.
- Page 25 Service & Maintenance 8. Remove locknut, piston and head from rod. 11. b) Tighten the band clamp to ensure the wire ring is fully seated. Then, loosen the clamp Piston Seal (2pcs) approx. 1/2 a turn to allow band clamp to slide Wear Ring during fi...
- Page 26 Service & Maintenance REPAIRING A THREADED HEAD CYLINDER REPAIRING A THREADED HEAD CYLINDER Set Screw Style Locking Ring Style Barrel Barrel Set Screw Locking Gland Ring Lock Piston U-Cup Wear Dual Seal Seal Piston Ring O-Rings Seal Wiper Piston Seals Seal (Style may vary, Lock...
-
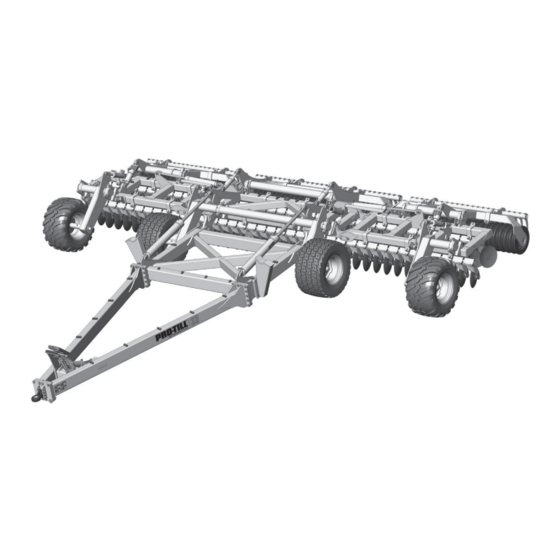
Page 27: Pro-Till Section Overview
Pro-Till Overview Exploded Overview of a 40’ Pro-Till RH Wheel Strut RH Wing Frame Wing Roller Frame Hyd Jack Assembly Wheel Rockshaft Cage Front Roller Hitch Pole Center Hitch Legs Frame Scraper - or - RH Wing Disc Gangs Hitch Pole Frame Center Roller Frame... -
Page 28: Hitch Pole Frame Components
117414 - Lock Nut, 3/4 - Unitorque (8) - 2 Halves (11) 572870 - Hitch Pole Frame Assembly (1) 143198 - Decal, Degelman - 8-1/4” (1) 117145 - Bushing (2) 572915 - Pin, 1-15/16 x 10-1/4 (2) mounts with... 118040 - Bolt, 3/4 x 1-1/2 (2) - Page 29 1 x 3-1/8 (1) 572576 - Pole Leg Assembly - LH (1) 118376 - Bolt, 1 x 6 UNC GR8 (1) 142962 - Decal, Pro-Till 33 - 7” (2) (142950 - Decal, Pro-Till 40 - 7”) 2-1/8” 3/4” 142963 - Decal, Danger - Negative (2) 2”...
- Page 30 118062 - Bolt, 3/4 117145 - 142949 - Decal, Pro-Till 40 - 4” (1) x 5-1/2 GR8 (4) Bushing (1) (142961 - Decal, Pro-Till 33 - 4”) 117414 - Lock Nut, 3/4 LH Wheelstrut GRC Unitorque (4) Components 131830 - Hub/Spindle Assembly (4)
- Page 31 Bushing (2) 572450 - Cage Roller Assembly (1) 131855 - Rubber Roller 142008 - Decal, Assembly, LSTX 4m (1) Degelman 6” (1) 572790 - Roller Frame Assembly, Center (1) 572428 - Washer Endplate, 2 Hole (2) 572940 - Scraper 117579 - Bolt, Carriage...
- Page 32 Wing Frame Components Pro-Till 33’ (10m) Wing Frame Components (LH Shown) 572915 - Pin, 1-15/16 118635 - Flat washer, 3/4 x 2-1/4 (2) x 10-1/4 (2) 118772 - Lock Washer, 3/4 GR8 (2) Wing Cylinder 118040 - Bolt, 3/4 x 1-1/2 (2)
- Page 33 Wing Frame Components Pro-Till 40’ (12m) Wing Frame Components 572915 - Pin, 1-15/16 x 10-1/4 (2) (LH Shown) Wing Cylinder 118040 - Bolt, 3/4 x 1-1/2 (2) 123050/123540 (1) 118772 - Lock Washer, 3/4 GR8 (2) 118635 - Flat washer, 3/4 x 2-1/4 (2) 572720 - Roller Bushing (1) 118447 - Lock Nut, 5/8 - Unitorque (1)
- Page 34 Scraper Components Scraper Section Overview 33’ 572940 - Scraper, 31 Section - 4m (1) 40’ 572950 - Scraper, 23 Section - 3m (1) Scraper Section Component Overview Scraper Position Overview Remove the 4 bolts to rotate into or out of “Storage position”, 572940 - Scraper, 31 Section - 4m (shown) Storage Position...
- Page 35 Rubber Roller Components 33’ Roller Assembly Overview 40’ 131855 - Roller Assembly, 131815 - Roller Assembly LSTX 4m (1) LTX 4m (1) 131729 - Roller 131845 - Roller Assembly, LTX 3m (1) Assembly, LSTX 3m (1) 131730 - Tube Assembly - 3m (1) 131730 - Tube Assembly - 3m (1) 131816 - Tube Assembly - 4m 131816 - Tube Assembly - 4m...
- Page 36 Disc Gang Components - Pro-Till 33’ (10m) Disc Gang Assembly Mounting (20) 572891 - V-Clamp (1) 118134 - Bolt, 1 x 3 GR8 (2) 131020 - Flat Washer, 1 F436 (4) Gang 118911 - Mounting Lock Nut, 1 572907 572902...
- Page 37 Disc Gang Components - Pro-Till 40’ (12m) Disc Gang Assembly Mounting (24) 572891 - V-Clamp (1) 118134 - Bolt, 1 x 3 GR8 (2) 131020 - Flat Washer, 1 F436 (4) Gang 118911 - Mounting Lock Nut, 1 572902 572902 572903 GRC (2) (See below...
- Page 38 Hydraulic Cylinders Hydraulic Cylinder Locations 123052/123690 Roller 123050/123540 123050/123540 Cylinders Wing Cylinder Wing Cylinder 123052/ 123052/ 123690 123690 Wheel Wheel Cylinder Cylinder 123045/ 123045/ 123680 123680 123045/ 123045/ Roller Roller 123680 123680 Rear Depth Rear Depth Rockshaft Rockshaft Cylinder Cylinder Front Depth Front Depth Cylinder...
- Page 39 Hydraulic Cylinders 123509 - Barrel (1) Jack Cylinder 118946 - Lock Nut, 1-1/4 UNF 123503 - Cylinder, 4 x 8 x 2 (1-1/4” Pin Eye) 122783 - Lock Ring (1) GR5 Unitorque (1) -or- 122781 - Open 122774 - Piston (1) Cap (1) 123055 - Cylinder, Monarch - 4 x 8 x 2 (Seal Kit: 123049)
- Page 40 Hydraulic Layout - 1 - Wheels Pro-Till 33’ (10m) Hydraulic Fittings Required 141581 - Quick Coupler-m - 3/4 ORB 141581 - Quick Coupler, 3/4 ORB (2) 141676 - Nipple, 3/4 ORB-m 540 390 141684 - Coupler, Green (+) 141676 - Nipple, 3/4 141685 –...
- Page 41 Hydraulic Layout - 1 - Wheels Pro-Till 40’ (12m) Hydraulic Fittings Required 141581 - Quick Coupler-m - 3/4 ORB 141581 - Quick Coupler, 3/4 ORB (2) 141676 - Nipple, 3/4 ORB-m 582 390 141684 - Coupler, Green (+) 141676 - Nipple, 3/4 141685 –...
- Page 42 Hydraulic Layout - 2 - Rollers Pro-Till 33’ (10m) Hydraulic Fittings Required 141581 - Quick Coupler-m - 3/4 ORB 141581 - Quick 390 510 Coupler, 3/4 ORB (2) 141676 - Nipple, 3/4 ORB-m 141682 - Coupler, Blue (+) 141676 - Nipple, 3/4 141683 –...
- Page 43 Hydraulic Layout - 2 - Rollers Pro-Till 40’ (12m) Hydraulic Fittings Required 141581 - Quick Coupler-m - 3/4 ORB 141581 - Quick 390 522 Coupler, 3/4 ORB (2) 141676 - Nipple, 3/4 ORB-m 141682 - Coupler, Blue (+) 141676 - Nipple, 3/4 141683 –...
- Page 44 Hydraulic Layout - 3 - Transport Hydraulic Fittings Required 141581 - Quick Coupler-m - 3/4 ORB 141581 - Quick Coupler, 3/4 ORB (2) 141676 - Nipple, 3/4 ORB-m 141686 - Coupler, Brown (+) 141676 - Nipple, 3/4 141686 ORB-m (2) 141687 - Coupler, Brown (-) Coupler, 141687 - Coupler,...
- Page 45 Hydraulic Layout - 4 - Wings Hydraulic Fittings Required 141581 - Quick 141581 - Quick Coupler-m - 3/4 ORB Coupler, 3/4 ORB (2) 141676 - Nipple, 3/4 ORB-m 141676 - Nipple, 3/4 141688 - Coupler, Black (+) 141688 ORB-m (2) 141689 - Coupler, Black (-) Coupler, 141689 - Coupler,...
- Page 46 Hydraulic Layout - 5 - Jack 141581 - Quick Hydraulic Fittings Required Coupler, 3/4 ORB (2) 141581 - Quick Coupler-m - 3/4 ORB 141676 - Nipple, 3/4 141676 - Nipple, 3/4 ORB-m ORB-m (2) 141680 - Coupler, 141680 - Coupler, Grey (+) 141681 - Coupler, Grey (+) (1) –...
- Page 47 Light Routing & Components Rear Light Configuration & Components Wire Harness - w/plugs (1) 572785 - Pro-Till, Wire Harness 244591 - Dual Lamp (1) 244590 - Dual Lamp (1) Light Bracket Location & Components 118483 - Lock Nut, 1/4 - Unitorque (8) 118541 - Flat Washer, 117414 - Lock 1/4 SAE (8)
- Page 48 Dirt Deflector Components & Adjustments 118088 - Bolt, 3/4 x 9 GR8 (2) 118775 - Flat Washer, 3/4 F436 (4) 117414 - Lock Nut, 3/4 GRC (2) 572980 - Top Clamp Assembly (1) 118134 - Bolt, 1 x 3 GR8 (1) 131020 - Flat Washer, 1 F436 (2) 572970 - Base...
- Page 49 Re-torque of fastening hardware, Hydraulic fluid purities, drive train alignments, and clutch operation) 3. If parts not made or supplied by Degelman have been used in the connection with the unit, if, in the sole judgement of Degelman such use affects its performance, safety, stability or reliability.
- Page 50 It is the retail customer’s responsibility to deliver the product to the authorized Degelman dealer, from whom he purchased it, for service or replacement of defective parts, which are covered by warranty. Repairs to be submitted for warranty consideration must be made within forty-five days of failure.
Need help?
Do you have a question about the Pro-Till 33 and is the answer not in the manual?
Questions and answers