Table of Contents
Advertisement
Quick Links
D E G E L M A N
I N D U S T R I E S
B O X
8 3 0 - 2 7 2
I N D U S T R I A L
R E G I N A ,
S K ,
C A N A D A ,
F A X 3 0 6 . 5 4 3 . 2 1 4 0
P H 3 0 6 . 5 4 3 . 4 4 4 7
1 . 8 0 0 . 6 6 7 . 3 5 4 5
D E G E L M A N . C O M
L T D.
D R I V E ,
S 4 P
3 B 1
OPERATOR & PARTS
MANUAL
143096 v1.0
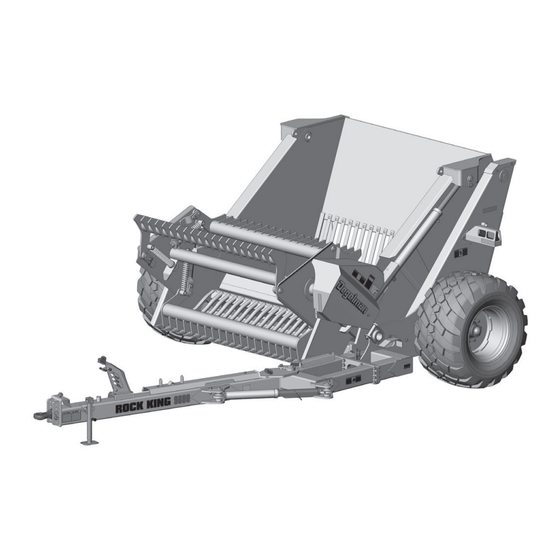
ROCK KING 9600
ROCK PICKER
Advertisement
Table of Contents

Related Manuals for Degelman Rock King 9600


Summary of Contents for Degelman Rock King 9600
- Page 1 OPERATOR & PARTS MANUAL 143096 v1.0 ROCK KING 9600 D E G E L M A N I N D U S T R I E S L T D. B O X 8 3 0 - 2 7 2...
- Page 3 QUICK-START GUIDE WARRANTY ROCK KING Rock Pickers REMEMBER! You must complete Product * Refer to operators manual for complete safety and operation info. Registration to be eligible for Warranty. Hook-up to Rock Picker NOTE: Stop the tractor engine, place all controls in neutral, set park brake before dismounting. 1.
- Page 4 Operation Overview (Refer to operators manual for complete safety and operation info before use.) 1. Material Size: Between 2-3/4” to 28” material that is loose and on top of the ground. 2. Grille Height: Lower to allow the front of the teeth to skim the ground surface. 3.
-
Page 5: Table Of Contents
* Reference Sheet Quick-Start Guide TABLE OF CONTENTS - OPERATORS SECTION TABLE OF CONTENTS - PARTS SECTION Hitch Pole Components Introduction Front Frame Components Safety Axle & Wheel Components Overview Rear Strut & Rear Frame Components Preparation Pre-Operation Checklist Hopper Box Components Tractor Preparation Reel Components Hook-up / Unhooking... -
Page 7: Introduction
If you follow the instructions given in this manual, your machine will work well for many years. Safe, efficient and trouble free operation of your Degelman Rock Picker requires that you and anyone else who will be operating or maintaining the Picker, read and understand the Safety, Operation, Maintenance and Troubleshooting information contained within this Manual. -
Page 8: Safety
CAUTION: Indicates a potentially hazardous situation CAUTION that, if not avoided, MAY result in minor or moderate injury if proper practices are not taken, or, serves as a reminder to follow appropriate safety practices. 143096 - Rock King 9600 (18-October-2018) - Page 9 GENERAL SAFETY YOU are responsible for the safe operation and 1. Read and understand the Operator’s maintenance of your Degelman Rock Picker. YOU Manual and all safety signs before must ensure that you and anyone else who is going operating, maintaining or adjusting to operate, maintain or work around the Rock Picker the Rock Picker.
-
Page 10: Overview
Overview TO THE NEW OPERATOR OR OWNER PRINCIPLES OF OPERATION The Degelman Rock King 9600 Rock Picker is The Rock Picker is a framework of steel bars called a designed to efficiently gather rocks from 2-3/4 grille that moves along the surface of the ground to to 28 inches (70 to 710mm) diameter and debris gather rocks and debris. -
Page 11: Preparation
11. Stay well back from machine when operating to prevent being hit by flying rocks. Keep others away. 12. Turn to the left when manoeuvring to keep the tractor away from the path of flying rocks. 143096 - Rock King 9600 (18-October-2018) -
Page 12: Pre-Operation Checklist
11. Check the paddles, grille and hopper box. Remove any rocks or debris that have become jammed in any of the components. 143096 - Rock King 9600 (18-October-2018) -
Page 13: Hook-Up / Unhooking
Jack Storage Chain Location Adjust bolts and Ensure hitchpole Check that height is at hitch position to is parallel to ground, least 12” for adequate set pole height. adjust with jack. clearance on hills. 143096 - Rock King 9600 (18-October-2018) -
Page 14: Rock Picker Preparation
Fully retract the dump cylinders to take the parallel to the ground. weight of the grille off the red transport pin. b) Disengage the red transport lock pin from its transport position. Disengage Grille Transport Lock 143096 - Rock King 9600 (18-October-2018) -
Page 15: Operation
IMPORTANT Do not use the Rock Picker grille to pry out deeply buried rock or debris. Grill teeth striking a buried rock will shock the machine and damage it. 143096 - Rock King 9600 (18-October-2018) - Page 16 WARNING Stay clear of the machine and surrounding area when unloading. Keep others away. WARNING Ensure there are no obstructions below the grille/grate area or the side cylinder lift bracket areas when dumping. 143096 - Rock King 9600 (18-October-2018) -10-...
- Page 17 • Relieve the pressure in hydraulic system off to the side. • Set park brake Keep Bystanders Away! • Remove ignition key. • Use a long pry bar (not hands) to dislodge the material. 143096 - Rock King 9600 (18-October-2018) -11-...
-
Page 18: Transporting
8. Maintain a safe speed. Slow down when cornering and on rough roads. 9. Slow down and pull off to the side of the road when meeting other traffic. 10. Use hazard flashers on tractor unless prohibited by law. 143096 - Rock King 9600 (18-October-2018) -12-... -
Page 19: Troubleshooting
Excessive rock pile-up at bottom of grille. Worn reel springs Replace springs. or inadequate spring tension. Reel misaligned. Realign reel. Paddle teeth contact grille teeth. Bent teeth. Straighten teeth. 143096 - Rock King 9600 (18-October-2018) -13-... -
Page 20: Service & Maintenance
• When a guard is opened or removed for grease reel bearing units - 2 locations servicing, be sure to install or close it before grease wheel hub nipple - 2 locations starting. 143096 - Rock King 9600 (18-October-2018) -14-... - Page 21 675 (915) 970 (1315) installation and prevent possible damage or hazards. 915 (1240) 1310 (1780) 1250 (1695) 1785 (2420) 1600 (2175) 2290 (3110) v1.0 143096 - Rock King 9600 (18-October-2018) -15-...
- Page 22 2. Align, thread into place and hand tighten. 8. Inspect to ensure that O-ring is not pinched and that washer is seated fl at on the face of the port. 3. Tighten to proper torque from the table shown above. 143096 - Rock King 9600 (18-October-2018) -16-...
-
Page 23: Adjustments / Repair
Tooth Tip Grille Tooth Tip Replacement: Replace broken cast tips immediately to prevent wearing down of mating stub. Replace tips by driving out roll pin, wedging new tip into position and reinstalling roll pin. 143096 - Rock King 9600 (18-October-2018) -17-... - Page 24 12 - Tighten the two setscrews on threaded spacer. Refer to “Adjusting Chain Sprocket Alignment” section. 13. Reposition and secure the chain shield. WARNING DO NOT operate machine without shield secured in position. 143096 - Rock King 9600 (18-October-2018) -18-...
- Page 25 Check the chain tightness. The amount of chain slack should measure approximately 1/4”. 11. Re-secure the adjusting bolt with Jam nuts and Setscrew. 12. Lubricate chain. 13. Close and secure the chain shield. 143096 - Rock King 9600 (18-October-2018) -19-...
- Page 26 Dust Cap 9. Fill dust cap half full of grease and gently tap into position. 10. Pump grease into hub through grease fitting until lubricant can be seen from dust seal. 143096 - Rock King 9600 (18-October-2018) -20-...
- Page 27 5. Apply Loctite anti-seize before installing cylinder end cap. 6. Torque cylinder end cap to 440 lb.ft (600 N.m). 7. Tighten Set Screw on end cap to 6 lb.ft (8 N.m). 143096 - Rock King 9600 (18-October-2018) -21-...
-
Page 28: Storage
9. Re-assemble all other debris. 5/16" necessary components. 10. Follow the procedure given in the Preparation section of the manual for unhooking. IMPORTANT: DO NOT use oil or grease on pins or bushing surfaces when re-installing. 143096 - Rock King 9600 (18-October-2018) -22-... - Page 29 142556 - Decal, Reflector Red - 2 x 9 142557 - Decal, Reflector Amber - 2 x 9 142650 - Decal, Fluorescent - 2 x 9 143570 - Decal, Rock King 9600 142008 - Decal, Degelman - 6” 142009 - Decal, Degelman - 3-3/4”...
-
Page 30: Hitch Pole Components
250706 - Hose Holder 118537 - Flat washer, 1/2 - 2 Halves Assembly (1) 5/8 F436 (2) 118729 - Lock Nut, 118221 - Bolt, Carriage 1/2 Unitorque (4) - 5/8 x 2 (1) 143096 - Rock King 9600 (18-October-2018) -24-... -
Page 31: Front Frame Components
117416 - Lock Nut, 7/8 Unitorq (16) 117426 - Bolt, 7/8 x 2-3/4 GR8 (1) Hose Clamp, 118774 - Flat washer, 7/8 - F436 (2) 1/2 - 2 Halves 117416 - Lock Nut, 7/8 Unitorq (1) 143096 - Rock King 9600 (18-October-2018) -25-... -
Page 32: Axle & Wheel Components
118936 - Flat Washer, 1-1/4” GR8 (1) 131838 - Dust 118443 - Slotted Nut, 1-1/4” UNF (1) Cap - #DC27 (1) 131839 - Pin, Spindle Nut Retainer (1) 131841 - Gasket, 4 Hole - #SE49 (1) 143096 - Rock King 9600 (18-October-2018) -26-... -
Page 33: Rear Strut & Rear Frame Components
- Unitorque (4) 250310 - Light Holder (2) mounts with... 118292 - Bolt, 1/2 x 1-3/4 (6) 118587 - Flat washer, 1/2 - F436 (12) 118729 - Lock Nut, 1/2 - Unitorque (6) 143096 - Rock King 9600 (03-December-2018) -27-... -
Page 34: Hopper Box Components
118112 - Bolt, 1/2 x 3 (4) 118774 - Flat washer, 7/8 - F436 (4) 118587 - Flat washer, 1/2 - F436 (8) 117416 - Lock Nut, 7/8 Unitorq (2) 118729 - Lock Nut, 1/2 Unitorque (4) 143096 - Rock King 9600 (18-October-2018) -28-... -
Page 35: Reel Components
B - Add Shims to end of reel shaft (as needed) C - Install End Plate with Hardware D - Using the Threaded Spacer Wrenches, adjust Threaded Spacer until it makes slight contact. E - Tighten the two setscrews on threaded spacer. 143096 - Rock King 9600 (10-December-2018) -29-... -
Page 36: Grille Components
117245 - Swivel Nut, 1 SS (1) bring Chain Slack to 14 Ga (12) approximately 1/4”. 250819 - Pin, F - Retighten Jam Nuts 1-1/2 x 12-1/2 (1) and Setscrew. 810218 - Retaining Ring (2) 143096 - Rock King 9600 (03-December-2018) -30-... -
Page 37: Swing Pole
141683 - Coupler, Blue (-) 141703 - Adaptor, 1/2 ORB M x ORFS M 250546 - Wrap, Hose Protection - 24” Required Hoses for Swing Pole Cylinder 126782 - Hose, 1/2 x 222 (2) 143096 - Rock King 9600 (18-October-2018) -31-... -
Page 38: Dumping Cylinder
126786 - Hose, 1/2 x 24 - F-90D (1) 126787 - Hose, 1/2 x 76 - F-90D (1) 126788 - Hose, 1/2 x 240 (1) 126784 - Hose, 1/2 x 252 (2) 126785 - Hose, 1/2 x 300 (1) 300 240 143096 - Rock King 9600 (18-October-2018) -32-... -
Page 39: Hydraulic Motor
141723 - Adaptor, 3/4 ORB M x 5/8 ORFS M (2) 141729 - Elbow, 45º 1-1/16 ORB M x 5/8 ORFS M 250547 - Wrap, Hose Protection - 45” Required Hoses for Hydraulic Motor 126780 - Hose, 5/8 x 312 (1) 143096 - Rock King 9600 (13-February-2019) -33-... -
Page 40: Electrical Routing
7 POLE PLUG WHITE Ground BROWN Tail/Running YELLOW Left High FL GREEN Right High FL Brake (viewed from back of plug) Wiring Assembly - RK9600 7 Pole 2450316 - Wiring Harness (1) Plug 143096 - Rock King 9600 (18-October-2018) -34-... -
Page 41: Warranty
Re-torque of fastening hardware, Hydraulic fluid purities, drive train alignments, and clutch operation) 3. If parts not made or supplied by Degelman have been used in the connection with the unit, if, in the sole judgement of Degelman such use affects its performance, safety, stability or reliability. - Page 42 It is the retail customer’s responsibility to deliver the product to the authorized Degelman dealer, from whom he purchased it, for service or replacement of defective parts, which are covered by warranty. Repairs to be submitted for warranty consideration must be made within forty-five days of failure.
Need help?
Do you have a question about the Rock King 9600 and is the answer not in the manual?
Questions and answers