Advertisement
Available languages
Available languages
INSTRUCTION GUIDE FOR:
AIRWAVE UNIVERSAL
CROSSBAR SYSTEM
Date of Purchase:
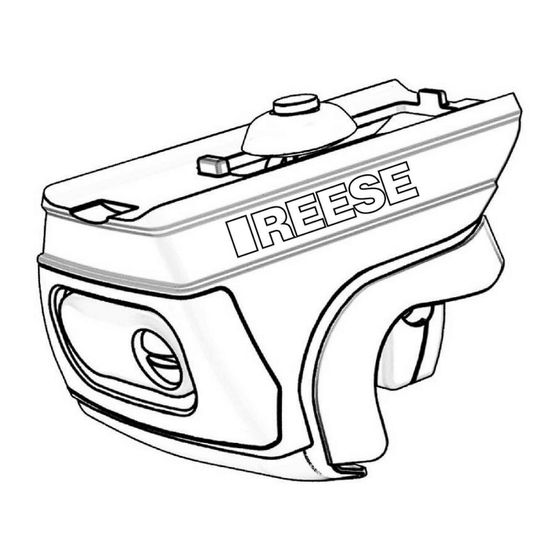
REESE Airwave Universal Crossbar System
1398700 / 1398800 / 1398900
SCAN NOW TO LEARN MORE
Use your smart device to scan the QR code
and get the latest:
▪ Instructions manual
▪ How-to videos
/
/
▪ News on our products
WARNING
Advertisement
Table of Contents

Subscribe to Our Youtube Channel
Related Manuals for Reese Airwave 47


Summary of Contents for Reese Airwave 47
- Page 1 Use your smart device to scan the QR code AIRWAVE UNIVERSAL and get the latest: CROSSBAR SYSTEM ▪ Instructions manual ▪ How-to videos Date of Purchase: ▪ News on our products WARNING REESE Airwave Universal Crossbar System 1398700 / 1398800 / 1398900...
- Page 2 Damage to your vehicle, your cargo or any person or property is excluded. • Maximum roof loads = weight of the cross bars + accessories + the weight of the load carried. Maximum load is defined by REESE or the Manufacturer- use which ever is lower.
- Page 3 REESE has no control over, or responsibility for, the attachment or the installation. REESE is NOT responsible, nor will it be held liable for any damage resulting from its attachment or improper use. REESE shall not be liable for any claims of any kind greater than the purchase price of the product.
- Page 4 No product modifications are allowed- this will void all warranties. • Check that the maximum load is not exceeded. Use the REESE load limit or the vehicle’s load limit- which ever is lower. Max. roof load = Cross bar weight + Accessory carrier + Load carried.
-
Page 5: Installation Instructions
INSTALLATION INSTRUCTIONS NOTE: Use this instruction guide and the crossbar Instructions to set up your REESE cross bars. PARTS LIST 4 End Supports 4 Height Adapters... - Page 6 INSTALLATION INSTRUCTIONS 1. Remove cross bars from the carton. Slide Out the outer under-cover strips. FIG A. 2. Slide the positioning slider inward. The slider will be positioned after the cross- bar assembly is on the vehicle. FIG B. 3. Unlock, open and loosen the handle on all the Airwave end supports.
- Page 7 INSTALLATION INSTRUCTIONS 4. Slide the Airwave end supports into the rails and leave loose until set into place on the vehicle’s raised side rails. FIG B. 5. Position the cross bars onto the vehicle side rails using measurements “Y” & “Z”. FIG C. Once on the car, position the cross bars to have equal amounts of overhang per side “X”...
- Page 8 INSTALLATION INSTRUCTIONS 6. Turn the locking handle in a clockwise direction to tighten the end support to the vehicles side rails. FIG E. The handle must be firmly turned (equivalent to 4Nm or 35 in/ lbs.) to achieve a positive and tight fit.
- Page 9 INSTALLATION INSTRUCTIONS 9. Push and tug on the now installed cross bar assemblies to check for tightness in all 4 mounting positions. If any looseness is detected review the installation steps and redo until completely firm. FIG CAUTION - Check the tension on the tightening handle periodically on long trips, after a load is applied, or if the cross bars remain on the car for long periods of time.
- Page 10 Insert the control key into the lock core then slide the core into the covers. Hold back the core and remove the control key. FIG B. Use your REESE standard keys to lock and unlock the locking handle. FIG C.
- Page 11 INSTALLATION INSTRUCTIONS Removing the cross bar from the vehicle: Pull Away from rail. Raise Over rail. Installing REESE T-bolts: For accessories requiring a T-bolt Both ends.
- Page 12 SERVICE ITEMS AVAILABLE Save this page for later use. S3001 BUFFER STRIP S3002 UNDER - COVER S3003 POSITION SLIDER S3004 END CAP S3005 ¼ TURN PLUG S3012 ADJUSTER, HEIGHT...
- Page 13 Utilisez votre appareil intelligent pour scanner SYSTÈME D’ENSEMBLE DE le code QR et obtenir les dernières informations: SUPPORTS D’EXTRÉMITÉ AIRWAVE ▪ Manuel d'instructions ▪ Vidéos d'utilisation Date d’achat: ▪ Nouvelles sur nos produits WARNING Supports d’extrémité AIRWAVE REESE 1398700 / 1398800 / 1398900...
- Page 14 REESE; choisir la plus faible. Ne pas dépasser les limites de capacité de charge du véhicule; voir le manuel du propriétaire ou les limites de REESE et choisir la plus faible. Il s’agit du poids de votre cargaison plus le poids du porte-bagage de toit.
- Page 15 REESE n'accepte AUCUNE responsabilité NI ne sera tenu responsable de quelque dommage que ce soit résultant de l’arrimage ou de l’utilisation inappropriée du produit. REESE ne saurait être tenu responsable de quelque réclamation que ce soit qui dépasse le prix d’achat du produit.
-
Page 16: Instructions D'installation
• Valider que la charge ne dépasse pas la capacité maximale. Respecter la limite de charge REESE ou la limite de charge du véhicule; choisir la plus faible. Charge de toit max = poids du porte-bagage + porte accessoires + le poids de la charge. - Page 17 INSTRUCTIONS D'INSTALLATION REMARQUE: Utilisez ce guide d'instructions et les instructions de la barre transversale pour configurer vos barres transversales REESE. LISTE DES PIÈCES 4 Supports d’extrémité 4 Adaptateur de hauteur...
- Page 18 INSTRUCTIONS D'INSTALLATION Bandes de protection inférieures 1. Retirez les traverses RE REESE de l’emballage. Enlevez les bandes de protection inférieures externes en les faisant glisser. FIG A. 2. Faites glisser le curseur de Glisser positionnement vers l’intérieur. Le curseur sera positionné après que l’ensemble de barres transversales aura...
- Page 19 INSTRUCTIONS D'INSTALLATION 4. Faites glisser le curseur de positionnement vers l’intérieur. Le curseur sera positionné après que l’ensemble de barres transversales aura été placé sur le véhicule. FIG B. Conseil: Placez la barre à l’envers pour faciliter la manipulation des pièces 5.
- Page 20 INSTRUCTIONS D'INSTALLATION 6. Tournez la poignée de verrouillage dans le sens des aiguilles d'une montre pour serrer le support d'extrémité sur les rails latéraux du véhicule. FIG E. La poignée doit être fermement tournée (équivalent à 4 Nm ou 35 in / lbs.) Pour obtenir un ajustement positif et serré. Tournez toujours la poignée dans le sens des aiguilles d'une montre jusqu'à...
- Page 21 INSTRUCTIONS D'INSTALLATION 9. Poussez et tirez sur les ensembles de barres transversales que vous venez d’installer pour vérifier la solidité des 4 positions de montage. Si vous détectez une quelconque mollesse, reprenez les étapes de l’installation jusqu’à ce que l’ancrage soit bien ferme. FIG H. ATTENTION –...
- Page 22 Insérez la clé de contrôle dans le noyau de verrouillage puis glissez ce noyau dans les couvertures. Maintenez le noyau pour qu’il reste en place et ôtez sa clé de contrôle. FIG B. Vous utiliserez maintenant vos clés standard REESE pour verrouiller/déverrouiller chaque poignée de verrouillage. FIG C.
- Page 23 INSTRUCTIONS D'INSTALLATION Enlever la traverse du véhicule: Tirez pour écarter du rail. Soulevez au-dessus du rail. Installer les boulons en T REESE: Pour les accessoires nécessitant un boulon en T À chaque extrémité.
- Page 24 PIÈCES DE RECHANGE DISPONIBLES Conservez cette page pour un usage ultérieur. S3001 BANDE TAMPON S3002 BANDE PROTECTRICE INFÉRIEURE S3003 COULISSE DE POSITIONNEMENT S3004 CAPUCHON D’EXTRÉMITÉ S3005 FIXATION QUART DE TOUR S3012 AJUSTEUR, HAUTEUR...
- Page 25 Utilice su dispositivo inteligente para SISTEMA DE KIT DE SOPORTE escanear el código QR y obtener lo último: AIRWAVE ▪ Manual de instrucciones ▪ Vídeos de instrucciones ▪ Noticias sobre nuestros Fecha de compra: productos WARNING Soportes REESE AIRWAVE 1398700 / 1398800 / 1398900...
- Page 26 Los usuarios deben leer y entender todas las advertencias y precauciones antes de utilizar los sistemas de barra transversal REESE. La instalación es responsabilidad final del usuario y fuera del control de REESE. Por lo tanto, REESE limita su garantía exclusivamente a la reparación o reemplazo de un producto defectuoso.
- Page 27 La colocación adecuada de este producto de acuerdo con las instrucciones anexas es vital para su desempeño adecuado. Consulte las instrucciones para la colocación adecuada, el uso correcto y los mensajes importantes de seguridad. REESE no tiene control ni responsabilidad por la colocación ni por la instalación.
-
Page 28: Instrucciones De Instalación
• Revise que no se rebase la carga máxima. Utilice el límite de carga de REESE o el límite de carga del vehículo: lo que sea menor. Carga máxima en el toldo = Peso de la barra transversal + Portador de accesorios + Carga transportada. - Page 29 INSTRUCCIONES DE INSTALACIÓN NOTA: Utilice esta guía de instrucciones, y las Instrucciones del soporte final para instalar sus barras transversales REESE. LISTA DE PARTES 4 Soportes 4 Adaptador de altura...
- Page 30 INSTRUCCIONES DE INSTALACIÓN Cubiertas inferiores 1. Retire las barras transversales REESE de de la caja. Deslice las cubiertas inferiores exteriores. FIG A. 2. Deslice la corredera de posicionamiento Deslice hacia adentro. La corredera se posicionará después de que el conjunto de travesaños esté...
- Page 31 INSTRUCCIONES DE INSTALACIÓN 4. Deslice los soportes extremos Airwave en las barandillas y déjelos flojos hasta colocarlos en su sitio sobre las barandillas laterales elevadas del vehículo. FIG B. Consejo: coloque la barra invertida para facilitar el manejo de las piezas. 5.
- Page 32 INSTRUCCIONES DE INSTALACIÓN 6. Gire la manija de traba en sentido horario para apretar el soporte extremo contra las barandillas laterales del vehículo. FIG E. La manija debe girarse con firmeza (equivalente a un par de apriete de 4 N·m o 35 lb·pulg.) para lograr un ajuste efectivo y apretado.
- Page 33 INSTRUCCIONES DE INSTALACIÓN 9. Empuje y dé un tirón a los conjuntos de travesaños recién instalados para comprobar su firmeza, en las 4 posiciones de montaje. Si se detecta alguna flojedad, revise los pasos de la instalación y rehágalos hasta que el conjunto esté completamente firme. FIG H. PRECAUCIÓN - Verifique la tensión de la manija tensora periódicamente en viajes largos, después de aplicar una carga, o si los travesaños permanecen en el auto durante períodos prolongados.
- Page 34 Inserte la llave de control en el núcleo de cierre, y luego deslice el núcleo en las cubiertas. Contenga el núcleo y quite la llave de control. FIG B. Use sus llaves estándar REESE para bloquear y desbloquear la manija de traba. FIG C.
- Page 35 INSTRUCCIONES DE INSTALACIÓN Retiro de la barra transversal del vehículo: Extraiga de la barandilla. Levante sobre la barandilla. Instalación de los pernos T REESE: Para ver los accesorios que requieren un perno T Ambos extremos.
- Page 36 ARTÍCULOS DE SERVICIO DISPONIBLES Guarde esta página para uso posterior. S3001 BANDA DE AMORTIGUACIÓN S3002 CUBIERTA INFERIOR S3003 CARRETILLA DE POSICIÓN S3004 TAPÓN S3005 TAPÓN DE ¼ DE VUELTA S3012 AJUSTADOR, ALTURA...
-
Page 37: Limited One-Year Warranty
LIMITED ONE YEAR WARRANTY 1. Limited Warranty ("Warranty"). Horizon Global Corporation. ("We" or "Us") warrants to the original consumer purchaser only ("You" or "Your") that the product will be free f om material defects in both material and workmanship for a period of one-year, ordinary wear and tear excepted. The Warranty is valid only if (a) the products are returned to Us for inspection and testing;... -
Page 38: Garantie Limitée D'un An
GARANTIE LIMITÉE D’UN AN 1. Garantie limitée (« Garantie »). Horizon Global Corporation. (« Nous ») délivre à l’acheteur initial seulement (« Vous ») une garantie couvrant le produit contre les vices de matière et de fabrication durant une période d’un an, exception faite de l’usure normale. -
Page 39: Garantía Limitada De Un Año
GARANTÍA LIMITADA DE UN AÑO 1. Garantía limitada ("Garantía"). Horizon Global Corporation. ("Nosotros" o "Nos") garantiza al comprador original únicamente ("Usted" o "Su/s") que el producto estará libre de defectos significativos tanto en materiales como en mano de obra, durante un periodo de un año, a excepción del desgaste normal. La garantía sólo es válida si (a) los productos se nos devuelven para inspección y pruebas;...
Need help?
Do you have a question about the Airwave 47 and is the answer not in the manual?
Questions and answers