Table of Contents
Advertisement
Quick Links
Advertisement
Table of Contents

Related Manuals for SKF QLS 301


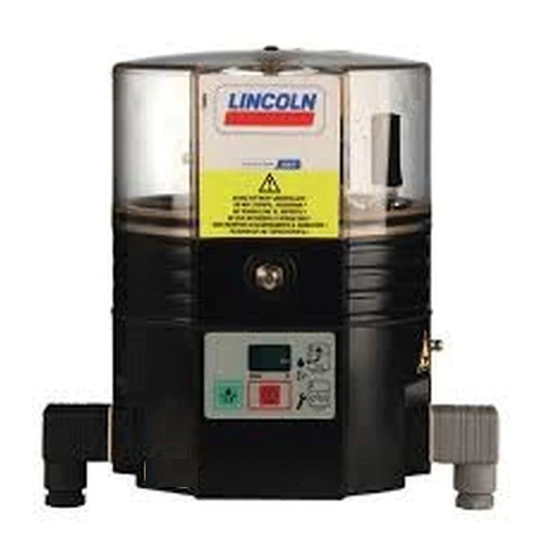
Summary of Contents for SKF QLS 301
- Page 1 Assembly Instructions Lubrication system QLS 301 / QLS 401 Created on: 08.12.2023 Document no.: 951-171-003-EN Version: Read these instructions before installation or start- up of the product and keep them readily available for later consultation!
- Page 2 The special technical documents were prepared following Annex VII part B. Upon justifiable request, these special technical documents can be forwarded electronically to the respective national authorities. The authorized company for the compilation of the technical documentation is SKF (U.K.) Limited, 2 Canada Close, Banbury, Oxfordshire, OX16 2RT, GBR. Designation:...
- Page 3 Appendix to Declaration of Incorporation in accordance with 2006/42/EC, Annex II, No. 1 B Description of the essential health and safety requirements according to 2006/42/EC, Annex I, which have been applied and fulfilled: Table 1 Appendix to Declaration of Incorporation No.: Essential health and safety requirement Applicable:...
-
Page 4: Masthead
We conduct detailed training in order to enable maximum safety and efficiency. We recommend taking advantage Berlin Plant of this training. For further information, contact your Motzener Strasse 35/37 authorized SKF dealer or the manufacturer. 12277 Berlin Germany Tel. +49 (0)30 72002-0 Fax +49 (0)30 72002-111... -
Page 5: Table Of Contents
6.6.3 Assembling screw sleeves and hose 2.7 Chisel pastes ................ 13 connectors ................32 6.7 Initial filling of a QLS 301 pump delivered without 3 Overview, functional description .......... 14 lubricant ..................33 3.1 Versions of the QLS system ..........14 6.8 Initial filling of a QLS 401 pump delivered without... - Page 6 13.2 Permanent shutdown, disassembly ......45 13.3 Disposal ................45 14 Spare parts ................. 46 14.1 SSV metering device for QLS 301 / 401 ....46 14.2 SSVDV metering device for QLS 401 ......46 14.3 Metering screws for SSVDV metering devices ..47 14.4 Seal set .................
-
Page 7: Safety Alerts, Visual Presentation, And Layout
• First-order bulleted lists: Items on a bulleted list start Safety alerts, visual with a solid black dot and an indent. – Second-order bulleted lists: If there is a further presentation, and layout listing of subitems, the second-order bulleted list is used. -
Page 8: Safety Instructions
Unauthorized modifications and changes are therefore • If protective and safety equipment has to be prohibited. Only original SKF spare parts and SKF dismantled, it must be reassembled immediately after accessories may be used. finishing the work, and then checked for correct •... -
Page 9: Foreseeable Misuse
1.6 Foreseeable misuse 1.10 Safety markings on the product Any usage of the product other than as specified in this Table 2 manual is strictly prohibited. Particularly prohibited are: Safety markings on the product • Use of non-specified consumables, contaminated lubricants, or lubricants with air inclusions. -
Page 10: Note On The Type Plate
1.15 Note on UKCA marking 1.11 Note on the type plate The UKCA conformity marking confirms the The type plate provides important data such as the type product’s conformity with the applicable designation order number, and sometimes regulatory legal provisions of Great Britain. characteristics. -
Page 11: Assembly, Maintenance, Fault, Repair
1.21 Assembly, maintenance, fault, repair Prior to the start of this work, all relevant persons must be notified of it. At a minimum, the following safety measures must be taken before any work is done: • Unauthorized persons must be kept away •... -
Page 12: Residual Risks
1.23 Residual risks Table 3 Residual risks Residual risk Possible in lifecycle Avoidance / Remedy Personal injury / property damage A B C G H K Unauthorized persons must be kept away. Nobody due to falling of hoisted parts is allowed to be present below hoisted parts. Lift parts using suitable lifting gear. -
Page 13: Lubricants
Solid lubricants may only be used after prior consultation application. The manufacturer or operator of the machine with SKF. When solid lubricants are used in lubrication should ideally make the selection in consultation with the systems, the following rules generally apply: supplier of the lubricant. -
Page 14: Overview, Functional Description
3 Pump elements The pump can be equipped with up to max. 2 pump QLS 301 (with and without control) elements. Each pump element must be secured with a suitable pressure limiting valve. Use plug screws to close • With follower plate off unneeded outlets. -
Page 15: Mounting Positions Of The Metering Devices
3.2.3 Pump for external metering device 3.2 Mounting positions of the metering devices Fig. 8 3.2.1 Rear-mounted metering devices Fig. 6 Pump for external metering device Legend to Figure 8: 1 Connection of proximity switch Rear-mounted metering devices • The connection (Fig. 8/1) for the proximity switch of the external SSV metering device is on the pump housing. -
Page 16: Changing The Delivery Rate With Ssv Metering Devices
3.3 Changing the delivery rate with 3.4 Changing the delivery rate with SSV metering devices SSVDV metering devices (rear- mounted) Fig. 9 The delivery rate is set by screwing the relevant metering screw into the relevant outlet on the metering piston level (Fig. -
Page 17: Return Of Unneeded Lubricant
3.5 Return of unneeded lubricant 3.6 Membrane keypad Fig. 12 Fig. 14 Bottom-mounted metering devices Fig. 13 Membrane keypad with display Legend to Figure 14: 1 Display 2 Red toggle button 3 Green setting button On pumps with control, the membrane keypad with display is used for: •... -
Page 18: Shown On The Display In Display Mode Of Control Circuit Board S4
3.6.1 Shown on the display in display Table 6 mode of control circuit board S4 Shown on the display in display mode of control circuit board S4 Table 6 <Content > Shown on the display in display mode of control Output signal programmed as NC circuit board S4 contact... -
Page 19: Shown On The Display In Programming Mode Of Control Circuit Board S4
3.6.2 Shown on the display in Table 7 programming mode of control circuit Shown on the display in programming mode of board S4 control circuit board S4 <Content > Table 7 UC (display 1) Shows the number of manually activated Shown on the display in programming mode of additional lubrications. -
Page 20: Principle Of Operation Of The Intermittent Low-Level Signal
Fig. 16 3.7 Principle of operation of the intermittent low-level signal Components of the intermittent low-level signal The intermittent low-level signal uses a contactless mechanism, comprised essentially of the following parts: • Stationary reed switch (Fig. 15 to 17/1) in the reservoir bottom •... -
Page 21: Operational Limits Of The Intermittent Empty Signal
3.8 Operational limits of the intermittent empty signal For the correct functioning of the intermittent empty signal, the following lubricant consistencies must be maintained. The correct functioning of the intermittent empty signal is not guaranteed above the specified temperature range. The lower temperature ranges are contingent on the suitability of the respective lubricant for these temperatures. -
Page 22: Technical Data
Also rotary installation, as is typical in wind turbines for example. Maximum speed and maximum distance to the hub can be specified on request. Lubrication greases of NLGI Grade III can be pumped only under particular operating conditions. Therefore, the pumpability of the grease should be clarified with SKF in advance. -
Page 23: Electrical System
4.2 Electrical system Table 9 Electrical system Parameter 12 V DC 24 V DC 120 V AC (60 Hz) 230 V AC (50 Hz) IP rating of bayonet connector IP69K IP69K IP65 IP65 Power supply with rectangular connector (left) Tolerance for input voltage -20 / +30 % -20 / +30 % ±10 %... -
Page 24: Factory Settings For Pumps With Control Circuit Board S4
4.4 Factory settings for pumps with control circuit board S4 Table 11 Factory settings for pumps with control circuit board S4 Programming step / value Factory setting Setting range P1 Pause time in hours 6 hours 0–59 hours P2 Pause time in minutes 0 minutes 0-59 minutes P3 Metering device circulations per work cycle 1 circulation... -
Page 25: Lubricant Requirement When An Empty Pump Is Filled For The First Time
4.6 Lubricant requirement when an empty pump is filled for the first time NOTE The following volumes of lubricant are required in order to fill a new empty pump up to the MAX mark on the reservoir. Table 13 Lubricant requirement when an empty pump is filled for the first time Reservoir size Quantity 1 liters... - Page 26 Type identification code QLS 301 P301 3 1 4 1 2 1 5 4 Basic type of the pump P301 Metering device External metering device SSV 6-KNQLS, SSV 8-KNQLS External metering device SSV 12-KNQLS, SSV 18-KNQLS SSV 6 (rear-mounted) SSV 8 (rear-mounted)
- Page 27 Type identification code QLS 401 P401 3 1 4 0 1 1 5 4 Basic type of the pump P401 Metering device External metering device SSV 6-KNQLS, SSV 8-KNQLS External metering device SSV 12-KNQLS, SSV 18-KNQLS SSV 6 (rear-mounted) SSV 8 (rear-mounted) SSV 12 (rear-mounted or bottom-mounted) SSV 18 (rear-mounted or bottom-mounted) Arrangement of metering device outlets...
- Page 28 Type identification code QLS 401 SSVDV P401 SSVDV16 AAAABBBB 24DC 1XN 2A 1 5 S4 Basic type of the pump P401 Metering device SSVDV 6 (rear-mounted, outlets vertical (V) SSVDV 12 (rear-mounted, outlets vertical (V) SSVDV 16 (rear-mounted, outlets vertical (V) Metering screws per outlet pair A 0.08 cm B = 0.14 cm...
-
Page 29: Delivery, Returns, Storage
5.5 Storage conditions for products 5 Delivery, returns, storage filled with lubricant 5.1 Delivery For products filled with lubricant, the permitted storage temperature range is: After receipt of the shipment, it must be inspected for any minimum + 5 °C [+41 °F] shipping damage and for completeness according to the maximum... -
Page 30: Assembly
Fig. 20 6 Assembly 6.1 General Only qualified technical personnel may install the products named in the instructions. During installation, pay attention to the following: • Other units must not be damaged by assembly work • The product must not be installed within range of moving parts •... -
Page 31: Assembly Holes
6.4 Assembly holes 6.5 Electrical connection < NOTICE WARNING Possible damage to the main machine and the pump Electric shock Work on electrical components may be The assembly holes should be created only on non- performed only by qualified electricians. load-bearing parts of the main machine. -
Page 32: Lubrication Lines
Bayonet connector 6.6.1 Connection of the lubrication lines • Remove the protective caps on the electrical The following components can be used for connection: connections of the pump • Quick disconnect couplings (see also section 14.8) / • Place the connector on the connections and fasten by plastic pressure pipe turning •... -
Page 33: Initial Filling Of A Qls 301 Pump Delivered Without Lubricant
6.7 Initial filling of a QLS 301 pump Fig. 24 delivered without lubricant < NOTICE Damage to the main machine Avoid air inclusions in the lubricant and under the follower plate. These can interfere with the suction Filling the space under the reservoir with lubricant characteristics of the pump, resulting in a poor delivery rate or no lubricant delivery. -
Page 34: Initial Filling Of A Qls 401 Pump Delivered Without Lubricant
6.8 Initial filling of a QLS 401 pump delivered without lubricant Fig. 26 Initial filling of a QLS 401 pump delivered without lubricant Legend to Figure 26: 1 Transport caps 2 Filler nipple 3 Green setting button When filling for the first time, proceed as described below: 1. -
Page 35: First Start-Up
7 First start-up 7.1 General First start-up of the fully and correctly assembled QLS pump is performed using the machine contact or vehicle driver switch. NOTE If “EP” or “Er” appears on the display after switch-on, there is a fault. For troubleshooting, see section “Malfunctions, causes and remedies”. -
Page 36: Programming The Control Circuit Board S4
7.3 Programming the control circuit board S4 QLS pumps with control circuit board S4 are programmed according to the following programming sequence: Fig. 27 Programming sequence for control circuit board S4 1. Press button 3.2 and button 3.3 (Fig. 27) at the same time for about 4 seconds to enter the first programming step, P1. When you release the buttons, the set value is displayed. -
Page 37: Triggering Additional Lubrication
3. Switch off the filling pump and disconnect it from the filler nipple (Fig. 29/1) of the pump. 8 Operation 8.1 General SKF products operate largely automatically. The activities required during normal operation are limited primarily to checking the pump for damage and proper functioning. -
Page 38: Maintenance
9 Maintenance Careful and regular maintenance is required in order to detect and remedy possible faults in time. The operator must always determine the specific intervals according to the operating conditions, review them regularly, and adjust them where necessary. If necessary, copy the table for regular maintenance activities. Table 19 Checklist: Maintenance activities Activity to be performed... -
Page 39: Cleaning
10 Cleaning 10.1 Basics Cleaning should be carried out in accordance with the operator's own company rules, and cleaning agents and devices and the personal protective equipment to be used should likewise be selected in accordance with those rules. Only cleaning agents compatible with the materials may be used for cleaning. -
Page 40: Faults, Causes, And Remedies
11 Faults, causes, and remedies 11.1 Mechanical faults Table 20 Mechanical faults on pumps with and without control Fault Fault Possible cause / How to recognize the Remedy fault Air inclusion in the lubricant/in the • Visually inspect for bubbles in the •... -
Page 41: Error Messages On Pumps With Control
11.2 Error messages on pumps with control Table 21 Error messages on pumps with control Error message on the display Meaning Remedy Error message LI • Pre-empty signal: • Refill the reservoir • There is only a small amount of lubricant left. This indication alternates with the "Pump is running"... -
Page 42: Electrical Faults On Pumps With Control
11.3 Electrical faults on pumps with control Table 22 Electrical faults on pumps with control Fault Fault Possible cause / How to recognize the Remedy fault Power supply to pump interrupted • Identified by - display screen on the • See the documentation for the main pump is off - fault in the main machine or vehicle machine/vehicle. - Page 43 Table 23 Electrical faults on pumps without control Fault Fault Possible cause / How to recognize the Remedy fault Motor defective • The pump does not run when • The pump may need to be replaced additional lubrication is triggered even though power supply is present Contact our Customer Service if you cannot determine or resolve the fault...
-
Page 44: Repairs
1. Disconnect the pump electrically from the mains. Undo 12 Repairs the fastening screw (Fig. 30/1) on the plug connector (Fig. 30/5) and pull out the plug connector. < 2. Undo the four screws on the cover of the pump housing WARNING (Fig. -
Page 45: Shutdown, Disposal
13 Shutdown, disposal 13.1 Temporary shutdown Temporary shutdowns should be done by a course of action to be defined by the operator. 13.2 Permanent shutdown, disassembly Permanent shutdown and disassembly of the product must be planned properly by the operator and conducted in compliance with all applicable laws and regulations. -
Page 46: Spare Parts
Spare parts may be used exclusively for replacement of identical defective parts. Modifications with spare parts on existing products are not allowed. 14.1 SSV metering device for QLS 301 / 401 Table 24 SSV metering device for QLS 301 / 401 Designation Pcs. -
Page 47: Metering Screws For Ssvdv Metering Devices
Item number Figure Seal set, complete, for QLS 301 550-36979-8 Not shown Seal set, complete, for QLS 401 550-34178-1 14.5 Membrane keypad (QLS 301 / QLS 401 with control) Table 28 Membrane keypad Designation Pcs. Item number Figure Membrane keypad, self-adhesive... -
Page 48: Pump Element K6
14.6 Pump element K6 Table 29 Pump element K6 Designation Pcs. Item number Figure Pump element K6 650-28856-1 14.7 Adapter M22 x 1.5 Table 30 Adapter M22 x 1.5 Designation Pcs. Item number Figure Adapter M22 x 1.5 with grease fitting A2 519-33959-1 14.8 Quick disconnect couplings with check valve Table 31... -
Page 49: Reservoir
Table 32 Reservoir Designation Pcs. Item number Figure Transparent reservoir, 1 liter, with seal and sticker (QLS 301) 550-36979-2 Transparent reservoir, 1 liter, with seal and sticker (QLS 401) 550-34179-1 Transparent reservoir, 2 liter, with seal and sticker (QLS 401) 550-34179-4 14.10 Housing cover replacement kit... -
Page 50: Electrical Connections
14.12 Electrical connections Table 35 Electrical connections Designation Pcs. Item number Figure Rectangular connector connection socket (black) with 10 m 664-36078-7 cable (4-core) Rectangular connector connection socket (gray) with 10 m 664-36078-9 cable (4-core) Bayonet connector connection socket with 10 m cable (4- 664-34045-1 core) 14.13 Control circuit board replacement kit... -
Page 51: Appendix
15 Appendix 15.1 Cable colors in accordance with IEC 60757 Table 37 Cable colors in accordance with IEC 60757 Abbreviation Color Abbreviation Color Abbreviation Color Abbreviation Color Black Green White Pink Brown Yellow Orange Turquoise Blue Violet Gray GNYE Green/Yellow RDWH Red/White Gold Silver... -
Page 52: Wire Assignment Of The Connector Plugs
15.3 Wire assignment of the connector plugs Table 40 Wire assignment of connection A1 / X1 Rectangular connector Pin 1 Pin 2 Pin 3 EN 175301-803 / EN 175301-803 GN / YE Table 41 Wire assignment of connection A2 / X2 Rectangular connector Pin 1 Pin 2... -
Page 53: Circuit Diagrams
15.4 Circuit diagrams NOTE For the meaning of each detail of the type identification code, see the type identification code in this manual. The actual type identification code details of your pump can be found on the type plate on the pump. 15.4.1 Circuit diagram 12/24 V DC, with rectangular connector and control circuit board S4 Valid for pumps with type identification codes that include PXXX-X-X-2/4-X-X-1-X-4... -
Page 54: Circuit Diagram 120 V Ac, With Rectangular Connector And Control Circuit Board S4
15.4.2 Circuit diagram 120 V AC, with rectangular connector and control circuit board S4 Valid for pumps with type identification codes that include PXXX-X-X-6-X-X-1-X-4 Fig. 32 Circuit diagram 120 V AC, with rectangular connector and control circuit board S4... -
Page 55: Circuit Diagram 230 V Ac, With Rectangular Connector And Control Circuit Board S4
15.4.3 Circuit diagram 230 V AC, with rectangular connector and control circuit board S4 Valid for pumps with type identification codes that include PXXX-X-X-8-1-X-4 Fig. 33 Circuit diagram 230 V AC, with rectangular connector and control circuit board S4... -
Page 56: Circuit Diagram 12/24 V Dc, With Rectangular Connector With Terminal Board
15.4.4 Circuit diagram 12/24 V DC, with rectangular connector with terminal board Valid for pumps with type identification codes that include PXXX-X-X-2/4-X-X-1-X-0 Fig. 34 Circuit diagram 12/24 V DC, with rectangular connector with control circuit board... -
Page 57: Circuit Diagram 12/24 V Dc, With Bayonet Connector And Control Circuit Board S4
15.4.5 Circuit diagram 12/24 V DC, with bayonet connector and control circuit board S4 Valid for pumps with type identification codes that include PXXX-X-X-2/4-X-X-5-X-4 Fig. 35 L2/24VDC L+ 6 A max. Piston Detector Machinecontact Potenti a l free- alarm contact Imax: 5A Umax: 30V -X3.2... -
Page 58: Circuit Diagram 230 V Ac, With Rectangular Connector And Cycle Switch, Without Control Circuit Board
15.4.6 Circuit diagram 230 V AC, with rectangular connector and cycle switch, without control circuit board Valid for type identification codes PXXX-X-X-8-X-X-1-X-0 Fig. 36 Circuit diagram 230 V AC, with rectangular connector and cycle switch, without control circuit board... -
Page 59: Circuit Diagram 120 V Ac, With Rectangular Connector Without Control Circuit Board
15.4.7 Circuit diagram 120 V AC, with rectangular connector without control circuit board Valid for type identification codes PXXX-X-X-6-X-X-1-X-0 Fig. 37 Circuit diagram 120 V AC, with rectangular connector without control circuit board... -
Page 60: China Rohs Table
15.5 China RoHS Table Table 43... - Page 61 Notes / Notizen / Apuntes...
- Page 62 ® SKF and Lincoln are registered trademarks of the SKF Group. ™ eLube is a trademark of the SKF Group. © SKF Group 2024 Reprint or reproduction of the contents of this information - even in part - is permitted only with SKF's prior written consent.
Need help?
Do you have a question about the QLS 301 and is the answer not in the manual?
Questions and answers