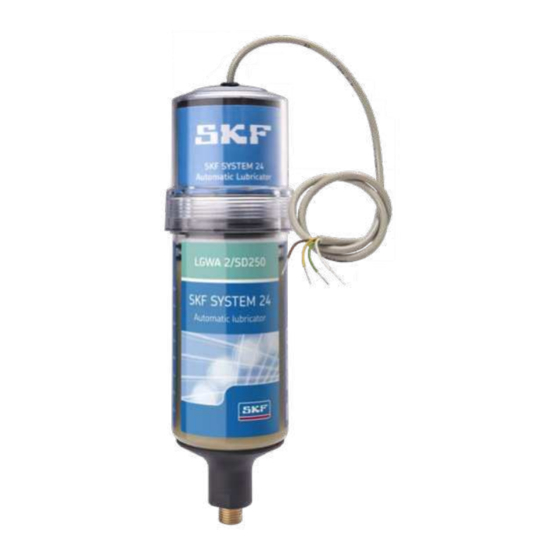
SKF SYSTEM 24 Instructions For Use Manual
Hide thumbs
Also See for SYSTEM 24:
- Instructions for use manual (20 pages) ,
- Instructions for use manual (52 pages)
Advertisement
Advertisement

Summary of Contents for SKF SYSTEM 24
- Page 1 SKF SYSTEM 24 TLSD 1-DK Instructions for use...
-
Page 3: Table Of Contents
Table of contents Safety recommendations ..............4 EU Declaration of Conformity ...............5 UK Declaration of Conformity ...............6 1. Technical data ................7 2. Installation ..................8 Installation of new lubricators ..............9 Replacement of canisters ..............11 3. Troubleshooting ................21 Original instructions... -
Page 4: Safety Recommendations
Safety recommendations www.skf.com/lubrication +25°C (77ºF) +15°C (59ºF) LGFP 2 LHMT 68 LHFP 150 Years Years LHHT 265... -
Page 5: Eu Declaration Of Conformity
TLSD 1-DK Automatic single point lubricator Cabled TLSD We, SKF MPT, Meidoornkade 14, 3992 AE Houten, The Netherlands herewith declare under our sole responsibility that the products described in these instructions for use, are in accordance with the conditions of the... -
Page 6: Declaration Of Conformity
Technical documentation for the assessment of electrical and electronic products with respect to the restrictions of hazardous substances. The person authorised to compile the technical documentation on behalf of the manufacturer is SKF (U.K.) Limited, 2 Canada Close, Banbury, Oxfordshire, OX16 2RT, GBR. Houten, The Netherlands, October 2021 Mrs. -
Page 7: Technical Data
1. Technical data Designation TLSD 1-DK Automatic single point lubricator Cabled TLSD Maximum ratings Voltage supply (VSS-GND) 7 V to 35 V Current supply up to 1.5 A Quiescent current <10 mA (sleep current) Relay maximum voltage 35 V Relay minimum current 100 mA Ambient temperature range -20 to 50 °C (-4 to 122 °F) -
Page 8: Installation
Click here Selection tools for: Document: - LubeSelect for SKF greases Publication Click here Document: - Lubricators settings Dial Set Publication Click here Document: On-line DialSet Publication Click here Document: SKF SYSTEM 24 – Cabled series TLSD 1-DK Publication MP5514... -
Page 9: Installation Of New Lubricators
2.1 Installation of new lubricators For installation at the application follow the steps: Clean the lubrication point from dirt and old grease in such a way that the dirt is not entering the lubrication point itself. Remove the yellow protection cap from the new grease cannister. - Page 10 Place the drive unit on top of the full grease cannister and make sure the teeth of both parts are engaged. The spindle head should now be inside of the motor coupler. Screw the drive unit cap onto the cannister. If the support flange is not mounted on the application, screw the complete lubricator onto the application.
-
Page 11: Replacement Of Canisters
2.2 Replacement of canisters In case the lubricator canister empty, the cannister should be replaced with a new full one. Dismount the lubricator from the application. It is recommended to keep the support flange mounted to the lubricator. Remove the support flange from the lubricator. - Page 12 71 mm (2.8 in) 0,70 kg 0.83 kg (1.5 lb) (1.8 lb) TLSD .../125 TLSD .../250 ø 63 mm ø (2.5 in) 63 mm (2.5 in) 250 ml 8.5 fl. oz. 125 ml 4.2 fl. oz. ø 58 mm (2.7 in) AF 21 mm 12 EN...
- Page 13 1 /2 / 3 4 / 6 / 8 9 / 10/ 12 months Max. Max. 5 bar 3 bar (72 psi) (43 psi) IP 41 TLSD 1-BAT months Dispense rate quantity 0 ml/day 0 ml/day is calculated assuming 4,1 ml/day 8,2 ml/day 2,0 ml/day 4,1 ml/day...
- Page 14 0°C (32ºF) 0°C (32ºF) 14 EN...
- Page 15 LAPC 63 TLSD 1-SP(V) TLSD 1-SP(V) LAPC 13 LAPC 63 TLSD 1-SP(V) LAPC 13...
- Page 16 20°C (68ºF) >50°C (>122ºF) <0°C (<32ºF) TLSD 1-SPV LAPF ... Max. 5.00 m Max. 3.00 m (196 in ) (118 in ) 16 EN...
- Page 17 LAPG 1/4 LAGG ...
- Page 18 DialSet skf.com/lubrication mapro.skf.com/dialset date 18 EN...
- Page 19 LAPN 1/8 LAPN 1/4 LAPN 1/4UNF LAPN 3/8 LAPN 1/2 LAPN 6 1 / 4 ”-28 UNF G 1 / 8 G 1 / 4 G 1 / 2 G 3 / 8 G 1 / 4 G 1 / 4 G 1 / 4 G 1 / 4 G 1 / 4...
- Page 20 TLSD 1-SP TLSD 1-SPV G 1 / 4 G 1 / 4 G 1 / 4 G 1 / 4 LAPC 13 LAPC 63 LAPG 1/4 DIN 71412 63 mm (2.5 in) R 1 / 4 LAPV 1/4 LAPV 1/8 LAPB 5-16E1 G 1 / 4 G 1 / 4...
-
Page 21: Troubleshooting
3. Troubleshooting Condition Functioning of LED signal Remote signal lubricator (Green and Yellow) No power, lubricator No grease No LED signal Open relay working correctly dispensing No power, lubricator No grease No LED signal Open relay in high pressure dispensed alarm No power, lubricator No grease... - Page 22 RU РУССКИЙ ДОПОЛНИТЕЛЬНАЯ ИНФОРМАЦИЯ Информация об уполномоченном лице и контактной информации для связи с ним: ООО «СКФ» 121552, город Москва, улица Ярцевская, д.19, Блок А, Этаж 7. Телефон: +7 495 215-1006 Е-mail: SKF.Moscow@skf.com 22 EN...
- Page 24 | mapro.skf.com | skf.com/lubrication ® SKF is a registered trademark of the SKF Group. © SKF Group 2021 MP5514 EN · 2021/10...


Need help?
Do you have a question about the SYSTEM 24 and is the answer not in the manual?
Questions and answers