Advertisement
Quick Links
Quick Installation Guide
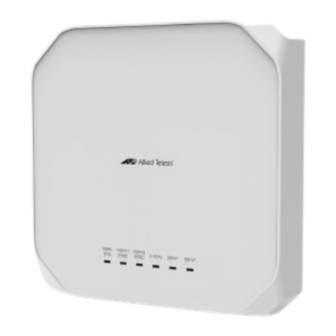
TQ6403 GEN2 Wireless Access Points
The access point models included in this Quick Installation guide are:
AT-TQ6403 GEN2
AT-TQm6403 GEN2
Installation and User's Guides
This document contains an abbreviated version of the installation instructions for the
TQ6403 GEN2 Wireless Access Point. For complete installation and management
instructions, see the TQ6403 GEN2 Wireless Access Point Installation Guide and TQ6403
GEN2 Management Software User's Guide on the Allied Telesis web site at
www.alliedtelesis.com/library.
Physical Description
Console Port
(For manufacturing purpose only)
DC IN Connector
for AC/DC Adapter
PORT1 POE+
Power Switch
PORT2 POE+
Reset Button
Safety Precautions and Site Requirements
Review the safety precautions and site requirements in the TQ6403 GEN2 Wireless
Access Point Installation Guide before installing the device.
Package Contents
The wireless access point comes with the following items in the shipping container:
One AT-TQ6403 GEN2 or AT-TQm6403 GEN2 Wireless Access Point
This Quick Installation Guide
One mounting bracket
Two M5 x4.5 mm pan-head screws for the mounting bracket
If any item is missing or damaged, contact your Allied Telesis sales representative for
assistance. You should retain the original shipping material in case you need to return the
unit to Allied Telesis.
*613-003124 Rev A*
613-003124 Rev A
Installation Options
You can install the access point on a desktop, celling, or wall. See the correct access point
orientations:
Desktop
Ceiling
Wall
Do not install the access point facing down.
1
Pre-fitting the Mounting Bracket
Before installing the mounting bracket on a wall or ceiling, pre-fit the bracket to the
access point.
1.
Place the access point upside down on a table.
2.
Install the two screws (provided) fully into the bottom panel of the access point.
The screw collar provides the proper spacing for the mounting bracket beneath the
screw head.
3.
Make sure that the mounting bracket fits to the access point by sliding the bracket
beneath the screws.
4.
Slide the mounting bracket forward and remove it from the access point.
2
Collar
3
Advertisement

Subscribe to Our Youtube Channel
Related Manuals for Allied Telesis AT-TQm6403 GEN2


Summary of Contents for Allied Telesis AT-TQm6403 GEN2
- Page 1 Two M5 x4.5 mm pan-head screws for the mounting bracket If any item is missing or damaged, contact your Allied Telesis sales representative for assistance. You should retain the original shipping material in case you need to return the unit to Allied Telesis.
- Page 2 Note The default setting for LAN2 port is disabled. To enable the port, use the web For wooden walls or ceiling, Allied Telesis recommends M4 25 mm flat-head wood management interface. For more details, see the TQ6403 GEN2 Management screws and anchors (if required). The screws and anchors are not provided.
- Page 3 Note compliance with the laws and regulations of your country or region. Anti-theft devices are not available from Allied Telesis. The country code for the US model is preset and cannot be changed. Per FCC regulations, the country code setting for all WiFi products marketed in the US must be fixed to US operational channels only.
- Page 4 Allied Telesis, Inc. reserves the right to make changes in specifications and other information contained in this document without prior written notice. The information provided herein is subject to change without notice. In no event shall Allied Telesis, Inc. be liable for any incidental, special, indirect, or consequential damages whatsoever, including but not limited to lost profits, arising out of or related to this manual or the information contained herein, even if Allied Telesis, Inc.
Need help?
Do you have a question about the AT-TQm6403 GEN2 and is the answer not in the manual?
Questions and answers