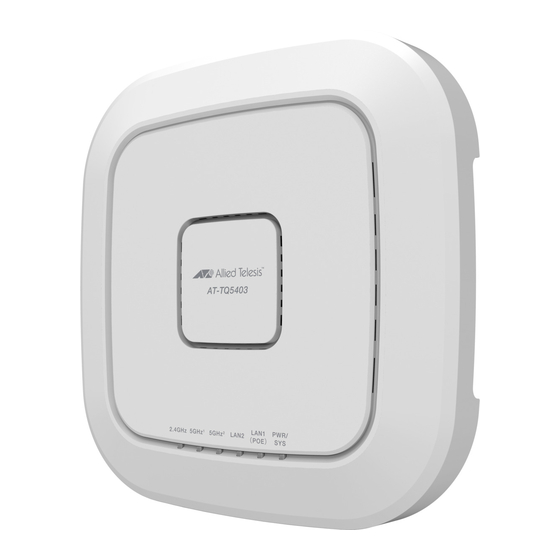
Allied Telesis AT-TQ5403 Management Software User Manual
Enterprise-class 802.11ac wave 2 wireless access points with 2.4ghz and 5ghz radios
Hide thumbs
Also See for AT-TQ5403:
- User manual (98 pages) ,
- Installation manual (58 pages) ,
- Quick installation manual (2 pages)

Related Manuals for Allied Telesis AT-TQ5403


Summary of Contents for Allied Telesis AT-TQ5403
- Page 1 AT-TQ5403 and AT-TQm5403 Enterprise-class 802.11ac Wave 2 Wireless Access Points with 2.4GHz and 5GHz Radios Management Software User’s Guide 613-002651 Rev.B...
- Page 2 * Neither the name of Allied Telesis, Inc. nor the names of the respective companies above may be used to endorse or promote products derived from this software without specific prior written permission.
- Page 3 Telesis, Inc. be liable for any incidental, special, indirect, or consequential damages whatsoever, including but not limited to lost profits, arising out of or related to this manual or the information contained herein, even if Allied Telesis, Inc. has been advised of, known, or should have known, the possibility of such damages.
-
Page 5: Table Of Contents
Contents Preface ................................11 Safety Symbols Used in this Document ......................12 Contacting Allied Telesis ..........................13 Chapter 1: Getting Started ..........................15 Features ................................16 Management Tools............................18 Web Browser.............................. 18 Vista Manager EX and AWC Plug-in......................18 SNMPv1 and v2c............................19 Starting the First Management Session ...................... - Page 6 Downloading the Configuration of the Access Point to Your Computer............134 Restoring a Configuration to the Access Point ....................136 Restoring the Default Settings to the Access Point ..................137 Uploading New Management Software to the Access Point................138 Rebooting the Access Point ..........................140 Sending Technical Support Information to Allied Telesis................141...
- Page 7 List of Figures Figure 1: Log On Window..........................23 Figure 2: Sample Management Window ......................25 Figure 3: Main Menu Button ..........................26 Figure 4: Network DHCP Window ........................33 Figure 5: Network Static IP Address Window....................35 Figure 6: Time Window - NTP Option......................38 Figure 7: Daylight Savings Time Settings......................
- Page 8 List of Figures...
- Page 9 List of Tables Table 1. AT-TQ5403 and AT-TQm5403 Access Points Differences ............. 17 Table 2. Network DHCP Window ........................33 Table 3. Network Static IP Selection Window ....................36 Table 4. Time Window - NTP Option ......................39 Table 5. Time Window - Manually Option ....................... 42 Table 6.
- Page 10 List of Tables...
-
Page 11: Preface
Preface This guide contains instructions on how to manage the features of the AT-TQ5403 and AT-TQm5403 access points with the web browser management interface. This preface contains the following sections: “Safety Symbols Used in this Document” on page 12 ... -
Page 12: Safety Symbols Used In This Document
Preface Safety Symbols Used in this Document This document uses the following conventions. Note Notes provide additional information. Caution Cautions inform you that performing or omitting a specific action may result in equipment damage or loss of data. Warning Warnings inform you that performing or omitting a specific action may result in bodily injury. -
Page 13: Contacting Allied Telesis
AT-TQ5403 and AT-TQm5403 Access Points User’s Guide Contacting Allied Telesis If you need assistance with this product, you can contact Allied Telesis technical support by going to the Support & Services section of the Allied Telesis web site at www.alliedtelesis.com/support. You can find links for the following services on the page: ... - Page 14 Preface...
-
Page 15: Chapter 1: Getting Started
Chapter 1 Getting Started Here are the sections in this chapter: “Features” on page 16 “Management Tools” on page 18 “Starting the First Management Session” on page 20 “Starting a Management Session” on page 23 “Management Windows”... -
Page 16: Features
Chapter 1: Getting Started Features The AT-TQ5403 and AT-TQm5403 wireless access points have the following features: One 2.4GHz radio Two 5GHz radios Eight virtual access points per radio WPA Personal and WPA Enterprise with WPA, WPA2, TKIP, and CCMP authentication and encryption ... -
Page 17: Table 1. At-Tq5403 And At-Tqm5403 Access Points Differences
AT-TQ5403 and AT-TQm5403 Access Points User’s Guide Table 1 lists the differences between the two access points. Table 1. AT-TQ5403 and AT-TQm5403 Access Points Differences Maximum Number of Access Point Channel Blankets Wireless Clients AT-TQ5403 Supported AT-TQm5403 Not supported 1. Requires Vista Manager EX and Autonomous Wireless Controller (AWC) plug-... -
Page 18: Management Tools
Note The AT-TQ5403 access point requires Vista Manager 2.4 or later. The AT-TQm5403 access point requires Vista Manager 2.5 or later. Note The channel blanket feature of the AT-TQ5403 access point requires Vista Manager EX and the AWC plug-in. -
Page 19: Snmpv1 And V2C
SNMPv1 and v2c You can use SNMPv1 or SNMPv2 to view the parameter settings of the devices. The MIB is available from the Allied Telesis web site. For instructions on how to configure the unit for SNMP, refer to “Configuring SNMPv1 and v2c”... -
Page 20: Starting The First Management Session
Chapter 1: Getting Started Starting the First Management Session After you install and power on the access point, it queries the subnet on the LAN1 port for a DHCP server. If a DHCP server responds to its query, the unit uses the IP address the server assigns to it. If there is no DHCP server, the access point uses the default IP address 192.168.1.230. -
Page 21: Starting The First Management Session With A Direct Connection
AT-TQ5403 and AT-TQm5403 Access Points User’s Guide Starting the First To start the management session with a direct Ethernet connection between your computer and the LAN1 port on the access point, perform Management the following procedure: Session with a Direct... - Page 22 Chapter 1: Getting Started port that is a member of the Sales VLAN, your computer must be connected to a port that is also a member of that VLAN. If your network is small and does not have VLANs or routers, you can connect your computer to any port on the Ethernet switch.
-
Page 23: Starting A Management Session
AT-TQ5403 and AT-TQm5403 Access Points User’s Guide Starting a Management Session This section explains how to start a management session on the access point from your management workstation, using a web browser. The procedure assumes that the access point has already been assigned an IP address, either manually or from a DHCP server. - Page 24 Chapter 1: Getting Started Note If you use HTTPS management, your web browser might display a warning message stating that the site certificate is invalid. If this occurs, select an appropriate option to continue to the web site. To avoid the message in future management sessions, make the web site a trusted site in your web browser.
-
Page 25: Management Windows
AT-TQ5403 and AT-TQm5403 Access Points User’s Guide Management Windows This section has a brief overview of the management windows and menus. The main parts of the management windows are identified in Figure 2. Navigator Sub-menu Main Menu Content Figure 2. Sample Management Window... -
Page 26: Navigation
Chapter 1: Getting Started enlarge the window or click the main menu button, shown in Figure 3. Clicking the main menu button displays the menu over the content window. The menu is hidden again after you make a menu selection. Main Menu Button Figure 3. -
Page 27: Saving And Applying Your Changes
AT-TQ5403 and AT-TQm5403 Access Points User’s Guide Saving and Applying Your Changes You need to click the SAVE & APPLY button to save and activate your changes when you are finished configuring the parameters in a management window. The button is located in the bottom of the windows. -
Page 28: Ending Management Sessions
Chapter 1: Getting Started Ending Management Sessions You should always log off when you are finished managing the unit. To log off, select Account > Logout. Click OK at the confirmation prompt. For added security, close your web browser. -
Page 29: What To Configure First
AT-TQ5403 and AT-TQm5403 Access Points User’s Guide What to Configure First Here are suggestions on what to configure during the first management session: 1. Set the country code. Refer to “Setting the Country Code Setting” on page 69. Note The country code for units sold in North America or Japan is preset and cannot be changed. - Page 30 Chapter 1: Getting Started...
-
Page 31: Chapter 2: Basic Settings
Chapter 2 Basic Settings This chapter contains the following procedures: “Assigning a Dynamic IP Address from a DHCP Server” on page 32 “Assigning a Static IP Address to the Access Point” on page 35 “Setting the Date and Time with the Network Time Protocol (NTP)” on page 38 ... -
Page 32: Assigning A Dynamic Ip Address From A Dhcp Server
Chapter 2: Basic Settings Assigning a Dynamic IP Address from a DHCP Server This section explains how to activate the DHCP client so that the access point receives its IP address from a DHCP server on your network. The unit uses the address to communicate with devices on your network, such as management workstations, syslog servers, and RADIUS servers. -
Page 33: Figure 4: Network Dhcp Window
AT-TQ5403 and AT-TQm5403 Access Points User’s Guide Figure 4. Network DHCP Window 4. Configure the fields by referring to Table 2. Table 2. Network DHCP Window Parameter Description Hostname Enter a hostname for the access point. Here are the guidelines: - The hostname can be from 1 to 63 alphanumeric characters. - Page 34 Chapter 2: Basic Settings Table 2. Network DHCP Window (Continued) Parameter Description Get Hostname from Control how the access point obtains its DHCP Server hostname. The options are listed here: - Enabled: The access point queries the DHCP server for its hostname. - Disabled: The access point does not query the DHCP server for a hostname.
-
Page 35: Assigning A Static Ip Address To The Access Point
AT-TQ5403 and AT-TQm5403 Access Points User’s Guide Assigning a Static IP Address to the Access Point This section explains how to manually assign an IP address to the access point. The unit uses the address to communicate with devices on your network, such as management workstations, syslog servers, and RADIUS servers. -
Page 36: Table 3. Network Static Ip Selection Window
- The first or last character cannot be a hyphen. - The access point can have only one hostname. - The default is AT-TQ5403 or AT-TQm5403. Connection Type Select Static IP. Static IP Address Enter the new IP address for the access point. - Page 37 AT-TQ5403 and AT-TQm5403 Access Points User’s Guide Table 3. Network Static IP Selection Window (Continued) Item Name Description DNS Name Server Specify the Domain Name Service name server address. This field is optional The default is no name. 5. Click the SAVE & APPLY button to save and update the configuration.
-
Page 38: Setting The Date And Time With The Network Time Protocol (Ntp)
Chapter 2: Basic Settings Setting the Date and Time with the Network Time Protocol (NTP) The access point has a Network Time Protocol (NTP) client for setting its date and time from an SNTP server on your network or the Internet. The access point adds the date and time to log messages and SNMP traps. -
Page 39: Table 4. Time Window - Ntp Option
AT-TQ5403 and AT-TQm5403 Access Points User’s Guide 4. Configure the fields by referring to Table 4. Table 4. Time Window - NTP Option Item Name Description Set System Time Select Network time protocol (NTP) to synchronize the date and time of the product with the NTP server. -
Page 40: Figure 7: Daylight Savings Time Settings
Chapter 2: Basic Settings Table 4. Time Window - NTP Option (Continued) Item Name Description NTP Server Specify the SNTP server using one of the following methods: - IP address (example, 12.34.56.78) - Fully qualified domain name (FQDN) (example, ntp.mydomain.com) Here are the guidelines: - You can specify only one server. -
Page 41: Manually Setting The Date And Time
(Jan 1 00: 00: 00 2018) when the device is reset or powered off. Note Allied Telesis recommends using a SNTP server to set the date and time. For instructions, refer to “Setting the Date and Time with the Network Time Protocol (NTP)” on page 38. -
Page 42: Table 5. Time Window - Manually Option
Chapter 2: Basic Settings Table 5. Time Window - Manually Option Field Description Set System Time Select Manually. This is the default. Current System Displays the current date and time settings. Time (24 HR) Click the AUTO button to set the date and time on the access point according to your management workstation. -
Page 43: Configuring Snmpv1 And V2C
AT-TQ5403 and AT-TQm5403 Access Points User’s Guide Configuring SNMPv1 and v2c You can use SNMPv1 and v2c to view the settings and client statistics on the access point, and receive traps. Here are the guidelines: You cannot use SNMP to change the settings on the access point. -
Page 44: Table 6. Snmp Agent Settings Window
Chapter 2: Basic Settings Note To configure the parameters in the window, you must first set the Status parameter to Enabled. You cannot adjust the settings when Status is Disabled. Table 6. SNMP Agent Settings Window Field Description Status Use this option to activate or deactivate the SNMP agent on the access point. - Page 45 AT-TQ5403 and AT-TQm5403 Access Points User’s Guide Table 6. SNMP Agent Settings Window (Continued) Field Description Port Use this parameter to specify the port number for SNMP. The range is 1 to 65535. The default is 161. Restrict the Use this option to increase the security of the...
- Page 46 Chapter 2: Basic Settings Table 6. SNMP Agent Settings Window (Continued) Field Description System Specify the system administrator name. The Contact system contact can be up to 64 alphanumeric characters. The default is Unknown. System Enter the location of the device. It can be up to 64 Location alphanumeric characters.
-
Page 47: Configuring Snmp Traps
AT-TQ5403 and AT-TQm5403 Access Points User’s Guide Configuring SNMP Traps To configure the access point to transmit SNMP traps, perform the following procedure: 1. Select Settings > System from the main menu. 2. Select SNMP from the sub-menu. 3. Click the Trap Settings tab. Refer to Figure 10. -
Page 48: Table 7. Snmp Trap Settings Window
Chapter 2: Basic Settings Table 7. SNMP Trap Settings Window Parameter Description Community Use this field to specify the community name the Name for access point is to use to transmit traps. Here are Traps the guidelines: - The community name can be from 1 to 256 alphanumeric characters. -
Page 49: Enabling Or Disabling The Leds
AT-TQ5403 and AT-TQm5403 Access Points User’s Guide Enabling or Disabling the LEDs The access point has an Eco Mode. When activated, it turns off the LEDs on the top panel. You might activate the mode when you are not using the LEDS to monitor or troubleshoot the device. -
Page 50: Enabling Or Disabling The Reset Button
Chapter 2: Basic Settings Enabling or Disabling the Reset Button This section explains how to enable or disable the Reset button on the rear panel of the access point. You use the Reset button to restore the default settings to the device. The default setting for the button is enabled. If the unit is installed in a non-secure area, you might disable the button to prevent unauthorized individuals from pressing it and disrupting the operations of your wireless network. -
Page 51: Chapter 3: Web Browser Interface
Chapter 3 Web Browser Interface This chapter contains the following procedures: “Configuring the Web Browser Interface” on page 52 “Changing the Manager’s Login Name and Password” on page 54 “Setting the Language of the Web Browser Interface” on page 56... -
Page 52: Configuring The Web Browser Interface
HTTP management is non-secure, meaning the packets exchanged between the access point and your workstation are sent in clear text, leaving them vulnerable to snooping. For this reason, Allied Telesis recommends using HTTPS to manage the access point. To configure the above functions, perform the following procedure: 1. -
Page 53: Table 8. Web Window
AT-TQ5403 and AT-TQm5403 Access Points User’s Guide 3. Configure the fields by referring to Table 8. Table 8. Web Window Field Description Maximum Sessions Specify the maximum number of active management sessions the access point will support at one time. Here are the guidelines: - The range is 1 to 10 sessions. -
Page 54: Changing The Manager's Login Name And Password
Changing the name and password does not affect your current management session. Note Allied Telesis strongly recommends changing the factory default password during the first management session to protect the device from unauthorized access. To change the login name and password of the manager account, perform the following procedure: 1. - Page 55 AT-TQ5403 and AT-TQm5403 Access Points User’s Guide 3. To change the password, select the Current Password field and enter the account’s current password. The default is “friend”. To display the password as alphanumeric characters or asterisks, click the green, double arrow symbol.
-
Page 56: Setting The Language Of The Web Browser Interface
Chapter 3: Web Browser Interface Setting the Language of the Web Browser Interface The access point can display the web browser interface in either English or Japanese. The default is English. To set the language, perform the following procedure: 1. Select Account > Language from the main menu. Refer to Figure 15. Figure 15. -
Page 57: Chapter 4: 2.4Ghz And 5Ghz Radios
Chapter 4 2.4GHz and 5GHz Radios This chapter has the following procedures: “Configuring the Radios” on page 58 “Displaying Radio Status” on page 66 “Dynamic Frequency Selection” on page 68 “Setting the Country Code Setting” on page 69... -
Page 58: Configuring The Radios
Chapter 4: 2.4GHz and 5GHz Radios Configuring the Radios The radio settings are divided into two groups: “Configuring Basic Radio Settings” next “Configuring Advanced Radio Settings” on page 62 Configuring To configure the basic settings for Radio1, Radio2, or Radio3, perform the following procedure: Basic Radio Settings... -
Page 59: Table 9. Basic Radio Settings Window
AT-TQ5403 and AT-TQm5403 Access Points User’s Guide Table 9. Basic Radio Settings Window Field Description Country Code Select the country code that applies to your country or region. The country code ensures that the device operates in compliance with the codes and regulations of your region or country. - Page 60 Chapter 4: 2.4GHz and 5GHz Radios Table 9. Basic Radio Settings Window (Continued) Field Description Mode Select the communications protocol for Radio2 or (Radio2 or Radio3 from the pull-down menu. The selections Radio3) are listed here: - IEEE 802.11a: The access point accepts 802.11a clients.
- Page 61 AT-TQ5403 and AT-TQm5403 Access Points User’s Guide Table 9. Basic Radio Settings Window (Continued) Field Description Bandwidth Select the bandwidth for Radio1 from the (Radio1) pull-down menu. The selections for IEEE 802.11n are listed here: - 20 MHz. This is the default setting.
-
Page 62: Configuring Advanced Radio Settings
- The range is 0 to 200 clients. The default is 200 clients. - The AT-TQ5403 and AT-TQm5403 access point can support a maximum of 200 and 127 clients, respectively, on all radios at one time. - Page 63 AT-TQ5403 and AT-TQm5403 Access Points User’s Guide Table 10. Advanced Radio Settings Window (Continued) Field Description Maximum - A radio rejects all clients when the parameter is Clients set to 0. (continued) In the following example for the AT-TQ5403 access point, Radio1 is limited to a maximum of...
- Page 64 Chapter 4: 2.4GHz and 5GHz Radios Table 10. Advanced Radio Settings Window (Continued) Field Description Neighbor AP Use this option to control whether the access Detection point listens for neighboring access points. Here are the options: - Enabled: The access point listens for neighboring access points and displays them in the Neighbor AP window.
- Page 65 AT-TQ5403 and AT-TQm5403 Access Points User’s Guide Table 10. Advanced Radio Settings Window (Continued) Field Description Airtime Fairness Select Enabled to activate airtime fairness to provide the same communication time (air time) to all connected clients regardless of communication speed. Select Disabled, the default, to turn Airtime Fairness off.
-
Page 66: Displaying Radio Status
Chapter 4: 2.4GHz and 5GHz Radios Displaying Radio Status To display operational information about a radio, perform the following procedure: 1. Select Monitoring > Status from the main menu. 2. Select Radio1, Radio2, or Radio3 from the sub-menu. You can view only one radio at a time. - Page 67 AT-TQ5403 and AT-TQm5403 Access Points User’s Guide Table 11. Radio Status Window (Continued) Field Description Status Displays the status (up, down) of the wireless interface. Mode Displays the current wireless communication mode. Radio1 has these modes: - IEEE 802.11b/g - IEEE 802.11b/g/n Radio2 and Radio3 have these modes - IEEE 802.11a...
-
Page 68: Dynamic Frequency Selection
Chapter 4: 2.4GHz and 5GHz Radios Dynamic Frequency Selection Dynamic frequency selection (DFS) is an industry standard that defines how wireless access points are to respond to the presence of radar signals on 5GHz channels. The standard states that a wireless access point that detects radar signals on its current 5GHz channel has to stop transmitting and select another channel to avoid interfering with the signals. -
Page 69: Setting The Country Code Setting
AT-TQ5403 and AT-TQm5403 Access Points User’s Guide Setting the Country Code Setting You should set the country code setting of the access point as soon as you install the unit so that it operates in compliance with the codes and regulations of your region or country. - Page 70 Chapter 4: 2.4GHz and 5GHz Radios...
-
Page 71: Chapter 5: Virtual Access Points
Chapter 5 Virtual Access Points This chapter contains the procedures for managing virtual access points (VAPs). The chapter contains the following sections: “VAP Introduction” on page 72 “Configuring Basic VAP Parameters” on page 73 “Configuring VAP Security” on page 76 ... -
Page 72: Vap Introduction
VIDs, SSIDs, and security methods. Here are VAP guidelines: Each radio can have up to eight VAPs. Allied Telesis recommends no more than five VAPs per radio for best performance. ... -
Page 73: Configuring Basic Vap Parameters
AT-TQ5403 and AT-TQm5403 Access Point User’s Guide Configuring Basic VAP Parameters To configure basic VAP settings, perform the following procedure: 1. Select Settings > VAP / Security from the main menu. 2. Select Radio1, Radio2, or Radio3 from the sub-menu. The default is Radio1. - Page 74 Chapter 5: Virtual Access Points Table 12. Virtual Access Point Tab (Continued) Field Description Status - The default setting for VAP1 to VAP7 is (continued) disabled. - You cannot disable VAP0. To stop VAP0 from forwarding traffic from wireless clients, you have to disable its radio.
- Page 75 AT-TQ5403 and AT-TQm5403 Access Point User’s Guide Table 12. Virtual Access Point Tab (Continued) Field Description VLAN ID Enter a VID for the VAP. Here are the guidelines: - The range is 1 to 4094. - The default is VID 1.
-
Page 76: Configuring Vap Security
Chapter 5: Virtual Access Points Configuring VAP Security The procedures for configuring VAP security is provided in the following sections: “No Security” on page 76 “Static WEP” on page 77 “WPA Personal (Pre-Shared Key)” on page 78 ... -
Page 77: Static Wep
AT-TQ5403 and AT-TQm5403 Access Point User’s Guide Static WEP To configure a VAP for Static WEP security, perform the following procedure: Note Static WEP mode is only supported by wireless modes 11b/g/a. It is not supported for radios set to 11n or 11ac, Refer to “Configuring Basic Radio Settings”... -
Page 78: Wpa Personal (Pre-Shared Key)
Chapter 5: Virtual Access Points Table 13. Static WEP Security Tab (Continued) Field Description Authentication Specify whether the access point authenticates VAP clients. Here are the options. - Open System: The access point does not authenticate VAP clients. All clients, even those without correct WEP keys, can connect to the VAP. -
Page 79: Figure 22: Wpa Personal Security Tab
AT-TQ5403 and AT-TQm5403 Access Point User’s Guide 3. Select a VAP to configure from the next sub-menu. The default is VAP0. You can configure only one VAP at a time. 4. Select the Security tab. 5. Select WPA Personal from the Mode pull-down menu. Refer to Figure 22. - Page 80 Chapter 5: Virtual Access Points Table 14. WPA Personal Security Tab (Continued) Field Description Cipher Suites Select the cipher suite for the VAP. The options are listed here: - CCMP. This is the default. - TKIP and CCMP When both TKIP and CCMP are selected, clients who are using WPA must have one of the following: - A valid TKIP key.
-
Page 81: Wpa Enterprise
AT-TQ5403 and AT-TQm5403 Access Point User’s Guide WPA Enterprise To configure a VAP for WPA Enterprise security, perform the following procedure: Note WPA Enterprise is not available on VAP0 when it is the parent or child of a WDS bridge. -
Page 82: Table 15. Wpa Enterprise Tab
Chapter 5: Virtual Access Points 6. Configure the parameters by referring to Table 15 on page 82. Table 15. WPA Enterprise Tab Field Description Mode Select WPA Enterprise. WPA Version Select the WPA version for the VPA. The options are listed - WPA2: Select this option if all the clients support WPA2, but not WPA. - Page 83 AT-TQ5403 and AT-TQm5403 Access Point User’s Guide Table 15. WPA Enterprise Tab (Continued) Field Description Primary Enter the shared secret key for the primary RADIUS RADIUS server. Here are the guidelines: Server Key - The key can be up to 128 alphanumeric characters.
- Page 84 Chapter 5: Virtual Access Points Table 15. WPA Enterprise Tab (Continued) Field Description Dynamic Control whether the VAP only accepts clients that VLAN are assigned VIDs by RADIUS servers. The options are listed here: - Enabled: The VAP forwards packets only from clients that are assigned VIDs from RADIUS servers.
-
Page 85: Configuring Vap Fast Roaming
AT-TQ5403 and AT-TQm5403 Access Point User’s Guide Configuring VAP Fast Roaming The access point supports IEEE 802.11k/v/r for high-speed roaming by wireless clients. Here are the guidelines: High speed roaming applies to VAPs with WPA Personal or WPA Enterprise security. It does not apply to no security or Static WEP. -
Page 86: Table 16. Fast Roaming Window
Chapter 5: Virtual Access Points Table 16. Fast Roaming Window Field Description IEEE802.11r Refer to the Vista Manager EX and AT-Vista Manager EX AWC documentation for Fast Transition descriptions of these parameters. Distributing System Mobility Domain PMK-R0 Lifetime AES Key 802.11k RRM Select one of the following: - Enabled: Activates IEEE 802.11k Radio... -
Page 87: Configuring The Mac Address List
AT-TQ5403 and AT-TQm5403 Access Point User’s Guide Configuring the MAC Address List The MAC address filter is used to control which wireless clients can access your network through the VAPs. You configure the filter by entering the MAC addresses of wireless clients whose association requests are to be accepted or rejected by the access point. - Page 88 Chapter 5: Virtual Access Points 2. From the Action pull-down menu, select one of the following: Deny: Select this option to have the access point reject association requests from wireless clients whose MAC addresses you enter in the filter, and to accept association requests from all other clients. This is the default setting.
-
Page 89: Displaying Vap And Lan Ports Statistics
AT-TQ5403 and AT-TQm5403 Access Point User’s Guide Displaying VAP and LAN Ports Statistics To view VAP and LAN ports status and statistics, select Monitoring > Statistics window. Refer to Figure 26. Figure 26. Statistics Window... -
Page 90: Table 17. Statistics Window
Chapter 5: Virtual Access Points The columns are defined in Table 17. Table 17. Statistics Window Column Description Interface Displays LAN1 and LAN 2 ports, and VAPs 0 to Status Displays the status (up or down) of the interface. Packets Received Displays the total number of packets received on the interface. -
Page 91: Chapter 6: Quality Of Service
Chapter 6 Quality of Service This chapter describes the following procedures: “Introduction to Quality of Service” on page 92 “Configuring QoS Basic Settings” on page 94 “Configuring AP EDCA Parameters” on page 95 “Configuring Station EDCA Parameters” on page 98... -
Page 92: Introduction To Quality Of Service
Chapter 6: Quality of Service Introduction to Quality of Service Each radio in the access point has four QoS egress queues and four ingress queues. There are parameters that control the manner in which the device stores and handles packets in the queues. You should not adjust these values unless you are familiar with QoS. -
Page 93: Figure 27: Qos Window
AT-TQ5403 and AT-TQm5403 Access Points User’s Guide Figure 27. QoS Window... -
Page 94: Configuring Qos Basic Settings
Chapter 6: Quality of Service Configuring QoS Basic Settings The fields for the Basic Settings section are defined in Table 18. Table 18. QoS Window - Basic Settings Parameter Description WiFi Multimedia Enable or disable QoS prioritizing and (WMM) coordination. Here are the settings: - Enabled: The access point uses the AP EDCA settings to control the flow of downstream traffic to the wireless clients and the station... -
Page 95: Configuring Ap Edca Parameters
AT-TQ5403 and AT-TQm5403 Access Points User’s Guide Configuring AP EDCA Parameters Table 19 defines the AP EDCA parameters in the QoS window in Figure 27 on page 93. Table 19. QoS Window - AP EDCA Parameters Parameter Description Data Type (Queue) - Page 96 Chapter 6: Quality of Service Table 19. QoS Window - AP EDCA Parameters (Continued) Parameter Description cwMin (Minimum Enter a value (in milliseconds) to be the lower Contention limit of the range from which the access point Window) determines the initial random back-off wait time.for resending packets during transmission conflicts.
- Page 97 AT-TQ5403 and AT-TQm5403 Access Points User’s Guide Table 19. QoS Window - AP EDCA Parameters (Continued) Parameter Description Max. Burst Specifies the maximum burst length (in seconds) for packet bursts on the wireless network. A packet burst is a collection of multiple frames transmitted without header information.
-
Page 98: Configuring Station Edca Parameters
Chapter 6: Quality of Service Configuring Station EDCA Parameters Table 20 defines the Station EDCA parameters in the QoS window in Figure 27 on page 93. Table 20. QoS Window - Station EDCA Parameters Parameter Description Data Type (Queue) Specifies the four ingress queues: - Data 0 (Voice) - High priority queue, with minimum delay. - Page 99 AT-TQ5403 and AT-TQm5403 Access Points User’s Guide Table 20. QoS Window - Station EDCA Parameters (Continued) Parameter Description cwMin (Minimum Enter a value (in milliseconds) to be the lower Contention limit of the range from which the station Window) determines the initial random back-off wait time.for resending packets during transmission...
- Page 100 Chapter 6: Quality of Service Table 20. QoS Window - Station EDCA Parameters (Continued) Parameter Description TXOP Limit Select the Transmission Opportunity (TXOP) limit. It defines the time intervals that a WME client has the right to initiate transmission to the access point.
-
Page 101: Chapter 7: Lan1 And Lan2 Ports
Chapter 7 LAN1 and LAN2 Ports This chapter describes the following procedures: “Configuring the Management VLAN” on page 102 “Enabling or Disabling the LAN2 Port” on page 104 “Configuring PoE Negotiation with Link Layer Discovery Protocol” on page 106 ... -
Page 102: Configuring The Management Vlan
Chapter 7: LAN1 and LAN2 Ports Configuring the Management VLAN Here are the guidelines to setting the management VLAN: When the management VLAN is disabled, the default setting, the access point handles untagged packets as members of VLAN 1. ... -
Page 103: Table 21. Lan Settings Window - Vlan Configuration Section
AT-TQ5403 and AT-TQm5403 Access Points User’s Guide Note The Link Aggregation Configuration section is explained in “Enabling or Disabling the LAN2 Port” on page 104. 2. Configure the settings by referring to Table 21. Table 21. LAN Settings Window - VLAN Configuration Section... -
Page 104: Enabling Or Disabling The Lan2 Port
Chapter 7: LAN1 and LAN2 Ports Enabling or Disabling the LAN2 Port The access point has two twisted pair ports, labeled LAN1 and LAN2. They are used to connect the device to your wired network. Here are the guidelines: The ports feature Ethernet 10/100/1000T-Base. - Page 105 AT-TQ5403 and AT-TQm5403 Access Points User’s Guide ports into a static LAG. Disabled: Deactivates LAN2 port and the static LAG. 3. Click the SAVE & APPLY button to save and update your configuration. If you enabled the Static LAG parameter, the access point automatically combines LAN1 and LAN2 ports into a static LAG.
-
Page 106: Configuring Poe Negotiation With Link Layer Discovery Protocol
Chapter 7: LAN1 and LAN2 Ports Configuring PoE Negotiation with Link Layer Discovery Protocol The feature described in this section is applicable when the access point is powered by Power over Ethernet and the LAN1 port is connected to a network device that supports Link Layer Discovery Protocol for Media Endpoint Devices (LLDP-MED). -
Page 107: Figure 29: Lldp Window
AT-TQ5403 and AT-TQm5403 Access Points User’s Guide 2. Select LLDP from the sub-menu. Refer to Figure 29. Figure 29. LLDP Window 3. Select one of the following from the PoE Negotiation pull-down menu. Enabled: Enables PoE negotiation. The access point transmits the Extended Power Management TLV on the LAN1 port. -
Page 108: Displaying The Status Of Lan1 And Lan2 Ports
Chapter 7: LAN1 and LAN2 Ports Displaying the Status of LAN1 and LAN2 Ports To display the status of the LAN1 and LAN2 ports, perform the following procedure: 1. Select Monitoring > Status from the main menu. 2. Select LAN1 or LAN2 from the sub-menu. Figure 30 shows the LAN1 port status window. -
Page 109: Table 22. Lan1 Or Lan2 Window
AT-TQ5403 and AT-TQm5403 Access Points User’s Guide The fields are defined in Table 22. Table 22. LAN1 or LAN2 Window Item Name Description Status (LAN1 port) Displays the status of the LAN1 port. The possible states are listed here: - Up: The port has established a link with a network devices, such as an Ethernet switch or router. - Page 110 Chapter 7: LAN1 and LAN2 Ports...
-
Page 111: Chapter 8: Wireless Distribution System Bridges
Chapter 8 Wireless Distribution System Bridges This chapter contains the procedures for managing Wireless Distribution Bridges. The chapter contains the following sections: “Introduction to Wireless Distribution Bridges” on page 112 “WDS Bridge Elements” on page 115 “Guidelines” on page 117 ... -
Page 112: Introduction To Wireless Distribution Bridges
Chapter 8: Wireless Distribution System Bridges Introduction to Wireless Distribution Bridges A wireless distribution system (WDS) bridge is a wireless connection between access points that allows units to forward traffic directly to each other over a wireless connection, as if they were connected with a physical Ethernet wire. -
Page 113: Figure 33: Example Of Radio And Channel Assignments In A Wds Bridge
AT-TQ5403 and AT-TQm5403 Access Point User’s Guide Wireless clients should use other radios to access the network. Additionally, because the access points have to use the same channel, you have to select the channel manually, instead of using the default auto channel setting. -
Page 114: Figure 34: Example Of An Access Point As Both Parent And Child
Allied Telesis does not recommend linking together more than two WDS bridges. The LAN ports on the parent connected to the wired network might not be able to efficiently handle the traffic load of... -
Page 115: Wds Bridge Elements
AT-TQ5403 and AT-TQm5403 Access Point User’s Guide WDS Bridge Elements This section describes the various elements of a WDS bridge. Radio You can use Radio1, Radio2, or Radio3 for a WDS bridge. Here are the guidelines: The access points must all use the same radio for a bridge. -
Page 116: Dynamic Frequency Selection
Chapter 8: Wireless Distribution System Bridges Note You cannot use static WEP or WPA Enterprise on VAP0 of a WDS bridge. Dynamic Dynamic frequency selection (DFS) is an industry standard that defines how wireless access points are to respond to the presence of radar Frequency signals on 5GHz channels. -
Page 117: Guidelines
An access point can be a parent in one bridge and a child in another. However, it cannot be a parent or child in more than one bridge. The WDS bridge feature on these access points is not compatible with the same feature on other products from Allied Telesis or other companies. -
Page 118: Preparing Access Points For A Wds Bridge
You have chosen the security level for VAP0 of the selected radio for the bridges. The security level can be none or WPA Personal. Allied Telesis recommends using WPA Personal security. The settings must be the same on all the access points of a WDS bridge. - Page 119 AT-TQ5403 and AT-TQm5403 Access Point User’s Guide Note The access point disables VAPs 1 to 7 on the same radio. 9. Repeat this procedure on all access points to be in the WDS bridge. When an access point is designated as a child, it automatically begins searching for a parent on the designated radio and channel.
- Page 120 Chapter 8: Wireless Distribution System Bridges...
-
Page 121: Chapter 9: Monitoring
Chapter 9 Monitoring This chapter has the following procedures: “Displaying Basic System Information” on page 122 “Displaying Neighboring Access Points” on page 125 “Displaying Associated Clients” on page 126... -
Page 122: Displaying Basic System Information
Chapter 9: Monitoring Displaying Basic System Information To display basic information about the access point, such as its firmware version number and MAC address, perform the following procedure: 1. Select Monitoring > Status from the main menu. 2. Select System from the sub-menu. This is the default window. Refer to Figure 35. - Page 123 AT-TQ5403 and AT-TQm5403 Access Points User’s Guide Table 23. System Window (Continued) Item Name Description System Time Displays the date and time. To set the date and time, refer to “Manually Setting the Date and Time” on page 41 or “Setting the Date and Time with the Network Time Protocol (NTP)”...
- Page 124 Chapter 9: Monitoring Table 23. System Window (Continued) Item Name Description DNS Name Server Displays the current DNS name server address. Refer to “Assigning a Dynamic IP Address from a DHCP Server” on page 32 or “Assigning a Static IP Address to the Access Point” on page 35. Management VLAN Displays the management VLAN ID.
-
Page 125: Displaying Neighboring Access Points
AT-TQ5403 and AT-TQm5403 Access Points User’s Guide Displaying Neighboring Access Points To view information about other access points that the access point has detected, select Monitoring > Neighbor AP, Refer to Figure 36. Note This feature requires activating the Neighbor AP Detection option on the radios, as explained in “Configuring Advanced Radio Settings”... -
Page 126: Displaying Associated Clients
Chapter 9: Monitoring Displaying Associated Clients To view the active wireless clients on the VAPs of the access point, select Monitoring > Associated Clients from the main menu. Refer to Figure 37. Figure 37. Associated Client Window The columns are defined in Table 25. Table 25. -
Page 127: Chapter 10: System Log
Chapter 10 System Log This chapter describes the system log in the following sections: “Displaying the System Log” on page 128 “Sending Log Messages to a Syslog Server” on page 130... -
Page 128: Displaying The System Log
Chapter 10: System Log Displaying the System Log A wireless access point is a complex piece of network equipment that includes both hardware and software components. Multiple software features operate simultaneously, interoperating with each other and processing large amounts of network traffic. It is often difficult to determine exactly what is happening when an access point appears not to be operating normally, or what happened when a problem occurred. -
Page 129: Figure 38: Log Window For Event Messages
AT-TQ5403 and AT-TQm5403 Access Points User’s Guide Figure 38. Log Window for Event Messages... -
Page 130: Sending Log Messages To A Syslog Server
Chapter 10: System Log Sending Log Messages to a Syslog Server To configure the access point to send the log messages to a syslog server on your network, perform the following procedure: 1. Select Settings > System from the main menu. 2. - Page 131 AT-TQ5403 and AT-TQm5403 Access Points User’s Guide Table 27. Log Window for Syslog Client (Continued) Field Description Log Relay Select one of the following: - Enabled: Activates the syslog client to transmit the event messages to your syslog server. - Disabled: Deactivates the syslog client to stop the access point from transmitting event messages.
- Page 132 Chapter 10: System Log...
-
Page 133: Chapter 11: Maintenance
“Restoring the Default Settings to the Access Point” on page 137 “Uploading New Management Software to the Access Point” on page 138 “Rebooting the Access Point” on page 140 “Sending Technical Support Information to Allied Telesis” on page 141... -
Page 134: Downloading The Configuration Of The Access Point To Your Computer
Chapter 11: Maintenance Downloading the Configuration of the Access Point to Your Computer This procedure explains how to download the configuration of the access point as a file to your computer. You might perform this procedure to maintain a history of the configurations of the unit so that you can easily restore a configuration, if needed. - Page 135 AT-TQ5403 and AT-TQm5403 Access Points User’s Guide 4. If desired, change the filename of the configuration file. The filename suffix must be “txt”. 5. Click the Save button. The access point downloads a file with its configuration to your management workstation, which stores it in the designated folder.
-
Page 136: Restoring A Configuration To The Access Point
Chapter 11: Maintenance Restoring a Configuration to the Access Point This procedure explains how to restore a configuration to the access point. You might perform this procedure to restore a previous configuration to the device, to configure a replacement unit, or to configure multiple access points with the same configuration. -
Page 137: Restoring The Default Settings To The Access Point
AT-TQ5403 and AT-TQm5403 Access Points User’s Guide Restoring the Default Settings to the Access Point This procedure explains how to restore the default settings on the access point. Please review the following information before performing the procedure: The manager name and password are reset to “manager” and “friend”, respectively. -
Page 138: Uploading New Management Software To The Access Point
Please review the following information before performing the procedure: The procedure assumes you have already obtained the new image file from the Allied Telesis web site and stored it on your computer or network server. The configuration settings of the access point are retained when a new firmware image is uploaded to the device. -
Page 139: Figure 41: Upgrade Window
AT-TQ5403 and AT-TQm5403 Access Points User’s Guide Figure 41. Upgrade Window The version number of the current firmware is displayed in the Firmware Information section of the window. 2. Click the Browse button next to the New Firmware Image field and locate the new image file on your computer or network server. -
Page 140: Rebooting The Access Point
Chapter 11: Maintenance Rebooting the Access Point This section explains how to reboot the access point. You might reboot the device if it is experiencing a problem. Caution The access point does not forward network traffic while it reboots. Some network traffic may be lost. To reboot the access point, perform the following procedure: 1. -
Page 141: Sending Technical Support Information To Allied Telesis
AT-TQ5403 and AT-TQm5403 Access Points User’s Guide Sending Technical Support Information to Allied Telesis If you contact Allied Telesis for technical assistance with the access point, you may be instructed to perform this procedure. It has the access point send to Allied Telesis technical and operational information that technicians can use to troubleshoot problems with the device. - Page 142 It is case sensitive. Spaces are not allowed. Be sure to send the key to the technicians at Allied Telesis. The factory default is blank. The file is sent in clear text if you do not enter a key.
Need help?
Do you have a question about the AT-TQ5403 and is the answer not in the manual?
Questions and answers