Table of Contents
Advertisement
Quick Links
Digital instrumentation amplifier for strain gage sensors
© 2024
burster
präzisionsmesstechnik gmbh & co. kg
All rights reserved
Valid from:
June 24, 2024
OPERATION MANUAL
with IO-Link interface
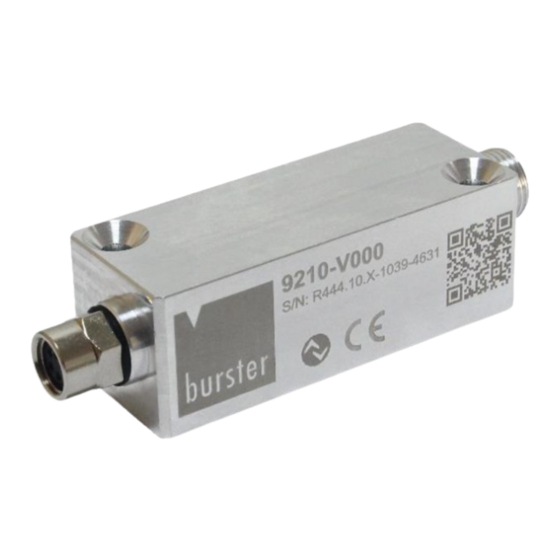
Model 9210
Manufacturer:
burster
präzisionsmesstechnik gmbh & co. kg
Talstrasse 1 - 5
Postfach 1432
76593 Gernsbach
76587 Gernsbach
Germany
Germany
Phone: +49 7224 645-0
Fax: +49 7224 645-88
Email: info@burster.de
www.burster.de
4533-BA9210EN-5199-031527
Advertisement
Table of Contents

Related Manuals for Burster 9210


Summary of Contents for Burster 9210
- Page 1 OPERATION MANUAL Digital instrumentation amplifier for strain gage sensors with IO-Link interface Model 9210 Manufacturer: © 2024 burster burster präzisionsmesstechnik gmbh & co. kg präzisionsmesstechnik gmbh & co. kg All rights reserved Talstrasse 1 - 5 Postfach 1432 76593 Gernsbach...
- Page 2 “product”) are the result of targeted development and meticulous research. From the date of delivery, burster provides a warranty for the proper condition and functioning of these products covering material and production defects for the period specified in the warranty document accompanying the product.
-
Page 3: Table Of Contents
Contents of pack ........................10 Storage ............................10 Electrical installation ........................11 Connection diagram instrumentation amplifier 9210-V000 ............11 Using the device for the first time ....................12 Putting the instrumentation amplifier into operation ..............12 Parameterization of the instrumentation amplifier ..............12 Functions ............................ - Page 4 7.3.1 Parameterization of the sensor characteristics .............. 18 7.3.2 Low-pass filter (IIR filter) ....................26 7.3.3 Parameterization SIO1/2....................27 7.3.4 Parameterization of the SSCx switching functions ............29 Diagnosis ............................ 36 7.4.1 Remote operation ......................36 7.4.2 Device Status / Error Handling ..................36 7.4.3 Error Handling ........................
-
Page 5: Introduction
Follow the instructions carefully to reduce repair costs and downtime, and increase the reliability and service life of the device. 1.2 Scope of this manual This operation manual applies exclusively to the model 9210 Digital Instrumentation Amplifier for Strain Gage Sensors with IO-Link Interface (henceforth: device). 1.3 Target group This operation manual is intended for personnel tasked with installing and operating the device. - Page 6 It is not permitted to make any changes to the device without the written agreement of burster präzisionsmesstechnik gmbh & co. kg. burster präzisionsmesstechnik gmbh & co. kg does not accept liability for damages or injury if this condition is disregarded.
-
Page 7: Safety
2 Safety IMPORTANT: Read the operation manual carefully before using the equipment, and keep it for future reference. 2.1 Applications 2.1.1 Intended use This product is a precision device and is used to measure objects, items or physical variables and to process and provide measured values as electrical values for the higher-level system. -
Page 8: Representation Of Hazards
2.2 Representation of hazards Hazards are represented in the following ways in this operation manual: NOTICE Property damage to the equipment or the surroundings will result if the hazard is not avoided. Observe the advice for protecting the device. 2.3 Requirements for personnel Personnel must be familiar with the relevant regulations. -
Page 9: Description
3 Description 3.1 How it works – general principle The amplifier electronics process signals from sensors with strain gages and transmit the measured values digitally. Communication conforms to the IO-Link standard. 3.2 IO-Link communication (overview) IO-Link communication uses cyclic and acyclic data: ... -
Page 10: Unpacking / What's Included / Storage
The device should be transported only in its original packaging or in packaging capable of providing an equivalent degree of protection. 4.2 Contents of pack IO-Link instrumentation amplifier, model 9210 4.3 Storage The device must be stored under the following conditions only: ... -
Page 11: Electrical Installation
5 Electrical installation 5.1 Connection diagram instrumentation amplifier 9210-V000 Figure 1: Connection diagram instrumentation amplifier 9210-V000 Figure 2: Electrical connections for instrumentation amplifier 9210-V000 of 53... -
Page 12: Using The Device For The First Time
For parameterization, you need an IO-Link master and the IO-Link Device Description (IODD) of the instrumentation amplifier. You can find the IODD to download at www.burster.com or ioddfinder.io-link.com. The following parameterization options can be used to adapt the instrumentation amplifier to your application (parameterization via IO-Link): ... -
Page 13: Functions
7 Functions 7.1 Process data The process value and the individual status bits are presented on the Process Data tab. 7.1.1 Process Data In (PDI) process value The cyclic process value is displayed here. Under Parameter | MDC Selection Source select what is to be presented here via the IO-Link communication (cyclic). -
Page 14: Status Bits Process Data In (Pdi)
7.1.2 Status Bits Process Data In (PDI) The following bits are presented: Status bit Description Switching status of SSC1 Bit 0: SSC1 Switching status of SSC2 Bit 1: SSC2 An internal value is not in the optimal range and possibly near the Bit 2: Quality function threshold. -
Page 15: Observation
7.2 Observation On the Observation tab, next to the processed process value, peak values and sample and hold process values are presented. Note: Resetting memory values and sample and hold Memory values and sample and hold can each be reset via the cyclic data or via one of the two I/O pins. -
Page 16: Peak Value Memory (Memory Values)
7.2.1 Peak value memory (Memory Values) The following values are stored with the Memory Values: Min. measured process value since the last memory reset Max. measured process value since the last memory reset Peak Peak process value (delta between min. and max. process value) Figure 3: Peak value memory The peak values are output via the cyclic process data. -
Page 17: Sample And Hold
7.2.2 Sample and Hold Sample and Hold (S&H) stores the following values: The process value that was held during the last sample and hold trigger (cf. fig. 4: S&H value). The measured value (process value) at the trigger time is held. ... -
Page 18: Parameter
7.3 Parameter On the Parameter tab, you can set various sensor characteristics. 7.3.1 Parameterization of the sensor characteristics By parameterizing the characteristics of the sensor you can define the conversion of the input signal (mV/V) into the process value (N, kN, μm/m, …). You have the following options for setting the parameters: ... - Page 19 7.3.1.1 Parameterizable sensor characteristics In general, you can parameterize the following sensor characteristics on the instrumentation amplifier: Unit of the process value (Process Value Unit) Nominal measuring range of the process value / rated load (Nominal Process Value) ...
- Page 20 7.3.1.2 Manual parameterization of the sensor characteristics (Teach-In by Value) With the Teach-In by Value function you enter the sensor characteristics directly as values via IO-Link. Example Sensor characteristics: Nominal process value: 1000 N Rated output sensitivity: 1.5110 mV/V ...
- Page 21 7.3.1.3 Teaching in the sensor characteristics via the teach-in process In addition to the manual parameterization of the sensor characteristics, you can also carry out the parameterization via a teach-in process: Offset teach-in (Teach-In Offset / Taring) Sensitivity teach-in (Teach-In Sensitivity) During the teach-in process, the instrumentation amplifier superimposes the Moving Average filter over the input signal.
- Page 22 Figure 6: Offset teach-in (with and without pre-load) IO-Link parameters: Offset teach-in (Teach-In Offset / Taring) Parameter name Description Teach-in.Offset Process Value Process value for which the current input signal corresponds to this process value. The teach-in offset only affects the offset register and does not alter the sensitivity register.
- Page 23 7.3.1.3.2 Sensitivity teach-in (Teach-In Sensitivity) With the sensitivity teach-in, the sensitivity is set so that the current input signal (mV/V) corresponds to this process value, without changing the previously taught-in offset. The sensitivity register and the offset register are affected. Condition: You carried out an offset teach-in before the sensitivity teach-in.
- Page 24 Figure 7: Sensitivity teach-in IO-Link parameters: Sensitivity teach-in (Teach-In Sensitivity) Parameter name Description Teach-in.Sensitivity Process Value Sensitivity teach-in Teach-in.Sensitivity Enable Enable/disable sensitivity teach-in: 0: Disabled 1: Enabled of 53...
- Page 25 7.3.1.3.3 Filter moving average for offset teach-in and sensitivity teach-in The Moving Average filter is active on the input signal during the offset teach-in and sensitivity teach- in to increase the measurement accuracy. The filter smoothes the signal curve by calculating the average of a specified number of measured values per filter interval.
-
Page 26: Low-Pass Filter (Iir Filter)
7.3.2 Low-pass filter (IIR filter) Optionally, you can run the input signal through a low-pass filter (infinite impulse response filter, IIR filter). The low-pass filter is recommended in the following cases: Increasing the effective resolution by reducing the noise. ... -
Page 27: Parameterization Sio1/2
7.3.3 Parameterization SIO1/2 Note: In the IO-Link environment, the signals are named from the perspective of the IO-Link master. This means: The input on the sensor is called DO, as DO is an output on the IO-Link master. Conversely, DI is an input on the IO-Link master and an output on the sensor. For SIOx mode you can select the following functions in the Settings.SIOx Function Select parameter: ... - Page 28 IO-Link parameters: Parameterization of the SIO (SIOx settings): Parameter name Description Settings.SIOx Function Selection Select function for SIOx: 0: SSC1 (DI) 1: SSC2 (DI) 5: Quality Bit (DI) 6: Alarm Bit (DI) 10: Inactive (DO) 11: Teach-in Offset/Tare (DO) 12: Memory Reset (DO) 13: Sample &...
-
Page 29: Parameterization Of The Sscx Switching Functions
7.3.4 Parameterization of the SSCx switching functions With the SSC, any number of switching functions can be set depending on the current process value. For parameterization of the SSC, the following must be defined: Mode (single point / window / two point) ... - Page 30 7.3.4.1 SSC modes You can choose among the following modes for the SSC: Single Point Window Two Point Mode Single Point, normal SSC mode – Single Point Figure 9: 1 switching threshold across the entire measuring range. Mode Window, normal SSC mode –...
- Page 31 7.3.4.2 SSC Logic SSC Logic Single Point, inverted SSC Logic – Single Point, inverted Figure 12: SSC Logic Window, inverted SSC Logic – Window, inverted Figure 13: SSC Logic Two Point, inverted SSC Logic – Two Point, inverted Figure 14: of 53...
- Page 32 7.3.4.3 SSC Hysteresis With the SSC Hysteresis function you can define how the hysteresis should be set in relation to the setpoint. The function is relevant for the Single Point and Window modes: Single Point: The hysteresis is set either to the left, right or center of the setpoint. ...
- Page 33 Example 2: Hysteresis, inverted The instrumentation amplifier is parameterized as follows: Settings.SSC1 Logic: Inverted Settings.SSCx Mode: Single Point, Window Settings.SSCx Setpoint 1: 200 N Settings.SSCx Setpoint 2: 800 N Hysteresis.SSCx Alignment Mode: Left/Outer, Center, Right/Inner ...
- Page 34 7.3.4.4 Timing SSCx With the Timing SSCx function you can set the following time-related behavior: Switching on delay (Response Delays) Switching off delay (Release Delays) Min. pulse duration / pulse duration extension (Minimum Pulse Duration) The individual functions must be activated. Response and release delays can be activated separately.
- Page 35 IO-Link parameters: Parameterization of the SSCx timing (SSCx delays) Parameter name Description Response Delay.SSCx Enable Enabling/disabling of the SSCx response delay. 0: Disabled 1: Enabled Response Delay.SSCx Time Setting the time span for the response delay (in ms). Response Delay.SSCx Enable Enabling/disabling of the SSCx release delay.
-
Page 36: Diagnosis
7.4 Diagnosis On the Diagnosis tab you can activate remote operation and see various device status and warning messages. 7.4.1 Remote operation Remote operation is used for test purposes and for easy setup of the instrumentation amplifier. In remote operation, a parameterizable input signal is simulated instead of the input signal from a loaded sensor (mV/V). -
Page 37: Error Handling
7.4.3 Error Handling Device status Cyclic Data Process value >1· Nominal process 0xE4, 0x18, 6144 Warning Not affected n. a. outside of value 0x00 (n. a.) nominal range <-1· Nominal process 0xE4, 0x18, 6145 value 0x01 Process value >2· Nominal process 0xE4, 0x18, 6146 Error... -
Page 38: Interface Description
8 Interface description 8.1 PDI (PDI48.INT32_INT8) Process Value Scale Status Bits Int32 Int8 8 x Boolean Type 47 … 16 15 … 8 7 … 0 Bit Offset 10 … 3 Subindex Sub- Name Type Range Description index Offset -2^31 … ... -
Page 39: Pdo (Pdi8.Bool1)
Activates teach-in sensitivity, is active as long as this bit is set to “1” Sensitivity Boolean Not used Boolean Not used 8.2.1 Identification Vendor Name String burster Präzisionsmesstechnik GmbH Vendor Text String www.burster.de Product Name String n.a. Specific sensor type within the sensor family Product ID String n.a. -
Page 40: Observation
8.2.2 Observation Process Values ±20’000 Process Value.Current int32 n.a. Current process value after signal processing. Memory Values ±20’000 Process Value.Minimum int32 n.a. Minimum process value since last memory reset. ±20’000 Process Value.Maximum int32 n.a. Maximum process value since last memory reset. 0…20’000 Process Value.Peak Peak int32... -
Page 41: Parameters
Offset of the transducer in mV/V. This Adjustment.Offset is the signal of the sensor corresponding to the process value 0. burster Command Restore Factory Adjustment. The values of section «Factory Sensor Settings» will be copied into the section «Customer Sensor Adjustment». - Page 42 Teach-in Offset / Taring Teach-in.Offset int32 ±20’000 Teach-in offset (taring) will set the offset in Process Value such a way, that the current sensor input signal corresponds to this process value. Teaching-in offset just affects the register offset and will not change the sensitivity register.
-
Page 43: Signal Processing
8.3.2 Signal Processing Input Low Pass Filter (8 kS/s) 0: Disabled Input Low Pass uint8 Filter.Enable 1: Enabled Input Low Pass uint8 Selection of cut-off frequency of input Filter.Frequency low pass filter. 0: 1 kHz 1: 500 Hz 2: 200 Hz 3: 100 Hz 4: 50 Hz 5: 20 Hz... -
Page 44: Mdc Settings
8.3.3 MDC Settings MDC Selection uint8 2: Current Process Value (2 kS/s) Selection.Source 3: Minimum Process Value (2 kS/s) 4: Maximum Process Value (2 kS/s) 5: Peak Peak Process Value (2 kS/s) 6: Sample and Hold Process Value (2 kS/s) 7: Sample and Hold Delta Process Value (2 kS/s) MDC Descriptor... -
Page 45: Sio Settings
8.3.4 SIO Settings SIO 1 Setting Settings.SIO1 Function uint8 Defines the function of SIO1 Selection 0: SSC1 (DI) 1: SSC2 (DI) 5: Quality Bit (DI) 6: Alarm Bit (DI) 10: Inactive (DO) 11: Teach-In Offset / Taring (DO) 12: Memory Reset (DO) 13: Sample / Hold (DO) 14: Teach-in Sensitivity (DO) 0...3'600’000... -
Page 46: Ssc 1 Settings
8.3.5 SSC 1 Settings SSC 1 Setting Settings.SSC1 uint8 Selects the switching behavior of SSCx: Mode 1: 1 Point 2: Window 3: 2 Point ±20’000 Settings.SSC1 int32 Defines the process value at which SSCx is Setpoint 1 set to active. ±20’000 Settings.SSC1 int32... - Page 47 SSC 1 Minimum Pulse Duration Minimal Pulse uint8 Enables/Disables minimum pulse duration Duration.SSC1 time of SSCx. Enable 0: Disabled 1: Enabled 0...86’400’000 Minimal Pulse uint32 Minimum pulse length of SSCx in Duration.SSC1 milliseconds Time Minimal Pulse uint8 Selects the affected pulse polarity for Duration.SSC1 minimum pulse duration of SSCx: Mode...
-
Page 48: Ssc 2 Settings
8.3.6 SSC 2 Settings SSC 2 Setting Settings.SSC2 Mode uint8 Selects the switching behavior of SSCx: 1: 1 Point 2: Window 3: 2 Point ±20’000 Settings.SSC2 Setpoint 1 int32 Defines the process value at which SSCx is set to active. ±20’000 Settings.SSC2 Setpoint 2 int32... -
Page 49: Diagnosis
SSC 2 Minimum Pulse Duration Minimal Pulse uint8 Enables/Disables minimum pulse Duration.SSC2 Enable duration time of SSCx. 0: Disabled 1: Enabled 0...86’400’000 Minimal Pulse uint32 Minimum pulse length of SSCx in Duration.SSC2 Time milliseconds Minimal Pulse uint8 Selects the affected pulse polarity for Duration.SSC2 Mode minimum pulse duration of SSCx: 1: Positive and negative pulses are... -
Page 50: Auxiliary Signals
8.4.2 Auxiliary Signals Measured Temperatures CPU Temperature.Current float -90…150°C Current temperature of the CPU. Internal Signal Process Value.Physical Input float ±4.0 n.a. Passive signal of the calibrated sensor Signal in mV/V. of 53... -
Page 51: Device Status
8.4.3 Device status Notifications / Warnings / Errors Device status uint8 n.a. 0: Device is operating properly 1: Maintenance-Required (lowest priority) 2: Out-of-Specification 3: Functional-Check (remote mode) 4: Failure (highest priority) Detailed Device Status 10x3 uint8[3] List of detailed warnings and errors [1…10] Device monitoring 0…32²-1... -
Page 52: Sensor Adjustment
8.4.4 Sensor Adjustment Factory Sensor Adjustment 1001 Factory Sensor uint16 DAB: Value of the register «Customer Adjustment.Process 1699 Sensor Adjustment.Process Value Value Unit Unit» during factory adjustment as DST: reference and for reloading 1698 0.1…10’000 1001 Factory Sensor int32 DAB: 1.0 Value of the register «Customer Adjustment.Nominal Sensor Adjustment.Nominal Process... -
Page 53: Accessories
9 Accessories Item number Description 9900-V147 M8 4-pin connector 90° angled, IP67 9900-V148 M8 4-pin connector straight, IP67 9900-V609 M8 4-pin connector straight, IP67 10 Customer service For repair inquiries, please call our customer service department on +49 7224 645-53. Please have the serial number to hand.
Need help?
Do you have a question about the 9210 and is the answer not in the manual?
Questions and answers