Advertisement
Quick Links
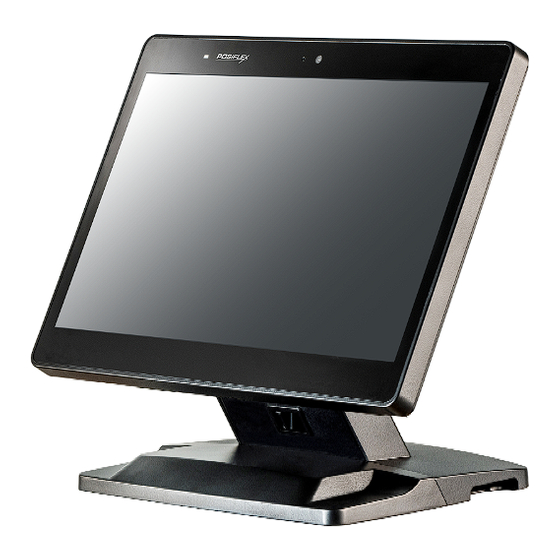
ZT-3715E1/3716E1
Fanless Touch POS Terminal
User Manual
FCC NOTES
This equipment has been tested and found to comply with the limits for a Class A digital
device, pursuant to part 15 of the FCC Rules. These limits are designed to provide
reasonable protection against harmful interference when the equipment is operated in a
commercial environment. This equipment generates, uses, and can radiate radio frequency
energy and, if not installed and used in accordance with the instruction manual, may cause
harmful interference to radio communications. Operation of this equipment in a residential
area is likely to cause harmful interference in which case the user will be required to correct
the interference at his own expense.
This device complies with part 15 of the FCC Rules. Operation is subject to the following
two conditions: (1) This device may not cause harmful interference, and (2) this device must
accept any interference received, including interference that may cause undesired operation.
CE CLASS A WARNING
This equipment is compliant with Class A of CISPR 32. In a residential environment this
equipment may cause radio interference.
AVERTISSEMENT CE CLASSE A
Cet équipement est conforme à la classe A de CISPR 32. Dans un environnement résidentiel,
cet équipement peut provoquer des interférences radio.
WARRANTY LIMITS
Warranty will terminate automatically when the machine is opened by any person other than
the authorized technicians. The user should consult his/her dealer for the problem happening.
Warranty voids if the user does not follow the instructions in application of this merchandise.
The manufacturer is by no means responsible for any damage or hazard caused by improper
application.
LIMITES DE GARANTIE
La garantie prend fin automatiquement lorsque la machine est ouverte par une personne autre
que les techniciens autorisés. L'utilisateur doit consulter son revendeur pour le problème qui
se produit. La garantie s'annule si l'utilisateur ne suit pas les instructions d'application de
cette marchandise. Le fabricant n'est en aucun cas responsable de tout dommage ou danger
causé par une mauvaise application.
警告使用者
為避免電磁干擾,本產品不應安裝或使用於住宅環境。
SAFETY INSTRUCTIONS
This equipment is not suitable for use in locations where children are likely to be present.
ZT-3715E1/3716E1 Ver. A0
1
Advertisement

Related Manuals for POSIFLEX ZT-3715E1


Summary of Contents for POSIFLEX ZT-3715E1
- Page 1 Le fabricant n'est en aucun cas responsable de tout dommage ou danger causé par une mauvaise application. 警告使用者 為避免電磁干擾,本產品不應安裝或使用於住宅環境。 SAFETY INSTRUCTIONS This equipment is not suitable for use in locations where children are likely to be present. ZT-3715E1/3716E1 Ver. A0...
-
Page 2: Revision History
Date Version Description 2024/06/03 For Preliminary Release Package Contents ZT-3715E1 15” fanless touch terminal or ZT-3716E1 15.6” fanless touch terminal..……………………...……..(x1) Power adapter………………………………………………………..(x1) Power cord………………………………………………………….…(x1) USB key (in base stand or in system unit if there is no base stand)…..(x1) - Page 3 Views of ZT-3715E1/3716E1 Front View LED indicator Camera (optional) Camera (optional) Base Stand 15.6” P-cap Touch Panel 15” P-cap Touch Panel 15” ZT-3715E1 15.6” ZT-3716E1 Rear View Attachment Bay (2 Monitor) Attachment Bay Base Cover Cable Exit...
- Page 4 Base Cover Latch Left-Side View Power Button Brightness Adjustment Button + Brightness Adjustment Button - Cable Exit View of I/O Interface of ZT-3715E1/3716E1 Bottom Side View 24V PoweredUSB Port CR Port RJ50 COM Port Type-C Port USB 2.0 Ports 12V PoweredUSB Port...
- Page 5 Side View USB 2.0 Port Keyhole Cable Exit Positioning your POS for a Perfect Viewing Angle Steady the base with one hand, and then tilt the screen in the Please do NOT direction shown by the arrow in the figure. press on the LCD panel while setting up the tilt angle.
- Page 6 Push the latch (toward left side) through the direction of the arrow like below pictures, and then you can release the base cover. Take off the base cover. Rotate the screen to the upright position like below pictures.
- Page 7 There is a latch inside cable exit on the rear side of the POS terminal. Push the latch with the thumb of the left hand, and then the touch monitor will release automatically. Open the touch monitor with two hands, and then you can do the maintenance work.
- Page 8 Pass the cable which you need into the cable exit. Connect the cables to the I/O port.
- Page 9 10. To close the touch monitor, you must press down on both sides of the screen with both hands. 11. Rotate the screen to the horizontal position like below pictures. 12. Close the base cover back to the POS terminal.
- Page 10 13. Make sure the cable could be pulled out of the cable exit from the bottom of the base. Cable connectors like the connector of LAN cable have to be gently inserted until a click sound is given. It is recommended that the I/O ports, such as COM (DB9) port, should be fastened with connector thumb screws after the I/O cable connectors are completely connected.
- Page 11 Insert the USB key into the keyhole, and then turn it clockwise. You can use the USB port after unlocking it. Be note that the USB key CANNOT be removed when the USB port is unlocked. Optional Wall Mounting For cement wall, to apply the plastic cotters, please drill 4 holes on the wall.
- Page 12 Fix the rear cover with four shoulder head screws. Hook the ZT POS terminal to the mounting bracket. Open the touch monitor, and then fix one thumbscrew.
- Page 13 Connect the power cable, and other cables that you need. Make the cable pass through the cable exit on the bottom side of the ZT POS terminal. Installing Optional Upgrade Kits and Peripherals ZT-series is an expandable model which allows you to upgrade its own capacity by additionally installing multiple peripheral devices, such as magnetic stripe reader (MSR), RFID, or fingerprint, and 2 rear-mount POS...
- Page 14 Driver Download If your POS terminal is shipped without OS pre-installed, please download the relevant driver that you need from the Posiflex website (http://download.posiflex.com/en-global/Download/download). Performing System Recovery For ZT-series model with preloaded operating systems, Recovery DVD which includes useful utilities will be provided in the package to assist you in efficiently restoring or repairing your damaged system.
- Page 15 Specifications ZT-3715E1 ZT-3716E1 Intel Tiger Lake UP3 Core i3-1115G4E Intel Tiger Lake UP3 Core i5-1145G7E 2 x DDR4 SO-DIMM System Memory 2 x M.2 port (support SATA interface only, M.2 Storage Device 2280 / B+M key) OS Support Windows 10 IoT...
- Page 16 ZA-103 ZA-104 2D scanner attachment 3-in-1 MSR + iButton + RFID attachment ZA-304 3-in-1 MSR + fingerprint sensor + RFID ZA-305 attachment 10.1” 2 display LM/TM-5011 10.1” Portrait 2 LM/TM-5011P- display 7” Rear-mount line display PD-6907U Outline Dimension ZT-3715E1...
- Page 17 ZT-3716E1 ※ The product information and specifications are subject to change without prior notice. To get the detailed information on the ZT-3715E1/3716E1, please check this model from Posiflex Global Website (http://download.posiflex.com/en- global/Download/download).
Need help?
Do you have a question about the ZT-3715E1 and is the answer not in the manual?
Questions and answers