Advertisement
TM/LM-2012E
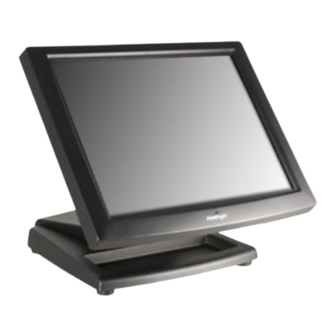
Standalone POS Monitor
User Manual
Product Features
Compact design, ideal for cramped space
High Quality 12" TFT LCD panel
LCD resolution up to 1024 x 768
Optional side attachment support (SD-366)
Flexible installation with VESA mounting support
Dimension : 261.67 mm (H) x 298 mm (W) x 253.71 mm (D); Weight :
2.48 kg
Color : Ivory or black
19670906010 Ver. Original
http://www.posiflex.com
Package Contents
12" TM/LM-2012E
Standalone Monitor...................(x 1)
VGA Cable.............................(x 1)
USB type A to B cable.................(x 1)
Power Cord.............................(x 1)
12V/18W Power Adapter.............(x 1)
User Manual...........................(x 1)
1
Advertisement
Table of Contents

Subscribe to Our Youtube Channel
Related Manuals for POSIFLEX TM-2012E


Summary of Contents for POSIFLEX TM-2012E
- Page 1 Optional side attachment support (SD-366) Flexible installation with VESA mounting support Dimension : 261.67 mm (H) x 298 mm (W) x 253.71 mm (D); Weight : 2.48 kg Color : Ivory or black 19670906010 Ver. Original http://www.posiflex.com...
- Page 2 Views of the TM/LM-2012E Front View 12.1” LM-2012E LCD Panel 12.1” TM-2012E Resistive Touch Panel LED Indicator Rear View Cable Cover Cable Exit OSD Control Button OSD button EXT button + button - button Power button...
- Page 3 I/O Ports of TM/LM-2012E VGA Port USB (Type B) Port DC-IN Power Jack USB (Type A) Port Positioning your monitor for a Perfect Viewing Angle Tilt the screen in the direction shown by the arrow in the figure. Connecting VGA and USB Cables Gen6 base features its own cable management to help you well organize the cords.
- Page 4 Connect the monitor to the terminal using VGA cable. Connect one end of the VGA cable to the VGA port at the bottom I/O plate of your monitor. Take the other end of VGA cable to insert it into the VGA port of your terminal.
- Page 5 For TM-2012E Model with Resistive Touchscreen For TM-2012E users, please follow the below instructions to complete installation of The Dual Touch Manager, a tool designed to allow your monitor to work as a secondary touchscreen monitor in extended mode.
- Page 6 POS terminals and electricity is supplied to the monitor either through POS terminals or through external power sources. For the users who prefer Posiflex POS system as primary power sources to power your monitor using VGA cable, please also refer to the Activating Power Output to VGA Port via BIOS Settings section to confirm that VGA port of your terminal is indeed enabled.
-
Page 7: Power Led Indicator
VGA power of the terminals in BIOS settings so that the monitor is able to extract power from the Posiflex terminals. However, if the monitor you are using is not manufactured by Posiflex, it is strongly suggested to deactivate the VGA power of your terminal in preventing your device from being damaged. -
Page 8: Using The Osd Menu
Setting up Display Resolution for Your Monitor The below chart defines the list of recommended display settings for TM/LM-2012E. Improper display configuration will prevent the monitor from properly displaying the image and lead to a warning message of “out of range” prompted on the screen. - Page 9 Icon Description While OSD menu is activated: to select the specific menu option OSD button While OSD menu is deactivated: to activate the OSD menu While OSD menu is activated: to exit from the current configuration EXT button While OSD menu is activated: ...
-
Page 10: Auto Adjustment
OSD Options Please refer to the following table for further explanation of the accessible items. OSD Menu Options Sub-menu items & Description Backlight Picture Press the “+” button to increase backlight intensity; Press the “-” button to decrease backlight intensity. - Page 11 OSD Menu Options Sub-menu items & Description Reset Other Restore the current menu back to the default setting. Menu Time Specify the length of time for OSD menu to stay active on the screen. Language Specify the language used in the OSD menu. Display information regarding display resolution, Information horizontal/vertical sync frequency, pixel clock...
-
Page 12: Specifications
Type-A USB Port x1 Type-B USB Port x1 Touch Touch type 5-wire Resistive Interface ※ The product information and specifications are subject to change without prior notice. To get the detailed information on TM/LM-2012E, please check this model from Posiflex Global Website (http://www.posiflex.com/en-global/Download/download).
Need help?
Do you have a question about the TM-2012E and is the answer not in the manual?
Questions and answers