
Related Manuals for FM STB 586 V7


Summary of Contents for FM STB 586 V7
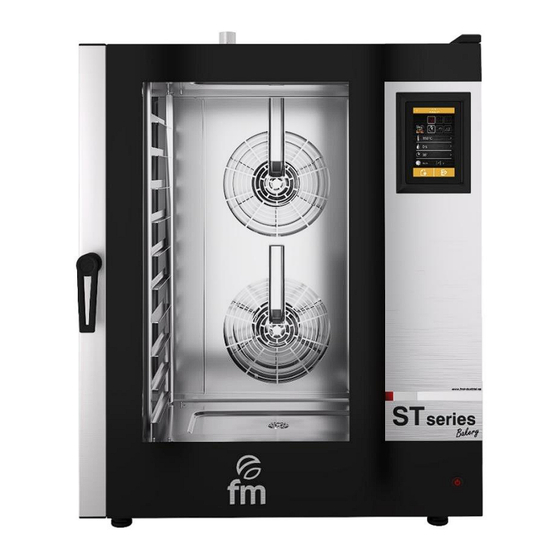
- Page 1 Instruction Manual Electric ovens Models: STB 604/606/610/616T/586/686/886/1086/1886T V7 (electric/gas) ATTENTION: Please, read these instructions before using this unit.
-
Page 3: Table Of Contents
CONTENTS CE CERTIFICATION WARRANTY GENERAL AND SAFETY STANDARDS SAFETY INSTRUCTIONS, TRANSPORT AND MAINTENANCE Unpackaging Transport Preliminary operations Placing the unit Trolley positioning (only for oven models equipped with trolley) STARTING UP THE UNIT Electrical connection Water inlet Draining connection Vapour exhaust from the cooking chamber Gas connection Nameplate (only for gas oven models) DISPLAY USE INSTRUCTIONS... - Page 4 Automatic cleaning (optional system) Detergent and rinse 6.10 Phases of automatic washing 6.11 Programmed automatic start 6.12 “Multicook” cooking 6.13 “All On Time” cooking 6.14 Memorising a “Multicook” / “All On Time” recipe 6.15 Registering HACCP data ALARMS Ed.:21 - Ver.:01 - 01/01/2021...
-
Page 5: Ce Certification
Application of the Standards: UNE-EN 60335-1:2012+AC:2014+A11:2014+A13:2017+A14:2014+A2:2020+A1:2020; UNE-EN 60335-2-42:2004+Corr:2007+A1:2008+A11:2012; UNE-EN 55014-1:2017+A11:2021; UNE-EN 55014-2:2015; UNE-EN 61000-3-2:2014; UNE-EN 61000-3-3:2013+A1:2020; UNE-EN 203-1: 2014AC; UNE-EN 203-2-2:2007; UNE-EN 60335-2-102:2016 Manufacturer´s address: FM CALEFACCIÓN S.L. CIF: B-14343594 Manufacturer´s address: CTRA. de Rute km.2.700, C.P.:14900, Lucena Cordoba, España Type of device: OVEN Trade.:... -
Page 6: Warranty
2. Warranty ________ ____ The warranty period is 12 months from the date of purchase of the unit. The warranty does not cover damages to the glass, lamps, door seals, damage to the insulating material or damage caused by improper installation or maintenance, lack of maintenance, improper repair or misuse. To process the repair of a unit under warranty or for any other query, please contact your distributor and refer to the following description table. -
Page 7: General And Safety Standards
Damages, injuries or fatal accidents could be produced due to the non-observance of the manufacturer’s indications. If the oven is installed on supports or overlaying parts, use the ones supplied by FM only and follow the assembly instructions inside the packaging. ... - Page 8 Faults caused by lime or water sediment are not included in the warranty. Failure to comply with these safety standards will release FM from any responsibility and the warranty will become null and void. Maximum loads according to the size of the units...
- Page 9 Only use the products recommended by the manufacturer. Using other products may damage the unit and invalidate the warranty. Only use home-use cleaning products and a soft damp cloth to clean the outside coating. Do not use corrosive or irritating substances.
-
Page 10: Safety Instructions, Transport And Maintenance
The transport agency label must be clearly visible. Photographs showing the content only and exclusively will not be accepted. In either case, transport incidences should be reported to FM Industrial to manage the replacement of the machine. -
Page 11: Preliminary Operations
4.3 Preliminary operations Remove the protection film from the unit. Clean the adhesive residues with an appropriate solvent. Never use abrasive or acid products or tools that may damage the surface. If your unit is fitted with a core probe kit, remember to remove its silicon protection cap. Otherwise, it could be melted and damage the probe. -
Page 12: Trolley Positioning (Only For Oven Models Equipped With Trolley)
Placing the unit next to heat sources P anel aislan te ignifugo Insulating panel M in. 1 00m m M in. 700m m We recommended leaving a free working space of around 500 mm for maintenance operations. This unit is not suitable for built-in installations. 4.5 Trolley positioning (only for oven models equipped with trolley) Ed.:21 - Ver.:01 - 01/01/2021... - Page 13 In order to ensure correct positioning of the car inside the oven, the height of the legs must be checked regularly. For this, 180mm is considered as an optimal measure for this task. 80mm Check the length of the diagonals of the oven inlet, and they must be identical. If not, act again on the regulation of the legs.
- Page 14 To correctly insert the trolleyriage inside the oven, position it following the guides located at the bottom of the oven. Ensure the correct movement of the trolley inside the oven, avoiding blows or obstructions that can cause the leakage of liquids and lead to possible burns. The oven should be placed on a completely flat surface.
-
Page 15: Starting Up The Unit
5. Starting up the unit _____________ To start up and install the unit appropriately, please follow the points in the “DOCUMENT FOR INSTALLING AND STARTING UP SMART UNITS”, included in the bag together with this instruction manual. Remember that any fault or breakage resulting from improper installation or starting up, will make the warranty become null and void. - Page 16 Three-phase connection 400V connected to a three-phase power socket type CETAC. MATERIAL NOT SUPPLIED THREE PHASE 230V Three phase connection 230V connected to a three-phase power socket type CETAC. MATERIAL NOT SUPPLIED In order to prevent damages from unintentional reset of the cutting thermal device, this unit should not be fed by an external control device, such as a timer, or be connected to a circuit whose supply is regularly interrupted.
-
Page 17: Water Inlet
COLOUR CODE Black (L2) Grey (L1) Brown (L3) PHASES Blue (N) NEUTRAL Yellow / Green GROUNDING 5.2 Water inlet The use of an anti-lime filter at the water supply inlet and a check valve is recommended. The oven has a ¾ connection for water inlet. - Page 18 Types of draining: 1. Wall draining: The wall draining outlet must have a vertical ventilation conduit with a diameter not smaller than 25 mm, which must be over the device top cover as shown in the image below. If there is no vertical ventilation conduit installed, proper draining is not ensured, and it may cause faults and the loss of the warranty.
- Page 19 2. Draining separated with a funnel: MATERIAL NOT SUPPLIED Distance 2,5mm Connection 40mm Connection Floor draining: Clamp Drain pipe Distance 2,5mm Ed.:21 - Ver.:01 - 01/01/2021...
-
Page 20: Vapour Exhaust From The Cooking Chamber
5.4 Vapour exhaust from the cooking chamber Exhaust gases may be wet and reach high temperatures. Therefore, do not use tubes made of materials not ensuring absolute thermal stability up to 250ºC to channel exhaust gases. A condenser enabling the condensation of vapours and exhaust of those vapours into a drainage may be adapted to treat cooking vapours. - Page 21 L = 1 ,5m m áxim o For any doubt related to the assembly process necessary for the evacuation of gases, please refer to the technical installation manual. It is advisable to install a cap at the end of the chimney in order to prevent rainwater from entering the device and prevent possible air returns caused by strong wind.
-
Page 22: Nameplate (Only For Gas Oven Models)
5.6 Nameplate (only for gas oven models) The nameplate of the furnace is located on the lower left side of the furnace: Nameplate location Depending on the country in which the appliance is to be used, it will be preconfigured for use with one or two types of gas. - Page 23 If only one type of gas is permitted, conversión to a second type is not allowed. If the use of a second type of gas is permitted, in the event of a changeover by a qualified and authorized technician, this will be indicated on the nameplate.
-
Page 24: Display Use Instructions
6. Display use instructions ____ Attention! Please, read these instructions thoroughly before starting the device. 6.1 Switching the device ON/OFF Please, follow these steps to switch the device on: Press the icon to activate the screen. Please, follow these steps to switch the device off: ... -
Page 25: Setting The Date And Time
6.3 Setting the date and time Make sure that the device is on and that there are no ongoing operations. 1. Press the icon on the main menu to go to the settings menu. 2. Select “Clock” to modify the date and time. 3. - Page 26 MEDIUM PREHEATING: To activate this mode, press icon no. 1 until the message “PREHEAT MEDIUM” is displayed on the screen. In this case, the preheating process will be active until reaching a temperature of +20°C with regard to the selected cooking/cooking temperature. HARD PREHEATING: To activate this mode, press icon no.
- Page 27 There are different parameters that can be modified in each type and mode of cooking/cooking selected: Temperature set point of the cooking/cooking chamber: It can only be set to the time-controlled cooking or core probe mode, regardless of the type of cooking/cooking selected (dry heat, vapour and combi). ...
- Page 28 Selecting the temperature set point of the core probe (only possible with core probe cooking modes and Delta T (ΔT): 6. Press the icon and next, press icons (or move the scroll bar) to select the temperature value wanted. Press again to confirm the value selected.
- Page 29 Adding a phase to the cooking cycle: 12. Press the icon to add a new phase to the cooking cycle, up to a maximum of 6 phases. To set the rest of options within each phase, repeat the steps above. Press icons to select the cooking phase wanted and previously created.
-
Page 30: My Recipes" Cookbook
1. Press the icon 2. Press icons (or move the scroll bar) to select the time value wanted. Press again to confirm the new time value selected. 6.4.3 Stopping the ongoing cooking cycle 1. Press the icon to stop an ongoing cooking cycle. Stopping the cooking cycle 6.5 “My recipes”... -
Page 31: Starting A Recipe
6.6 Starting a recipe This oven has two types of recipes: 1. FM INDUSTRIAL Cookbook: In this cookbook, images and recipes configured and already pre-set are included, with a wide range of foods. You only need to select the type of food you want to cook, and the oven will do the rest. -
Page 32: Special Cycles
6.7 Special cycles “Special cycles” menu allows the user to use work cycles created by FM INDUSTRIAL. Next, the enabled special cycles are described: Regeneration cycle with core probe (enabled in models with core probe). Time-controlled regeneration cycle. Proofing cycle. -
Page 33: Automatic Cleaning (Optional System)
If the default cycles do not meet your requirements, these cycles can be modified and memorised like a recipe. To do so, go to the special cycle wanted (proofing, regeneration, cooling-down...) and proceed in the same way as in the memorising process of a recipe. -
Page 34: Detergent And Rinse
Warning: Use rubber protection gloves and protection mask or goggles before manipulating these chemical products. Detergent: It is a concentrated alkaline detergent designed for FM-ovens automatic cleaning. The use of any other detergent or cleaning product may produce a bad finish or damages resulting in the device loss of warranty. -
Page 35: Programmed Automatic Start
Each cleaning cycle consists of the following phases: 1. Pre-cleaning phase: the cooking chamber of the oven increases its temperature to facilitate the cleaning process. The oven injects vapour to the chamber for 15 minutes. Next, the cleaning arm starts injecting water to rinse for 2 minutes. - Page 36 This system allows the user to cook different foods with different coking time, informing about the end of the cooking process of each food when the trays are ready. There are 2 different ways to go to the “multicook” cooking: ...
-
Page 37: All On Time" Cooking
1. Set the multicook cooking cycle from a recipe. To do so, press to go to the cookbook. 2. Select the cooking parameters wanted (pre-heating, humidity, temperature,...) and then press to accept. 3. Press of the level wanted to include another tray. Take into account that this tray will undergo the same cooking conditions (percentage of humidity and temperature) as the first selected tray. -
Page 38: Memorising A "Multicook" / "All On Time" Recipe
6.14 Memorising a “Multicook” / “All On Time” recipe Follow the steps below to save a recipe in the memory. 1. Set a cooking cycle following the steps in 12 or 6.13. 2. Press to save the set cycle. 3. Select the position number in which you want to save the recipe. 4. -
Page 39: Alarms
Chamber temperature Core probe temperature Executing registration of HACCP data Have the screen at “PRESS TO ACTIVATE” mode. 2. Insert an external memory into the USB port in the oven display. 3. Press “Download HACCP” 4. Select the date and time from which you want to download the data. Then, press 5. - Page 40 If an alarm is produced, a sound will be activated. An icon and an alarm code will be displayed on the screen. Touch on the centre of the screen to stop the alarm. The table below shows the meaning of the device alarm codes. ALARM DESCRIPTION Alarm description:...
- Page 41 If the alarm is activated during a Delta T or with a core probe cooking cycle, this cycle will stop. Alarm description: Shutting off the power supply or oven switched off unproperly. It is activated when there is a power supply shut off or when the oven is switched off unproperly.
- Page 42 Alarm description: Motor thermal protection. Solutions: Thermal Switch the oven off and switch it on again after 10 minutes. protection Alarm Check visually if there is a motor in poor conditions. If so, replace it. If possible, check that there is continuity in the internal klixon of motors to detect which motor is in poor conditions.
- Page 43 Alarm description: Safety thermostat. Solutions: Reset the safety thermostat. Check that the safety thermostat is dully connected. Safety Check that (pin 9) of the power pale is appropriately connected. thermostat alarm Main consequences: If the alarm is activated when the device is ON, no cooking cycle can be started. If the alarm is activated during a cooking cycle, this cycle will stop.
- Page 49 Ed.:21 - Ver.:01 - 01/01/2021...
Need help?
Do you have a question about the STB 586 V7 and is the answer not in the manual?
Questions and answers