Table of Contents
Advertisement
Available languages
Available languages
Quick Links
Manual de instrucciones
Instruction manual
Hornos eléctricos/gas – Electric/gas ovens
Modelos/Models:
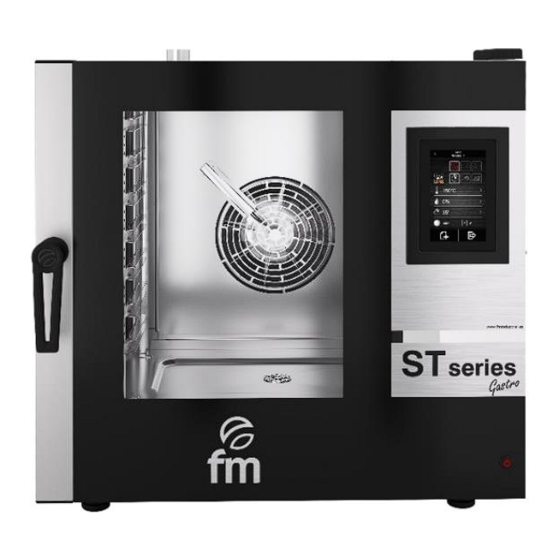
STC 423/411/611/1011 V5 (eléctrico/electric)
STC 411/611/1011 V5 W (eléctrico/electric)
STG 71/111/201T/72/112/202T V7 (eléctrico/gas electric/gas)
ATENCIÓN: Lea las intrucciones antes de utilizar el aparato.
ATTENTION: Please, read these instructions before using this unit.
Advertisement
Table of Contents

Related Manuals for FM STC 423 V5


Summary of Contents for FM STC 423 V5
- Page 1 Manual de instrucciones Instruction manual Hornos eléctricos/gas – Electric/gas ovens Modelos/Models: STC 423/411/611/1011 V5 (eléctrico/electric) STC 411/611/1011 V5 W (eléctrico/electric) STG 71/111/201T/72/112/202T V7 (eléctrico/gas electric/gas) ATENCIÓN: Lea las intrucciones antes de utilizar el aparato. ATTENTION: Please, read these instructions before using this unit.
-
Page 3: Table Of Contents
INDICE/CONTENTS CERTIFICACIÓN CE GARANTÍA NORMAS GENERALES Y NORMAS DE SEGURIDAD INSTRUCCIONES DE SEGURIDAD, TRANSPORTE Y MANTENIMIENTO Desembalaje Transporte Operaciones preliminares Colocación del equipo Posicionamiento de carro (solo para modelos de hornos equipados con carro) PUESTA EN MARCHA DEL EQUIPO Conexión eléctrica Entrada de agua Conexión de desagüe Conexión gas... - Page 4 6.10 Fases de un lavado automático 6.11 Encendido automático programado 6.12 Cocción “Multicook” 6.13 Cocción “All On Time” 6.14 Memorizar una receta “Multicook” / “All On Time” 6.15 Registro de datos HACCP ALARMAS CE CERTIFICATION WARRANTY GENERAL AND SAFETY STANDARDS SAFETY INSTRUCTIONS, TRANSPORT AND MAINTENANCE 11.1 Unpackaging...
- Page 5 13.4 Manual cooking/cooking cycle. Parameters 13.5 “My recipes” cookbook 13.6 Starting a recipe 13.7 Special cycles 13.8 Automatic cleaning 13.9 Detergent and rinse 13.10 Phases of automatic washing 13.11 Programmed automatic start 13.12 “Multicook” cooking 13.13 “All On Time” cooking 13.14 Memorising a “Multicook”...
-
Page 6: Certificación Ce
EN 60335-1:2012 / EN 60335-2-42:2003 + Corr:2007 + A1:2008 + A11:2012 / EN 55014-1:2006 + A1:2009 + A2:2011 / EN 55014-2:1997 + A1:2001 + A2:2008 / EN 61000-3-2 :2006 + A1:2009 + A2:2009 / EN 61000-3-3 :2008 Fabricante FM CALEFACCIÓN S.L. CIF: B-14343594 CTRA. de Rute km.2.700, C.P.:14900, Lucena Dirección Cordoba, España... -
Page 7: Garantía
2. Garantía La duración de la garantía será de 12 meses a partir de la fecha de compra del equipo. La garantía no cubre los daños de cristal, lámparas, juntas de puerta o deterioro del material aislante o daños imputables a una incorrecta instalación, mantenimiento, reparación inadecuada o ausencia del mismo así como usos indebidos del aparato. -
Page 8: Normas Generales Y Normas De Seguridad
Una instalación que no respete las indicaciones del fabricante podría ocasiones daños, lesiones o accidentes mortales. En caso de instalar el horno sobre soportes o superpuestos, utilice únicamente los suministradas por FM y siga su montaje el cual econtrará dentro del embalaje. ... - Page 9 Todo tipo de averías ocasionadas por la cal o sedimentos del agua quedarán exentas de garantía. El incumplimiento de algunas de estas normas de seguridad exime de toda responsabilidad a FM y hace que la garantía quede invalidada. Cargas máximas en función del tamaño de los equipos CAPACIDAD CARGA MÁXIMA...
- Page 10 Peligro por quemaduras Lea con detenimiento estas advertencias y síga sus indicaciones siempre que el horno esté en funcionamiento o aún no se haya enfriado completamente. Toque únicamente los elementos de control del equipo y la maneta de apertura de puerta. Evite tocar cualquier otro elemento externo del horno, ya que estos pueden llegar a alcanzar temperaturas superiores a 60ºC.
-
Page 11: Instrucciones De Seguridad, Transporte Y Mantenimiento
No serán válidas, fotografías sólo y exlusivamente del contenido. En cualquiera de los 2 casos descritos, deben comunicar a FM industrial, la incidencia en el transporte, ya que de esta manera se podrán gestionar la reposición de la máquina. -
Page 12: Operaciones Preliminares
4.3 Operaciones preliminares Retire la película de protección del equipo. Limpie los restos de pegamento con disolvente adecuado. No utilizar en ningún caso productos abrasivos o ácidos ni tampoco herramientas que puedan estropear las superficies. Si su equipo incorpora Kit de Sonda Pincho, recuerde retirar el capuchón de silicona protector de ésta. De lo contrario podría derretirse y dañar la sonda. - Page 13 Ejemplo de colocación del equipo sin fuentes de calor cercanas. Colocación del equipo junto a fuentes de calor. Panel aislante ignifugo Insulating panel Min. 100mm Min. 700mm Para operaciones de mantenimento recomedamos un espacio libre de trabajo de unos 500 mm. El aparato no es apto para instalación empotrada.
-
Page 14: Posicionamiento De Carro (Solo Para Modelos De Hornos Equipados Con Carro)
4.5 Posicionamiento de carro (solo para modelos de hornos equipados con carro) Con el fin de asegurar un correcto posicionamiento del carro en el interior del carro, hay que controlar regularmente la altura de las patas. Para ello, se considera 180mm como medida óptima para tal cometido. Verificar la longitud de las diagonales de la entrada del horno, debiendo ser estas idénticas. - Page 15 Para insertar correctamente el carro en el interior del horno, posicionarlo siguiendo las guías situadas en la parte inferior del horno. Asegurar el correcto movimiento del carro en el interior del horno, evitando golpes u obstrucciones que puedan provocar la fuga de liquidos y dar lugar a posibles quemaduras. El horno deberá...
-
Page 16: Puesta En Marcha Del Equipo
5. Puesta en marcha del equipo Para una correcta instalación y puesta en marcha del equipo, deberá seguir los puntos indicados en el “DOCUMENTO DE INSTALACIÓN Y PUESTA EN MARCHA DE EQUIPOS SMART”, incluido en la bolsa junto con este manual de instrucciones. - Page 17 Conexión trifásica 400V conectada a toma trifásica tipo CETAC TRIFÁSICA 230V Conexión trifásica 230V conectada a toma trifásica tipo CETAC Con el fin de evitar cualquier peligro debido al rearme accidental del dispositivo térmico de corte, este aparato no debe ser alimentado con un dispositivo de control externo, como un temporizador, ni conectarse a un circuito cuya alimentación se interrumpa con regularidad.
-
Page 18: Entrada De Agua
Observar el código de colores de los cables. Una conexión inapropiada puede dañar irreparablemente el aparato. CODIGO DE COLORES: Gris (L1) Negro (L2) Marrón (L3) FASES Azul (N) NEUTRO Amarillo / Verde TIERRA 5.2 Entrada de agua Se recomienda el uso de un filtro antical en la entrada del suministro de agua y una válvula antirretorno. El horno está... - Page 19 Tipos de desagüe: 1. Desagüe de Pared: La salida de desagüe de pared, debe tener un conducto de ventilación vertical con un diámetro no inferior a 25 mm, el cual debe quedar por encima de la cubierta superior del aparato, tal y como se muestra en la imagen. En caso de no instalar el conducto de ventilación vertical, no se garantiza un correcto drenaje pudiendo provocar averías y la pérdida de la garantía.
- Page 20 2. Desagüe separado con embudo: Desagüe de suelo:...
-
Page 21: Conexión Gas
El incumplimiento de estas normas pueden ocasionar daños y lesiones, dando lugar a la invalidación inmediata de la garantía y eximiendo a FM de toda responsabilidad. Antes de proceder a la conexión, compruebe que el tipo de gas que se va a utilizar, asi como la presión de este, se corresponden con la configuración de uso de su horno, la cual se indica en la etiqueta de características del mismo. - Page 22 Asegurese de que el tubo de gas no pasa cerca de zonas calientes y que no quede expuesto a posibles tracciones, torsiones o aplastamientos. El tubo de alimentación de gas (rigido o flexible) deberá cumplir la normativa nacional vigente y ademas, deberá someterse a las inspecciones periodicas pertientes, asi como ser sustituido en caso necesario.
- Page 23 Evacuación tipo B21: mediante este modo, los gases de combustión son evacuados al exterior a través de una campana de aspiración. La distancia mínima a mantener entre el horno y la campana será de, al menos, 50cm...
-
Page 24: Instrucciones De Uso Del Display
6. Instrucciones de uso del display ¡Atención! Lea con detenimiento estas instrucciones antes de poner en funcionamiento el dispositivo. 6.1 Encendido / Apagado del dispositivo Para encender el dispositivo realice la siguiente operación: Pulse sobre el icono y se activará la pantalla. Para apagar el dispositivo realice la siguiente operación: ... -
Page 25: Ajuste Fecha Y Hora
6.3 Ajuste fecha y hora Asegúrese que el dispositivo está encendido y no hay otra operación en curso. 1. En el menú principal, pulse sobre el icono para acceder al menú ajustes. 2. Seleccione “Reloj” para modificar fecha y hora. 3. - Page 26 PRECALENTAMIENTO MEDIO: Para activar este modo, pulsar icono nº 1 hasta que aparezca la indicación “PREHEAT MEDIUM”. En este caso, el proceso de precalentamiento permanecerá activo hasta que se alcance una temperatua de +20°C con respecto a la temperatura de cocción seleccionada. PRECALENTAMIENTO FUERTE: Para activar este modo, pulsar icono nº...
- Page 27 también conocida como “cocción lenta”. Aquí el usuario establece la temperatura de consigna para la sonda picnho y un delta T (diferencial de temperatura entre la programada para la sonda pincho y la cámara de cocción). Dentro de cada tipo y modalidad de cocción seleccionada, existen diferentes parámetros a modificar: ...
- Page 28 confirmar el valor seleccionado, vuelva a pulsar nuevamente el icono Selección de la temperatura de consigna de la sonda pincho (solo posible con modos de cocción sonda pincho y Delta T (ΔT): 6. Toque sobre el icono y, seguidamente, sobre los iconos (o deslice la barra de desplazamiento) para seleccionar el valor de temperatura deseado.
- Page 29 iconos (o deslice la barra de desplazamiento) para seleccionar el valor de tiempo deseado, en el caso de que nos encontremos en el modo de cocción temporizado, o apertura/cierre en el caso de que nos encontremos en los modos de cocción sonda pincho o Delta T (ΔT).
-
Page 30: Recetario "Mis Recetas
1. Pulse sobre el icono 2. Pulse sobre los iconos (o deslice la barra de desplazamiento) para seleccionar el valor de tiempo deseado. Para confirmar el nuevo valor de tiempo seleccionado, vuelva a pulsar nuevamente sobre el icono 6.4.3 Detener ciclo de cocción en curso 1. -
Page 31: Puesta En Marcha De Una Receta
6.6 Puesta en marcha de una receta Este horno dispone de dos tipos de recetarios: Recetario FM INDUSTRIAL: En este recetario se incluyen imágenes y recetas configuradas ya preestablecidas con gran variedad de alimentos en las que usted sólo tendrá que elegir el tipo de alimento que desea cocinar y el horno se encargará... -
Page 32: Ciclos Especiales
6.7 Ciclos especiales El menú “Especiales”, permite usar ciclos de trabajo creados por FM INDUSTRIAL. A continuación se detallan los ciclos especiales que se encuentran habilitados: Ciclo de regeneración con sonda pincho (sólo habilitado en los modelos con sonda pincho). -
Page 33: Lavado Automático
Puesta en marcha de un ciclo de cocción especial: 1. Pulse sobre el icono para acceder al menú de “ciclos especiales”. 2. Pulse sobre el ciclo especial deseado (regeneración, fermentación o enfriamiento). 3. A continuación pulse sobre el icono a continuación comenzará... -
Page 34: Detergente Y Abrillantador
Advertencia: Póngase guantes de caucho de protección y máscara o gafas de protección antes de manipular estos productos químicos. Detergente: se trata de un detergente alcalino concentrado, diseñado para la limpieza automática de hornos FM. El uso de cualquier otro detergente o producto de limpieza podría ocasionar un mal acabado o daños irreversibles que pueden provocar la pérdida de la garantía del aparato. -
Page 35: Fases De Un Lavado Automático
6.10 Fases de un lavado automático Cada ciclo de lavado está compuesto por las siguientes fases: 1. Fase de prelavado: la cámara de cocción del horno sube de temperatura para facilitar el lavado del mismo. El horno inyectará vapor en cámara durante 15 min. Seguidamente, el brazo de lavado comienzará a inyectar agua durante 2 minutos para realizar un enjuague. -
Page 36: Cocción "Multicook
6.12 Cocción “Multicook” Este sistema le permitirá cocinar alimentos diferentes con tiempos de cocción distintos, avisándonos de la finalización del proceso de cocción de cada uno de ellos a medida que las bandejas estén listas. Existen 2 formas diferentes de acceder a la cocción “multicook”: ... -
Page 37: Cocción "All On Time
10. Para detener la operación en cualquier momento, bastará con pulsar sobre el icono Configuración de un ciclo de cocción multicook a partir de una receta configurada manualmente: 1. Configure el ciclo de cocción multicook a partir de una receta. Para ello, pulse sobre para acceder al recetario. -
Page 38: Memorizar Una Receta "Multicook" / "All On Time
Para configurar una cocción “all on time”, siga en primer lugar los pasos comentados en el punto 6.12 (configuración de un ciclo de cocción multicook a partir de una receta memorizada o configurada manualmente) 1. Una vez configurado, pulse sobre para activar el modo de cocción “all in time”. - Page 39 Entre sus objetivos principales, cabe destacar: Refuerzo de la seguridad alimentaria. Facilita el cumplimiento de la legislación alimentaria. Fomenta las exportaciones aumentando la confianza en la inocuidad de los alimentos. Facilita la agilidad y transparencia en los controles. Para ello, el equipo permite el registro de los siguientes eventos y temperaturas: Eventos: Receta utilizada...
-
Page 40: Alarmas
7. Alarmas___________________________________________________ Si se produce una alarma, se activará un sonido y se mostrará en pantalla el icono y un código de alarma. Para silenciar la alarma toque en el centro de la pantalla. La siguiente tabla muestra el significado de los códigos de alarma del dispositivo. - Page 41 En caso de que persista el problema, sustituir la sonda de pincho. Principales Consecuencias: Si se produce la alarma cuando el dispositivo está encendido, no se podrá ejecutar un ciclo Delta T ni con sonda al corazón. Si se produce la alarma durante un ciclo de cocción Delta T ó con sonda corazón, se interrumpirá...
- Page 42 Si la alarma se produce cuando el dispositivo está encendido, no se podrá iniciar ningún ciclo de cocción. Si se produce durante un ciclo de cocción, se interrumpirá dicho ciclo. Descripción de la alarma: Protección térmica de los motores. Soluciones: Apague y vuelva a encender el horno transcurridos 10 minutos.
- Page 43 Principales Consecuencias: Si esta alarma ocurre durante un ciclo de cocción, este se pausará hasta que se cierre la puerta. Descripción de la alarma: Termostato de seguridad. Soluciones: Alarma Rearmar el termostato de seguridad. Termostato de Comprobar que el termostato de seguridad está conectado correctamente. seguridad Verificar que el (pin 9) de la placa de potencia está...
- Page 44 Invertir polaridad del schucko. Para ello, desconectar y conectar el enchufe invirtiendo los polos. Principales Consecuencias: Si la alarma se produce cuando el dispositivo está encendido, no se podrá iniciar ningún ciclo de cocción. Si la alarma ocurre durante un ciclo de cocción, este se interrumpirá.
-
Page 45: Ce Certification
EN 55014-1:2006 + A1:2009 + A2:2011 / EN 55014-2:1997 + A1:2001 + A2:2008 / EN 61000-3-2 :2006 + A1:2009 + A2:2009 / EN 61000-3-3 :2008 Manufacturer´s name: FM CALEFACCIÓN S.L. CIF: B-14343594 CTRA. de Rute km.2.700, C.P.:14900, Lucena Manufacturer´s address: Cordoba, España... -
Page 46: Warranty
9. Warranty ________ ____ The warranty period is 12 months from the date of purchase of the unit. The warranty does not cover damages to the glass, lamps, door seals, damage to the insulating material or damage caused by improper installation or maintenance, lack of maintenance, improper repair or misuse. To process the repair of a unit under warranty or for any other query, please contact your distributor and refer to the following description table. -
Page 47: General And Safety Standards
Damages, injuries or fatal accidents could be produced due to the non-observance of the manufacturer’s indications. If the oven is installed on supports or overlaying parts, use the ones supplied by FM only and follow the assembly instructions inside the packaging. ... - Page 48 Faults caused by lime or water sediment are not included in the warranty. Failure to comply with these safety standards will release FM from any responsibility and the warranty will become null and void. Maximum loads according to the size of the units...
- Page 49 Risk of fire If you do not clean the unit properly and as often as needed, greases and food leftovers will be accumulated in the cooking chamber and then, become inflamed. Only use the products recommended by the manufacturer. Using other products may damage the unit and invalidate the warranty.
-
Page 50: Safety Instructions, Transport And Maintenance
The transport agency label must be clearly visible. Photographs showing the content only and exclusively will not be accepted. In either case, transport incidences should be reported to FM Industrial to manage the replacement of the machine. -
Page 51: Preliminary Operations
11.3 Preliminary operations Remove the protection film from the unit. Clean the adhesive residues with an appropriate solvent. Never use abrasive or acid products or tools that may damage the surface. If your unit is fitted with a core probe kit, remember to remove its silicon protection cap. Otherwise, it could be melted and damage the probe. - Page 52 Example of placing the unit without nearby heat sources Placing the unit next to heat sources Panel aislante ignifugo Insulating panel Min. 100mm Min. 700mm We recommended leaving a free working space of around 500 mm for maintenance operations. This unit is not suitable for built-in installations.
-
Page 53: Trolley Positioning (Only For Oven Models Equipped With Trolley)
11.5 Trolley positioning (only for oven models equipped with trolley) In order to ensure correct positioning of the car inside the oven, the height of the legs must be checked regularly. For this, 180mm is considered as an optimal measure for this task. 80mm Check the length of the diagonals of the oven inlet, and they must be identical. - Page 54 To correctly insert the trolleyriage inside the oven, position it following the guides located at the bottom of the oven. Ensure the correct movement of the trolley inside the oven, avoiding blows or obstructions that can cause the leakage of liquids and lead to possible burns. The oven should be placed on a completely flat surface.
-
Page 55: Starting Up The Unit
Starting up the unit _____________ To start up and install the unit appropriately, please follow the points in the “DOCUMENT FOR INSTALLING AND STARTING UP SMART UNITS”, included in the bag together with this instruction manual. Remember that any fault or breakage resulting from improper installation or starting up, will make the warranty become null and void. - Page 56 Three phase connection 400V connected to a three-phase power socket type CETAC. MATERIAL NOT SUPPLIED THREE PHASE 230V Three phase connection 230V connected to a three phase power socket type CETAC. MATERIAL NOT SUPPLIED In order to prevent damages from unintentional reset of the cutting thermal device, this unit should not be fed by an external control device, such as a timer, or be connected to a circuit whose supply is regularly interrupted.
-
Page 57: Water Inlet
COLOUR CODE Black (L2) Grey (L1) Brown (L3) PHASES Blue (N) NEUTRAL Yellow / Green GROUNDING 12.2 Water inlet The use of an anti-lime filter at the water supply inlet and a check valve is recommended. The oven has a ¾ connection for water inlet. - Page 58 Types of draining: 3. Wall draining: The wall draining outlet must have a vertical ventilation conduit with a diameter not smaller than 25 mm, which must be over the device top cover as shown in the image below. If there is no vertical ventilation conduit installed, proper draining is not ensured, and it may cause faults and the loss of the warranty.
- Page 59 4. Draining separated with a funnel: MATERIAL NOT SUPPLIED Distance 2,5mm Connection 40mm Connection Floor draining: Clamp Drain pipe Distance 2,5mm...
-
Page 60: Gas Connection
Failure to comply with these regulations may cause damage and injury, resulting in the immediate invalidation of the guarantee and exempting FM from any responsibility. Before proceeding to the connection, check that the type of gas to be used, as well as the pressure of this, correspond to the configuration of use of your oven, which is indicated on the characteristics label of the oven. - Page 61 Make sure that the gas pipe does not pass near hot areas and that it is not exposed to possible tractions, torsions or crushing. The gas supply pipe (rigid or flexible) must comply with current national regulations and, in addition, must undergo appropriate periodic inspections, as well as be replaced if necessary.
- Page 62 Type evacuation B21: by this way, the flue gases are evacuated to the outside through a suction hood. The minimum distance to keep between the oven and the hood will be at least 50cm.
-
Page 63: Display Use Instructions
Display use instructions Attention! Please, read these instructions thoroughly before starting the device. 13.1 Switching the device ON/OFF Please, follow these steps to switch the device on: Press the icon to activate the screen. Please, follow these steps to switch the device off: ... -
Page 64: Setting The Date And Time
13.3 Setting the date and time Make sure that the device is on and that there are no ongoing operations. 10. Press the icon on the main menu to go to the settings menu. 11. Select “Clock” to modify the date and time. 12. - Page 65 MEDIUM PREHEATING: To activate this mode, press icon no. 1 until the message “PREHEAT MEDIUM” is displayed on the screen. In this case, the preheating process will be active until reaching a temperature of +20°C with regard to the selected cooking/cooking temperature. HARD PREHEATING: To activate this mode, press icon no.
- Page 66 There are different parameters that can be modified in each type and mode of cooking/cooking selected: Temperature set point of the cooking/cooking chamber: It can only be set to the time-controlled cooking or core probe mode, regardless of the type of cooking/cooking selected (dry heat, vapour and combi). ...
- Page 67 Selecting the temperature set point of the core probe (only possible with core probe cooking modes and Delta T (ΔT): 6. Press the icon and next, press icons (or move the scroll bar) to select the temperature value wanted. Press again to confirm the value selected.
- Page 68 Adding a phase to the cooking cycle: 12. Press the icon to add a new phase to the cooking cycle, up to a maximum of 6 phases. To set the rest of options within each phase, repeat the steps above. Press icons to select the cooking phase wanted and previously created.
-
Page 69: My Recipes" Cookbook
5. Press the icon 6. Press icons (or move the scroll bar) to select the time value wanted. Press again to confirm the new time value selected. 13.4.3 Stopping the ongoing cooking cycle 2. Press the icon to stop an ongoing cooking cycle. Stopping the cooking cycle 13.5 “My recipes”... -
Page 70: Starting A Recipe
Starting a recipe This oven has two types of recipes: 1. FM INDUSTRIAL Cookbook: In this cookbook, images and recipes configured and already pre-set are included, with a wide range of foods. You only need to select the type of food you want to cook, and the oven will do the rest. -
Page 71: Special Cycles
Special cycles “Special cycles” menu allows the user to use work cycles created by FM INDUSTRIAL. Next, the enabled special cycles are described: Regeneration cycle with core probe (enabled in models with core probe). Time-controlled regeneration cycle. Proofing cycle. -
Page 72: Automatic Cleaning
If the default cycles do not meet your requirements, these cycles can be modified and memorised like a recipe. To do so, go to the special cycle wanted (proofing, regeneration, cooling-down...) and proceed in the same way as in the memorising process of a recipe. -
Page 73: Detergent And Rinse
Warning: Use rubber protection gloves and protection mask or goggles before manipulating these chemical products. Detergent: It is a concentrated alkaline detergent designed for FM-ovens automatic cleaning. The use of any other detergent or cleaning product may produce a bad finish or damages resulting in the device loss of warranty. -
Page 74: Phases Of Automatic Washing
Phases of automatic washing Each cleaning cycle consists of the following phases: 1. Pre-cleaning phase: the cooking chamber of the oven increases its temperature to facilitate the cleaning process. The oven injects vapour to the chamber for 15 minutes. Next, the cleaning arm starts injecting water to rinse for 2 minutes. -
Page 75: Multicook" Cooking
“Multicook” cooking This system allows the user to cook different foods with different coking time, informing about the end of the cooking process of each food when the trays are ready. There are 2 different ways to go to the “multicook” cooking: ... -
Page 76: All On Time" Cooking
Setting a multicook cooking cycle from a manually set recipe: 1. Set the multicook cooking cycle from a recipe. To do so, press to go to the cookbook. 2. Select the cooking parameters wanted (pre-heating, humidity, temperature,...) and then press to accept. -
Page 77: Memorising A "Multicook" / "All On Time" Recipe
Memorising a “Multicook” / “All On Time” recipe Follow the steps below to save a recipe in the memory. 1. Set a cooking cycle following the steps in 12 or 6.13. 2. Press to save the set cycle. 3. Select the position number in which you want to save the recipe. 4. - Page 78 Temperatures: Chamber temperature Core probe temperature Executing registration of HACCP data Have the screen at “PRESS TO ACTIVATE” mode. 2. Insert an external memory into the USB port in the oven display. 3. Press “Download HACCP” 4. Select the date and time from which you want to download the data. Then, press 5.
-
Page 79: Alarms
13. Alarms_______________________________________________ If an alarm is produced, a sound will be activated. An icon and an alarm code will be displayed on the screen. Touch on the centre of the screen to stop the alarm. The table below shows the meaning of the device alarm codes. ALARM DESCRIPTION Alarm description:... - Page 80 core probe. If the alarm is activated during a Delta T or with a core probe cooking cycle, this cycle will stop. Alarm description: Shutting off the power supply or oven switched off unproperly. It is activated when there is a power supply shut off or when the oven is switched off unproperly.
- Page 81 Solutions: Switch the oven off and switch it on again after 10 minutes. Check visually if there is a motor in poor conditions. If so, replace it. If possible, check that there is continuity in the internal klixon of motors to detect which motor is in poor conditions.
- Page 82 Alarm description: Safety thermostat. Solutions: Safety Reset the safety thermostat. thermostat Check that the safety thermostat is dully connected. alarm Check that (pin 9) of the power pale is appropriately connected. Main consequences: If the alarm is activated when the device is ON, no cooking cycle can be started. If the alarm is activated during a cooking cycle, this cycle will stop.
Need help?
Do you have a question about the STC 423 V5 and is the answer not in the manual?
Questions and answers