Advertisement
Quick Links
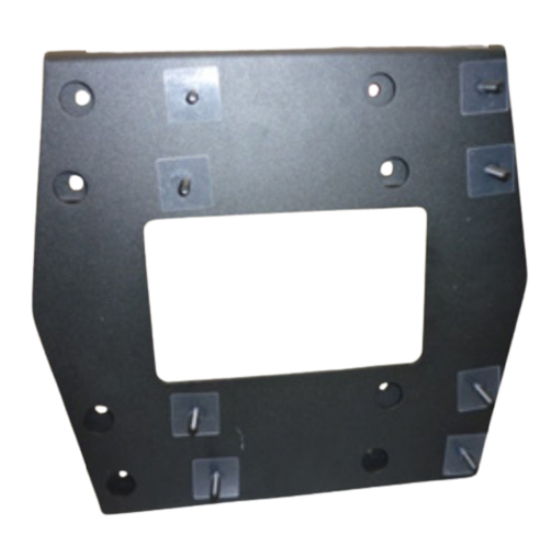
RAID REAR WHEEL RELOCATION AND LICENCE PLATE HOLDER
11
10
• Installation time: Approximately 2 hours
11
10
person and it is the responsibility of this person to ensure correct fitment.
©Copyright 2021 Ironman 4x4 Pty Ltd. No part of this publication may be reproduced or replicated without the prior written consent of Ironman 4x4 Pty Ltd
9
8
7
9
8
7
Viewing this on your phone or tablet?
Take a screenshot of the QR code and download a QR
scanner app on your device. Use this screenshot within the
app to access the video.
IMPORTANT: Installations should only be done by a qualified
INSTALLATION
6
5
TO SUIT JEEP WRANGLER JL 2018+
ZONE
NOTES:
1.
THIS DRAWING SHOW MAJOR DIMENSIONS AND RELATED
INFORMATION ONLY;
FOR CONTOURS AND SHAPES REFER TO 3D
PROPRIETARY AND CONFIDENTIAL
CAD MODEL.
THE INFORMATION CONTAINED IN THIS
2.
ALL APPEARANCE SURFACES MUST BE FREE OF TOOL MARKS, BURRS,
DRAWING IS THE SOLE PROPERTY OF
SHARP, EDGES, FLASH, SPATTERS, AND ANY OTHER IMPERFECTIONS.
IRONMAN 4X4. ANY REPRODUCTION
3.
PARTS MUST BE PROTECTED AGAINST DAMAGE AND DEFORMATION
IN PART OR AS A WHOLE WITHOUT THE
WRITTEN PERMISSION OF
DURING SHIPMENT AND STORAGE.
IRONMAN 4X4. IS PROHIBITED.
4.
Surface finsih
unless specified
6
5
GUIDE
RWC077JL
4
3
2
REVISIONS
REV.
DESCRIPTION
BY
UNLESS OTHERWISE SPECIFIED:
NAME
DATE
DRAWN
MARK.B
02/06/2021
DIMENSIONS ARE IN MILLIMETERS
TOLERANCES:
TITLE:
CHECKED
FRACTIONAL
RWC077JL RAID Rear Wheel &
ANGULAR: MACH
BEND 1
ENG APPR.
NO DECIMAL
(X.0). 1.0
License Plate Relocation.
ONE PLACE DECIMAL (X.X). 0.5
MFG APPR.
Q.A.
AS1100 - 1992
MATERIAL
SIZE
DWG. NO.
REFER TO BOM
A2
FINISH
NA
SCALE: 1:2 WEIGHT:
DO NOT SCALE DRAWING
4
3
2
1
H
DATE
ECN No.
G
F
E
D
C
B
Wrangler JL 2018+
A
REV
1
035-24-000062
SHEET 1 OF 3
1
Advertisement

Related Manuals for Ironman4x4 RWC077JL


Summary of Contents for Ironman4x4 RWC077JL
- Page 1 NAME DATE DRAWN MARK.B 02/06/2021 DIMENSIONS ARE IN MILLIMETERS TOLERANCES: TITLE: CHECKED FRACTIONAL RWC077JL RAID Rear Wheel & ANGULAR: MACH BEND 1 ENG APPR. NO DECIMAL (X.0). 1.0 License Plate Relocation. ONE PLACE DECIMAL (X.X). 0.5 NOTES: MFG APPR. Wrangler JL 2018+ THIS DRAWING SHOW MAJOR DIMENSIONS AND RELATED Q.A.
-
Page 2: Parts List
DRAWN MARK.B 02/06/2021 DIMENSIONS ARE IN MILLIMETERS TOLERANCES: TITLE: 2. Spare Tire Carrier Assembly CHECKED FRACTIONAL RWC077JL RAID Rear Wheel & ANGULAR: MACH BEND 1 ENG APPR. NO DECIMAL (X.0). 1.0 License Plate Relocation. ONE PLACE DECIMAL (X.X). 0.5 NOTES: MFG APPR. -
Page 3: Tools Required
Installation Guide RWC077JL Tools Required Metric and Imperial Metric and Imperial Screw Driver Set Metric Allen Key Set Spanner Set Socket Set Tension Wrench Side Cutters Pliers Tape Measure Hammer Metric Torx Set Panel Remover Tool Bolt Tension Chart BOLT SIZE... - Page 4 Installation Guide RWC077JL Prior to installation ensure product application is compatible with your vehicle make, model and year. Remove spare wheel cover. Remove rear camera cover using T40 Torx bit. Remove spare wheel. Starting from the bottom bolts remove wheel carrier from rear door using a 13mm socket.
- Page 5 Installation Guide RWC077JL Swing wheel carrier to the side taking care not to stretch the wiring. Place padding between the carrier and the paint work of the rear door and temporarily secure to the rear door handle using cable ties.
- Page 6 Installation Guide RWC077JL With rear door closed, using a panel remover tool and a rag, carefully wedge the bottom of the rear door to prevent it from moving once the hinge bolts are removed. 10. Using a T45 Torx bit, remove the four bolts holding hinge to the door taking care not to dislodge the door.
- Page 7 Installation Guide RWC077JL 12. Insert the 4 x bolt plates into the wheel carrier bracket and secure into position using the clear bolt retainers. 13. Place the supplied spring, flat washers and sealing washers from the original mounting bolts onto the M8 x 55mm bolts.
- Page 8 Installation Guide RWC077JL 14. Place 4 x mounting bolts in position through the mounting holes and position the angled spacer plates over the bolts as shown. 15. Attach the mounting bracket to the door taking care not to dislodge the angled spacer plates with mounting studs to the top.
- Page 9 Installation Guide RWC077JL 16. Insert the four remaining mounting bolts. Tighten all bolts. NOTE: Tighten bolts on hinge reinforcement bracket also. 17. Carefully remove the camera / stop light wire from the recess the wheel carrier to allow for extra length. Ensure the wire stays in channel.
- Page 10 Installation Guide RWC077JL 19. If the spare wheel is a larger diameter than standard and obscures the high-level stop light remove the 7 retaining screws and the plastic cover from the spare wheel back support as shown. 20. Remove the high-level stop light from its mount and disconnect the wiring.
- Page 11 Installation Guide RWC077JL 22. Attach the spare wheel to the carrier with the factory nut on the lower stud and the two long wheel nuts supplied on the upper studs. NOTE: The two long wheel nuts allow for the license plate rises to be mounted as detailed on page 12.
- Page 12 Installation Guide RWC077JL License Plate Riser Installation Option 1 - To suit large negative offset wheels: Install licence plate riser using M8 bolts into supplied long wheel nuts. Bolt licence plate bracket to riser using suppled M6 dome head combo.
Need help?
Do you have a question about the RWC077JL and is the answer not in the manual?
Questions and answers