Advertisement
NOTE
Some images contained in these instructions are generic and are
a representation of the actual model and/or parts used. Some steps
may also show parts out of sequence to the instructional steps.
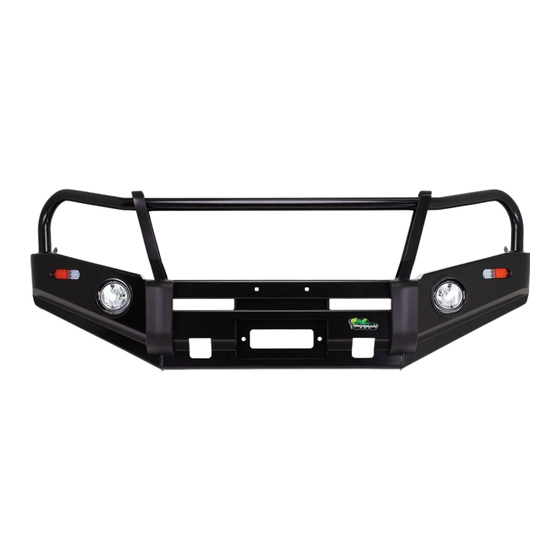
This bull bar requires parker/indicator lights. These are not included and must be purchased separately.
SAFETY WARNING
Ironman 4X4 requires you read and understand the safety and pre-install
directions on page 2 and 3 before commencing installation of this product.
This product has been tested for airbag compatibility
and therefore the mounting system MUST NOT be modified
©Copyright 2024 Ironman 4x4 Pty Ltd. No part of this publication may be reproduced or replicated without the prior written consent of Ironman 4x4 Pty Ltd
INSTALLATION
INSTRUCTIONS
BBC080 / BBCD080
BULL BARS TO SUIT MAZDA BT50
Document Number: BBC_BBCD080/300424
2020+
5 Hours
Approximately
Advertisement
Table of Contents

Related Manuals for Ironman4x4 BBC080


Summary of Contents for Ironman4x4 BBC080
- Page 1 INSTALLATION INSTRUCTIONS BBC080 / BBCD080 BULL BARS TO SUIT MAZDA BT50 2020+ NOTE Some images contained in these instructions are generic and are 5 Hours a representation of the actual model and/or parts used. Some steps Approximately may also show parts out of sequence to the instructional steps.
-
Page 2: Pre-Installation Procedures
Installation Guide BBC/BBCD080 Pre-Installation Procedures SAFETY WARNING • It is always good practice to disconnect the battery while working on 12 Volt systems. - Please check the owner’s manual for vehicle-specific requirements as some models may need battery backup. • Auto electrical work should be carried out by a competent person. -
Page 3: Important Warnings
Installation Guide BBC/BBCD080 Important Warnings Due to the increasing complexity of new cars with cameras, sensors and radars, it is imperative that when installing bar work to cars, the vehicle is not turned on at all - not even to accessories - without having all cameras, sensors and radars connected. -
Page 4: Tools Required
Installation Guide BBC/BBCD080 Bull Bar Parts List 1. Bull Bar QTY-1 2. Mounting Cradle 3. Centre Protection Plate 4. Side Protection Plates 5. Infill Panels QTY-1 QTY-1 QTY-2 QTY-2 6. Headlight Brackets 6. Outer Support Brackets 7. Inner Support Brackets 8. - Page 5 Installation Guide BBC/BBCD080 Confirm bull bar application is suitable for your vehicle make, model and year. Unwrap the bull bar and ensure the overriders and light assemblies are tight before installation. Remove clips from inner guard liner. Remove bumper retaining screw behind headlight before unclipping bumper from vehicle.
- Page 6 Installation Guide BBC/BBCD080 5a. Remove OE bumper retaining clip and retain OE bolt. 5b. Fit supplied grille support bracket using OE bolt. Drill 6mm hole through plastic grille and bolt using supplied M6 hardware. Mark grille as shown in the picture, cut across grille opening below the tape line.
- Page 7 Installation Guide BBC/BBCD080 Mark centre air dam as shown, remove section marked with an air hacksaw or similar. Install inner and outer chassis support brackets to the chassis using the following per side: • 2 x M12 120mm Bolts • 4 x M12 Flat Washers •...
- Page 8 Installation Guide BBC/BBCD080 10. Using rear hole in outer support brackets as a guide drill 1 x 12mm hole per side, insert nut plate and secure with M12 x 40mm bolt, spring washer and flat washer. Leave bolts loose. 11. Fit mounting cradle to chassis using 4 x original M10 bolts and supplied M10 washers removed from vehicle.
- Page 9 Installation Guide BBC/BBCD080 12. Install 8 x M12 x 40mm bolts, 16 x flat washers, 8 x spring washers and 8 x nuts to remaining mounting holes and tighten. 13. Install 2 x captive nuts to square number plate mounting holes in the face of the bullbar from behind.
- Page 10 Installation Guide BBC/BBCD080 16. Once bullbar is aligned, drill 4 x 10mm holes through pinning points as shown and secure in position using 4 x M10 x 40mm bolts, 8 x flat washers, 4 x spring washers and 4 x M12 nuts. 17.
- Page 11 Installation Guide BBC/BBCD080 20. Install centre protection plate using 3 x black M8 bolts, spring washers, flat washers and two original bolts retained from step 7. 21. Attach number plate to bullbar using M6 hardware. Page 11 of 14 Document Number: BBC_BBCD080/300424 ©Copyright 2024 Ironman 4x4 Pty Ltd.
-
Page 12: Wiring Diagrams
Installation Guide BBC/BBCD080 Wiring Diagrams DRL/PARKING/INDICATOR LIGHTS Daytime Running Light Brown Park Light Yellow Indicator Light White Ground If vehicle is not fitted with DRL, leave red wire disconnected FOG LIGHTS Ground Lamp Fuse Connector Relay Black Blue Battery Lamp Parklight Switch SPST... - Page 13 Installation Guide BBC/BBCD080 Wiring Diagrams IDLWL001 WIRING LOOM TO SUIT SCOPE 7” DRIVING LIGHTS CUBE LIGHT (RED) GROUND (BLACK) GROUND (BLACK) SPOTLIGHT (RED) LIGHTBAR TRIGGER (WHITE) POSITIVE HIGHBEAM TRIGGER (RED) CUBE LIGHT (RED) GROUND (BLACK) POSITIVE HIGHBEAM (RED) LIGHTBAR TRIGGER (WHITE) PARKER (BROWN) GROUND (BLACK) NEGATIVE HIGHBEAM TRIGGER (BLACK)
- Page 14 Installation Guide BBC/BBCD080 Once Installed... • Ensure all bolts are tensioned correctly • Doing a pre-trip check before heading away, or every 10,000km (6,200 miles) is good practice. • Visually inspect bull bar and hardware, retention bull bar hardware or when needed. •...
Need help?
Do you have a question about the BBC080 and is the answer not in the manual?
Questions and answers